
Listen to the Podcast:
On the podcast this week we talk about lighting from windows and the mistakes most cinematographers make dealing with window lighting on location when starting out.
Natural light can be a beautiful thing and with the right techniques and tools can be shaped to create incredibly nuanced images. The key is understanding how to use the natural light to enhance what is already in place.
Patreon Podcast: The Biggest Mistake
This week on the Patreon Podcast I go into a bit more detail on why young DPs have a hard time with window lighting and balancing location interiors.
Hopefully through hearing my mistakes when I was starting out you can avoid them and get up to speed a bit quicker.
Patreon support helps keep this show going and I couldn't continue to put out new content each week without it. In turn for becoming a supporter of the show I put up extended podcasts for Patreon listeners.
You can gain access to all the extended podcasts that aren't available anywhere else online simply by becoming a supporter.
Check out the Wandering DP Patreon page and if you do decide to become a member please know that I truly appreciate the support.
The Case Study: Lighting from Windows
The Wide Shot - Window Lighting
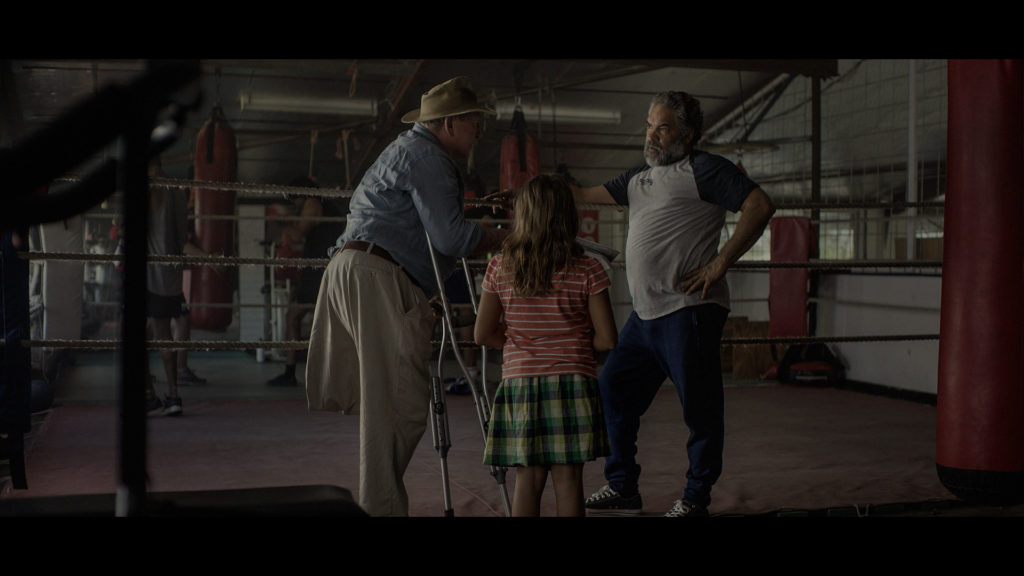
The Shot
This shot was an intro wide shot that kicked off a sequence of a three way dialogue scene. We had to place the characters in their surroundings and keep in the back of our minds the lighting angles for the Medium shots.
The Lighting
We were working on a very small budget and the lighting package reflected that. We didn't have a generator or any big lights so we had to run off of house power and the sun.
Using the Sunseeker app I found the time the sun would be highest in the sky (thereby giving us the most ambient source inside the space) and decided it would be easiest to control the levels in the room at that time.
To bring in some direction I placed what few medium sized lights we had through soime textiles out the window camera left. In the background over the far BG windows I had the gang place potting netting from Home Depot to cut down the level and prevent things from clipping.
Inside I wrapped some 12x12 Neg fill camera right and added some haze to finish things off.
The Results

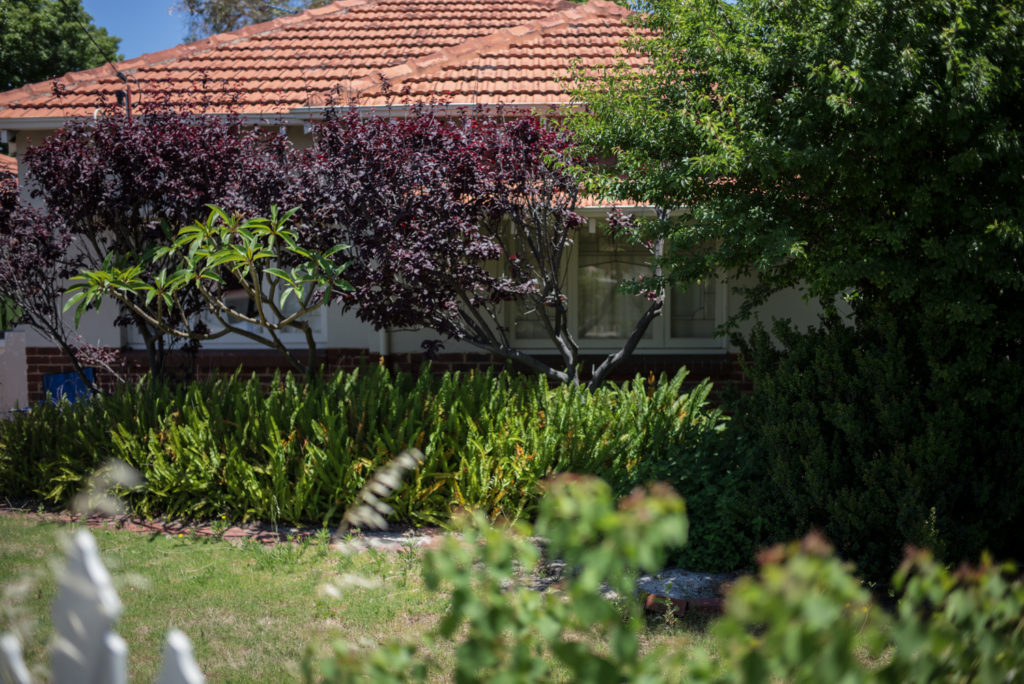
Behind the Scenes
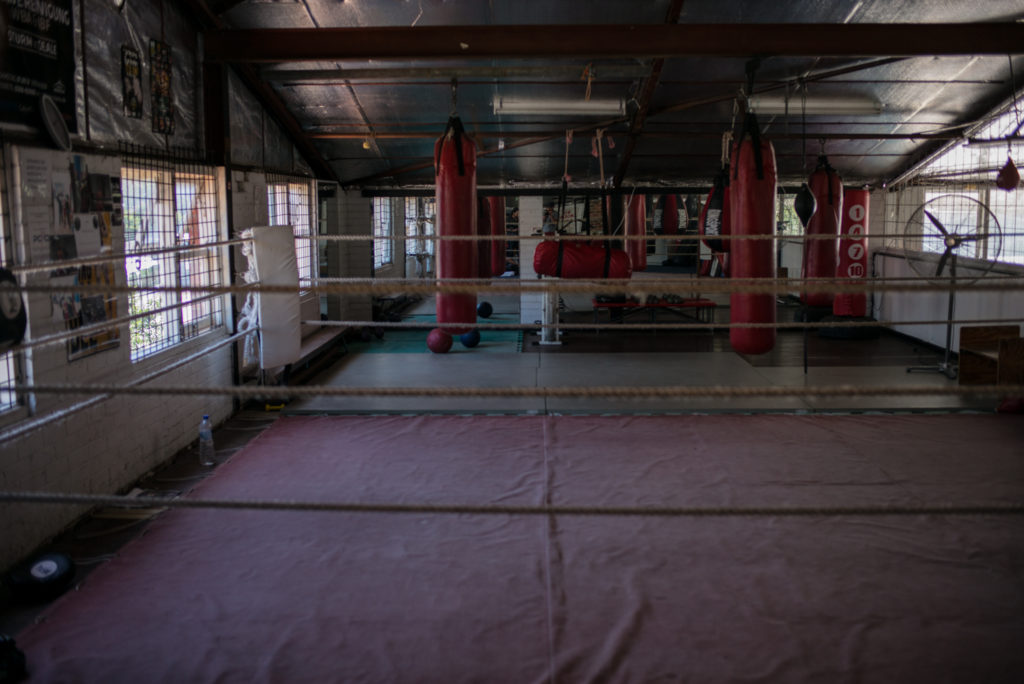
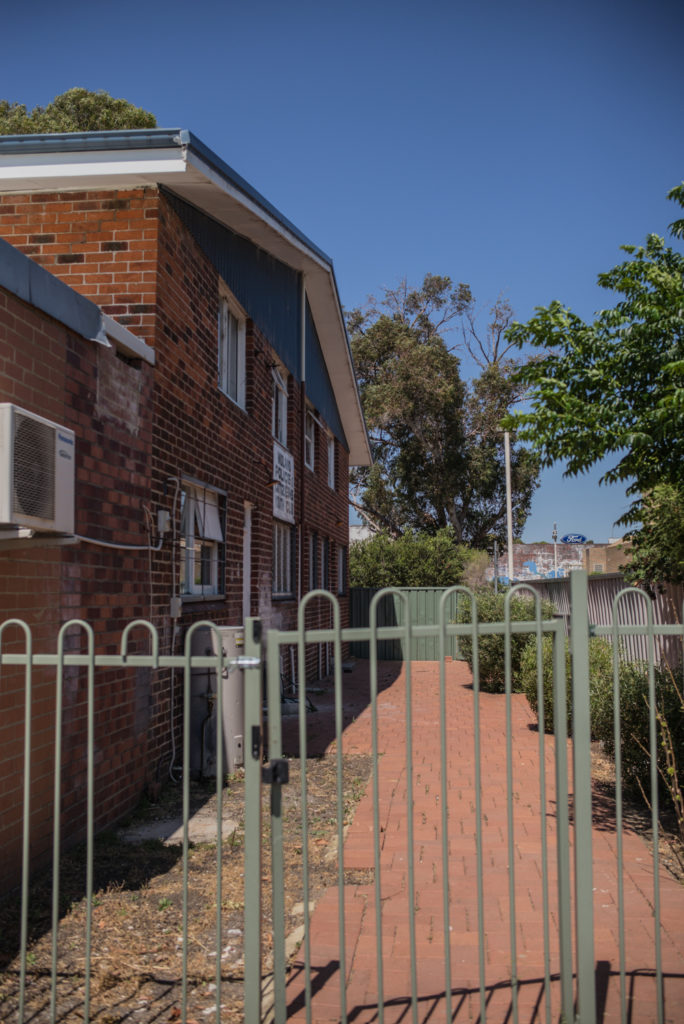
In the picture above you can see the windows into the gym on the second floor. No cherry picker and only a few crew made lighting from these windows a giant pain.
The Punch In
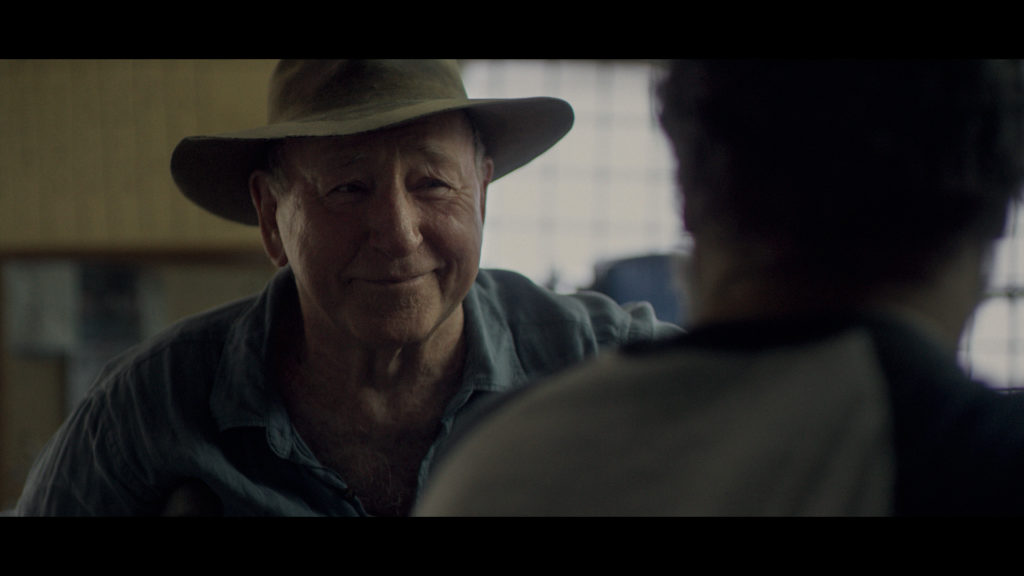
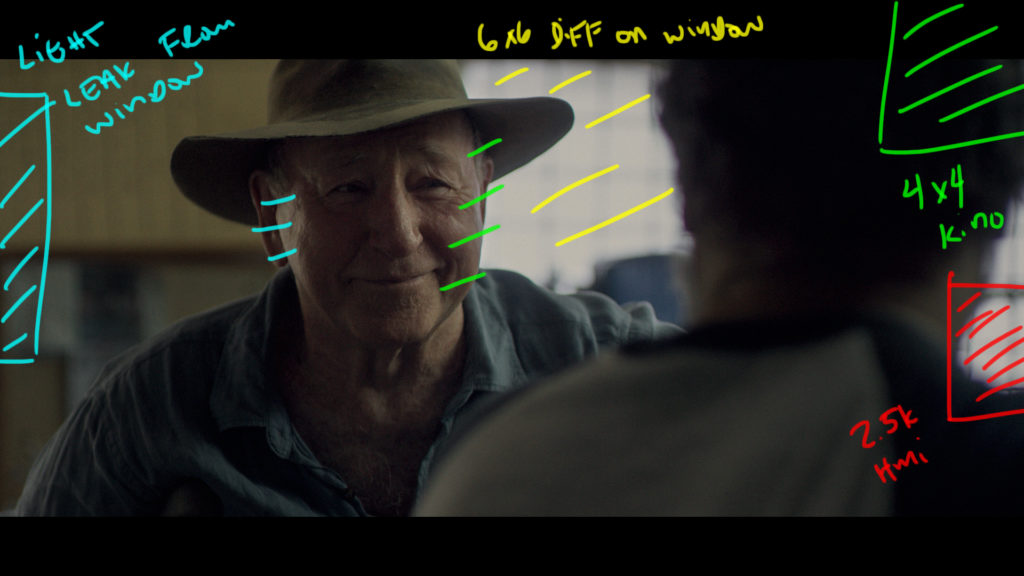
The Shot
This was one of the angles from the previous wide as we punched in for dialogue.
The main challenge was we were facing directly into the window we were lighting from in the wide. This is the nightmare situation for the DP. You should be trying to avoid this through blocking at all cost.
If you do find yourself forced into a corner like this here is one way to deal with it.
The Lighting
So we need to fake the new source but it needs to be from the same direction and with roughly the same softness as the previous wide.
To stop the window in the BG from blowing out we through a thicker 6x6 textile frame over it. Once we know where we can place the exposure so that the window won't blow out then we start balancing everything in relation to that level.
To fake the soft source I ghosted in a Kino 4x4 from camera left.
To add a bit of an edge of the talent's fill side I just peeled back the blacks that had been covering the big window out of frame. It just needed a bit of light poking through at just the right angle to get that look on his near side cheek.
For the light from outside we just bumped down the 2.5k HMI to maintain some ambient levels in the room and BG.
The Results
The Night Time Shot - Window Lighting
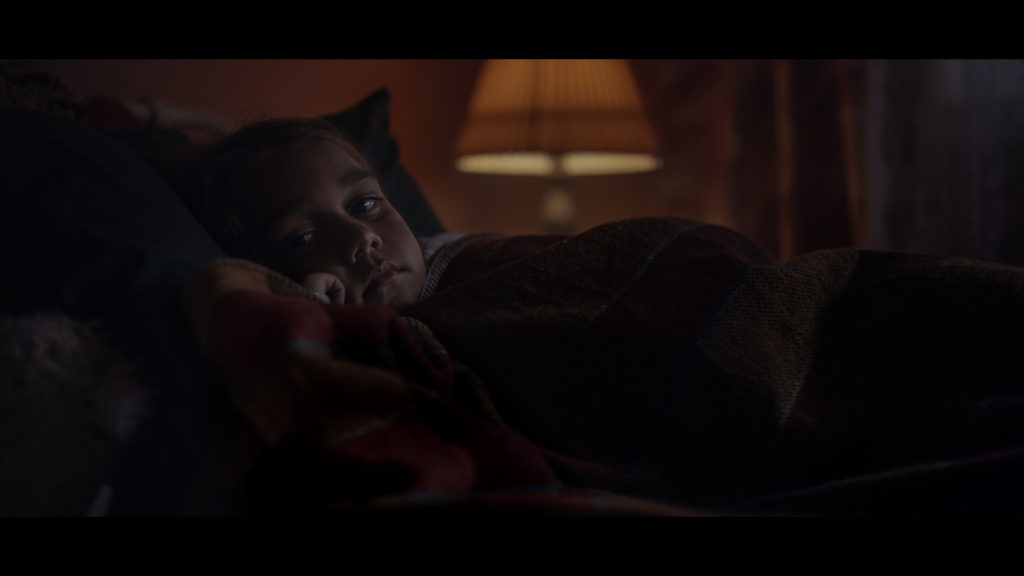
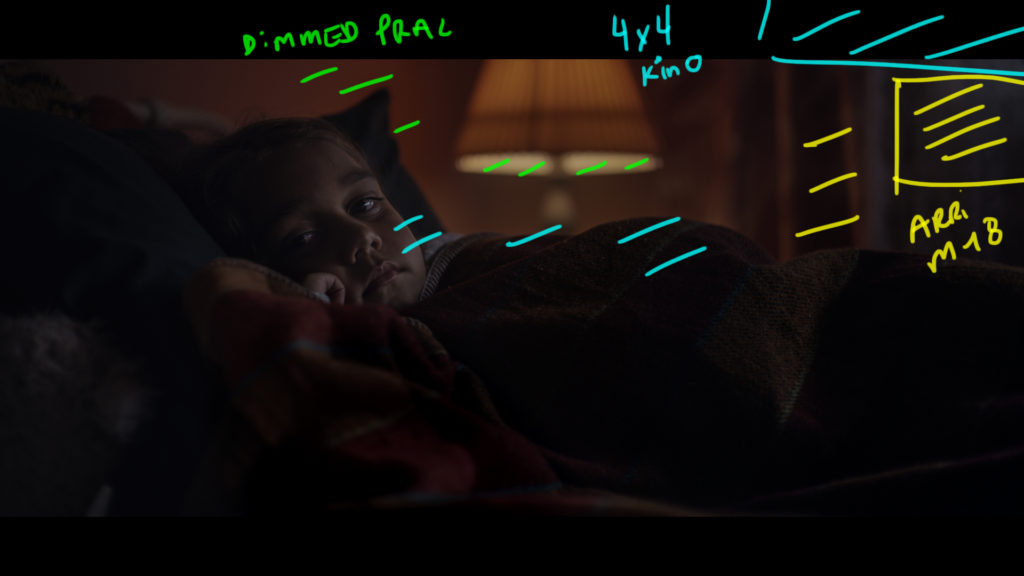
The Shot
This shot called for a night scene with a young girl who couldn't fall asleep.
The Lighting
To get the shot during the middle of the day we had to start by blacking out the sun. To create a bit of moonlight out the window it had to be tented and then inside the ten we backed up (as far as it would back up in the tent) an M18 and put it through about 8 layers of diffusion to make it as soft as possible.
Then inside the source is again diffused by the sheers. We put 1/2 CTO on it and shot everything at 3200K to give it a bit of a steel grey look.
Inside there is a 4x4 kino with just a single tube on raking across the bed providing the main light for her face. We flagged the spill off the bed to make it a bit more shapely and darker on the blanket.
Then in the background the practical was placed and had a dimmer added. The light is dimmed way down to give it that nice glow and add a bunch of warmth to the light.
The Results
Behind the Scenes
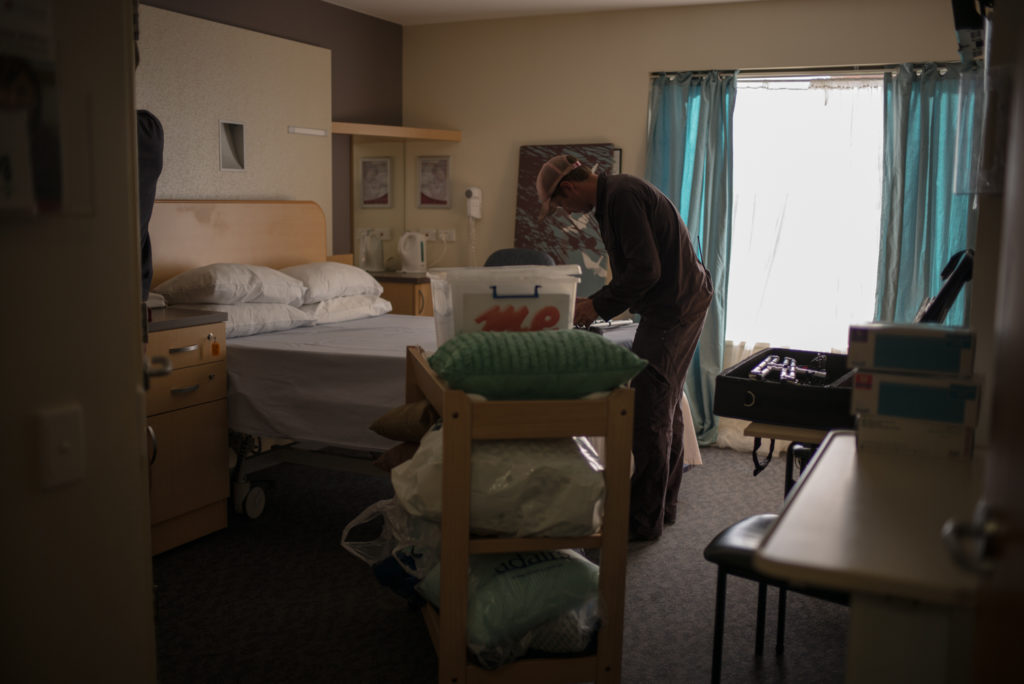
The Hospital Wide
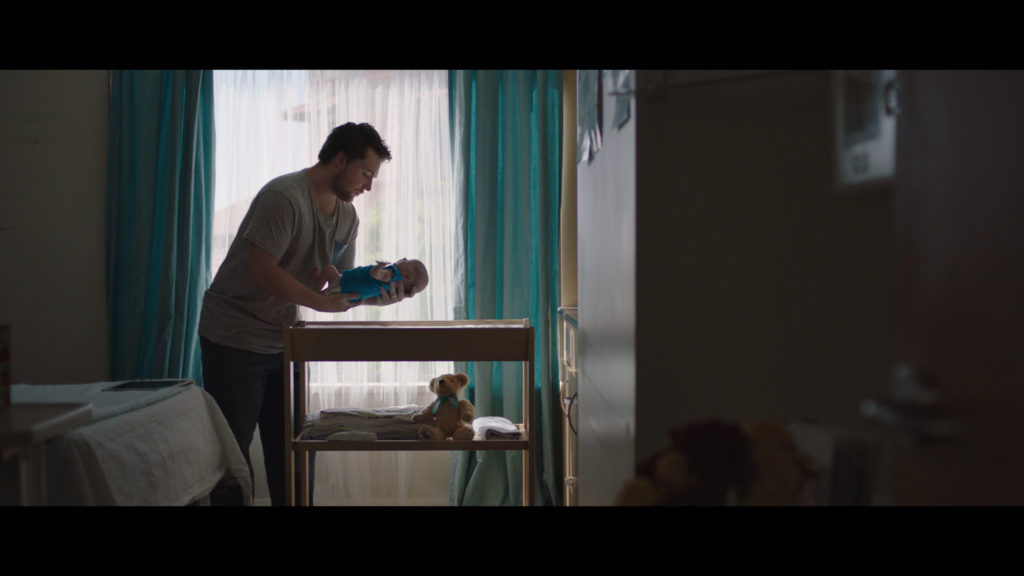
The Shot
The location backed us into shooting directly into the only window in a very tiny hospital room.
We needed a wider shot to establish our location and help tell the story. I liked this angle and height because the cabinets picked up a bit of highlight through the window reflection.
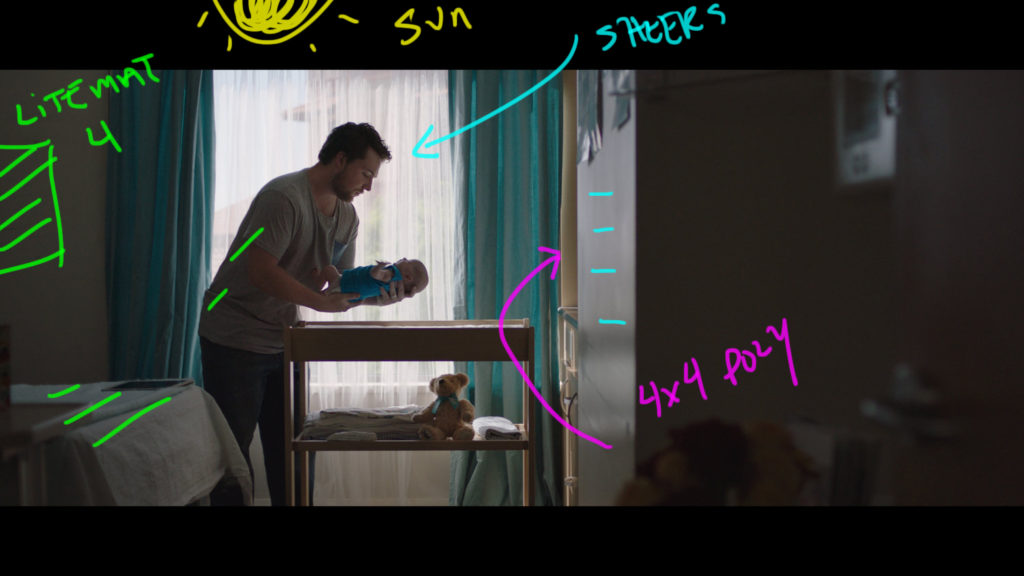
The Lighting
Making a shot like this work requires juggling a few things.
First is getting the time of day right. we want as much light coming in the room as possible with as much dark background items as possible. This translates to things being backlit.
Then we need to soften the light from outside to spread the ambient throughout the room. I know from past experience we need this step and an easy, cheap way to do it is with curtain sheers.
The we hid a small 4x4 inside the little area directly in front of the talent to wrap the sun a bit more on his shadow side.
To balance out the in with the out we still needed more ambient reach so I added a Litemat camera left in the room to help carry that through.
The Results
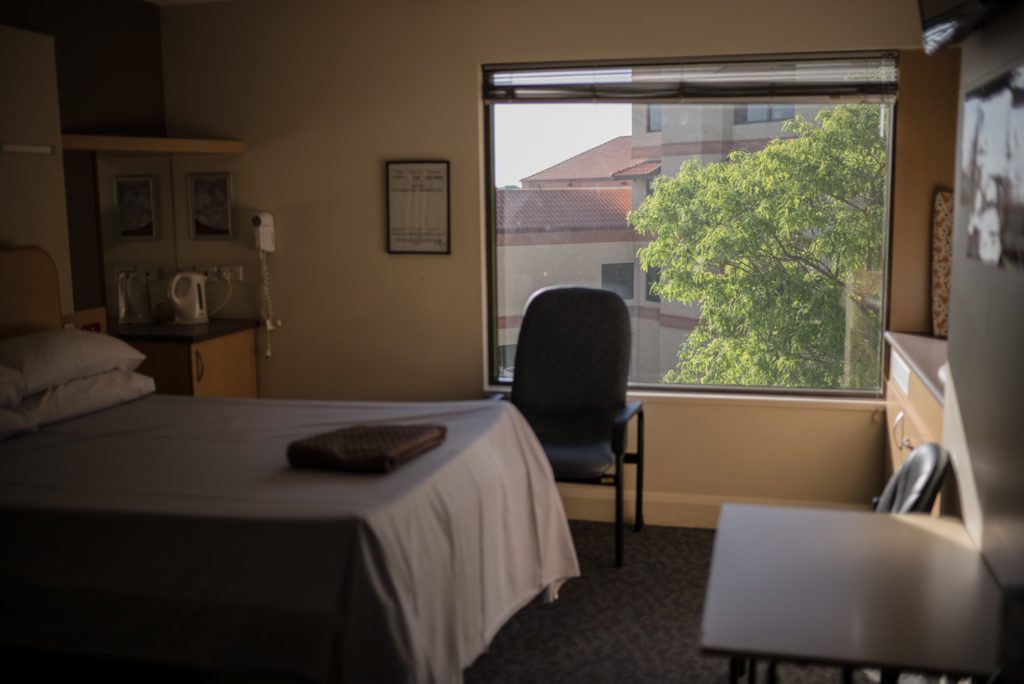
Behind the Scenes
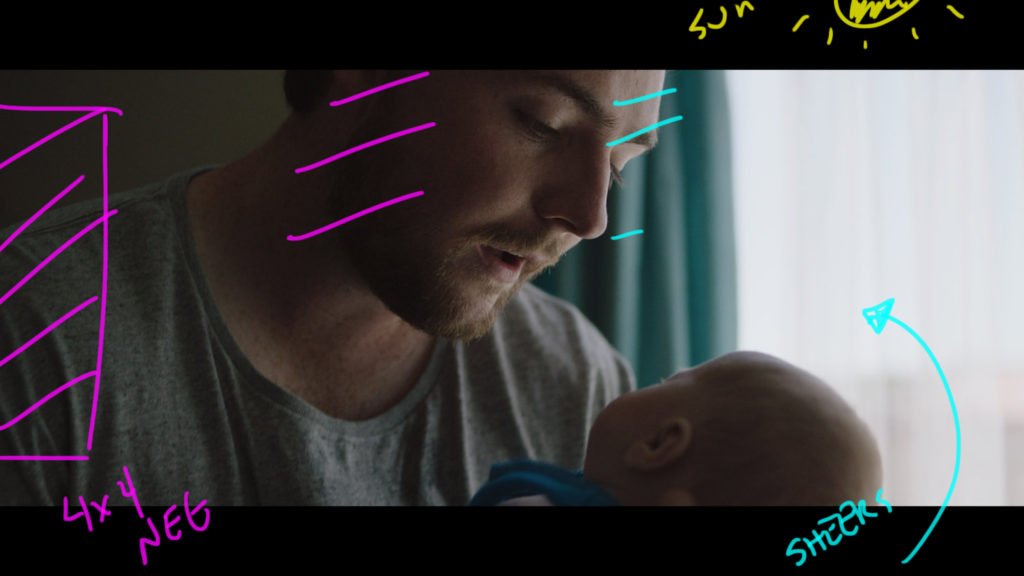
The Hospital Tight - Extending the Key
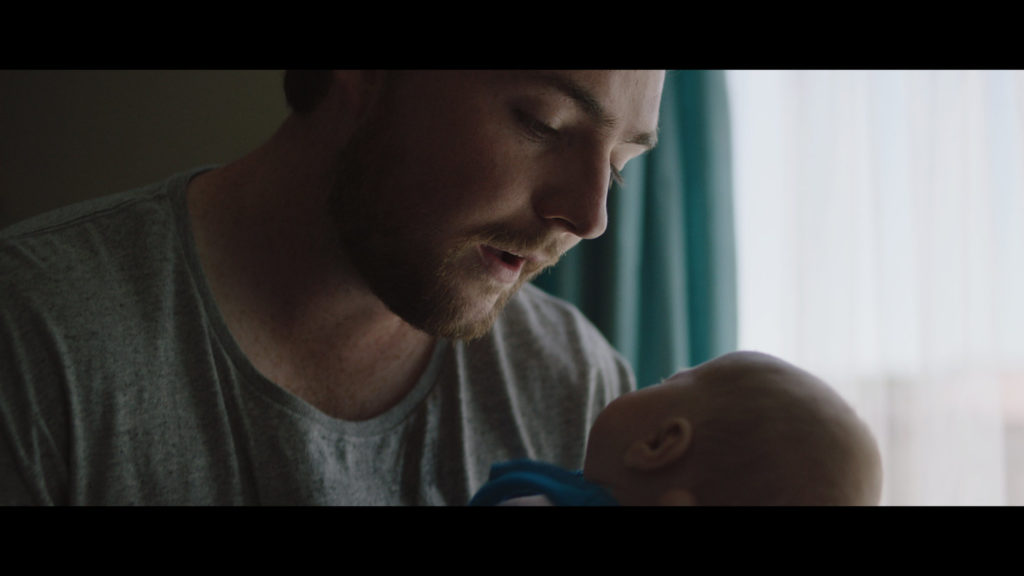
The Shot
We punch in from the wide and end up it a tight shot on the talent.
The Lighting
To create a bit more shape and contrast I took away the Litemat from the previous shot and replaced it with some negative fill.
Again he is keyed with the sunlight from the window pushing through the sheers and then bouncing off a 4x4 poly just out of shot camera right. That is what is creating the nice nose shadow on his face.
We then darkened the background wall with another 4x4 poly and we were ready to shoot.
The Results
Going Forward - Explore the Limits
Becoming a better cinematographer requires you to go out and explore the edge of what is possible. Once you find the edge you can start to peel things back and strike a balance.
Lighting from windows can be extremely easy or incredibly difficult and the tips and tricks I've explained here can help you get a head start.
Go out and have some fun with them!
Patrick… you are awesome! Thank man!
Is it possible to see the HD images, we want to see the quality of the shadow, how the skin tones renders etc. Pls pls pls give us some bigger images to analyse.
Hey fellow Patrick, really enjoyed this breakdown! Just a quick question, what IRE values are you usually aiming for on faces using this type of lighting (with the upstage lighting technique)? What value are you usually comfortable with when it comes to the shadow part of the face? How hot do you usually go on the highlight side?
This is complicated because the short answer is I don’t think in IRE but then again I use false color which at the base level of understanding works by reading IRE levels.
I will have to answer it in one of the next podcasts. Not enough time to write it all out at the moment. Look out for it!
Great post as always, thanks! In the night scene, would the lower ISO strategy would work as well shooting non-raw Log-C or some such?
Thanks!
Good question, I would love to know aswell.
The ISO idea works for any camera.