What is a Lighting Ratio in Cinematography?
When I talk about Lighting Ratios in cinematography I am referring to the measurement of the amount of light illuminating one area or object in the frame compared to the amount of light illuminating another object or area of the frame.
Cinematography is a very complex art and there are an endless number of lighting possibilities but understanding ratios and commonly used ratios can help a cinematographer develop a visual language across a project.
Lighting ratios for cinematography aren’t concerned with the number of lights or the types of light (soft/hard) but rather how much light is falling in one area vs. another area.
Understanding the effects of lighting ratios can make you a more efficient and more effective visual storyteller. As a cinematographer you are painting with light and to get the results you are looking for you need to have a firm understanding of the principles you are trying to manipulate.
What Are the most common Ratios Cinematographers track and use?
1. Key to Fill
The most common ratio that cinematographers measure when shooting is the Key to Fill ratio.
In this case the term “Key” is referring to the amount of light coming from the Key Light in the scene. The key light in any given scene is the light that is providing the main illumination for your subject. The key light is also the most common light used for setting your exposure on the lens (setting you shooting stop).
The Fill refers to the fill light level in the scene. The fill light doesn’t have to actually be a light.
The fill light levels can come from a bounce, or general abmient light, or it can be negative fill. The term Fill as used here just means the opposite side of the Key.
The Key to Fill ratio is most commonly discussed when lighting people. For example, lets take a look at this shot of Jude Law.
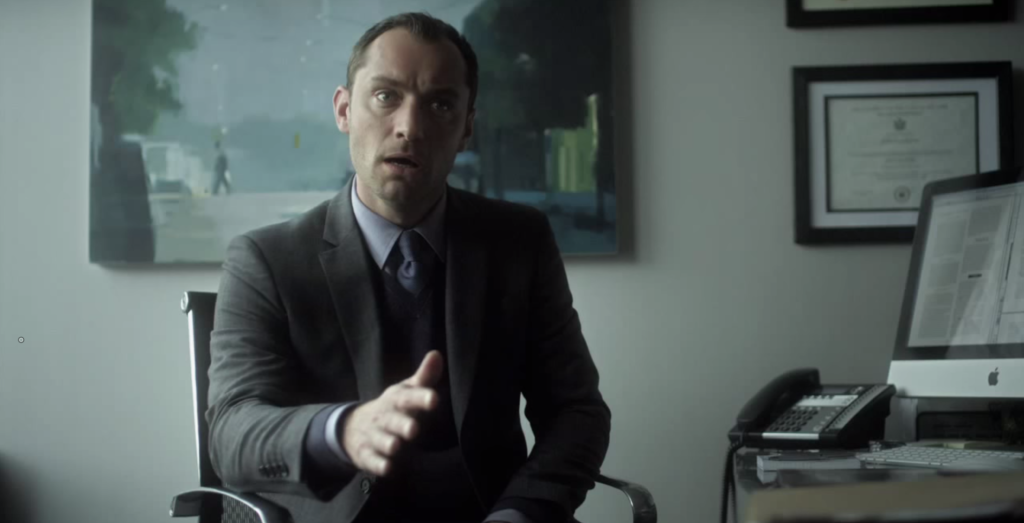
This is a simple close up in an office and you can quickly see the Key light is coming from camera left and providing the light on the camera left side of Jude’s face.
The fill side is on Camera right. The fill doesn’t look to be generated from another light in this example.
It could be from the key light bouncing of some poly board or white card or there may not be any bounce at all and it could be coming from the walls of the set.
Either way, to measure the key to fill ratio you would measure the amount of light falling onto Jude’s key side (the camera left side in this example), write it down, then measure the amount of light falling on the fill side of Jude’s face (camera right in this example) and compare the two.
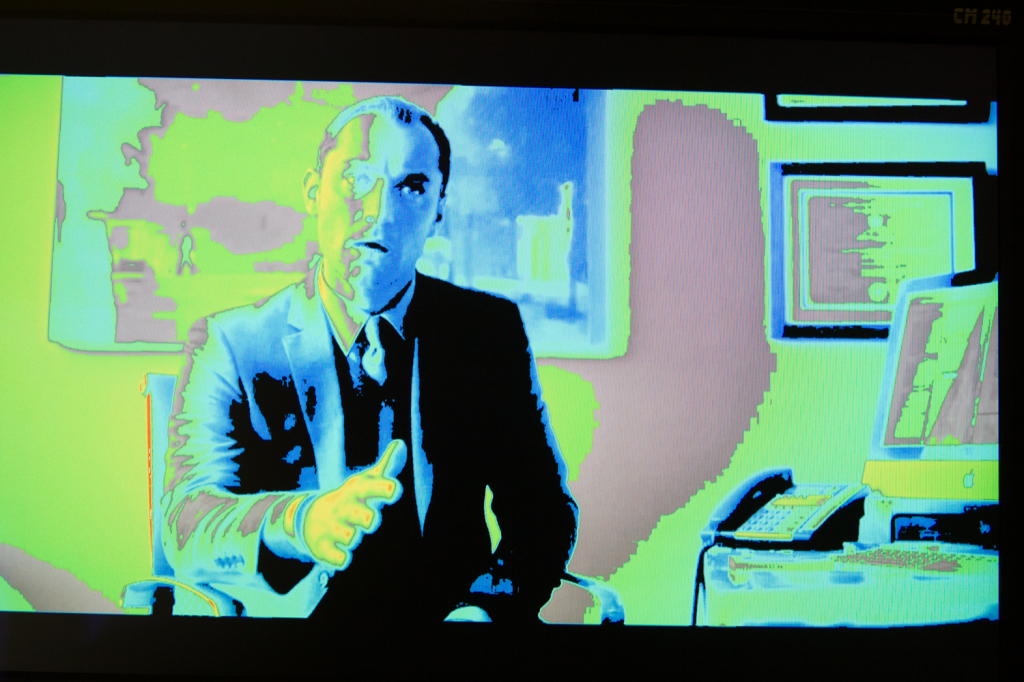
In this example it looks to be about a 8:1 ratio in terms of light levels, or a difference of 3 stops. We will get into the specifics of working in light levels or stops levels later on in this article. For now we will work in my preferred terminology which is Stop Levels.
Using stop levels when talking about ratios means you are comparing the light levels in stops of light. For a definition on what a stop of light means you can check out these helpful links:
Stops of Light
Try the numbers
What does a stop change?
Each extra stop doubles the light. Compare two measured light levels below.
The brighter reading is 8 times the darker reading.
The bars show relative light quantities. They are not a simulation of how your camera renders a face. Ratio = 2 raised to the stop difference.
Quick reference
0 stops = 1:1 · 1 stop = 2:1 · 2 stops = 4:1 · 3 stops = 8:1 · 4 stops = 16:1 · 5 stops = 32:1 · 6 stops = 64:1
Read Nikon’s explanation of stops What is a Stop?
Cinematography & Stops
So in our example the key light is reading 3 stops brighter than the fill light if we were to be measuring with a light meter on set. Now that we know that if we wanted to reproduce this shot or a shot with a similar light/dark feel to it we now know that we would need 8 times the amount of light on the key side compared to the fill side.
2. Key to Background
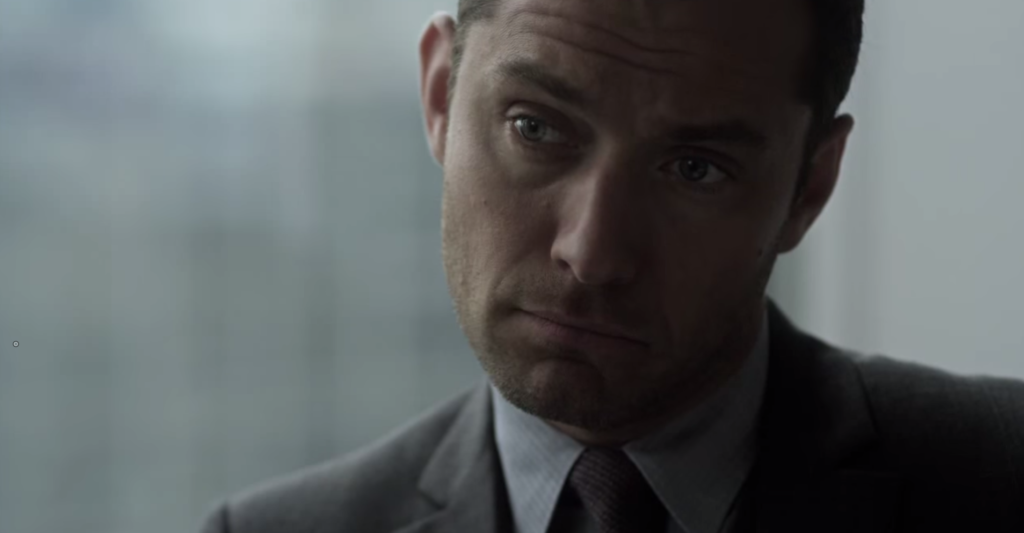
The second major ratio a cinematographer needs to be aware of is the Key to Background ratio. As in the previous example the key refers to the main light illuminating the scene.
If we again use the example of Jude Law we know the key light is coming from the camera left side. The amount of light coming from the key light is irrelevant as we are talking in terms of ratios. This is where the power of ratios comes in handy.
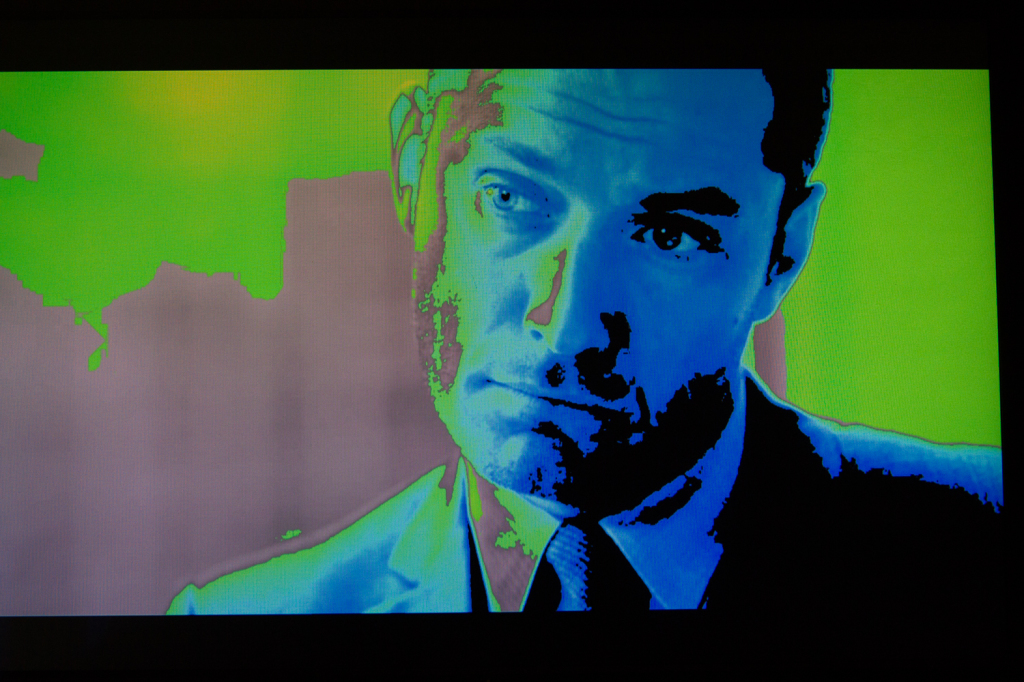
If you want to shoot a scene at T2.8 you can figure out how much light you will need to get a key light to read T2.8 by factoring in your ASA (ISO) rating of your camera and the shutter speed you are using. From there you can then know exactly how much fill light you will need because you know the ratio you are going for.
The Key to Background ratio works just like the Key to Fill Ratio but its implementation can be a bit broader. In the Key to Background ratio you measure the Key Light and then measure the background as a whole. Most of the time in dramatic film and television work the background will be one or two stops under Key but that is a very broad generalization. The Key to Background ratio sets the mood for the viewer and can help a cinematographer shape where he or she wants the audience to focus their attention in a given frame.
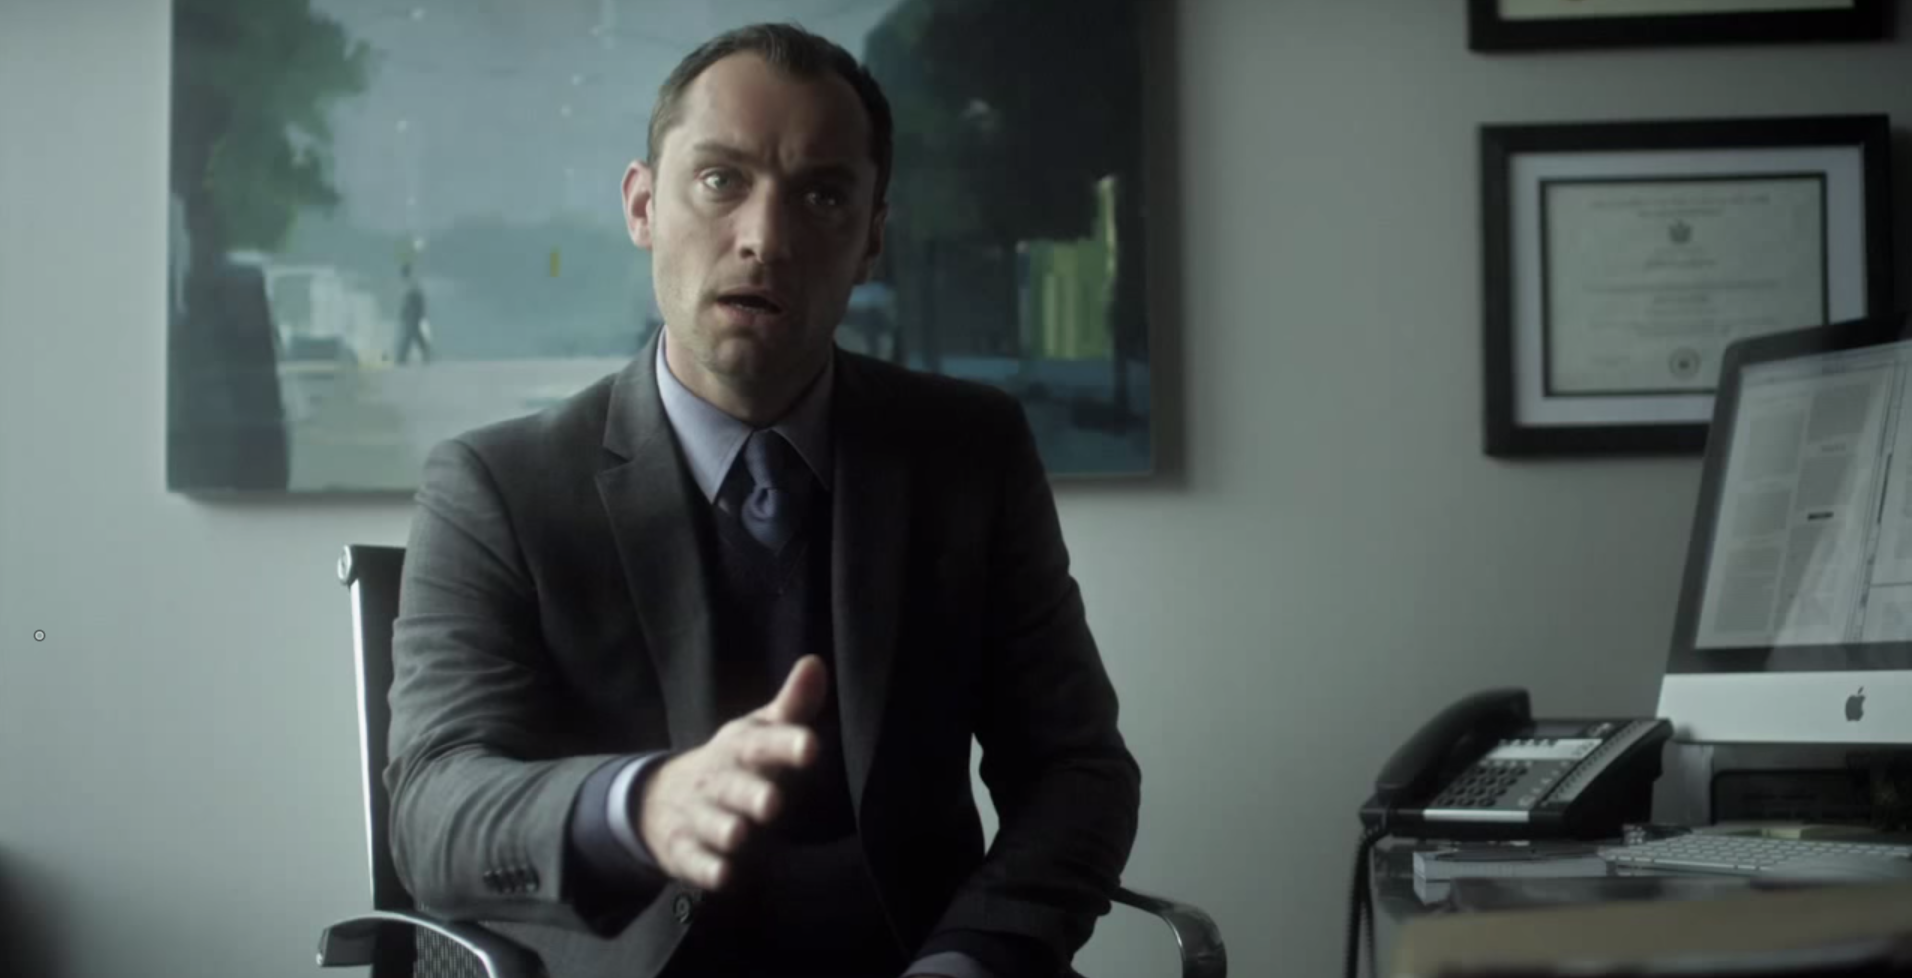
If we again focus our attention on our earlier example we can measure the key light of the scene and then measure the background of the scene. When we do that we see that the background is reading at Key on the left had side of the frame and then dropping to one and a half stops under on the right. There are no objects in the background over key.
This is powerful knowledge.
We are now armed with a deep understanding of what it takes to replicate a visual language like the one being projected in this example.
So now that you know what the two big ratios are to consider when on set how can you use them in your work?
Using Lighting Ratios to Take Your Work to the Next Level
1. Pre-production
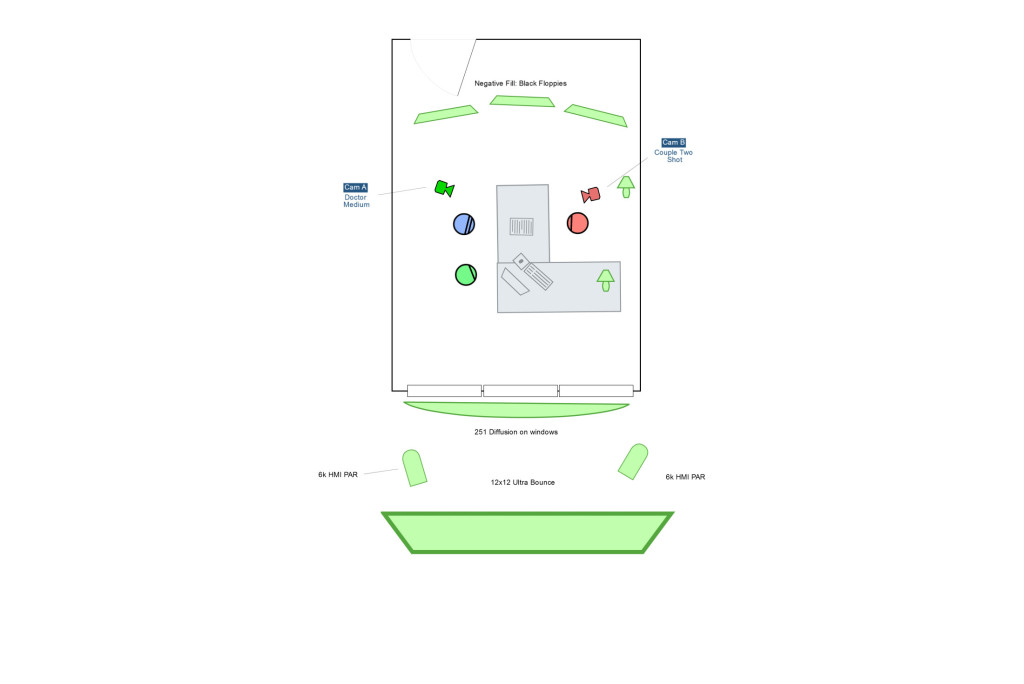
Pre-production is a very important stage for establishing a visual language. Ratios play an important role in the style of a piece and deciding on appropriate ratios for a project and for specific scenes can help make you better prepared on the day of shooting.
Directors generally speak in terms of mood or reference. They may sit down with the DP in preproduction and look over stills or other films and talk their way through them.
A good DP will know how to translate a director’s language into information that cn help bring their vision to life.
If a director says they like a certain shot for the dark mood this can be interpreted into actual numbers by a DP. You can immediately identify the Key to fill Ratio and the Key to background ratio.
The more references the director brings up the more and more you will start to see a specific key to fill and key to background ratio become.
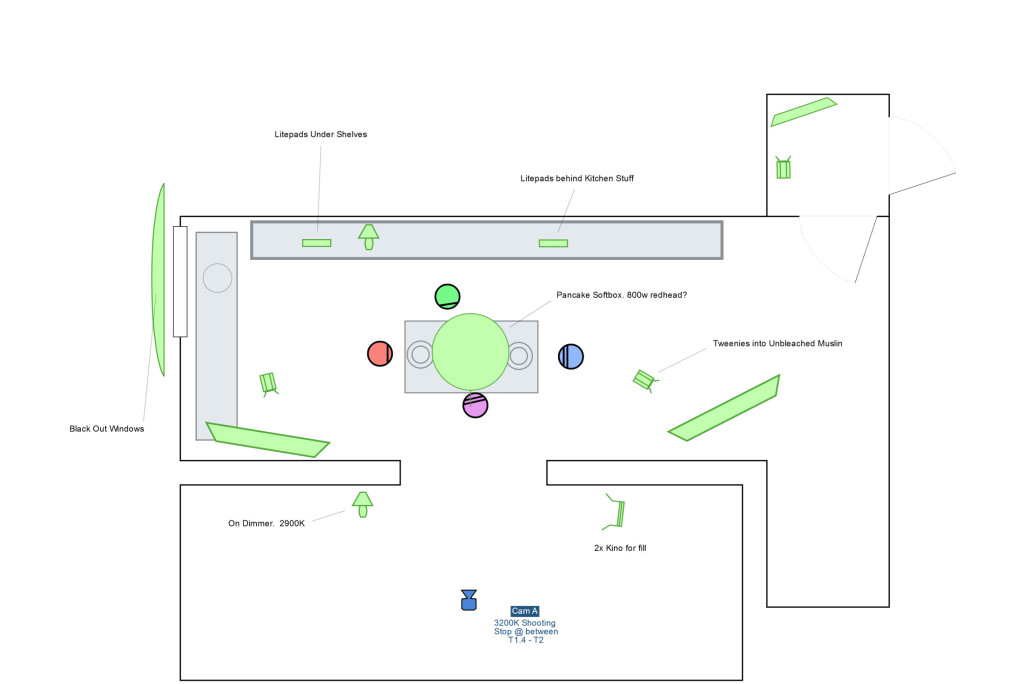
Knowing exact numbers will help you communicate more clearly with your team and will speed up your workflow. Time is the constant enemy of the DP and any chance you find to maximize your return on time you should take advantage of it.
Once you get a sense of what the director is looking for you can then use the ratios you have established to help plot out the tools necessary to get the job done. In combination with location scouts you can use the ratios to determine exactly how much level you are going to need from your lights. The gaffer can then plan on what tools they will need to bring along to make sure you get the look you are after.
For example, say you want a Key to background ration of 2:1 stops and you are shooting an exterior location.
This means you want the background 1 stop under key. You and the gaffer now know that you will have to either look for a darker background or if that isn’t possible you will have to brighten your key to get the ratio where you want it. Maybe you can fly a silk to bring down the sun on the actor and then bounce an HMI in to model and throw a double net in the background to take it down 2 stops.
Knowing your ratios will save you time by knowing exactly what kind of gear you are going to need to get the look you want.
On Set
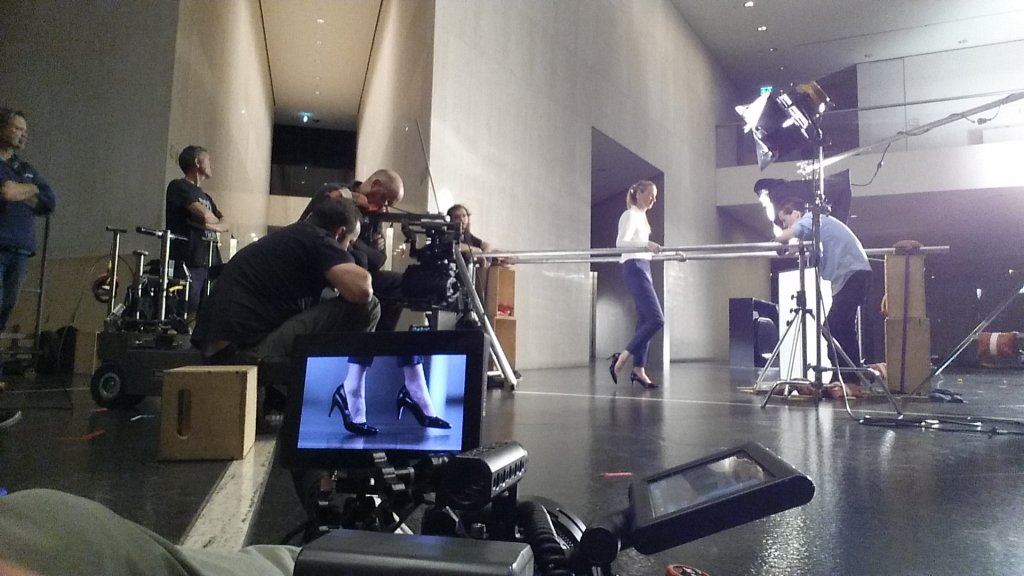
Ratios help you communicate on set. Exact numbers are clear and concise and there is very little need for explanation which can speed up your lighting set ups.
Let’s talk about communication with your gaffer.
Which of these examples is more clear?
Take the background down a little bit and bring the key light up a little.
or
Take the background down a stop and a half and bring the key up to 2.8.
The answer is obvious. The more black and white you can communicate your desires, the higher % chance you are of your crew being able to produce the results you are looking for.
Another great thing about knowing ratios you like is the ability to prelight in your head.
Do you like 3:1 on actors, 2.5:1 on actresses and a K:B (Key to Background) of 3:1 for a specific scene? Knowing that you and the gaffer can light without the camera. While everyone else is waiting on the camera & talent you can be putting the finishing touches on your set ups which will give the director more time to nail performances.
What Can’t Ratios Tell You?
Ratios are great but they don’t solve all the challenges of a lighting set up for a DP. Ratios help with the mood but there are a number of other factors that need to be considered as well.
1. Type of Lighting:
Soft light vs. Hard Light. Ratios can’t help you determine whether to use soft light or hard light. You have to know what the differences are and when to employ them.
2. Direction of Lighting
Ratios can’t help you determine where the Key light should be coming from.
3. Color
Ratios are no good for color. You have to develop your project and understand how the color temperature of lights impacts mood and feeling.
4. End All and Be All
Ratios are great for preproduction and communicating with crew but they are hard and fast rules. They are guidelines that can help you maintain consistency in your project but that doesn’t mean you need to follow the patterns every set up.
Studying ratios can be helpful to any cinematographer but what is the best way to go about finding out which ratios you like?
Every cinematographer is different and people just starting out should realize that there is no hard and fast answer to which ratio is the proper ratio for a given scene. There are cinematic tendencies and patterns that are used but ultimately the choice of ratios is up to you.
Cinematography School: Tools to Learn more About Ratios
The rise of modern technology has made it easier than ever for aspiring cinematographers to learn how the greats are lighting and in this section I want to go over a few of the different menthods for learning lighting ratios.
We will start with the method that has been around the longest and then I will get into exactly how I study lighting ratios for my projects using all the modern gear at my disposal.
The Light Meter
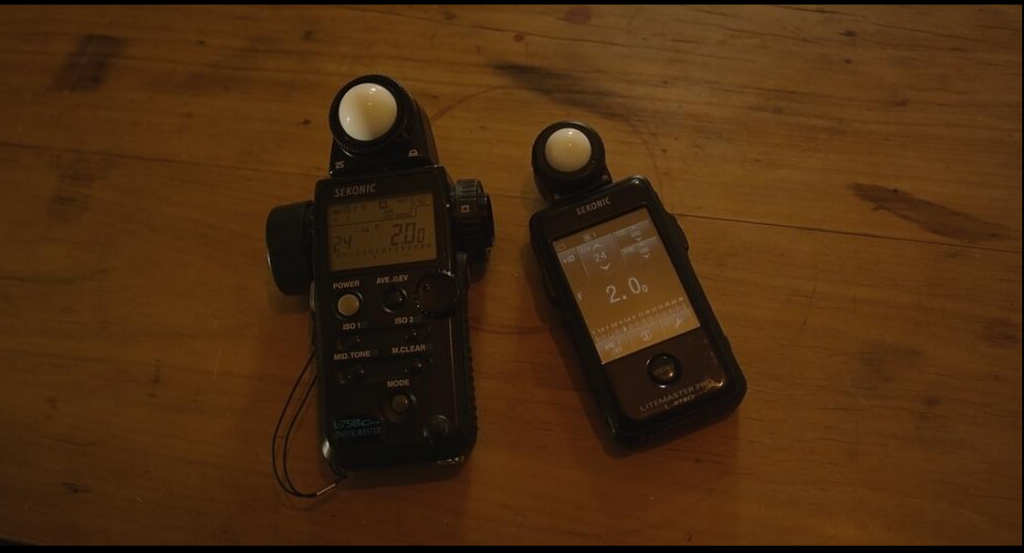
The Light meter is the original ratio tool. The incident meter and the spot meter are both great ways of analyzing lighting ratios.
For the Key to Fill light it is a fairly straight forward process to measure the ratio. You take a reading of the key side of your talent in the shot, then you take a reading on the fill side of your shot.
Voila.
You have your key to fill ratio.
To get the Key to Background ratio you can use the incident meter reading of the Key you got when you were measuring the Key to Fill, lets say T4 for this example, and you can spot meter different areas of the background to determine the K:B ratio. If you spot meter the wall behind the subject and it reads T2.8 you know the background wall is one stop under key.
If you spot the window behind the talent and it reads T11 you know the window is 3 stops over key. If that is to high for you and the mood you are going for you know you have to bring that window light down by a certain number of stops.
The light meter is still a fantastic tool and something I use on every shoot but it does have its limitations in helping you learn what kind of lighting and what kind of ratios you prefer.
The biggest issue is that you can’t meter a movie on your TV or a still on your computer.
It just doesn’t work.
So in order to learn what kind of ratios you prefer you have to actually do the set ups yourself and work your way through them. This isn’t always possible and it certainly isn’t very convenient if you are just starting out.
The advent of other exposure technologies though has taken ratio learning to a whole other level.
I still recommend getting a meter both incident and spot and learning how to use them.
They are still invaluable to cinematographers and many still use a meter as their only method for measuring light.
The New Wave
The light meter is great but what about taking this whole ratio learning thing to the next level? Well that is exactly what I set out to do not too long ago.
I wanted to find a way to analyze what others had done in the most effecient and accurate way possible and I came up with a method that I think fit the bill. Here it is:
1. Gather What You Like
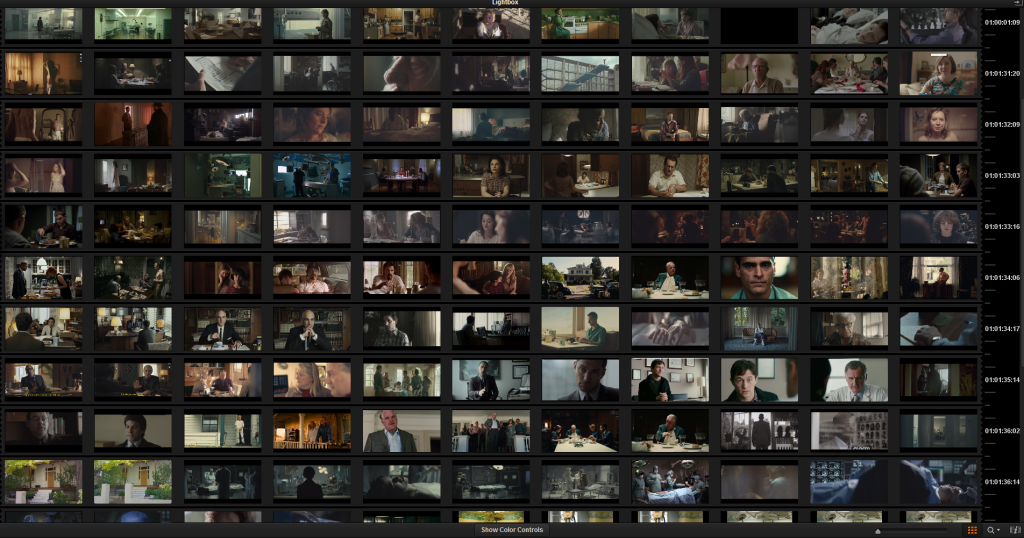
The first step is fairly simple. You go out and find photos or clips that you like. Gather as many as you can. You want a wide variety of situations and settings. The more images and clips you amass the better you will understand later what it is you actually like.
The way I work is I will browse sites like youtube and vimeo and use a program called Jing to take screen grabs of images I like. Jing is free and because I am a PC guy it works great. You can use any screen grab tool you want though in reality. Just get the highest quality screen captures you can.
Another method is to go to screen grab websites like Evan Richards blog or Cinema Squid.
Evan E. Richards – Cinematography Frame Grabs
Cinema Squid – Cinematography Stills
From these sites you can download high quality stills from your favorite movies.
2. Get the Stills Into Resolve
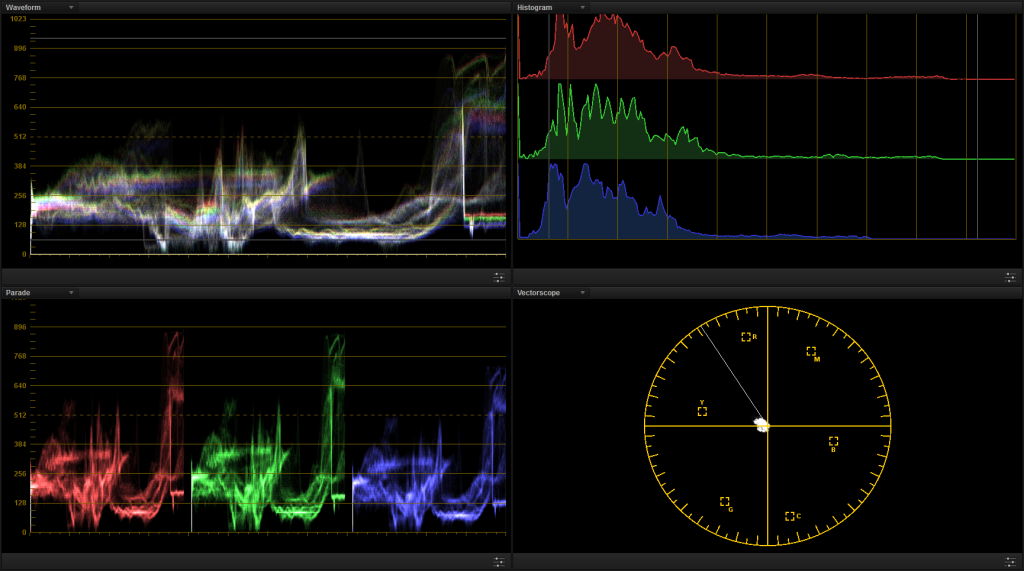
After you have gotten all the images you want to study you can use Resolve Lite (FREE!!) to get them all in one place. Resolve is super powerful and there are a lot of great built in tools that you can use to analyze the images in Resolve but I stay away from things like waveform and RGB Parade.
I have got a background as a colorist and for me, when I am trying to study ratios, I want the clearest and easiest answer to my questions. That is why I use another tool not found in Resolve.
3. False Color
After I have brought my stills into Resolve and I have loaded them into an empty timeline I feed them out of my computer onto a reference monitor. The reference monitor I have is a Flanders FSI CM240 Grading monitor. It is an awesome monitor and I love it.
The great thing about the CM240 besides the beautiful picture quality is the built in tools. The monitor comes with a mode called False Color mode.
In False color mode the monitor turns the IRE levels that it is being fed through Resolve and turns them into colors based on their brightness.
Boom!!!
Talk about easy. Now I can take a still from a movie, save it using Jing, load it into Resolve, pump it out to my Flanders monitor, and immediately see actual levels that were used to capture the mood and lighting of a scene. Talk about eye opening.
It is like you are seeing behind the curtain.
The False Color mode really makes a big difference because it makes it so easy to identify different stop values and the different areas of an image that are above or below key. Using the false color I can start to see patterns of the ratios that I like. I can look at 1000s of images and scan ratios in a matter of seconds.
Once you get good at it you don’t even need the false color but since I am still working at it the False color has been incredible.
Very powerful stuff.
4. Putting the Knowledge Into Practice
Now comes the moment of truth. I have got the knowledge but how can I use it to help my projects?
Easy.
I take the Flanders in the field with me on set, I take the notes I’ve made on what ratios I want and what I like for each set up or scene, and then I make sure everything is good on the false color while I am setting up the lights. It is impossible to not get it right. You analyze enough images and you take measurements of what you like and you can’t miss.
You still have to decide on the things ratios can’t tell you like I mentioned earlier in this post.
Things like light softness, direction, and color but it definitely helps get you started.
The whole reason to do this sort of study is not to copy someone elses work. Far from it actually.
The role of cinematographer is blended into part technician and part artist. You cannot make the art unless you know the technical details. Can you make pretty pictures without doing any of this? Of course, but I am not talking about making pretty pictures.
I am talking about developing a mastery of controlling and manipulating light and emotions. To raise the game you have to know what others have done before you. Why not use the knowledge they have acquired to help boost your work to the next level and conitnue to push the art form further.
Knwoing what opthers have done you can then build your own style and your own language. Once you know the tools and the formulas then you can break them and shake them up to suite your projects and your taste.
Cinematography School: Real World Examples
I want to take you through a few more examples to show you how this whole method of learning cinematography works.
To get the most out of the images below you have to know what you are looking at. The FSI False Color is user adjustable (one of the reasons it is so powerful) and they way I have set it up reads like this.
RED = 3 Stops Over
Yellow = 2 Stops Over
Light Green = 1 Stop Over
Grey = Key
Teal = 1 Stop Under
Light Blue = 2 Stops Under
Dark Blue = 3 Stops Under
Black = 4 Stops Under
OK lets take a look at a few stills.
This first sequence was shot by Roger Deakins. I found the stills at Evin Richard’s site. It is a night time INT scene in a kitchen/dining room.
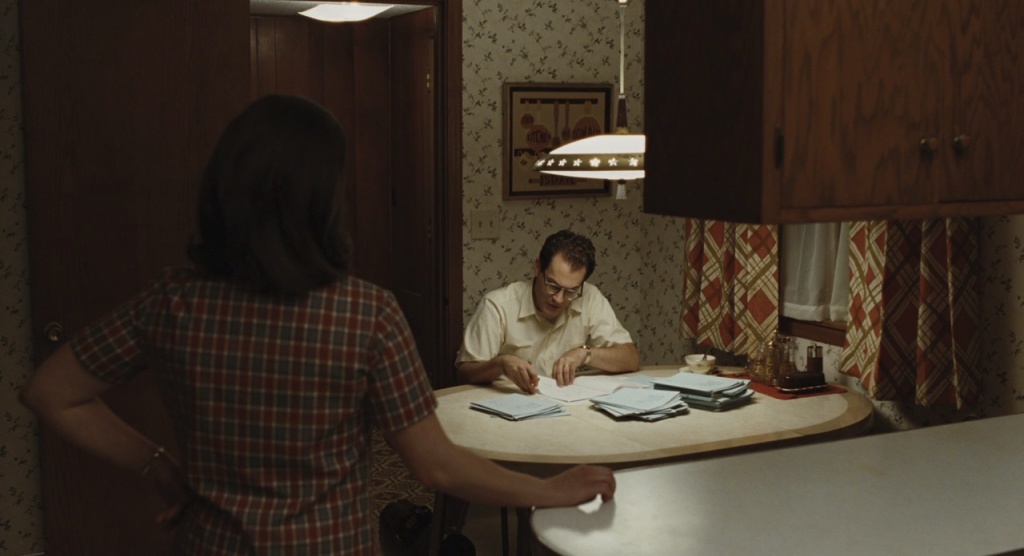
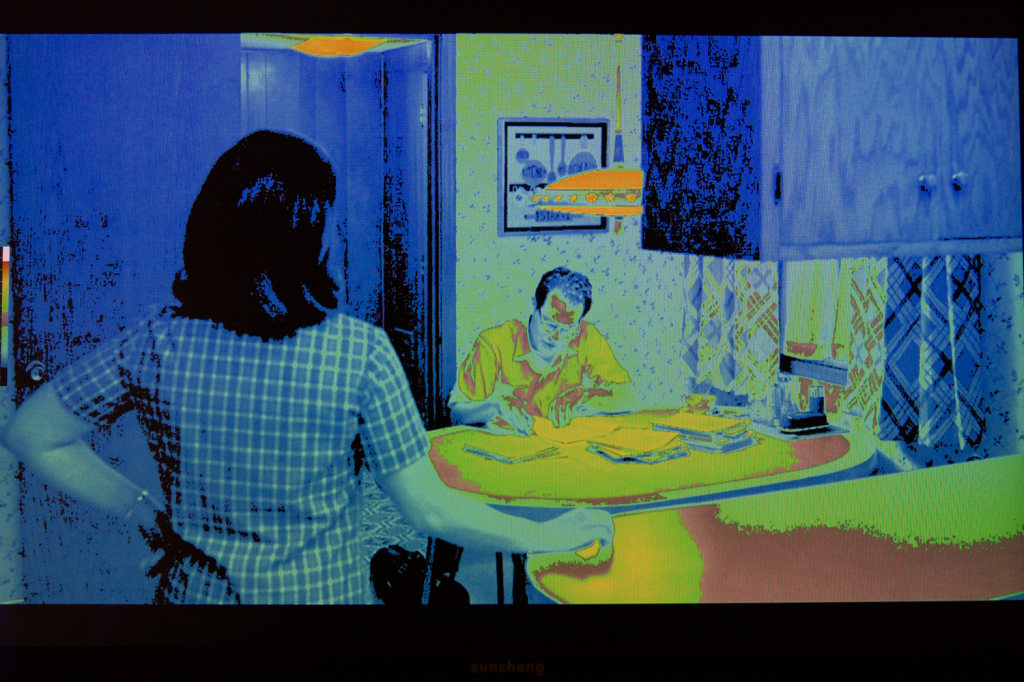
You can see that the Key light is coming from the light over the table. The light is the hottest thing in the frame. It is 2.5 stops over. The Table itself is 2 stops over. The main character seated at the table is at Key for his skin and his face fades into about 1 stop under. The background is all 2-4 stops under which helps to focus the attention of the view. We aren’t looking at anything hear but ratios remember.
So now if I like this scene I would know that I need my table at 2 stops over, my talent at key, and my background hovering around 2 -4 stops under.
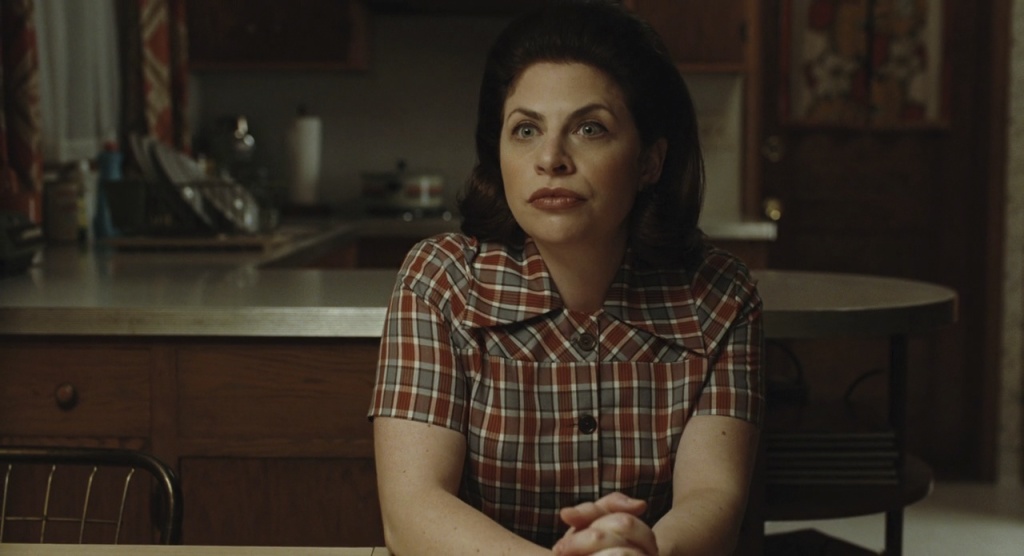
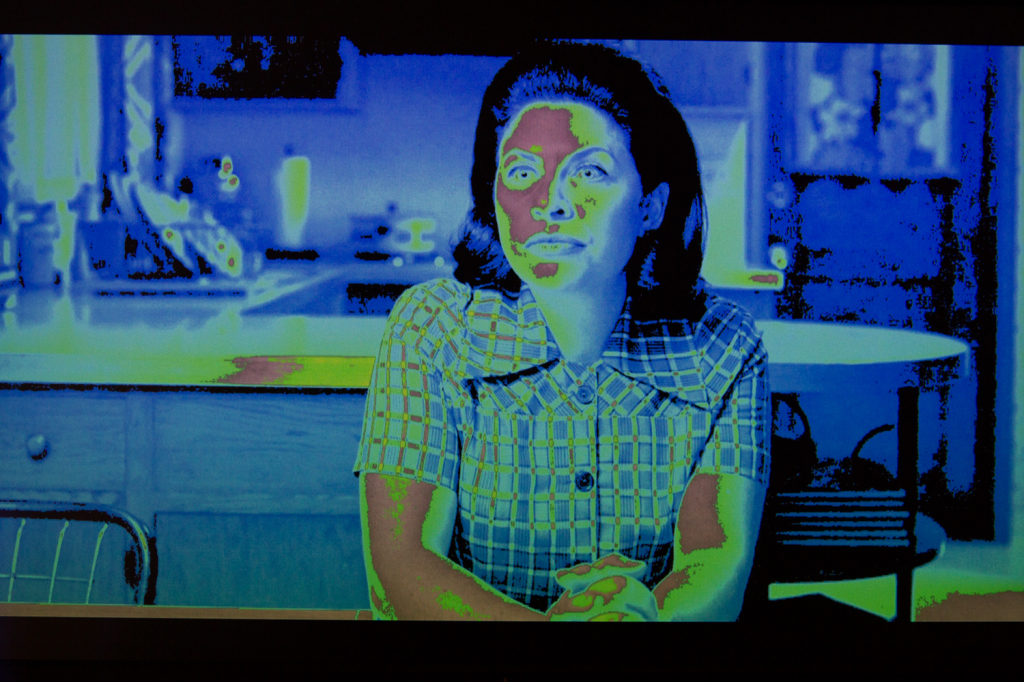
Same scene different shot.
Here you can see the actresses skin is at Key and the key to fill ratio is 2.5:1. If you were there on set it would read say T2.0 on her key side and T0.7 1/2. You can also see how the light wraps around the fill side and gradually falls off to her hair that is 4 stops under. You can also see that there is nothing in the background over Key. Everything is between 1 and 4 stops under.
Now you have to remember that this is all post “grade” but that doesn’t really matter. You get the idea. The closer you can get these ratios on set the better your results will be.
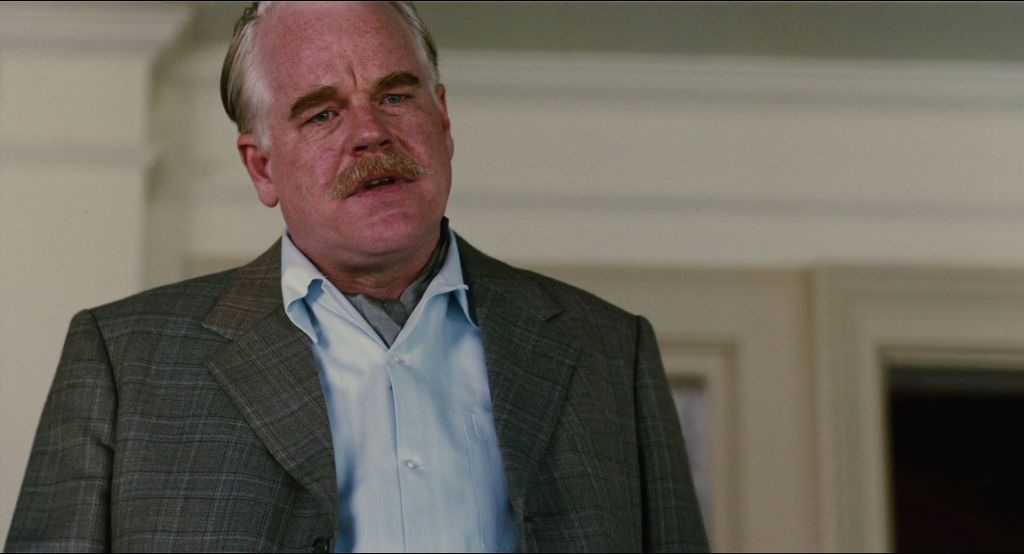
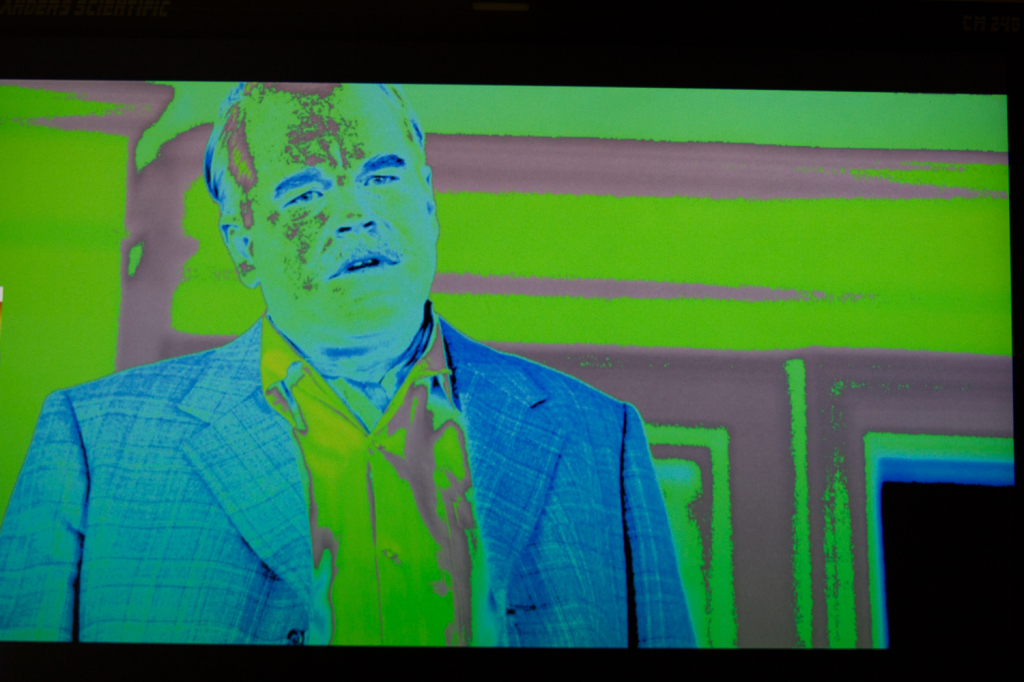
Here is a shot from the movie The Master.
The shot is under a porch EXT day. You can see that PSH’s head is at Key.
The fill ratio on his camera right side of his head is about 1.5 stops under. The background is either at Key or one stop under. His jacket is 2-3 stops under Key.
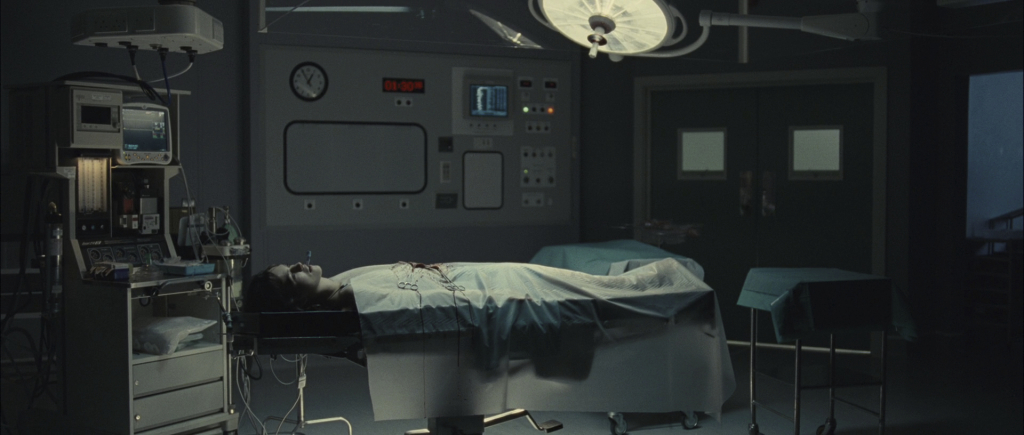
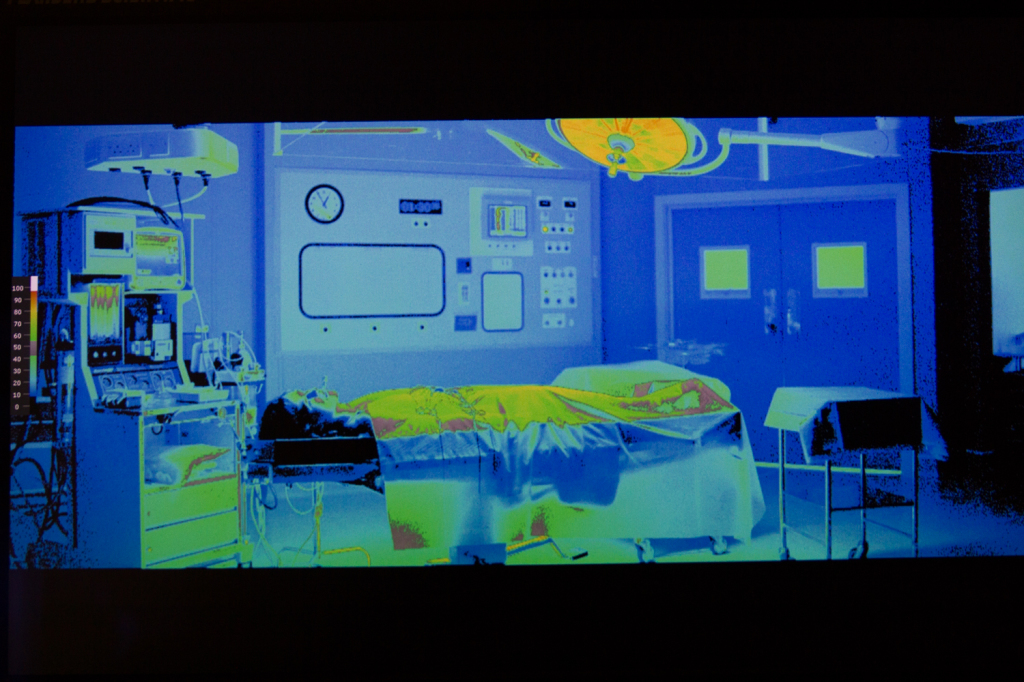
This is a great sequence from Never Let Me Go.
I really like this dim environment and this shows just how accurate you can get with the false color modes.
In this wide you can see the skin tone of the woman laying on the stretcher is at Key. The cover on her is one to two stop over.
The fall off on the light from above means the background gradually melts into 1 stop under, then two stops under, then 3 stops under. I really like the look of the 2-3 stops under stuff.
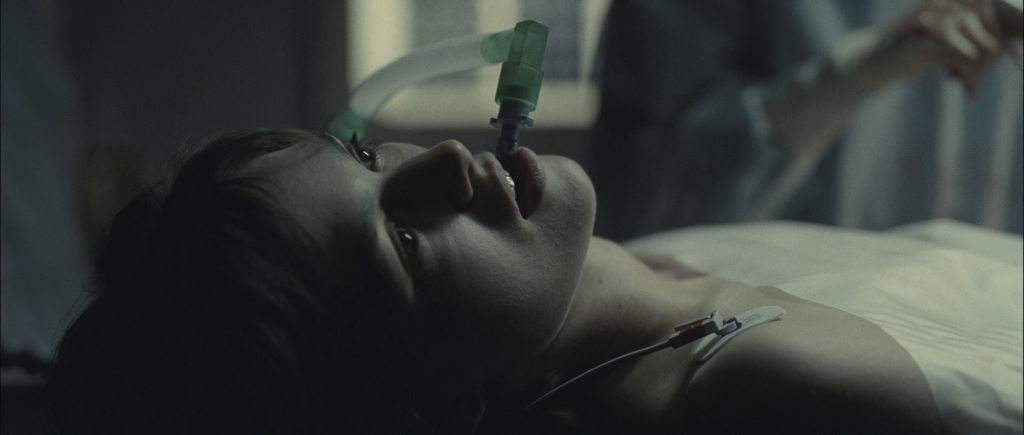
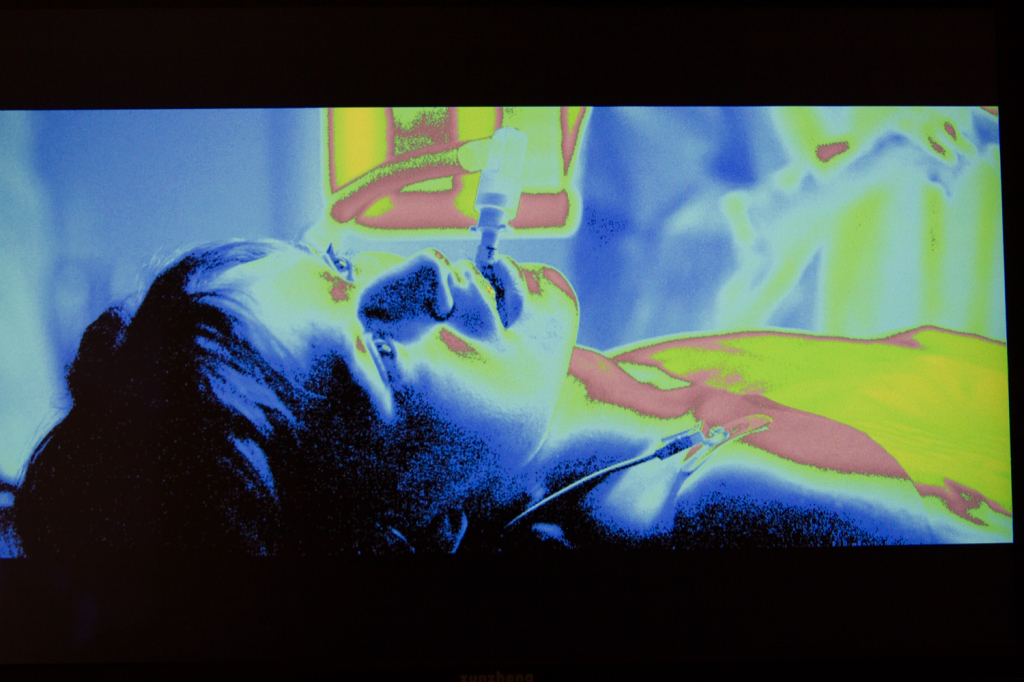
In the close up you can again see the fall off and the K:F ratio. The top side is at Key and the Fill falls off from 2-4 stops under fairly quickly.
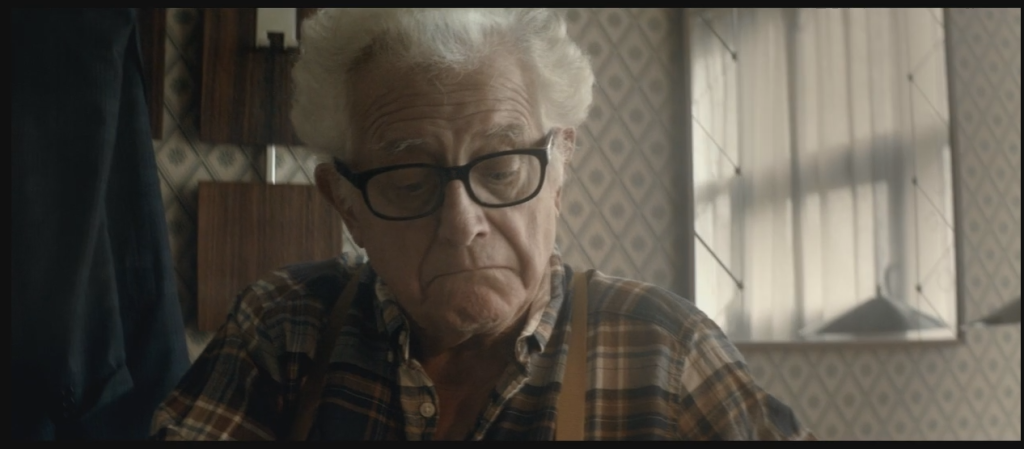
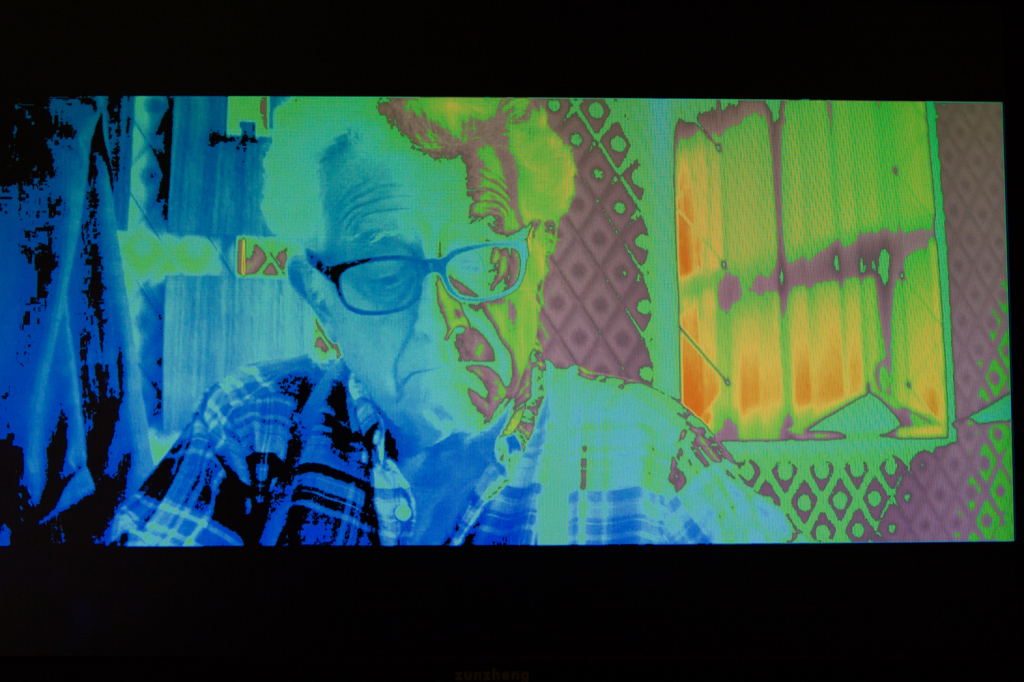
Here is an INT close up that I quite like the look of. You can see that the Key to Fill is 3:1. The K:B is Key to 2 stops under with a splash of light in the reflection.
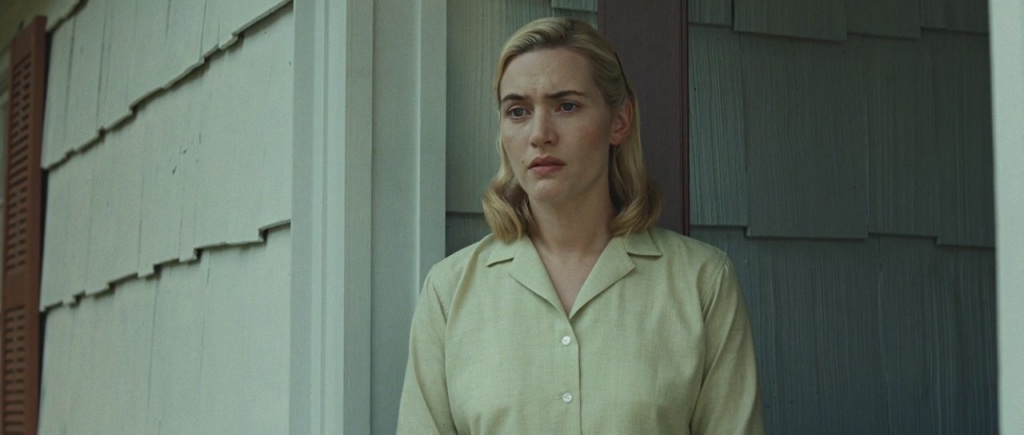
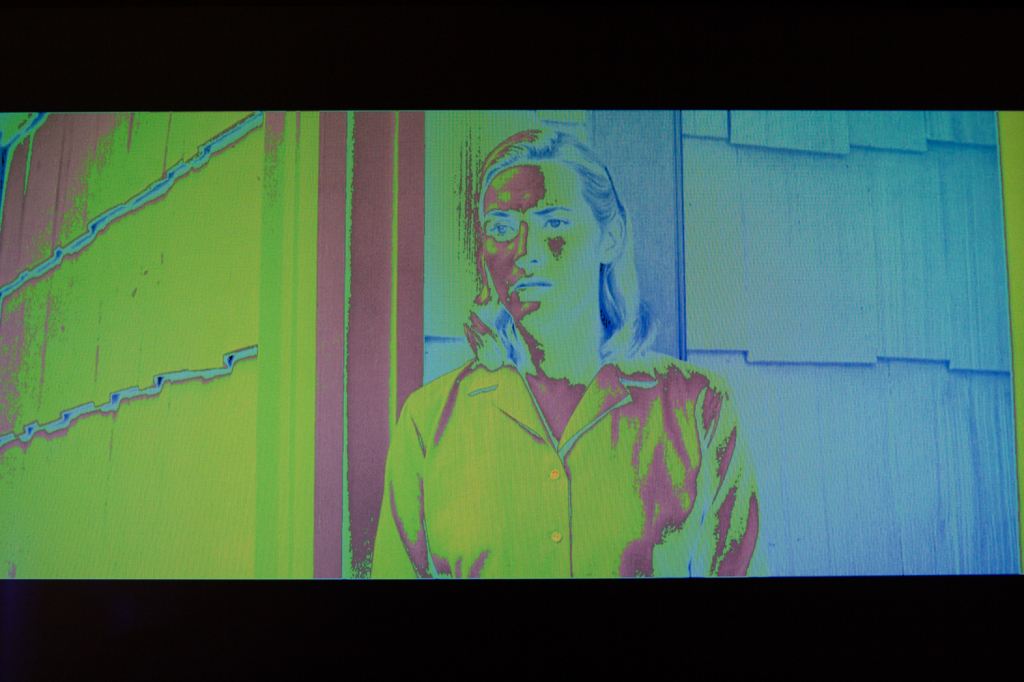
In this final example you can see Roger Deakins keeping everything very tight and well exposed to provide shape and just the right amount of contrast.
The woman’s key side is at Key and the light is just kissing her camera right cheek. The K:F ratio is 2:1 with fall off warpping around to 3:1. You can also see that nothing in the background gets too far over Key meaning there are no bright spots to draw the viewers attention away from the main character.
Your Mileage May Vary

This is just what works for me. I like seeing the patterns emerge in images I like. In film the ratios are fairly consistent throughtout a project. 9/10 th background is a stop or two under. The K:F for miles is larger than the K:F for females. It is fun to spot the differences and this method has drastically improved my understanding of what makes a pleasing image.
The tools I use I do so because I had them on hand. You can do the same method using other tools as well. You don’t need Jing, you don’t need Resolve, and you don’t need a FSI monitor. Any monitor with false color you can program will work. If you have an Odyssey 7 or 7Q that will work great. If you have a SmallHD you can use their false color as well. There are lots of ways to put this method into practice.
The other benefit of studying images like this is you can then start to extrapolate other things top DPs are doing. You can see when a Key light is soft vs hard. You can see how they feather out practical lights or how they add a bit of brightenss and contrast to an image to make certain point of interest in the frame.
Ways lead on to ways.
Side Note: If you do use Resolve it is also fun to see what your favorite shots look like at different exposure levels. Play around and bring up or pull down the shots to see what a difference exposure levels and ratios make on an image. Have Fun!
Hopefully you can take this method and put it into action like I have. It has helped me out numerous times and has made me a better cinematographer.
If you have any questions please leave them in the comments.