The Art of Cinematography Prep
There are as many different ways to prep for a project as there are to shoot a project. Each cinematographer will have his or her way of getting inspiration from the script or treatment and translating it to the screen and in this article I wanted to lay out how I go about the prep process to give you an idea of the steps involved.
For the purpose of this article I am going to assume that you have already spoken with the director, discussed the look and the feel you are after, and are now on to actually gather inspiration and ideas on how to put that plan in to action. With that being said, in this article I am going to lay out a few steps that are necessary when I am getting ready to shoot a project.
It doesn’t matter if it is a commercial or a music video, a short or a feature, this process can be transfered to any sort of project. So let’s get into it.
Gathering Inspiration
If you have been shooting for any period of time you will no doubt have come across people’s work that you are drawn to more than others. You are constantly developing your eye as a cinematographer and keeping up with what other people are producing can help expand your own arsenal of ideas.
I am always on the lookout for inspiring videos or still images. I use the app Evernote to help me organize everything.  When starting a news project I always head to Vimeo and look at what some other DPs whose work I respect are up to. I am not looking for direct correlations to the project or projects I may be prepping for, I am just looking for things that catch my eye. Over time I have built a list of DPs whose work I enjoy and here is just a small taste of that list:
- Bjorn Charpentier
- Max Goldman
- Steve Annis
- Evan Prosofsky
- Chayse Irvin
- Matthias Koenigswieser
- Jeremy Rouse
- Stefan Duscio
If you are starting out and you don’t have a list of guys whose stuff you enjoy you can use another trick which I use on a weekly basis.
The Search Tool
 Inside of Vimeo there is a search function.
The search function allows you to filter videos based on a few different parameters including text in the title, the description, and the various tags for the videos. There are so many videos eing uploaded to Vimeo that it can be hard to separate the really great work. I use the search function and filter the results by using terms of high quality camera and lens gear.
For example, if you type Arri Alexa into the search bar and hit enter you get around 4,700 entries. The vast majority of those videos where shot using the Arri Alexa camera. Now most of these aren’t going to be great and it will take some time to filter through the results but if you exercise a bit of patience you are often rewarded with a few gems.
I will search Vimeo at least once a month for each of the major search terms and then log the best videos I find. I do this for terms like:
- Arri Alexa
- Arri Alexa XT
- Red Epic
- Red Epic Dragon
- Sony F55
- Cooke S4
- Master Primes
- Hawk Anamorphics
- Ultra Primes
- Anamorphic
- & a few more.
Note: It is important once you do this once or twice to make sure you are filtering the content by clicking on the Date tab.
Once you do this for a while you will keep seeing the same names pop up again and again. Sometimes it is the name of the DP or sometimes it is the name of the production company or director.
Either way if you find a person or a company who is doing great work all you have to do is follow them on vimeo and you can stay connected with their latest work.
Using the Footage
So now that you have some footage what are you supposed to do with it and how is that going to help you prep your own project?
What I do is when I find a project or clip that I like (and I can like it for the whole piece or maybe just one or two frames) is I will copy the link and head over to website called Off Liberty.
Off Liberty is a website that allows you to download videos from sites like Vimeo or Youtube so you can look at them while you are offline.
********Disclaimer************
I am not suggesting you download this stuff and then re-upload it somewhere else for your own benefit. Do your best not to be a bad person. Don’t abuse the tools. Never upload any work that isn’t your own.
Now that you have it on your computer you can go into your NLE of choice (I use Adobe Premiere Pro) and you can do a few things with it.
You can start by just going through the piece and pulling frames that you like the look of. I have a number of different files on my computer for different areas of cinematography such as:
- Lighting
- Mood
- Contrast
- Framing
- Composition
- Camera Movement
- Sequences
I will then save those still frames into the appropriate folder so that when I need inspiration and I have a certain idea in mind, for example, a dark street alley scene, I can flick through my mood section and find something dark and then combine it with other frames from composition or sequences to get the ball rolling on my ideas.

The next step is to turn your still frames in to a sizzle reel.
If you have the time I have found that this step can be useful for seeing how camera movements and focal lengths cut together.
I originally got the idea after I saw this promo made by Looper director Rian Johnson.
You simply go back through your clip library and cut the moving sequences together. Pretty easy and very effective for understanding how the director and editor might look to cut the piece.
Cinematography Prep – The Lights
Now that you have an understanding of the shots you want to use and the mood you want to create the next step is identifying the tools you will need and exactly how you will use them on set.
If you are a seasoned veteran you can simply figure it out by looking at the reference images or dialing up the combinations based on your own experience. If you are just starting out it is going to take a little bit more work.
Here is a trick I use.  I take the stills references that I want to draw on for my project and I import the sequence containing those images into Davinci Resolve. Inside of Davinci Resolve I have access to a full range of tools that can help me identify things like color balance, exposure, contrast ratios, and saturation.
You can also use specific tools like zoneSCOPE which allows you to analyze an image outside of Davinci Resolve.
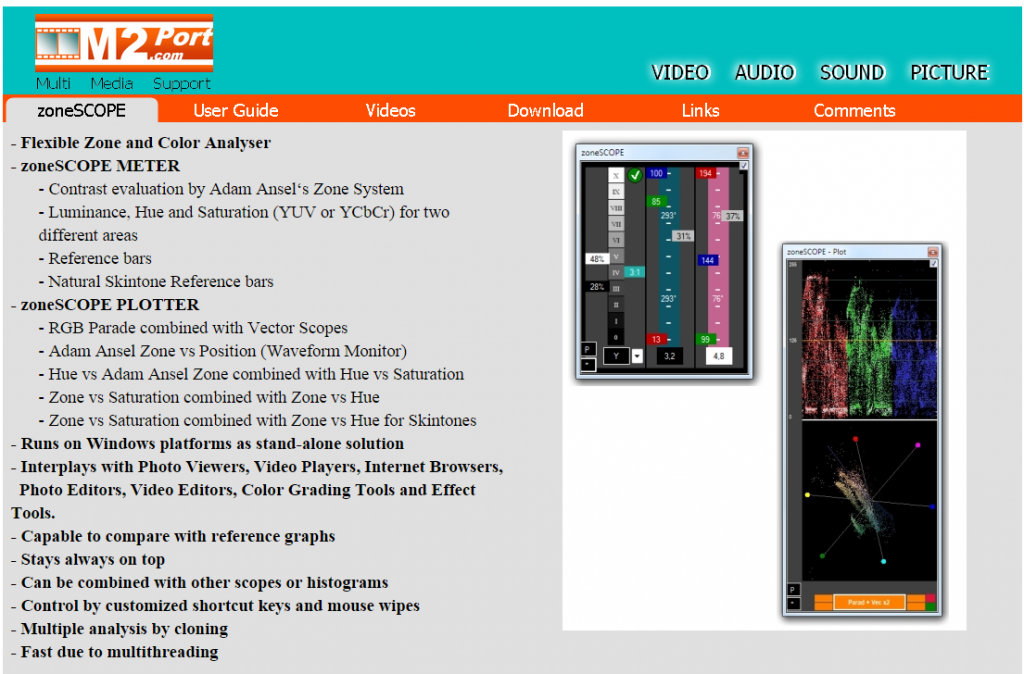
The idea of this step is too see which part of the frame you like and want to reproduce, then analyze the light ratios and levels required to make the shot. Once you have determined the answer you can make better gear decisions based on what you will need to get the job done.
For example if you take this shot: 


You can check inside resolve that the skin is at one stop under (typical “normal” exposure) and the background is 3 stops under the Key.
Then you can see where the light is coming from (the angle, the size of the source) and reverse engineer how to get this shot on your own.
Does this take a long time to do? Yes.
Do you need to do it if you are Roger Deakins? No.
Are you Roger Deakins? Probably not.
If you are, please email me as I would love to have you on the show. Anyway, back to the cinematography prep.
Pulling It All Together
Now that you know the mood you want to create, what fixtures and equipment is going to be necessary to getting that look, and how exactly you are going to set it all up it would be nice to pass that info to the crew.
Why is that you ask?
Well, the most obvious answer is that if the crew can get an idea of what you want they can help you work quicker and more effectively. The more the gaffer knows about the look the more he can delegate and plan ahead to make sure that while on set you get the most amount of time to play with.
Everybody wins if everyone is on the same page from the start. So how do you translate your vision into reality?
If it is a big project with lots of lights needed I like to draft up a shot list and plan using Shot Designer.
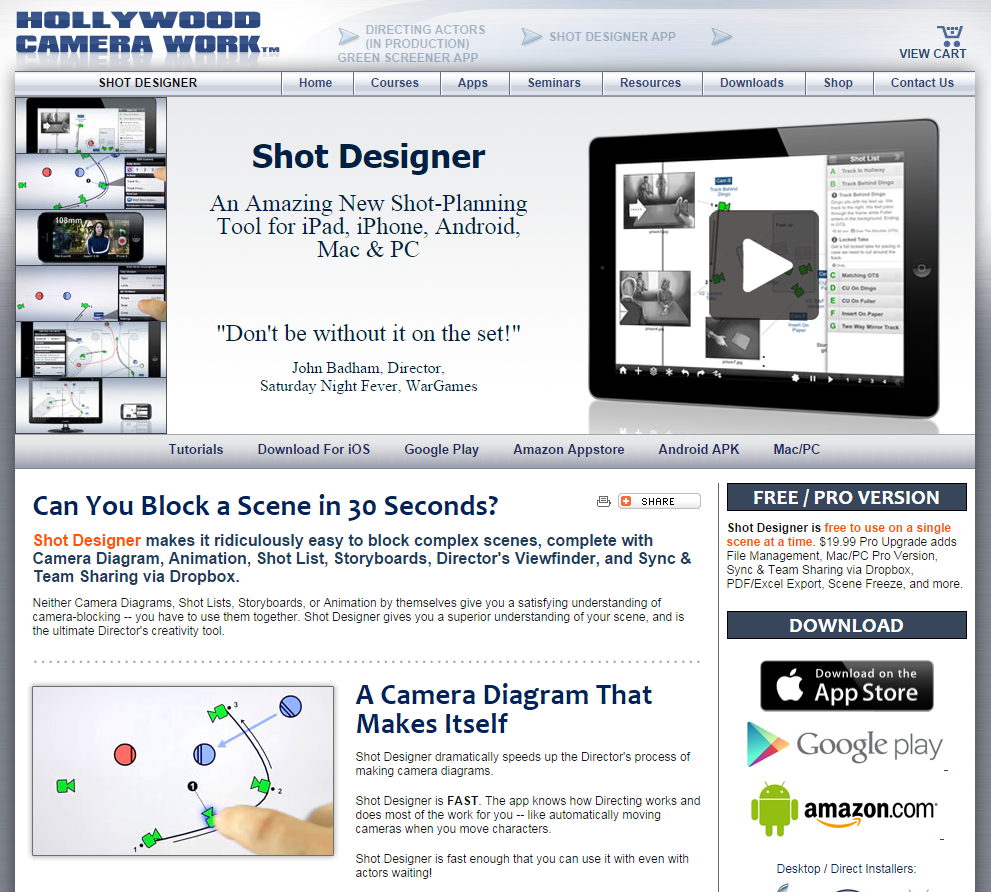
Shot Designer is an app for your Idevices and also available for your desktop.
Inside of Shot Designer you can draw up the various set ups and layout where you think things are needed alongside the director and the gaffer. Then I want to create a list that I can send out to everybody.
That is where ShotLister comes in handy.
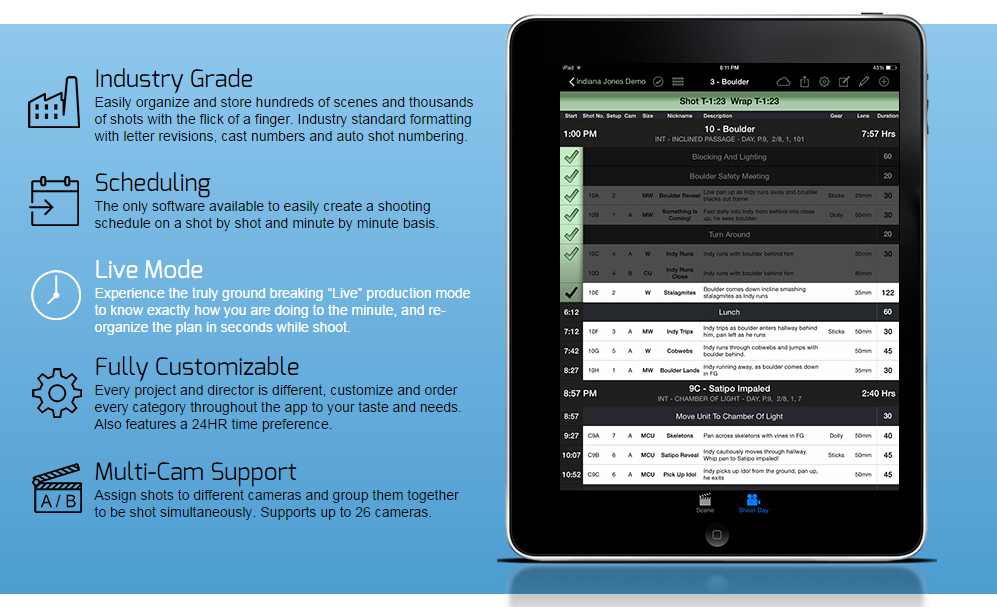
Once I have formulated the shot layouts I will then save those as pdfs and load them into Shot Lister on my Ipad.
Shot List is aimed at productions on a variety of scales and even has live tracking of productions for 1st ADs but I like to use it as a planner.
I will take the stills from my NLE that I made, match them with the shot designer PDFs, and then group them according to the shots. Using this system allows me to email pdfs with both the shot layout (including necessary equipment, lighting, camera settings) and shot references to all the key departments so that everyone is on the same page.
The first time setting it all up can be a challenge but now that I have the flow down it doesn’t take long at all.
Being able to have a vision is one thing. Being able to communicate and execute that vision is a completely different kettle of fish.
Camera and lighting prep can help save money and ensure a better finished product.
Of course, this system may not work for all projects as some treatments & directors operate in a much looser style but even if it is going to be a bit of a run and gun type thing I still like to prepare a few sheets for my own mental preparation.
Cinematography Prep Opinions
The world of cinematography is so vast and there are so many different ways to tackle image making that ideas like camera prep best practices can sometime feel a little irrelevant. The truth is you have to find your own way of working and what works for me may not work for you at all. If everyone operated the same way it would make for a pretty boring world.
So what are some of the ways you prepare for a shoot? Do you like to go all out and look at every shot and every angle or are you someone who likes to see where the day takes them? Post a comment below and let me know.
Want More?
Sign up for The Wandering DP Newsletter and get email updates as soon as we release another Cinematography Lighting PDF and other great exclusive content. Simply click on the button below to sign up.
I’m prepping for a short right now and was looking for ways to keep everyone on the same page. Thanks for sharing!
Something that has worked for me in the past is shooting a video storyboard. I’ll take my DSLR on a scout and use stand ins (whoever is on the scout) to mime out entire scenes, then make a rough cut of it that night. It gives the director and I an idea of the pacing, whats working and what isn’t working, and helps the AD schedule. Sounds like it takes a long time, but it’s much faster than drawing physical storyboards. Plus, once you are shooting you can show the crew the exact shot so they know what we’ll be seeing, where to lay track, etc.
This sounds like a very effective way to prepare for a shoot, thanks for the tip.
In Resolve 12 how do you perform the contrast and light ratios check. Can some give me a step-by-step on how you do this
I appreciate the information on cinematography. I agree that the world of cinematography is so vast and there are a lot of different ways to go about image making, it makes the choices that much harder when looking for the right program. My brother has been looking into doing a little cinematography for fun and has been looking into Davinci Resolve 12, I will be sure to share this with him.