Listen to the Podcast:
This week on the podcast we are continuing our look at a recent 5 day TV campaign we shot in Los Angeles. In today's episode we look at the pros and cons of shooting with two cameras and discuss how to effectively manage your team as it grows.
In this breakdown you will see what happens when plans are forced to change and we take a look at how communication with larger crews is essential for staying fast and nimble on set.
Podcast Sponsors:

Remember to use the coupon code "Wandering20" to save 20% off your next on site license.
Keslow has a special offer worked up for listeners of the podcast and if you let them know your heard them on the Wandering DP Podcast they will hook you up with a sweet deal on the next rental.
Patreon Group: On Set Series - Part #2
Over on Patreon this week we are upping the game once again with a full behind the scenes video of this shoot day. In the video you will see and hear director Seth Epstein and myself discussing set ups, plans, last minute lighting changes and more.
This On Set Series takes Patreon members one step closer to the action as they get to see how a set of this size works, where a DP slots in, how pre-production planning can help speed you up on set and much more.
If you are interested in checjking out this week's extended On Set Video click on the link below to become a Patreon member :
If you are a fan of the podcast and want more video content the patreon group is the place to be. Each and every week I release an exclusive podcast, video, or live stream just for the Patreon members.
Patreon members also get access to the Private Facebook community for the show. The podcast couldn't exist without the Patreon support and I do my best to take care of the supporters.
Two Camera Cinematography: The Road Forward
This was a series of ads that we will be looking at over the next few weeks. The central theme of the campaign was our talent visiting real world locations and interacting with real customers.
Each customer had a specific location relevant to their story and in today's episode the location was a large hall. The main action in the ad is our spokesman comes in, greets the customer, and they sit down to have a chat.
The Location

The main challenge with today's location was the orientation of the home relative to the path of the sun. Although we had a large union crew and resources available to alter the existing light we didn't have an unlimited budget so to make things work and still look nice we were going to need a solid plan.
We settled on the idea of shooting all of the front yard action as early as possible before going around the back where we could keep things a bit more contained as the sun rose higher and higher in the sky.
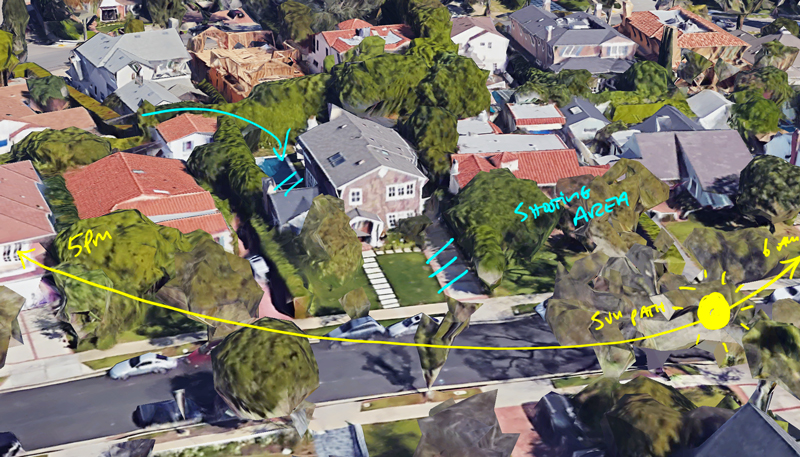
This was a still taken from the tech scout at approx 3PM.
The Schedule
The most important aspect of the scheduling came down to when we would shoot the front yard scenes vs the backyard scenes.
The house was never going to be backlit so we decided on shooting the front of the house as early as possible. The lower sun meant we wouldn't have as hard a time dealing with the angle of the light.
The Gear Package: Camera & Lighting
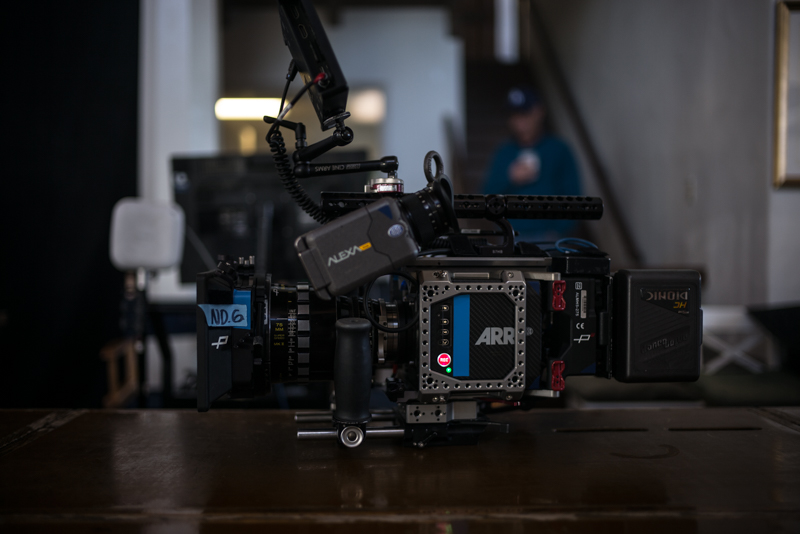
We shot this ad on two Panavised Arri Alexa Minis with a combination of Panavision Ultra Speeds and Super Speeds.
For lighting on this shoot day we had:
2 x Arri M40s
1 X Arri Skypanels
20x12 Half Soft Frost
12x12 Bleach Muslin
8x8 1/4 grid
Various 4x4 diffusion frames
20x12 Black
12x12 Black
Two Camera Cinematography: The Set Ups
Shot #1 - The Walking Intro

The Shot
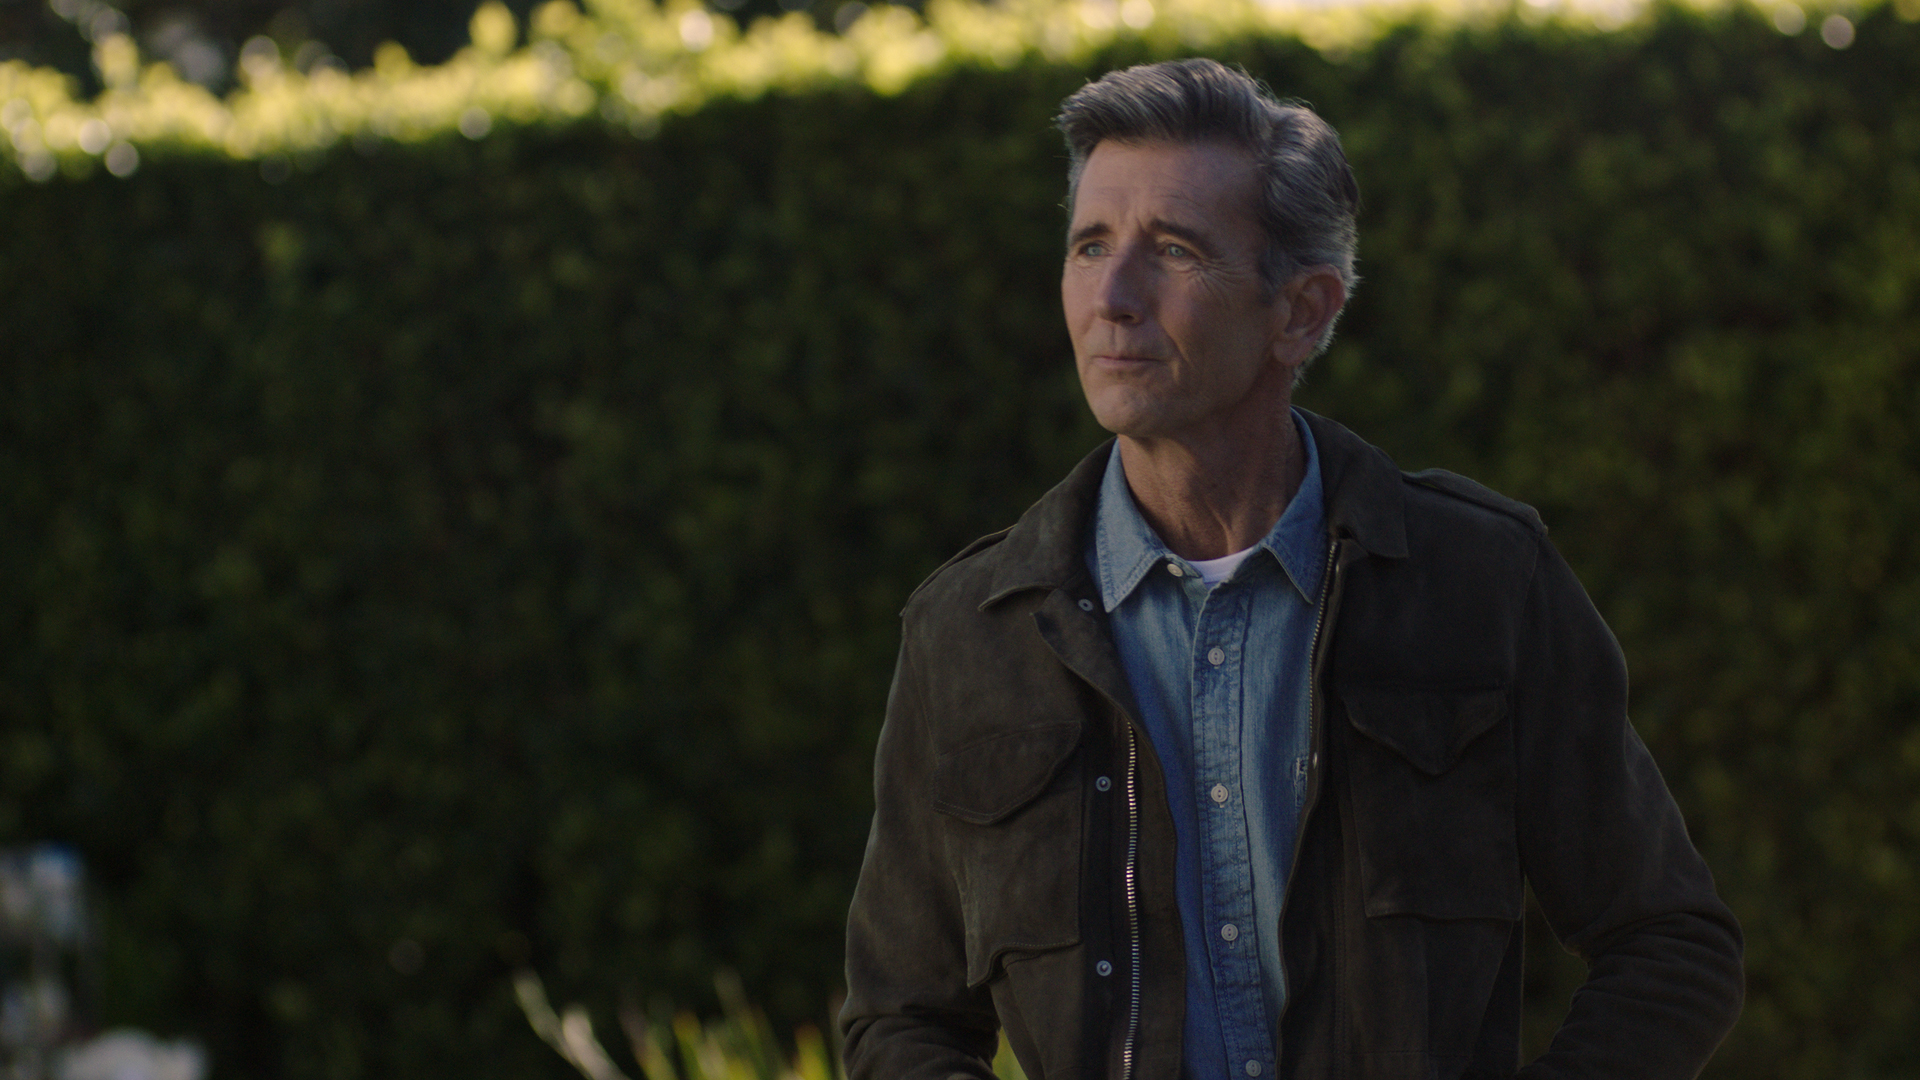
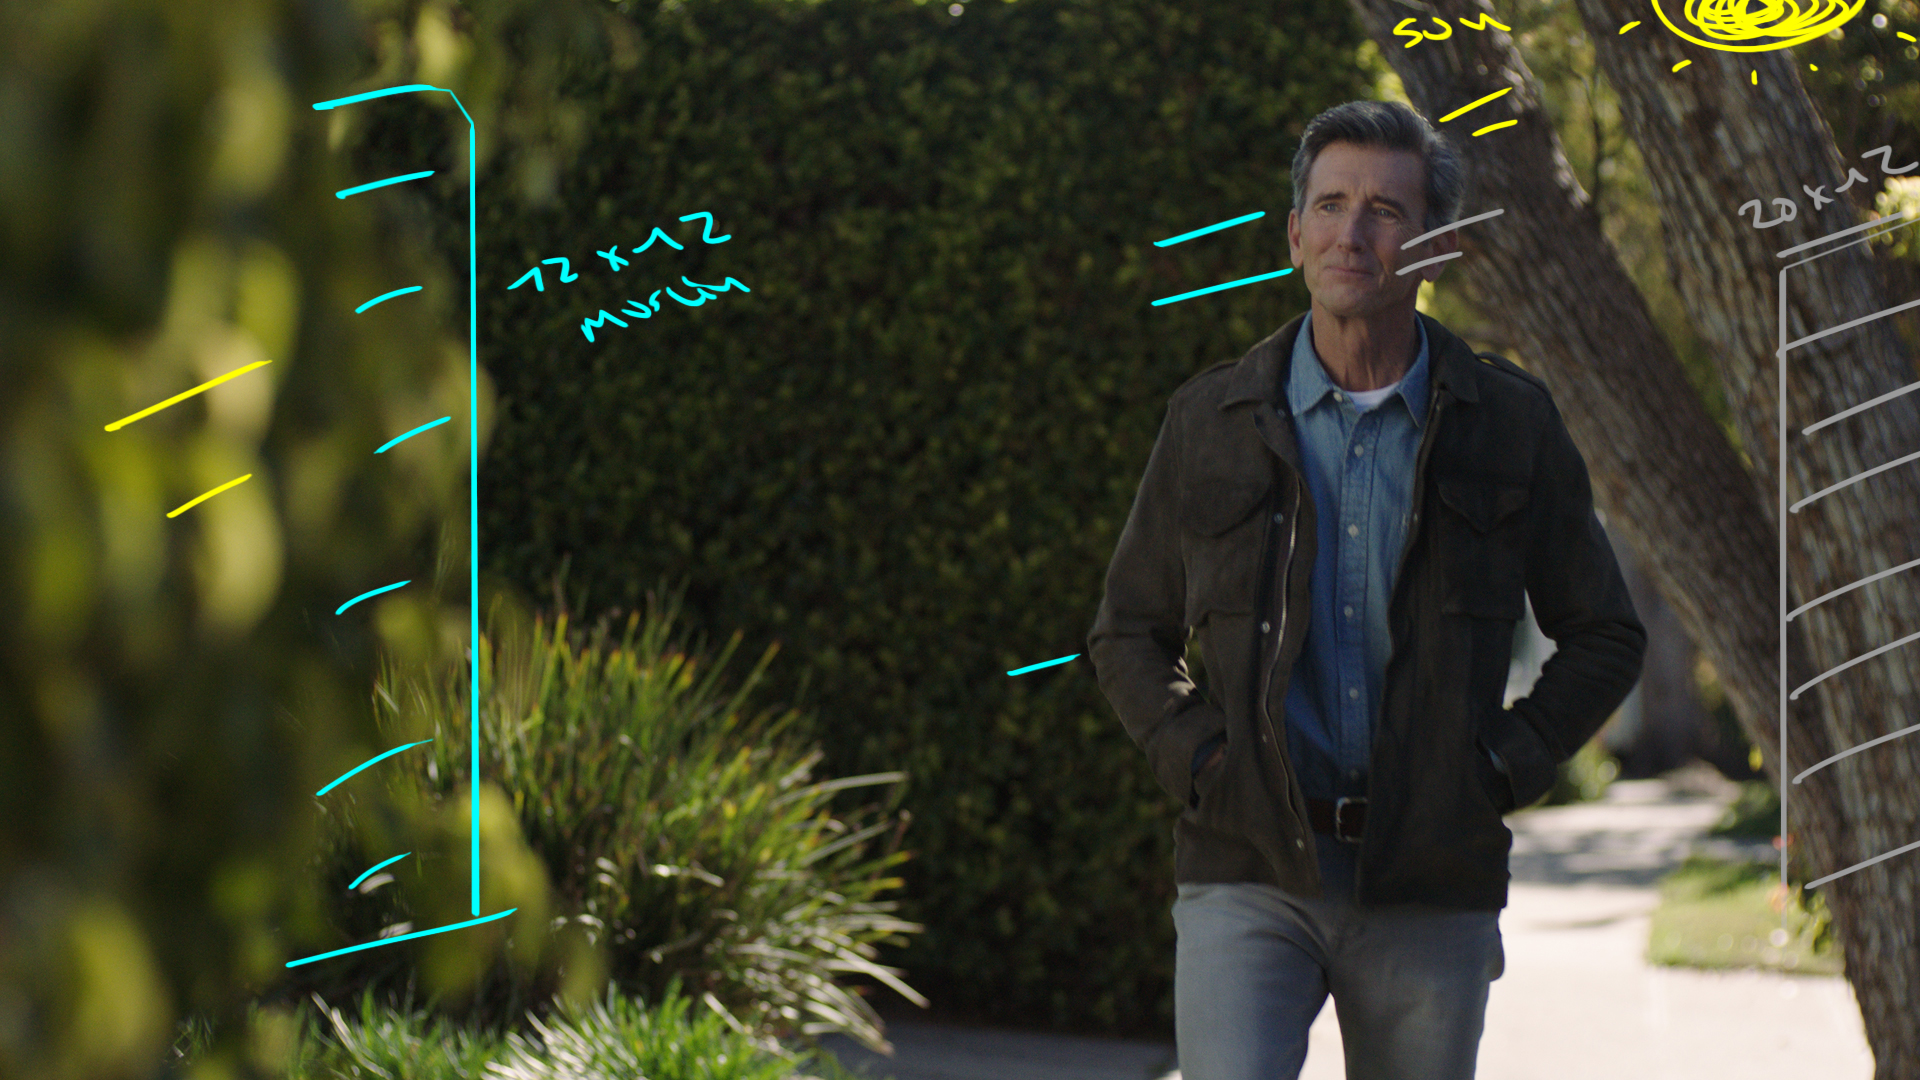
This was the first shot of the day and we wanted our talent walking from east to west so we could take advantage of the backlight.
The Lighting
We used a bleached Muslin bounce from camera left, a 20x12 and a 12x12 Neg on camera right to take away some of the ambient and then chose two angles where we were shooting into a darker background.
For this set up both cameras were positioned close to one another on two different lenses. A cam was on a 100mm and B cam was on a 75mm.
The Result
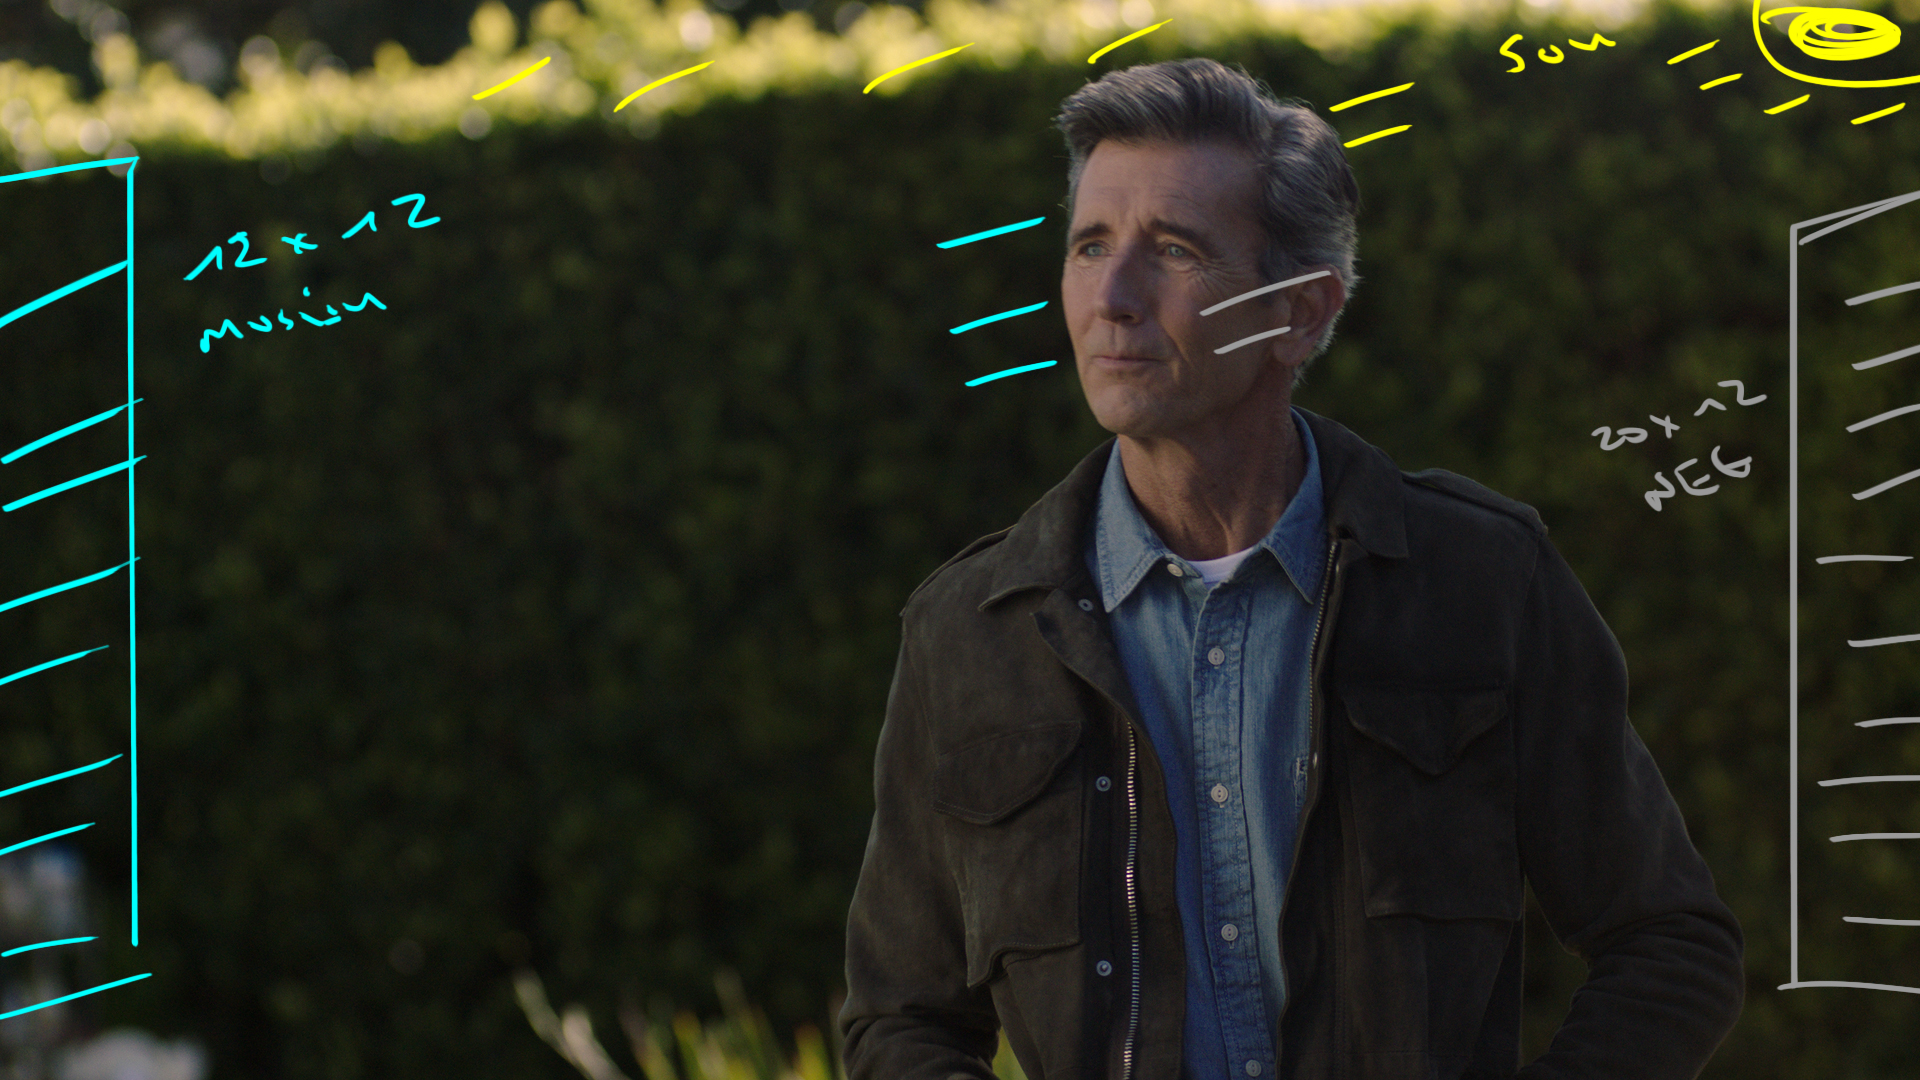
Behind the Scenes
Shot #2 - The Meet & Greet


The Shot
We were really rushing to get through this front yard stuff as the sun path had the potential to ruin all the fun if we were late. We needed to cover a meet and greet in the front yard so to save time we had A cam doing a wider shot with B cam further back on a longer lens looking for details.
The Lighting
We set the blocking to give ourselves a little bit of backlight and then added 12x12 negs just behind the wider A Cam. A cam was on a 29mm and B cam was on a 50mm.
Then from camera left we reused the 12x12 bleached muslin to help balance the levels between the shade and sun.
The Result
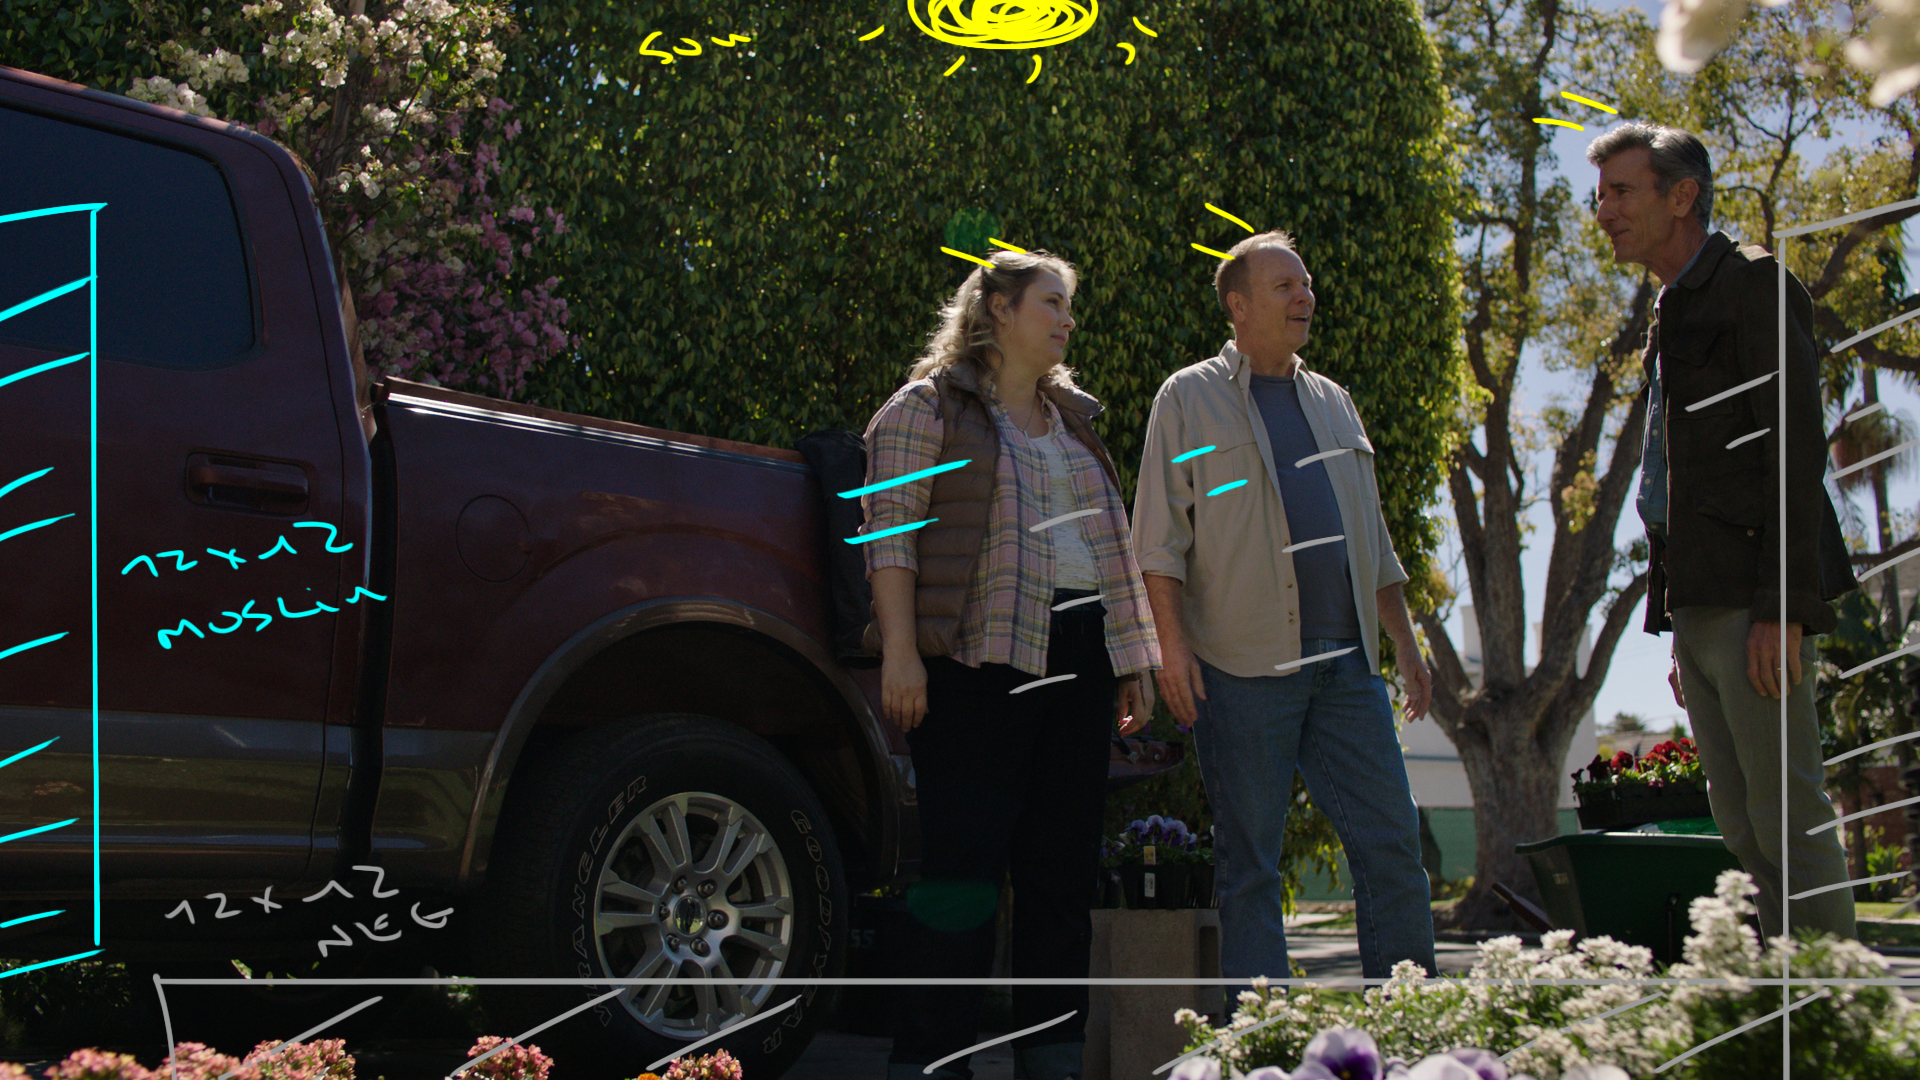
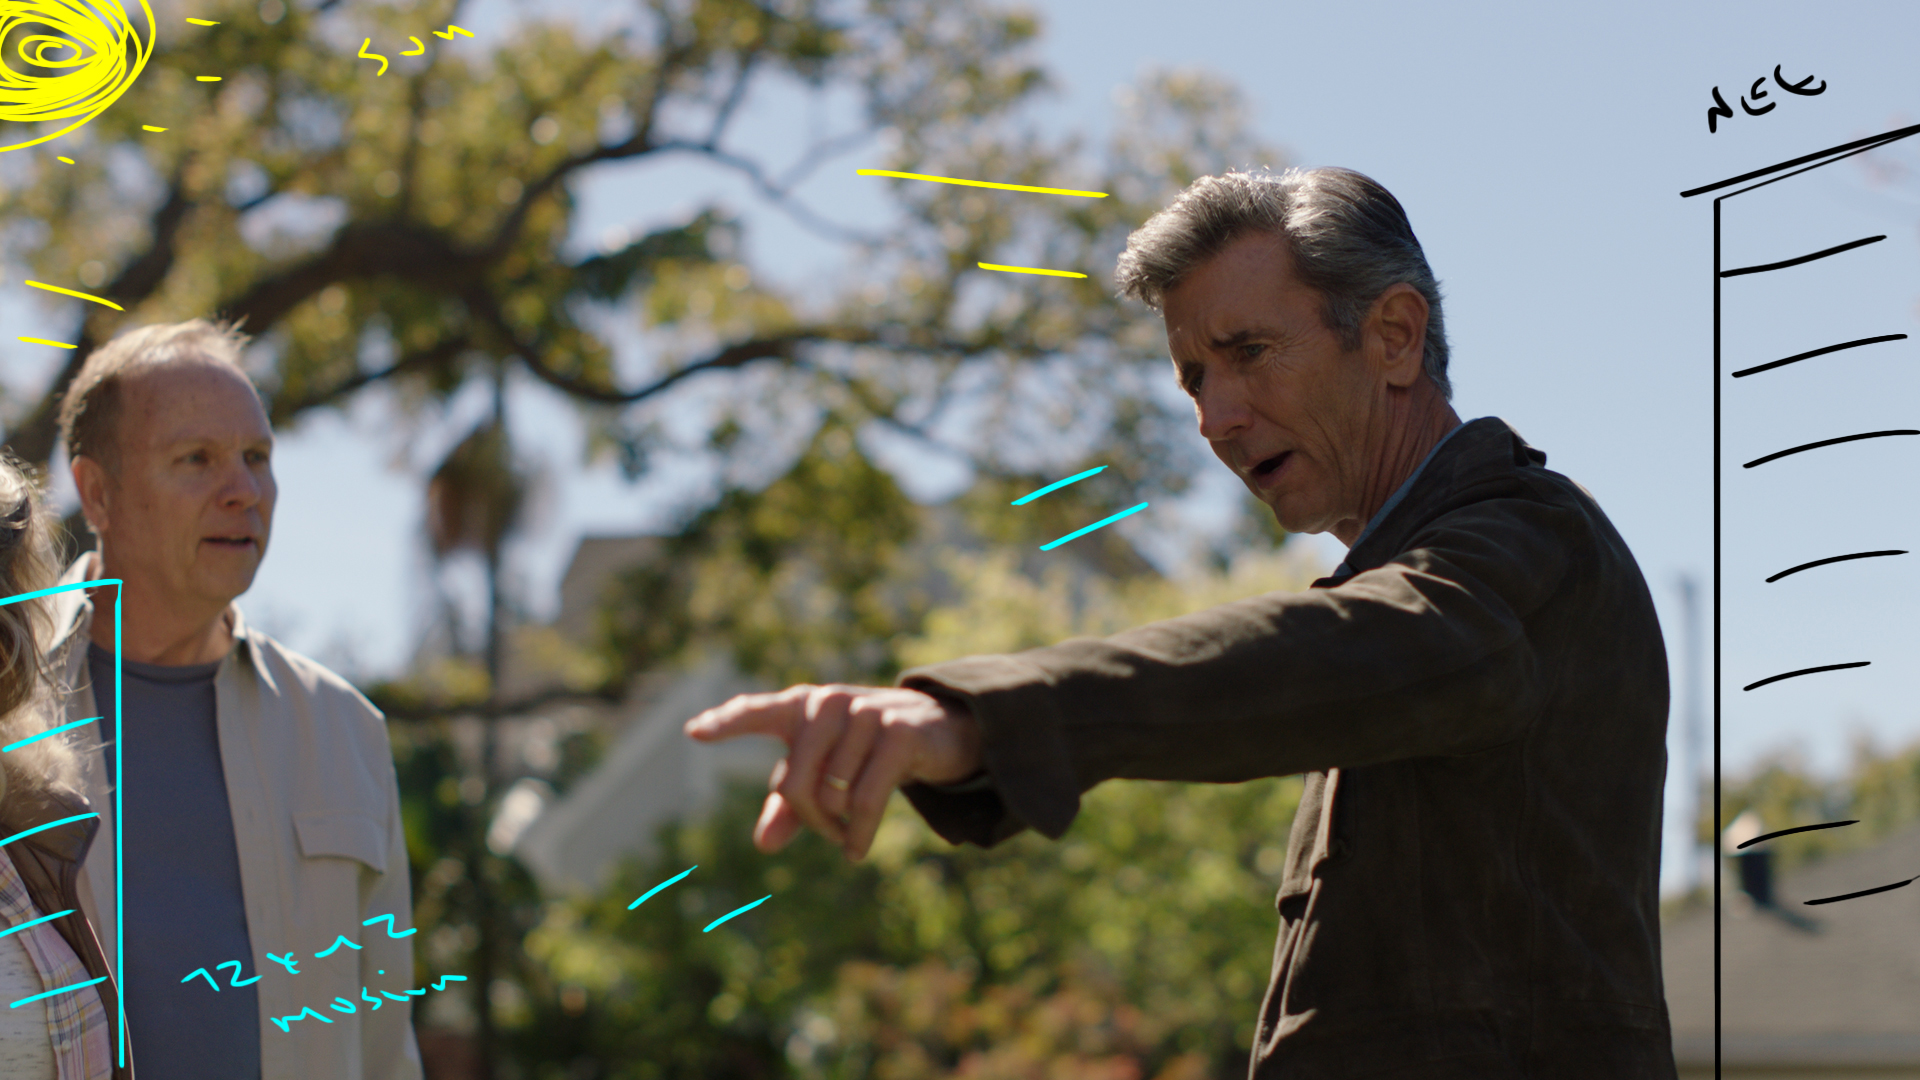
Behind the Scenes
Shot #3 - Undercover

The Shot
This was the hero shot of the backyard conversation and the first time we were seeing the area that would hold the majority of the ad.
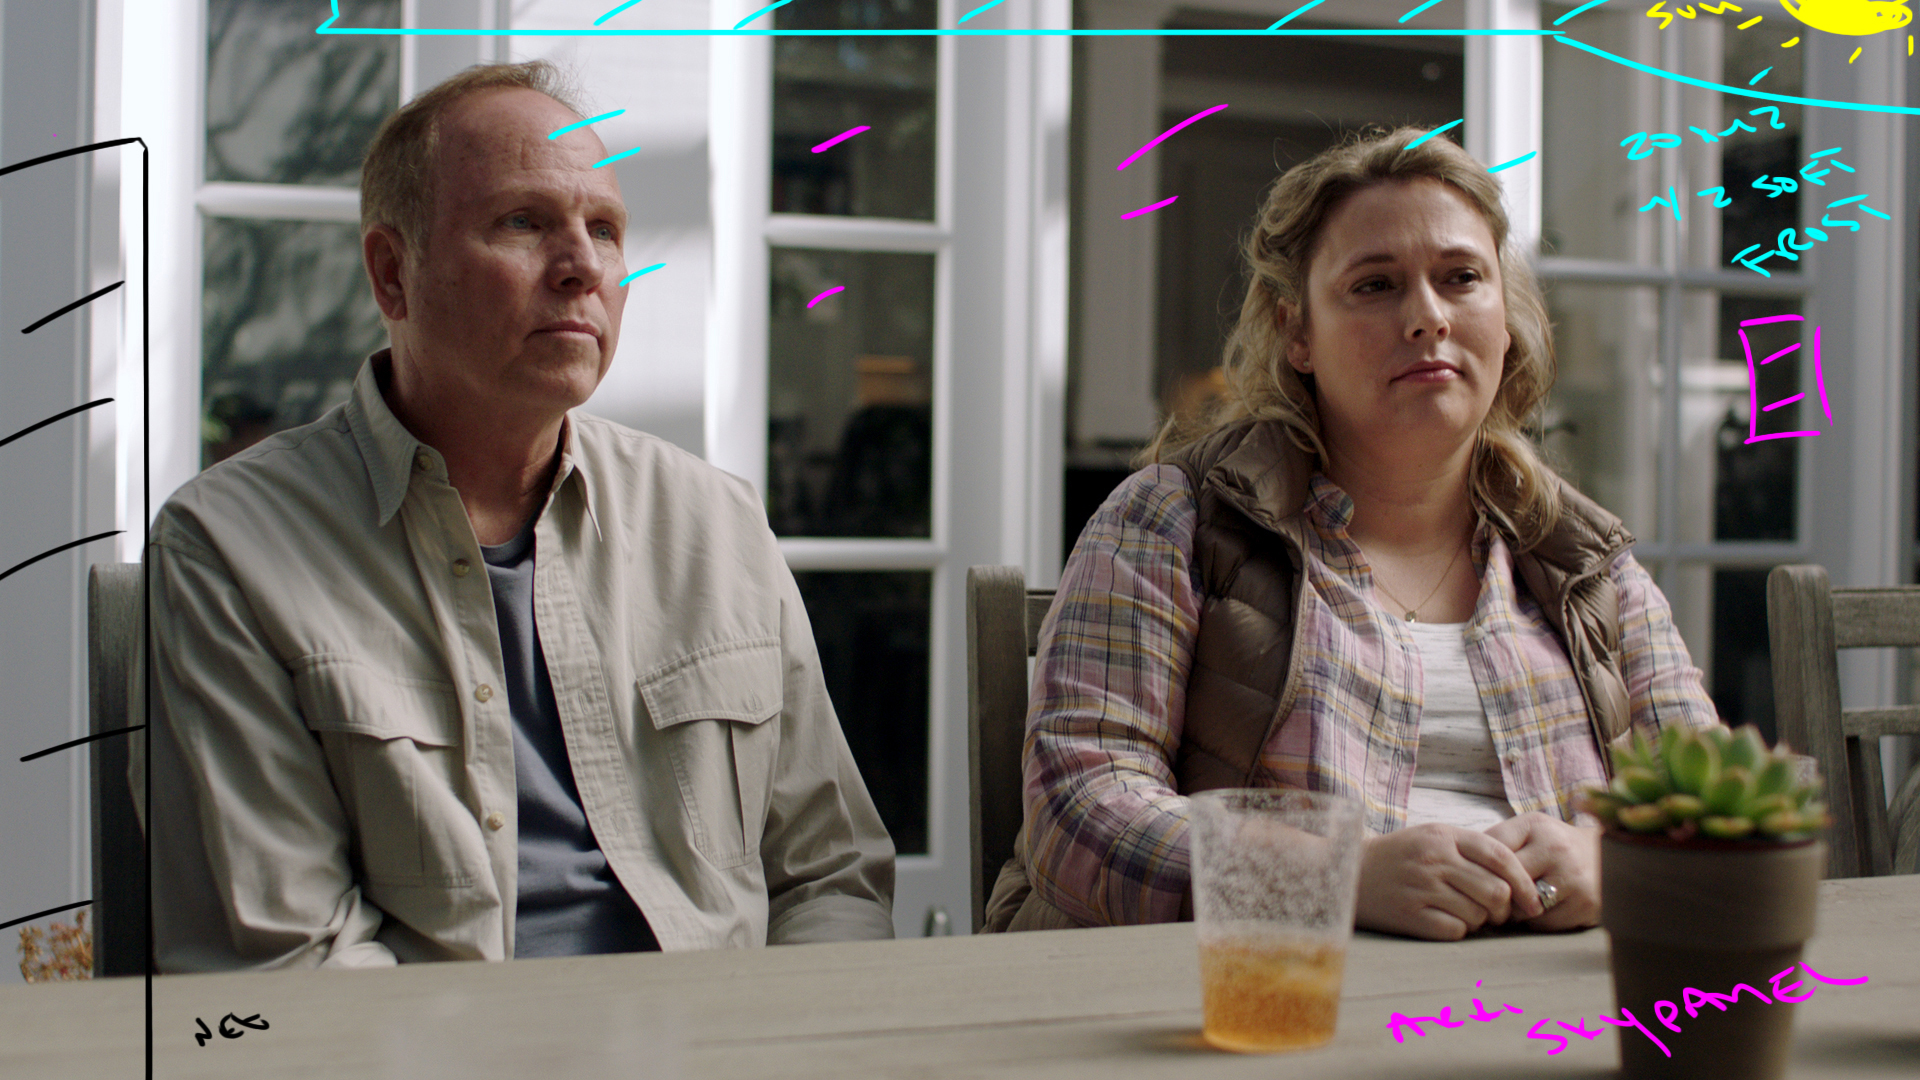
The Lighting
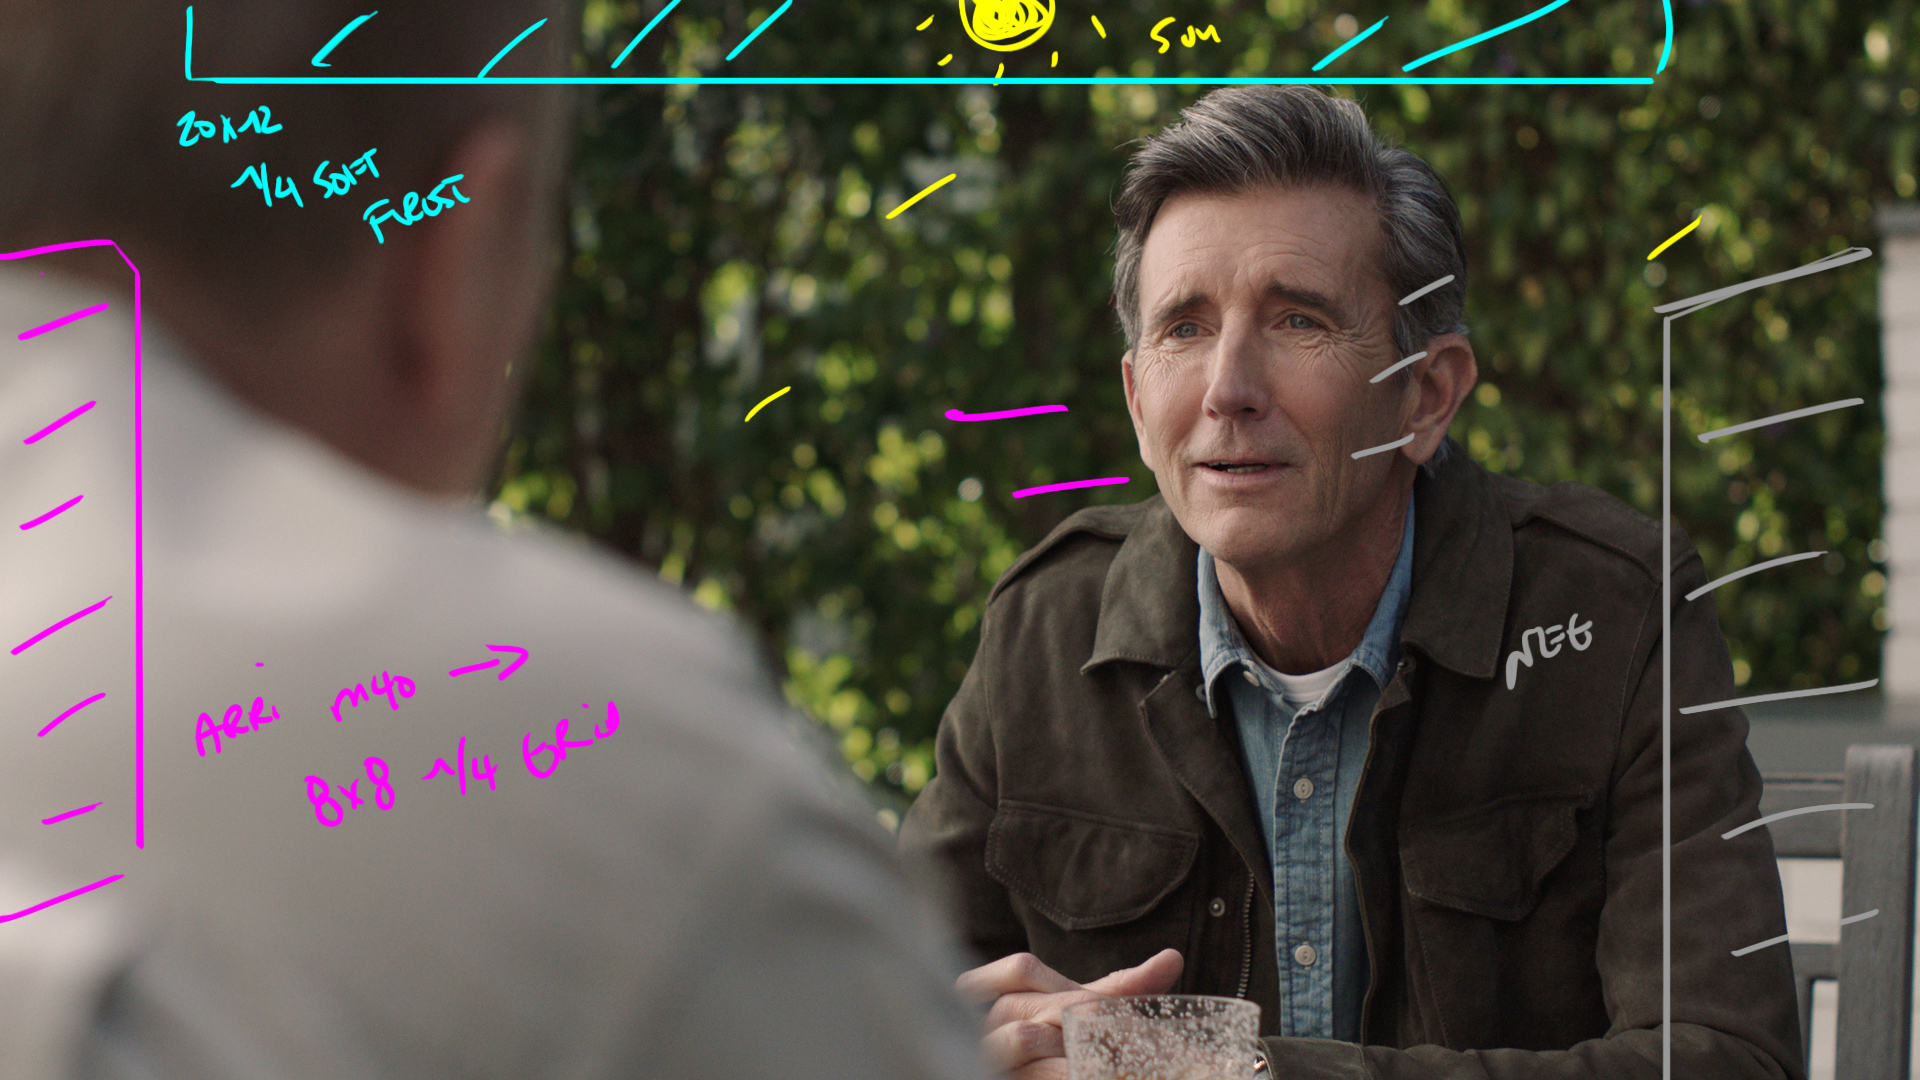
WE were lighting this wide just before lunch and the sun was high in the sky. The angle was bad but it still had a slight bit of backiness to it.
We used a 20x12 of half soft frost as an overhead to take the edge of the shadows. Then we had a 20x12 double net to take the overall level down. That allowed use to open up a bit and get more light into the interior of the house.
Behind the cameras we had 4 4x4 floppies to help cut the amount of fill. Inside we were using skypanels to boost the overall levels inside the house.
The Result
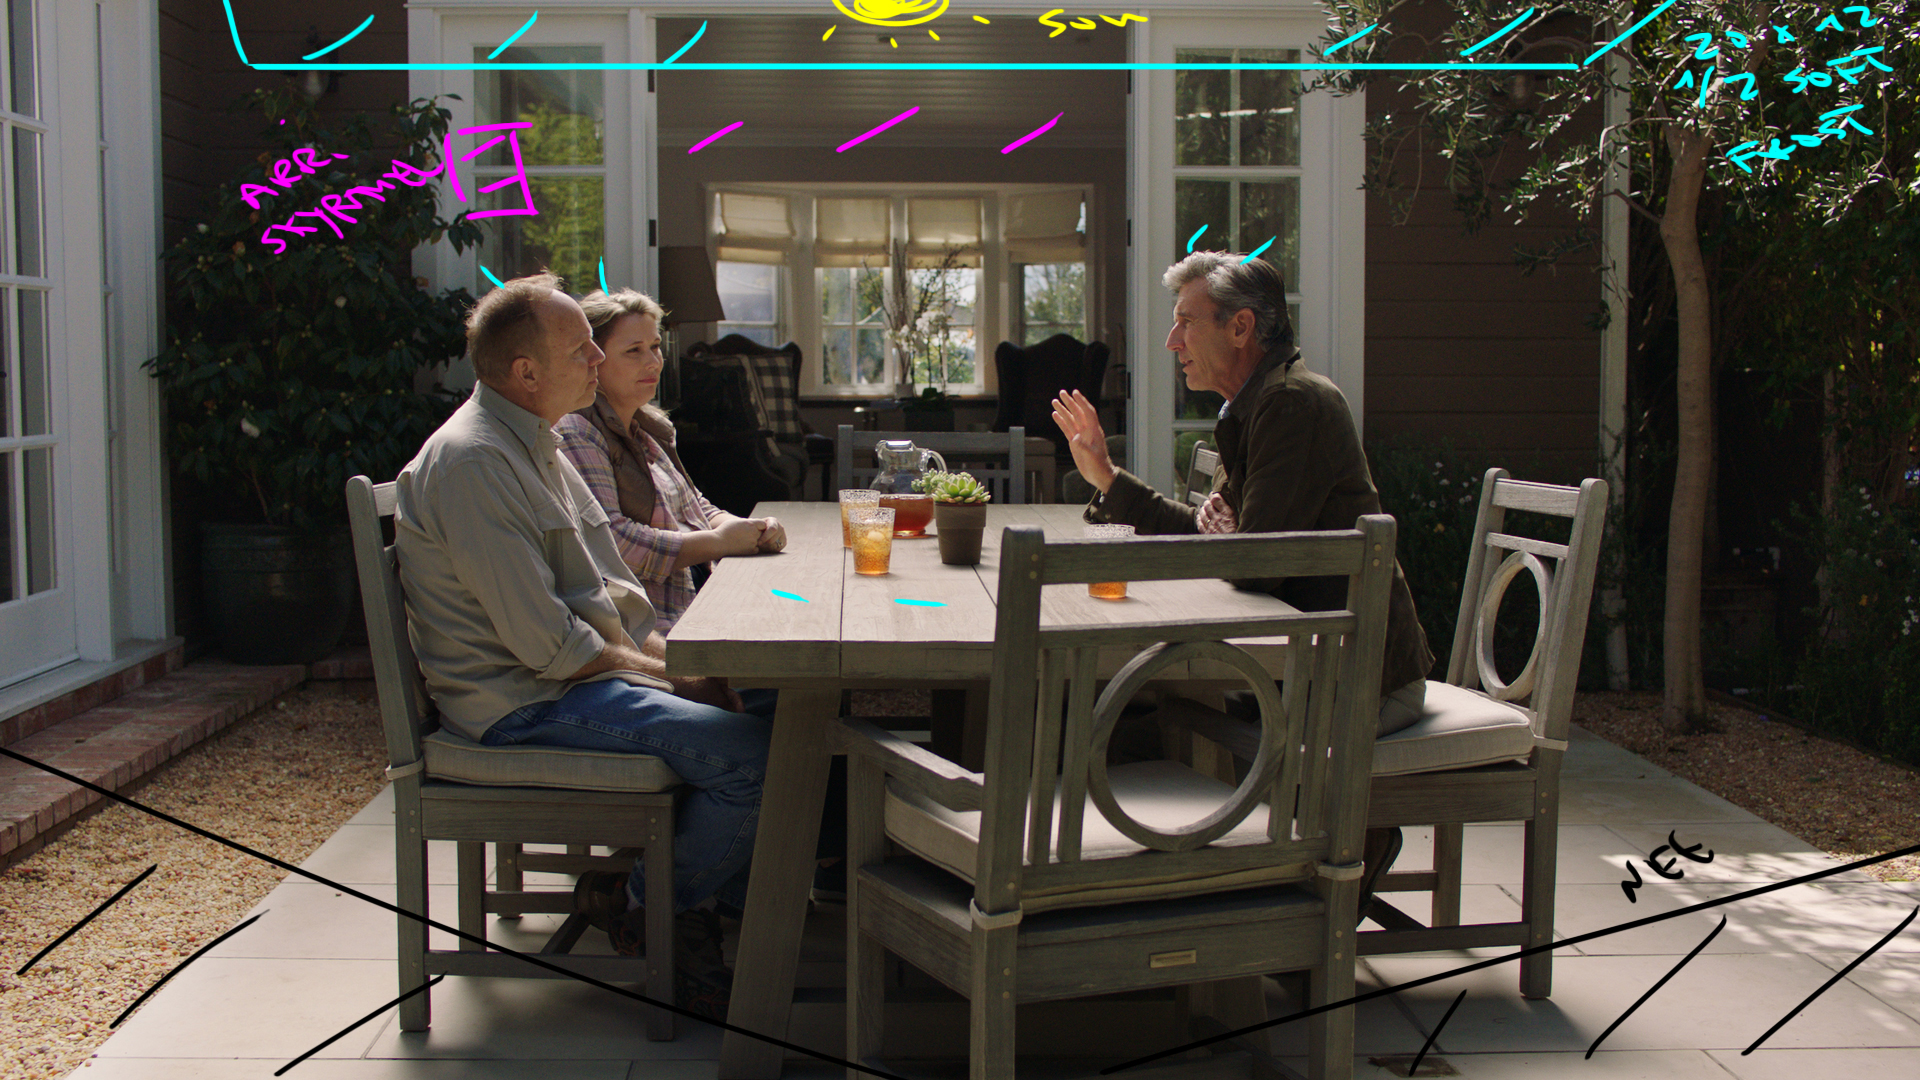
Shot #4 - In Tight


The Shot
Our wider conversation angles.
The Lighting
Shooting this stuff before lunch meant we stayed with relatively the same set up as the wide. We shuffled the neg closer in and played with some bounces below the 1/2 soft frost.
Inside the house in the BG we also moved the skypanels around to add a bit more level there.
The Result
Shot #5 - The Sit Down Wide

The Shot
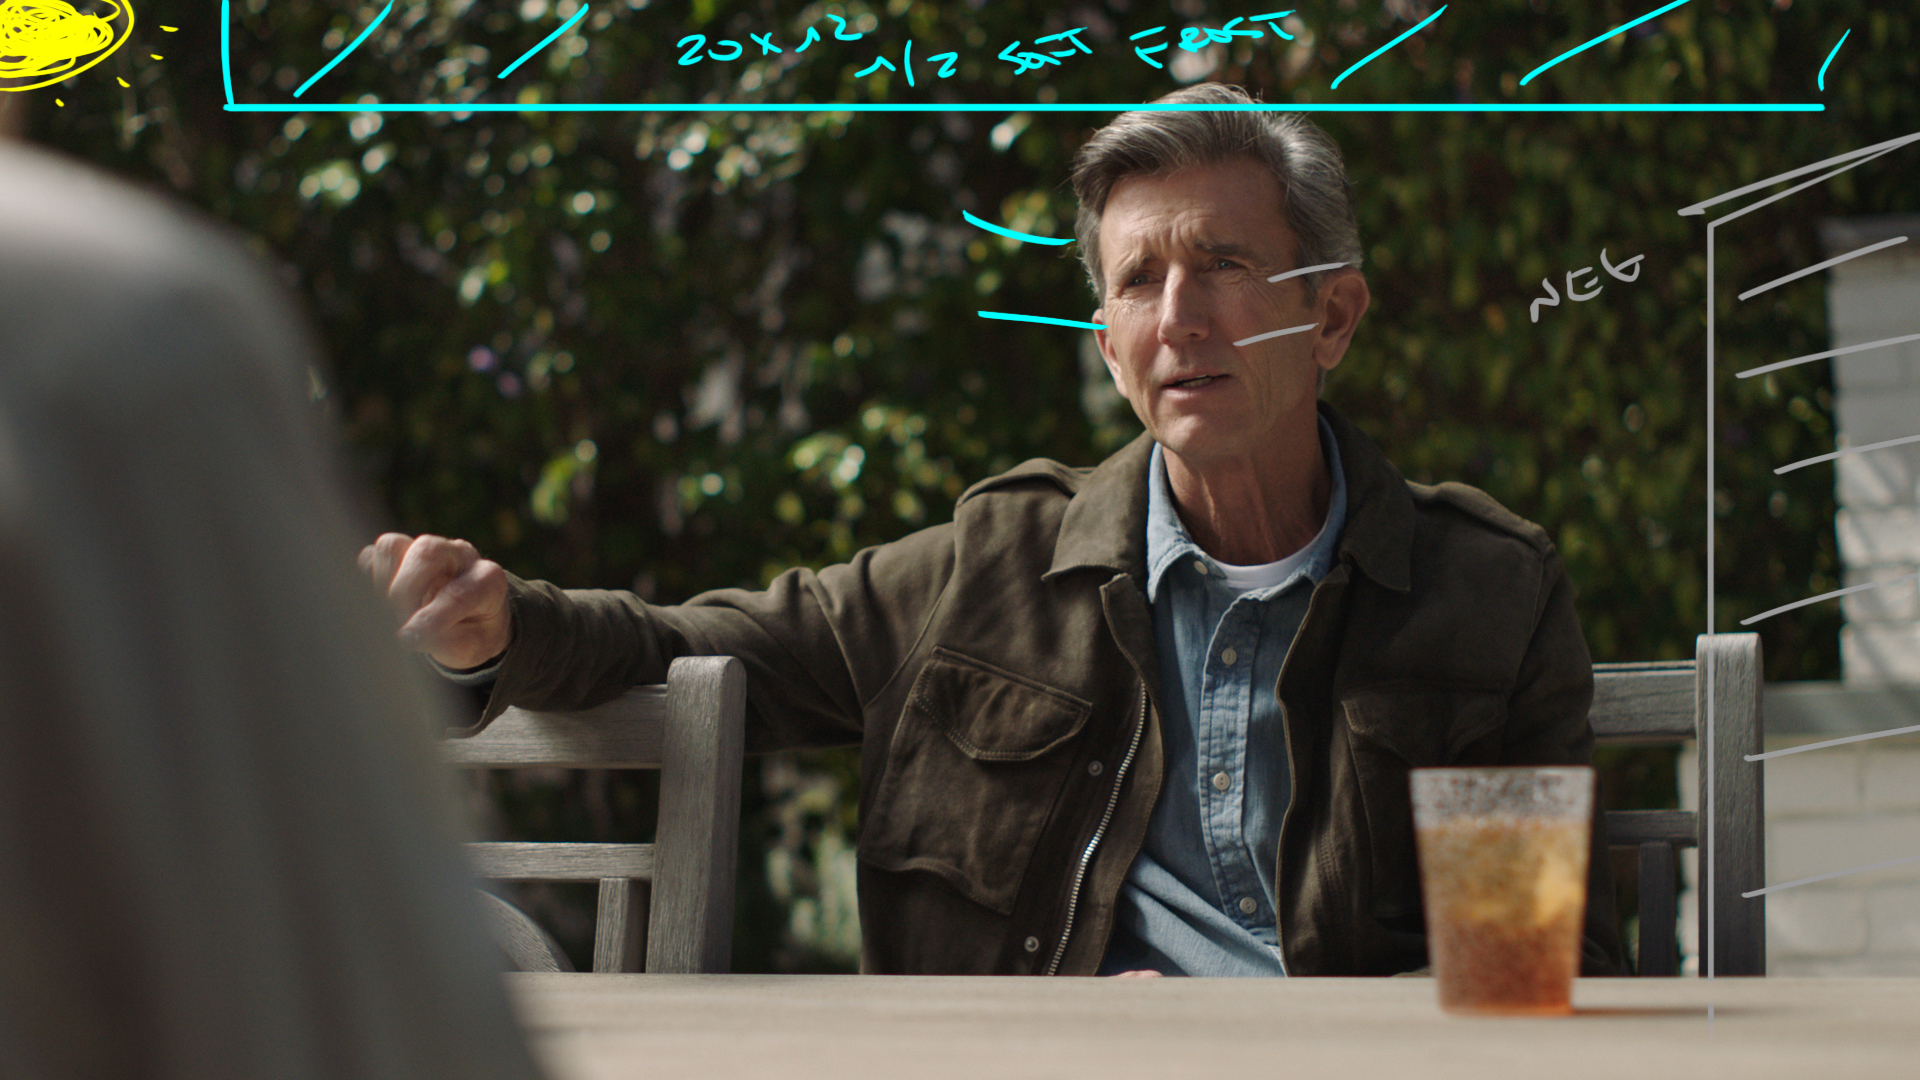
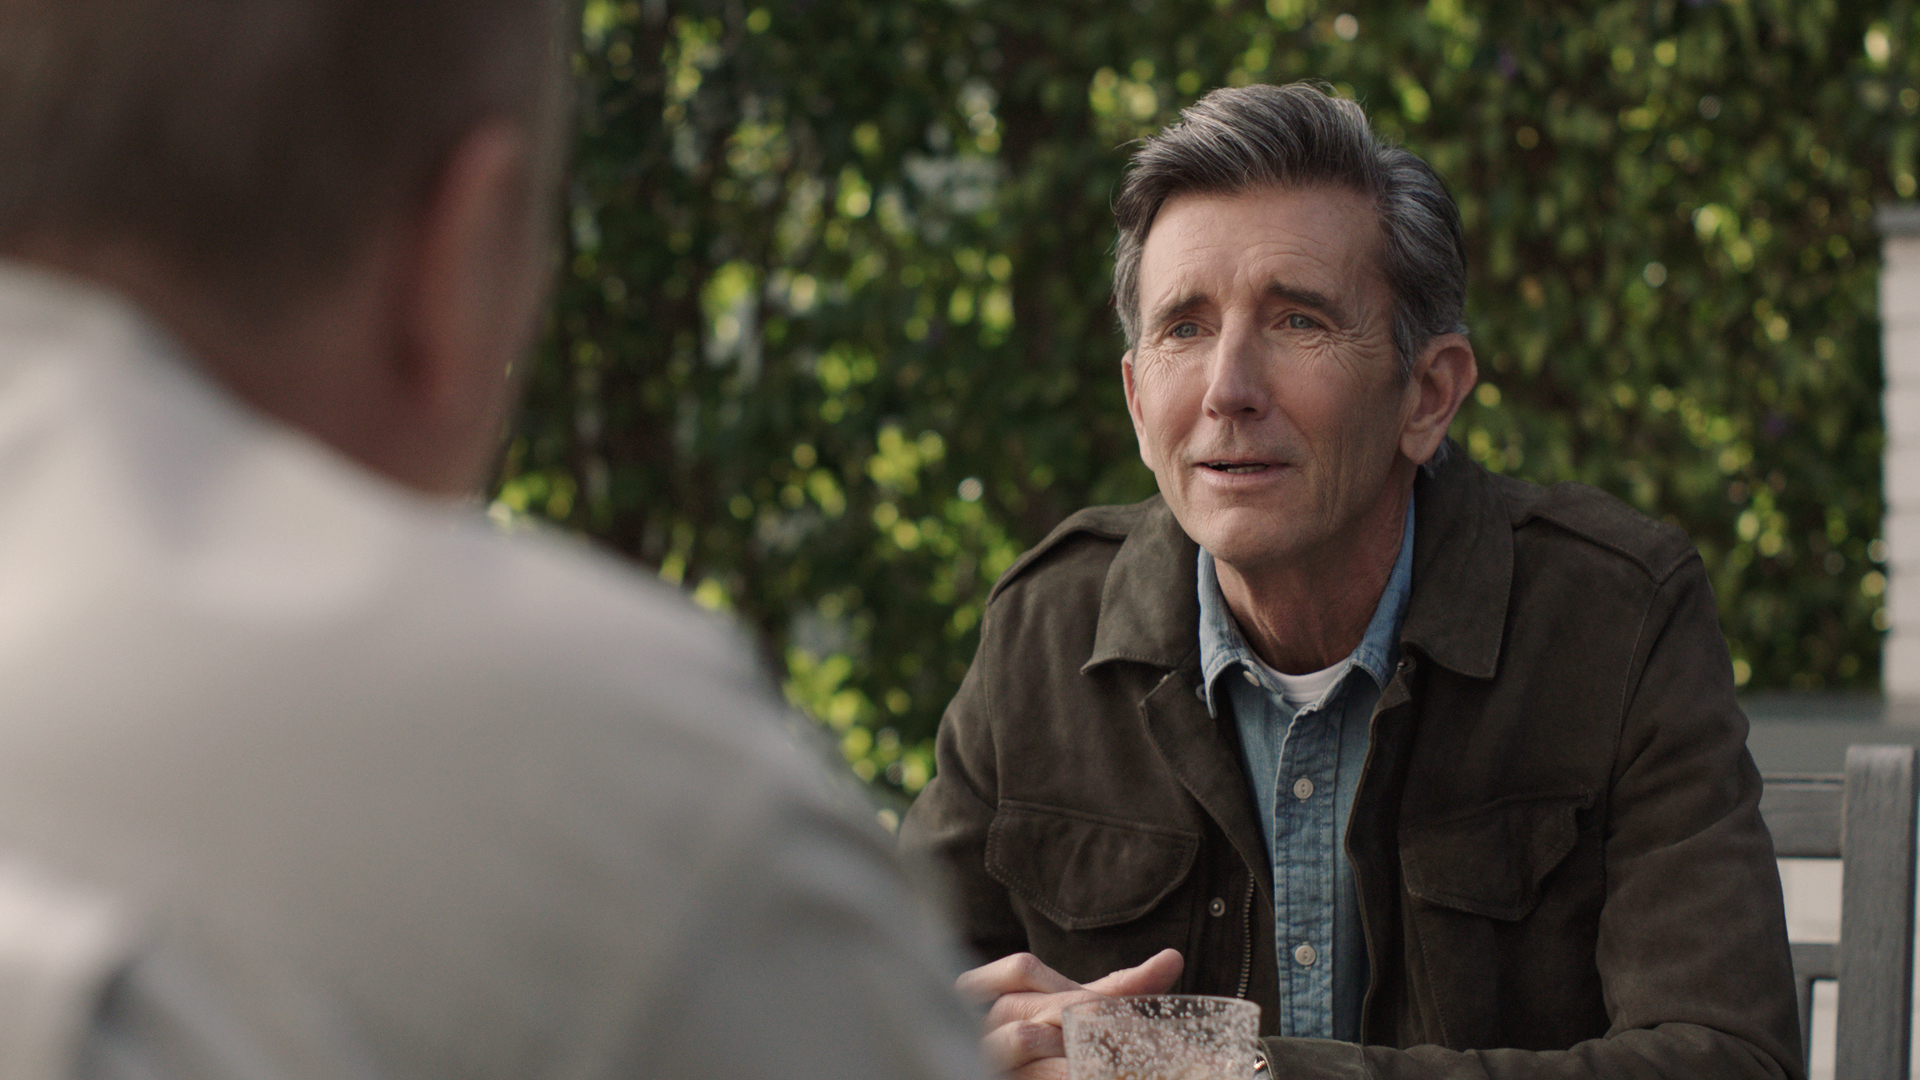
By this time in the day the sun had completely disappeared behind the hedge and we needed to recreate the level to match what we had earlier in the day.
The Lighting
We left the 20x12 overhead but removed the double net. Then we added a Arri M40 with a chimera through an 8x8 of 1/4 grid to act as our sun replacement. The angle wasn't ideal but it got the job done in the end.
The Result
Straight to Camera

The Shot
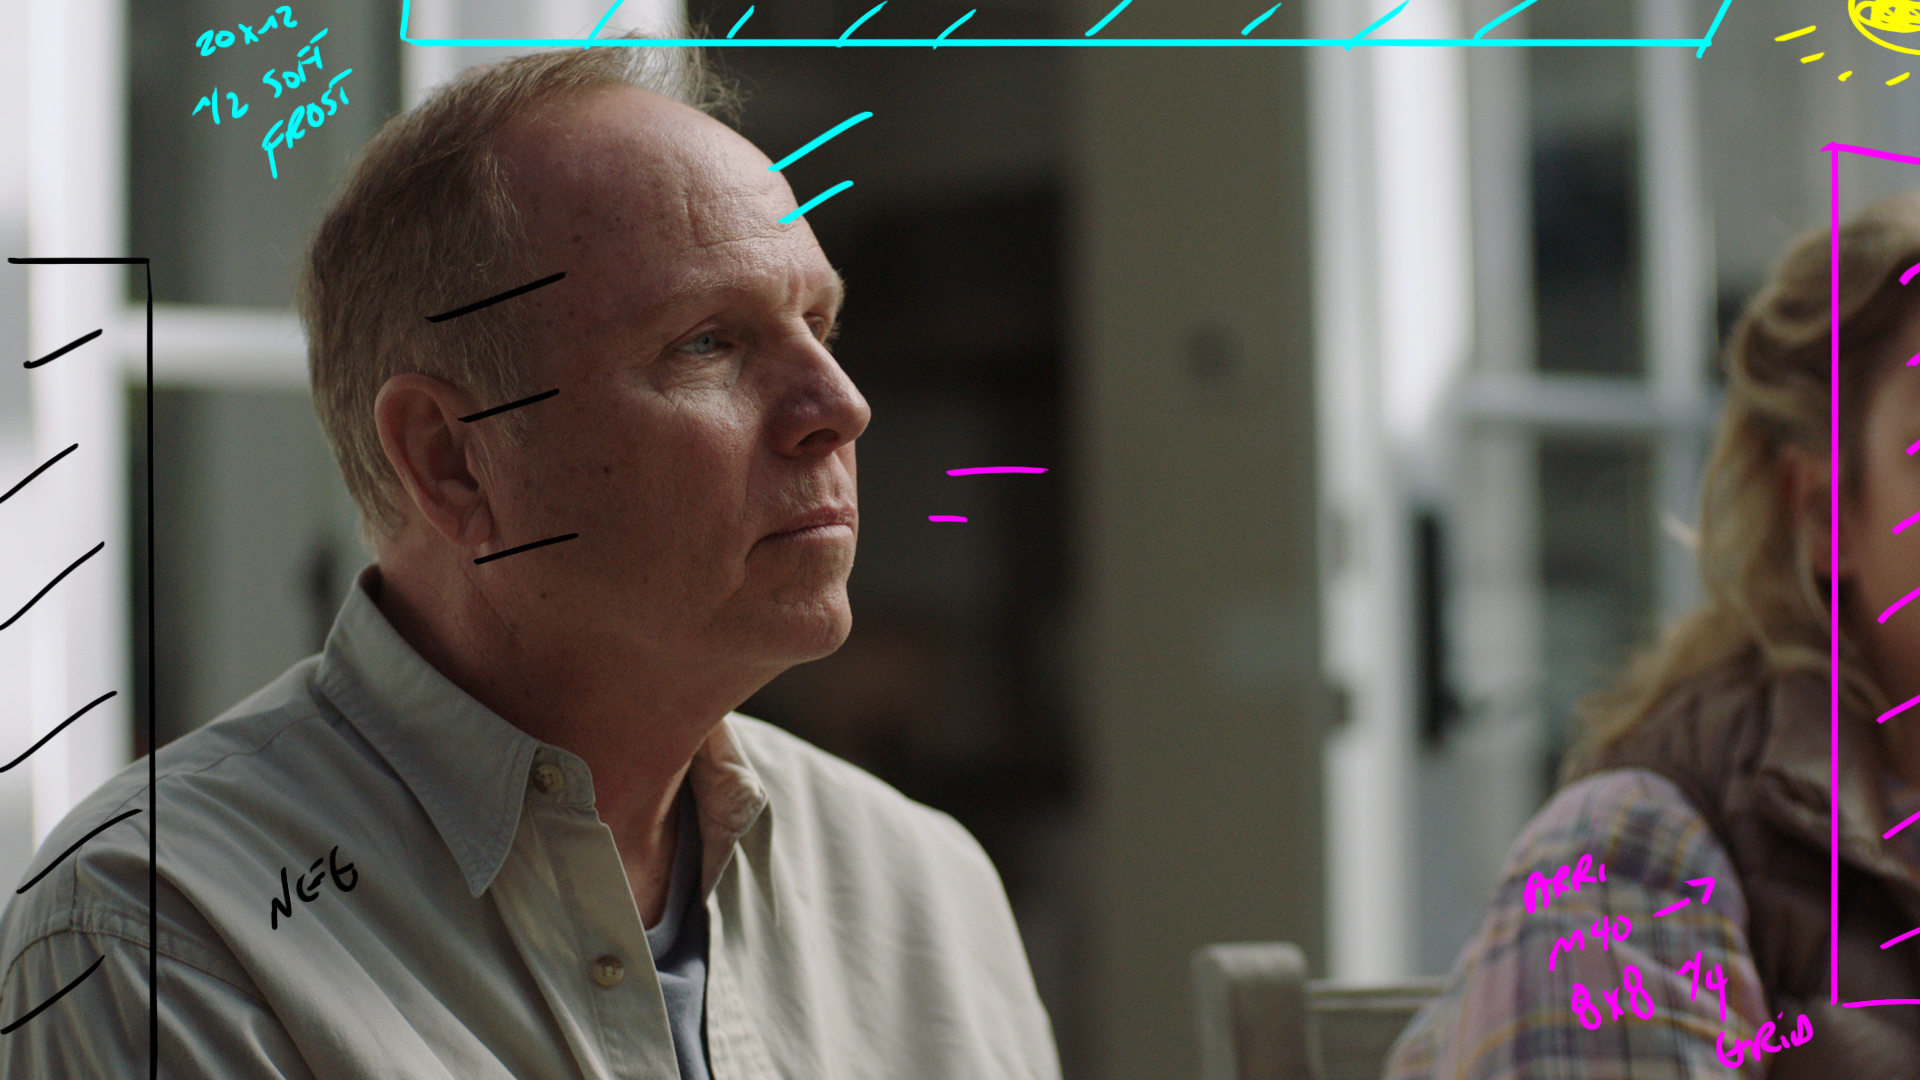
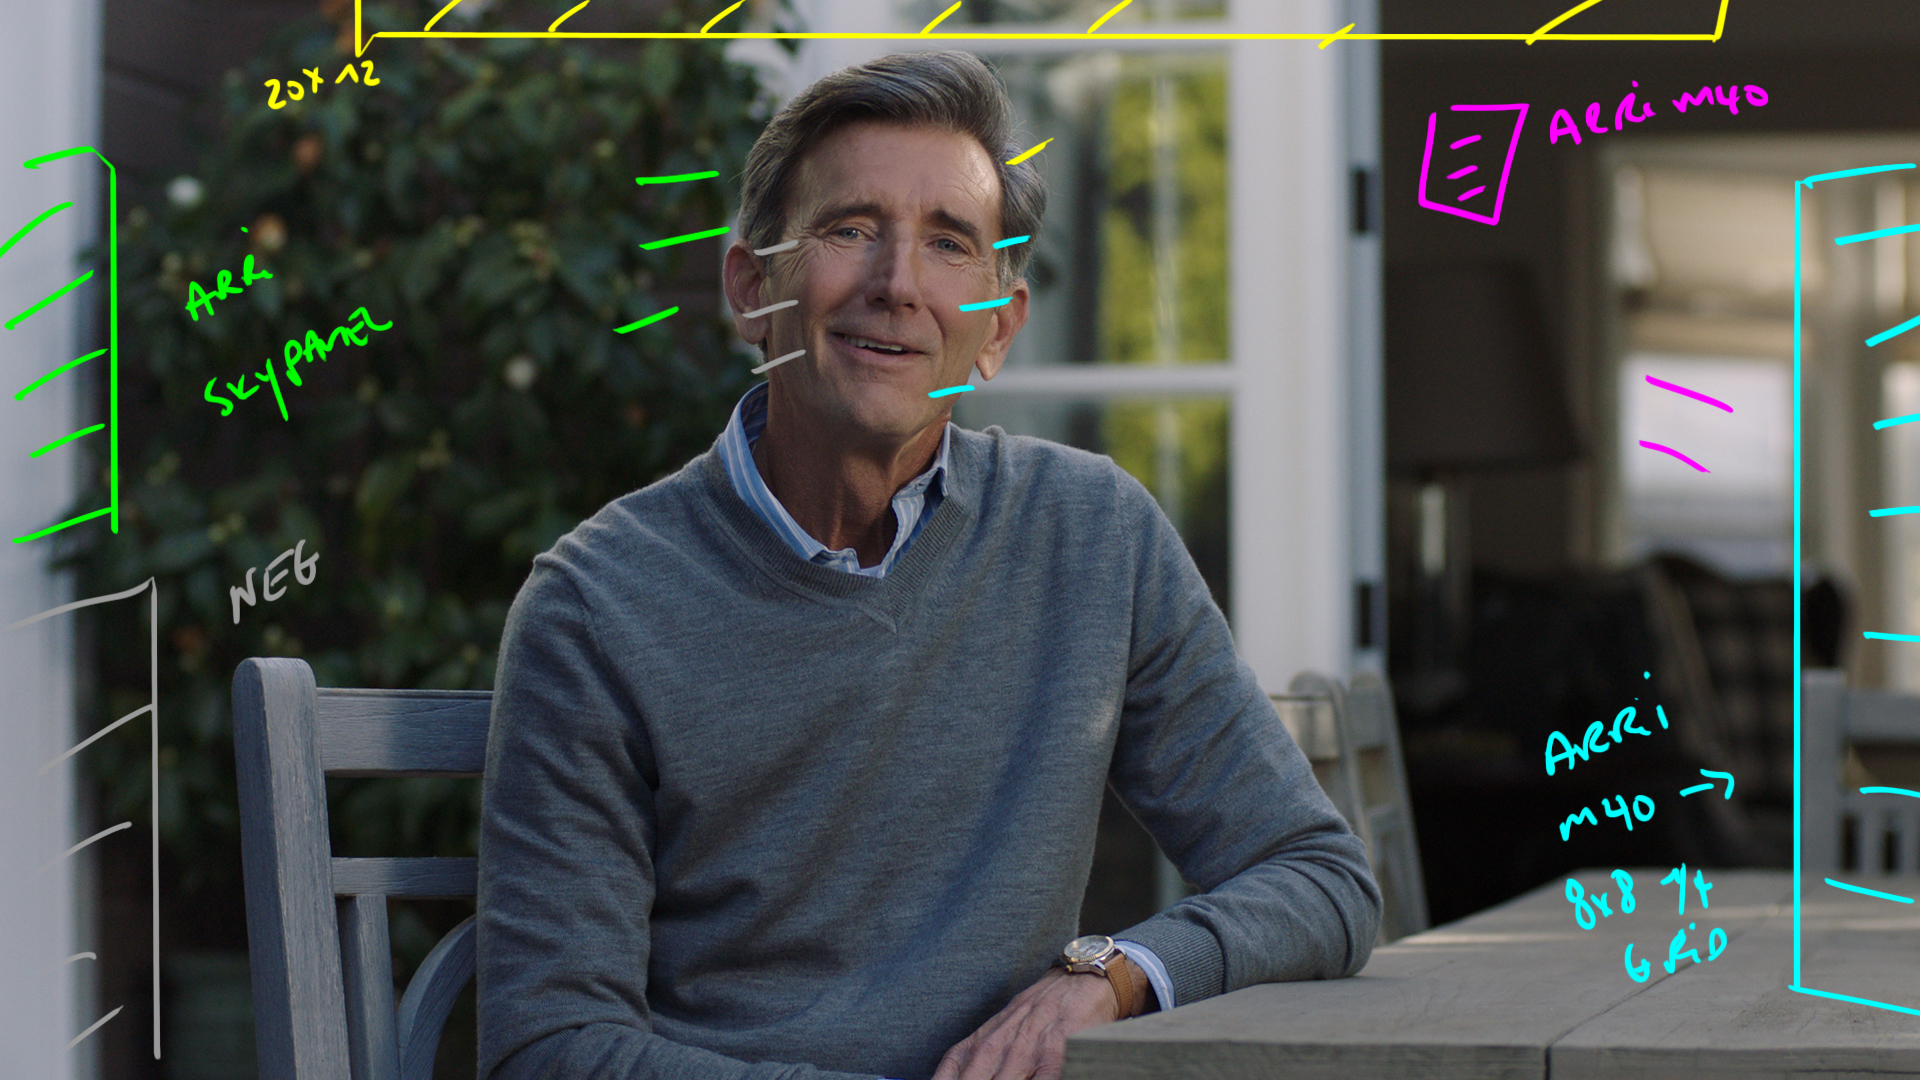
For our final shot of the day we had a straight to camera piece that was to be a stand alone spot. Thankfully for us that meant it didn't have to match the earlier material.
The Lighting
We brought the M40 around to the right hand side of the frame and used it again through the chimera and 8x8 of 1/4 grid.
On camera left we had a 4x4 floppy to cut some fill and we also had a skypanel pushing in a bit of level from camera left.
The Result



Hey Patrick, as per usual….incredible stuff!
Wondering if it’s possible to post some wider BTS stills that would show exactly where your lights, and diffusion/nets are placed. The
scribble illustrations on the stills are very helpful but im still finding it difficult to visualize where exactly they are on the set.
Thanks dude and will continue the ol’pledges on the Patreon.