Listen to the Podcast:
Each week we try to mix it up with the interviews and breakdowns on the podcast and this week is no different.
On the show today we look at a slightly different style of cinematography than previous episodes.
There are jobs as a cinematographer where you spend days prepping sets, designing lighting plans, building moods into your shot design and then there are jobs like the one we are talking about today.
In this episode we look at a run and gun style commercial where we spent the majority of the time thinking of ways we could best capture what was naturally in our locations.
We also needed to quickly and efficiently get through our shot list without sacrificing image quality.
Patreon Podcast: Communication
Over on the Wandering DP Patreon page we have a new episode of the exclusive Patreon Podcast.
This week we talk about all the different strategies and techniques for effective communication in pre-production and on set.
Communication is often overlooked by cinematographers but if you want to maximize your results you need to make sure you are communicating with directors, crew members, and producers in the most efficient way possible.
Head over to the Patreon page to give it a listen.
Location
This is one of those jobs when the location and the creative essentially shoot themselves. The job of the cinematographer is to help shape the world leading up to the production and make sure you and the director are on the same page.
The location was Hong Kong and after a few days of scouting we had a handful of locations that fit the bill. We needed a few different scenarios as the spot required lots of locations in a very small amount of time.
The Case Study: Street Cinematography
Landing the Gig
Instagram. It is true. This job came through my instagram. If you are a cinematographer or would like to become one and you are not putting your work on instagram I think you are missing an opportunity.
I've talked about this on the podcast and other podcasts I've been on and I still think it is true. The hardest thing about getting work as a cinematographer is letting people know you exist and your aesthetic. Instagram is a great tool for both.
The Creative
We are shooting an ad but, it's an ad that is meant to be shared rather than forcefully consumed. What is good about that?
Shared = cool with a logo at the end.
There is a treatment but no boards. The directive from the agency and client is to make something that people are interested in and that people will share.
Luckily for me we were working with a production company and a director that were very experienced in this department.
The Schedule
We were in Hong Kong shooting multiple ads so the locations scouting was a bit longer than you would normally have. Plus we needed quite a few locations so in terms of days I think we did about 3 all up.
For the actual production we shot the entire thing in one day. The majority of the time was spent racing from location to location.
The tight schedule meant we had to adapt our lighting and aesthetic approach to suit the pace.
The main issue with the pace of shots was the lack of parking in Hong Kong. This doesn't seem like an issue that would be much of a problem but it essentially eliminated any big lights as we couldn't get parking to actually get them out and run them.
The Pre-production Process
Pre-production on a job like this for the cinematographer comes down to one thing: Making sure you understand what the director is after and ensuring you make decisions that align with that vision.
In this case it is complicated to talk much beforehand as all the major team members were on 3 different continents.
After chatting with the director I did a bit of fishing around for tv spots in Hong Kong just to see what others had found for locations and angles of the city.
The main aesthetic decision and probably the move that had the biggest impact on the entire project was deciding to shoot anamorphic. It was pretty obvious that we wanted widescreen but we also needed some speed as we were traveling so light and small.
We ended up with the Arri Master Anamorphics. They are smallish for anamorphics, incredibly fast and great wide open at T1.9.
Once we landed the pre with the team generally resolved around sequencing of shots and making sure we were getting the most value out of each of our locations.
Set Up #1 - Daytime Street Vibe
Shot #1
The Shot
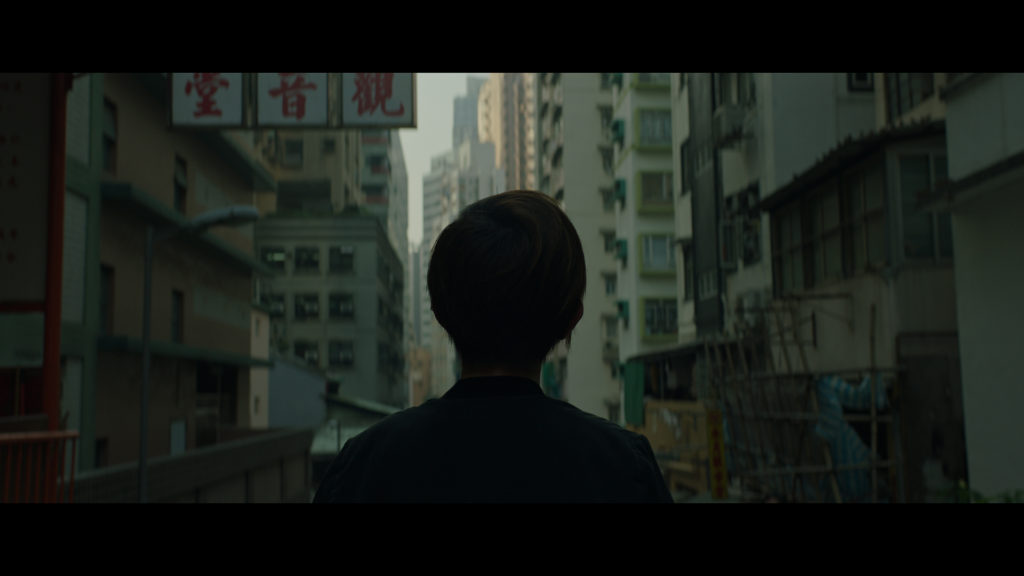
We started with a sequence of our talent amid the skyscrapers. We needed a shot to place the talent in their environment.
The Lighting
The lighting was the schedule. We made sure to be in this area at the right time and then do everything we could to maintain some shape. The key to this shot was maintaining the darkness and shadow without it feeling super underexposed.
The Result

Shot #2

The Shot
This was a continuation of the previous sequence. We are introduced to the talent who is a photographer specializing in capturing the Hong Kong skyline.
The Lighting
The lighting comes from the time and the frame/blocking. We needed her to walk as close to the off camera buildings as possible to suck up as much ambient bounce fill. When she did that we were able to get the exposure which shaped the shot.
The Result

Shot #3
The Shot
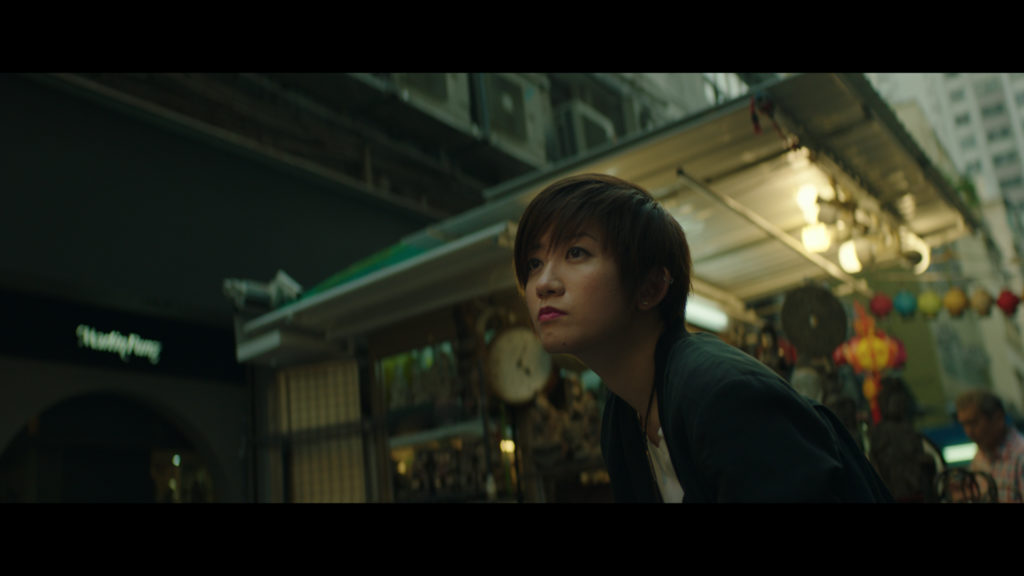
We shot the talent walking through a long city block of markets. There were little shops everywhere and we need her looking for photos and hunting for angles off screen.
The Lighting
Again the lighting of this shot comes from knowing what to look for and then being able to quickly identify it and move to make it better.
As we were walking down the street I identified where the shadow side of her face would be and kept to that side. I started looking for areas where she would be keyed by something slightly more powerful than the background.
Once we found that then we scanned the possible background angles looking for points of interest. All of these things happening in about 60 seconds.
The same process would take place on a stage but instead of finding it we would be building it.
The Result

Shot #4

The Shot
Same as above.
The Lighting
Only difference from the previous shot is the background coolness provided by the fluorescents.
The Result
Shot #5
The Shot
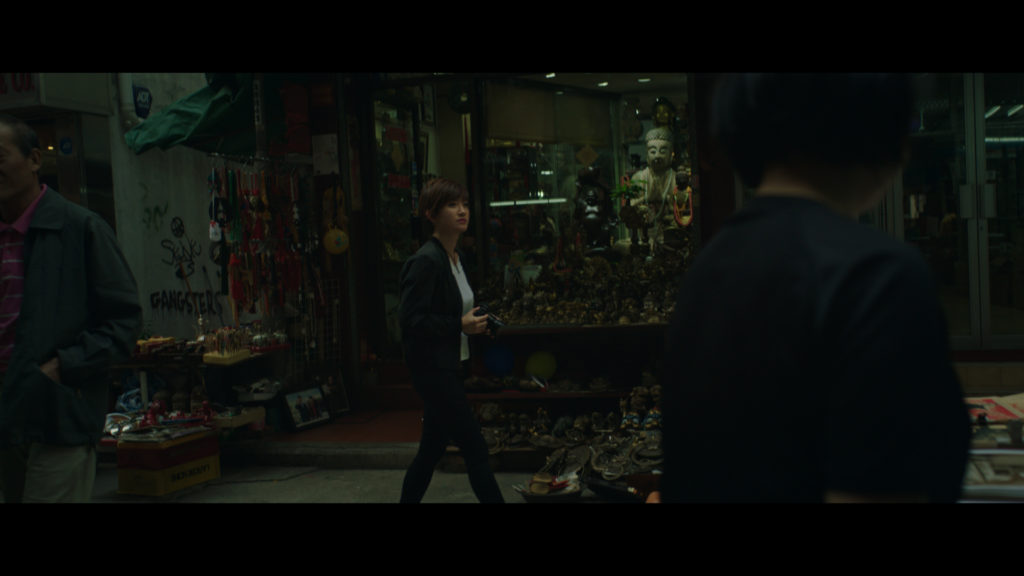
We needed to get sequences in these locations which meant hunting for little 3 shot stories. We needed a wider shot to place the talent, a close up to identify her and then another shot with a little point of interst.
Could be a silhouette, a profile shot, something from behind or a little detail.
This was the wider version of the market stall.
The Lighting
At one end of the market it got quite dark and that allowed for a bit of playing between the talent and background. Basically just looking for points of interest and opportunities to key her with something.
The Result
Shot #6

The Shot
We swapped locations and needed some tighter stuff.
I switched to the 40mm (which is the perfect follow lens) and hosed a few scenes down of her taking photographers all over the city.
The Lighting
This is another example where the blocking and framing do the major lifting. The light is all determined by her position to me, the angle we are looking and the background colors.
The Result

Shot #7

The Shot
This was the talking head bit of the day. We need a few interesting shots of the talent talking about her experiences. We didn't want anything to formal or serious so we chose this location for it's proximity to where we were the rest of the day and for the little windows in the BG that easily allowed us to create some interesting layers.
The Lighting
This is a good example of the power of negative fill. We timed it so the sun would be behind a large building frame left. Doing so meant the sun wouldn't be direct and would bounce up to the sky and be largely diffused.
When we eliminated the hard shadows we lost a ton of contrast. The key to making something intersting was finding a way to bring back some localized contrast.
The solution was 2 4x4 floppies just off camera right. We walked them in to just off the edge of frame and then played with the angles to make sure it still looked slightly plausible in terms of darkness levels.
The Result

Shot #8

The Shot
Same as above only tighter.
The Result

Shot #9
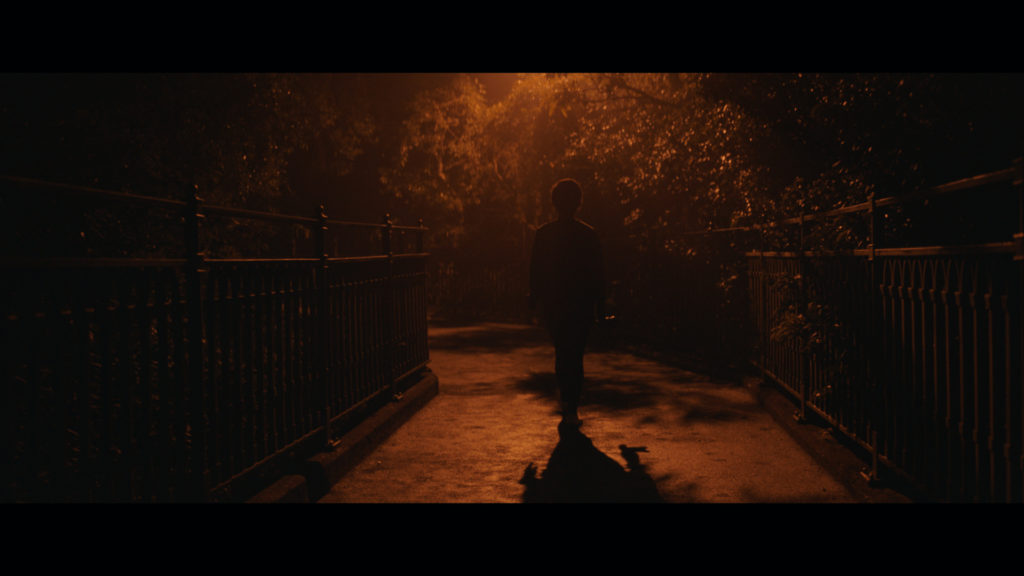
The Shot
This was the first shot in our night series.
We needed to match the sodium vapor output of the streetlights in the area where we chose to shoot.
The Lighting
This is an Arri Skypanel set to sodium vapor. It is through a softbox that the gaffer rigged up and then pointed directly at the camera. It is as high up as the stand would allow. The rest is angle and making the most out of the long shadow the skypanel created.
The Result

Shot #10
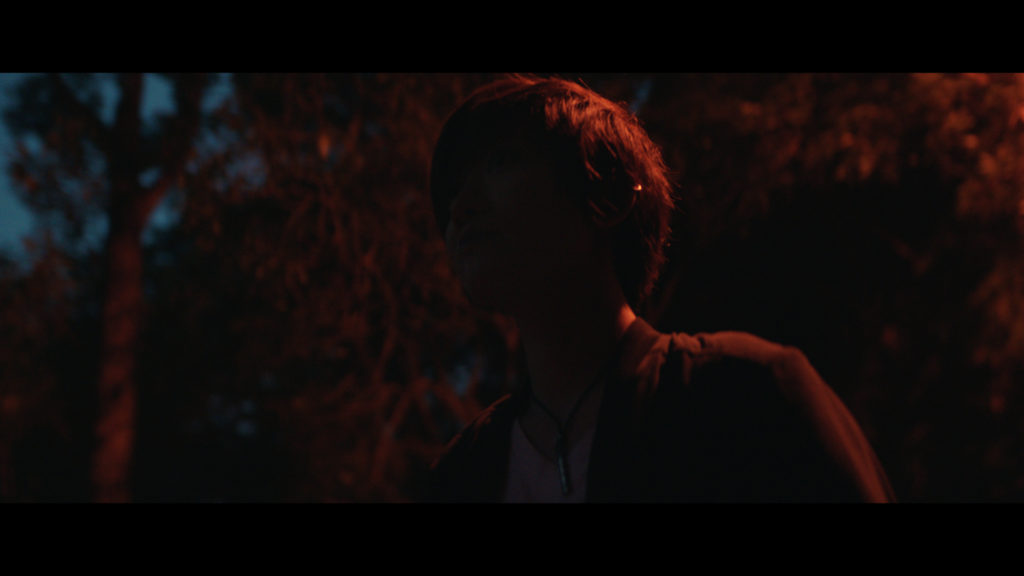
The Shot
This was the second shot in the sequence. Something in tighter to show her progression forward.
The Lighting
Everything is the same as before but we needed to just catch a bit of her eyes. So camera left is a 4x4 bounce to ever so slightly throw some light back in to her faces from the sky panel.
The Result

Shot #11
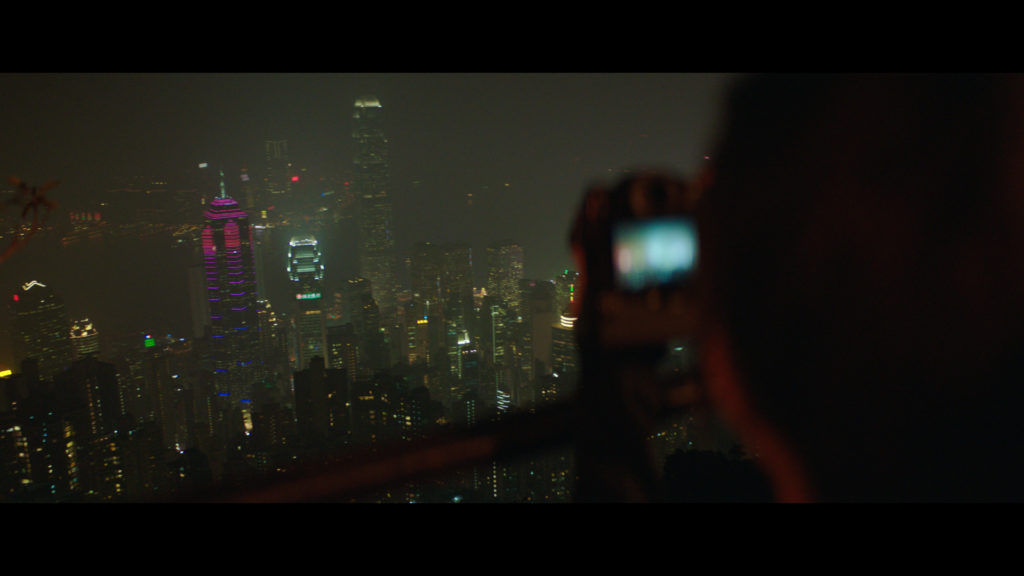
The Shot
We needed the obvious skyline picture. Easy in theory, more difficult in practice.
The Lighting
This shot was all about levels on her in relation to the city lights.
We obviously couldn't control the city lights so everything was balanced to those. There was the camera LCD which we turned all the way down so as not to blow out then we just edged in the sky panel to add just a hint of foreground color.
The Result

Shot #12
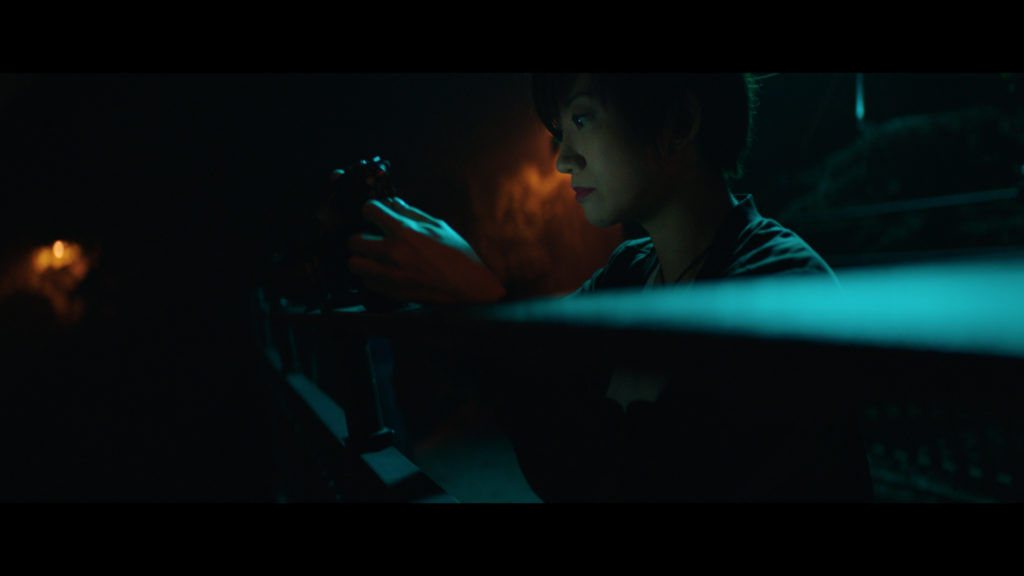
The Shot
This was the next shot in the sequence as we came around to reveal the talent.
The Lighting
This is where the power of the Sky panel came into it's own. We flipped the switch on the back and settled on this nice blue/cyan which placed nicely against the warm sodium vapor in the background.
We then turned the LCD on the camera all the way up so that it would get a nice bit of practical level back into her face. This lighting change took about 60 seconds. We played with the framing to get some more streelights/color into the BG and away we went.
This is a good example of layers in night exterior cinematography. It isn't much but without that last streelight in the BG on frame left this shot would be much less interesting.
The Result

Shot #13

The Shot
We needed some traveling shots with a bit of movement.
We found a glass elevator where we could get a lot of BG movement with very little set up.
The Lighting
Overcast sky plus 4x4 floppy. That is it. Nice and simple. Take away with the flatness by creating shape where you can.
The Result

Shot #14

The Shot
A continuation of the previous shot. This time with focus thrown to the BG.
The Lighting
Same as above.
Run + Gun Experience
This job had a lot of key elements in place to make something fun.
The main thing was having a production company and a director willing to go with a slightly unconventional approach to get the results we needed.
The crew was small and nimble and when we came across a problem in a location we couldn't fix we just changed course.
The flexibilty we had was key for allowing us to get the shots we did. For the cinematographer on a job like this it was about knowing what makes a good photo and then constantly scanning the areas and the action to make as many of those elements fit in each set up.


Hi Patrick,
This is by far the most influential and if i may say inspiring podcast I’ve ever come across. The way you talk about lighting in real locations(for eg. highlight on the neck and the transition to shadows and the sun bounce off buildings etc.) has inspired me on a great level!!
Loved it and looking forward for more. Thank you so much.
Kavish Agrawal
DP/Cinematographer
This was awesome. Thanks for sharing this experience with us. I learned so much. I need to go get myself some 4×4 floppies now.
Was this all easy rig? Easy Rig seems the way to go for handheld. Makes everything quick.
Yep all easyrig.
Hey Patrick!
I get so excited every time you post another breakdown. I was just watching your awesome reel and I’m dying to know how you achieved that sexy push in on Shot 3 from this article?
Considering this was more of a run-and-gun shoot, how do you pull off that kind of production value on the fly? It’s silky smooth with just the right amount of organic movement, and the focus is spot on. I just really love this style so much. Were you sitting on a dolly? Please do share your technique 🙂
Also, just out of curiosity, was this the 40mm? The framing is so nice 🙂
Best,
Darren
That is just an few steps with the easyrig. Looks stabilized though. And yea it was a 40.
Thanks for sharing. I would love it if you did a breakdown in the future about camera movement. One thing I struggle with going into new projects is choosing how to move the camera. It would be really helpful to know the process you go through with a director when deciding camera motion.
Will do Darren!
Thanks for listening