Listen to the Podcast:
On the show this week we are taking an extensive behind the scenes look at a recent television commercial and how you can use your limitation to your advantage.
There are always issues on set with budget, crew, time, production, and one of the cinematographers main jobs is deciding where and when to allocate resources over a given project to deliver the best results.
In today's episode we break down how we adjusted on the fly during production to adapt to the limitations encountered along the way.
Podcast Sponsors:

Remember to use the coupon code "Wandering20" to save 20% off your next on site license.
Keslow has a special offer worked up for listeners of the podcast and if you let them know your heard them on the Wandering DP Podcast they will hook you up with a sweet deal on the next rental.
Patreon Live Stream: Your Questions Answered
Over on Patreon this week we are chatting about building an audience of directors, finding your groove in a production environment, and what it takes to level up in the industry.
If you are interested in participating in this week's live stream sign up to become a Patreon member:
If you are a fan of the podcast and want more video content the patreon group is the place to be. Each and every week I release an exclusive podcast, video, or live stream just for the Patreon members.
Patreon members also get access to the Private Facebook community for the show. The podcast couldn't exist without the Patreon support and I do my best to take care of the supporters.
Location Lighting: The Beginnings
This was a series of ads that we will be looking at over the next few weeks. The central theme of the campaign was our talent visiting real world locations and interacting with real customers.
Each customer had a specific location relevant to their story and in today's episode the location was a large hall. The main action in the ad is our spokesman comes in, greets the customer, and they sit down to have a chat.
The Location
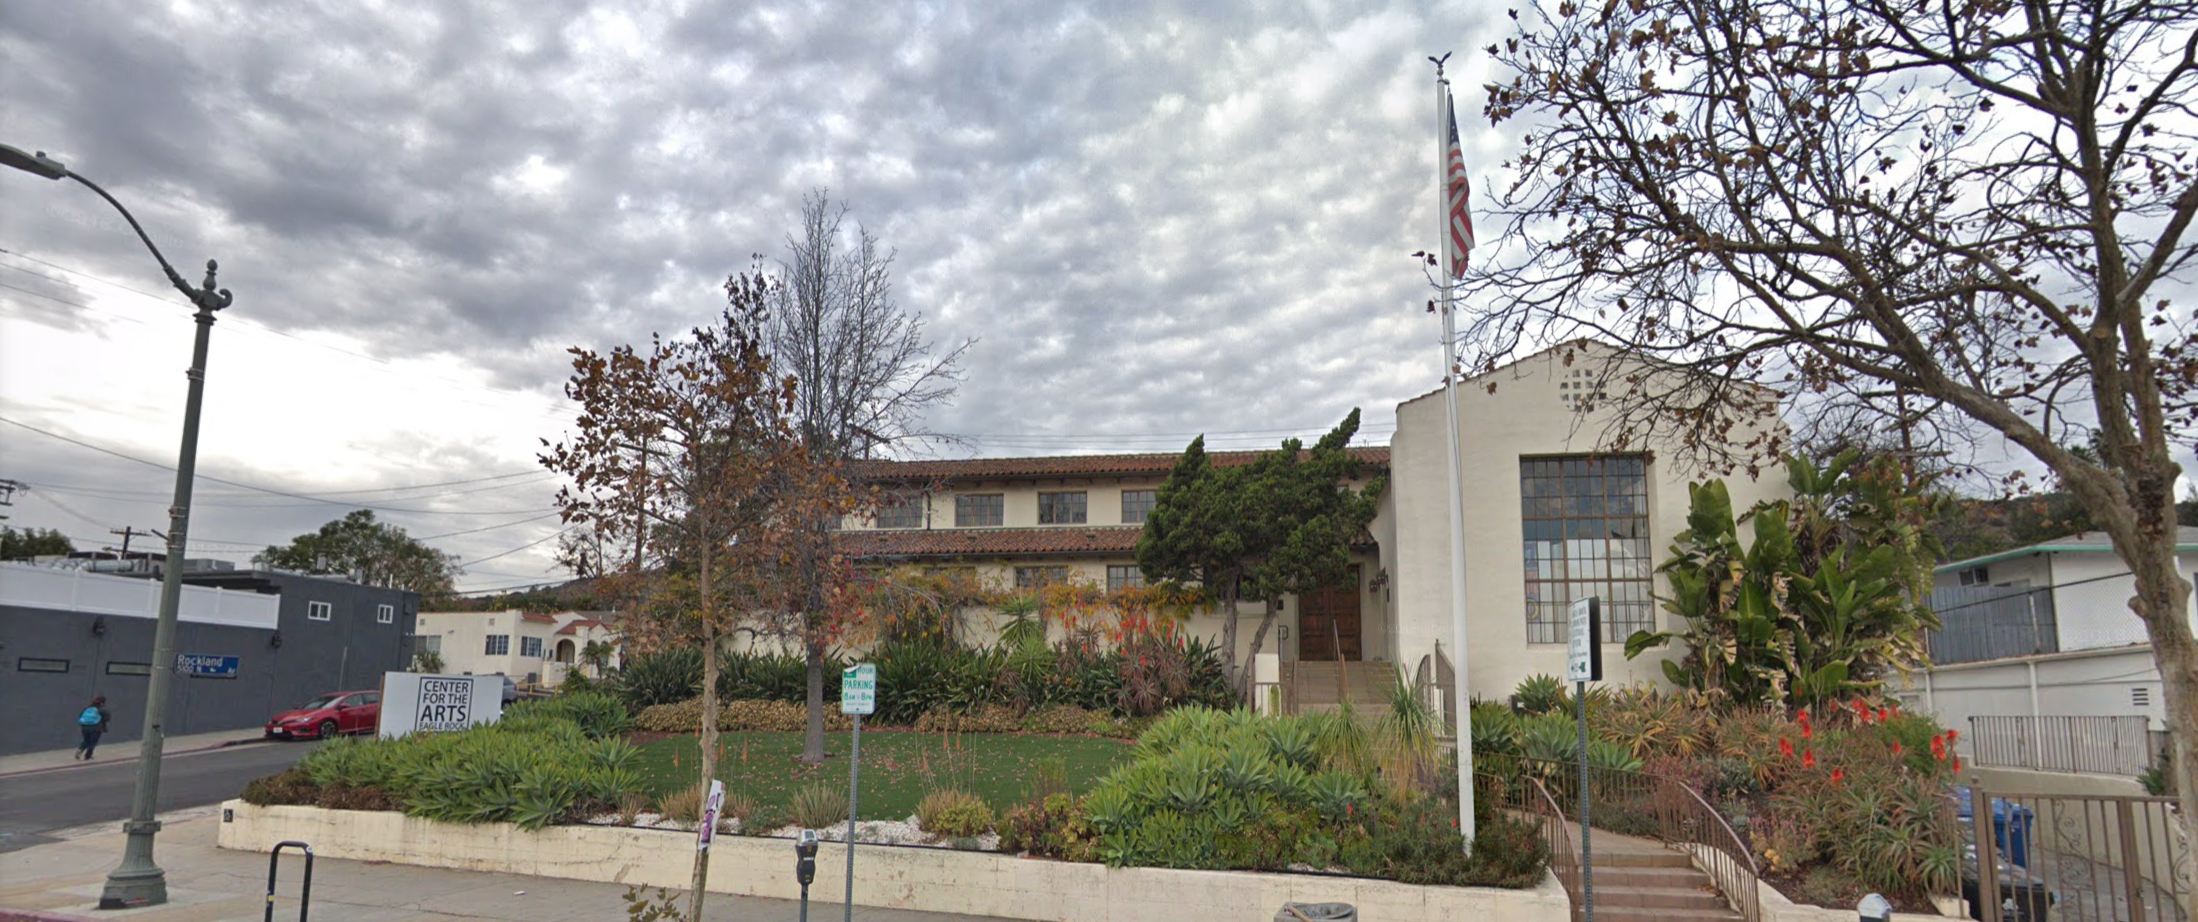
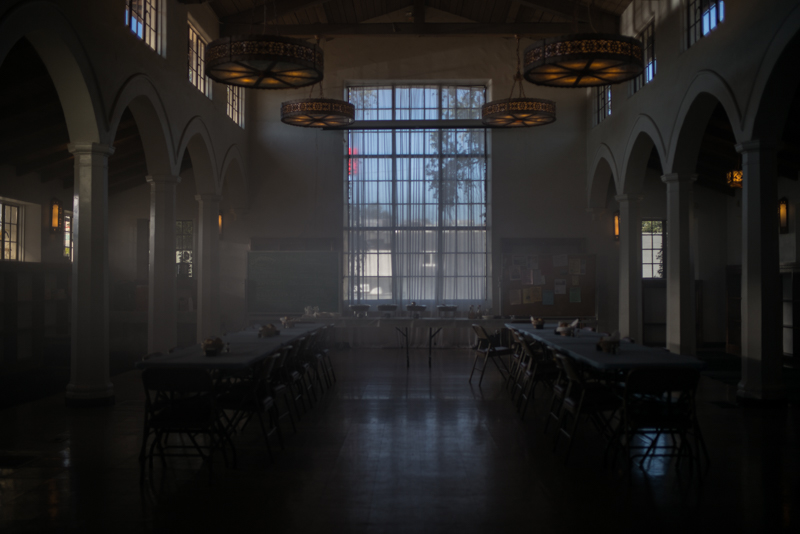
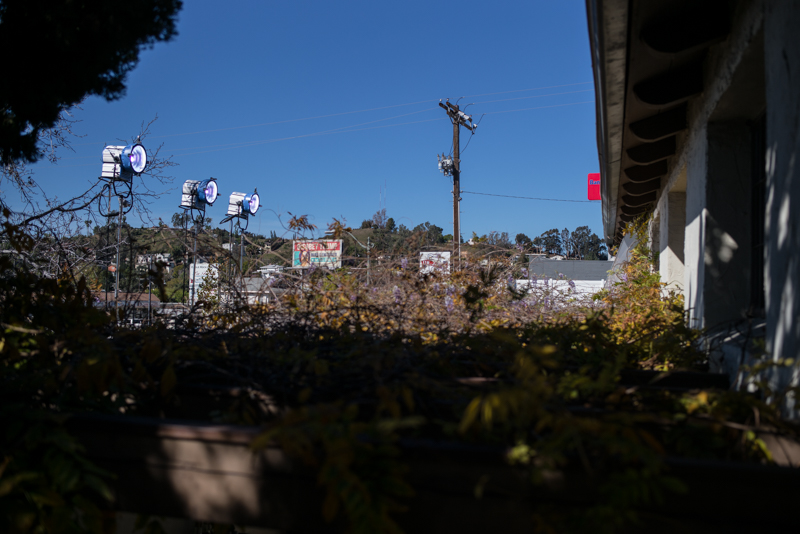
The location was a great find and perfect for our needs. It wasn't without it's challenges though. The main issue was the actual site. The angle of the front lawn area outside made it difficult to get access for lighting. In order to get the lights where we wanted we were going to have to have a few cherry pickers.
During the tech scout we realized the expensive version of this set up was going to be too much for the production and we would have to work to come up with another solution.
We scratched the cherry pickers and the 8 x 18ks for something a bit easier to manage.
The angle of the sun meant the front facing part of the structure (see photo above) would be getting hit with sun all day. We needed to use that to our advantage seeing as how we didn't have the firepower to fight it.
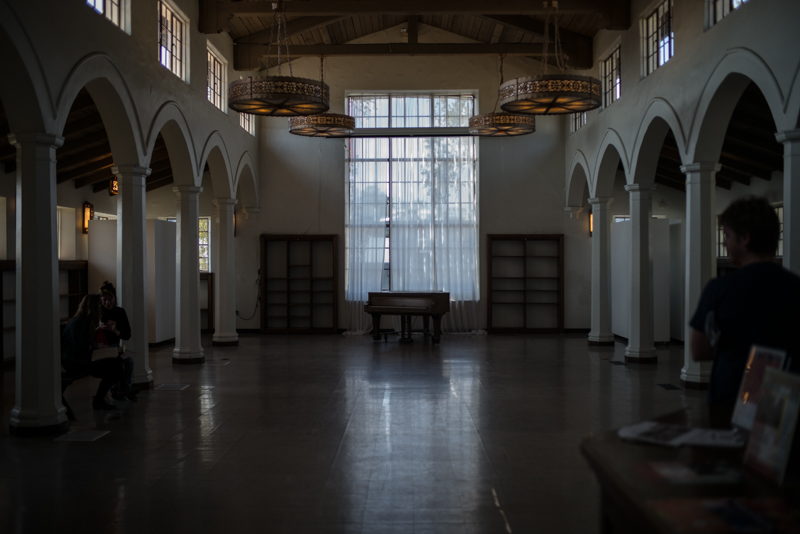
This was a still taken from the tech scout at approx 3PM.
The Schedule
The main discussion during the tech scout was when were needed to be in the location and shooting. The wide shot was the most complicated and to make sure we were getting a look we could maintain the rest of the day we needed to have everyone on the same page.
We decided to come in and light and shoot the wide at 8AM so we would be fighting as little direct light as possible. After the wide was taken care of we wouldn't have trouble matching the closer in elements.
The Gear Package: Camera & Lighting
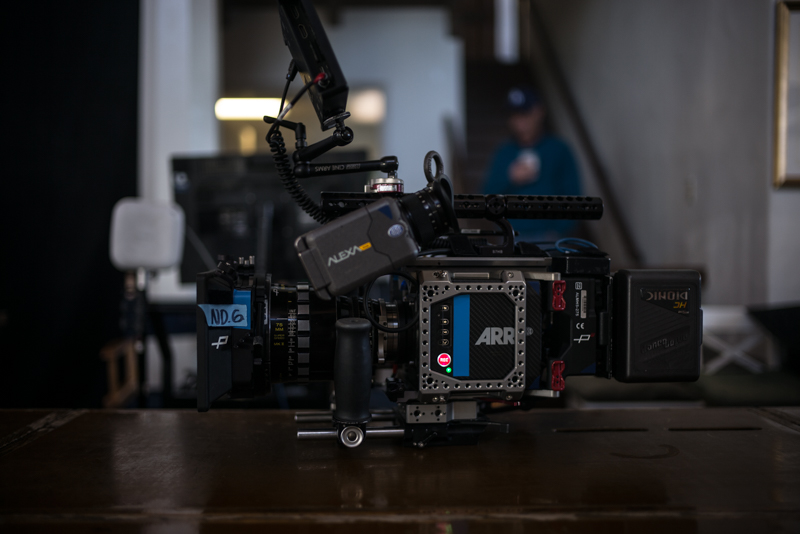
We shot this ad on two Panavised Arri Alexa Minis with a combination of Panavision Ultra Speeds and Super Speeds.
For lighting on this shoot day we had:
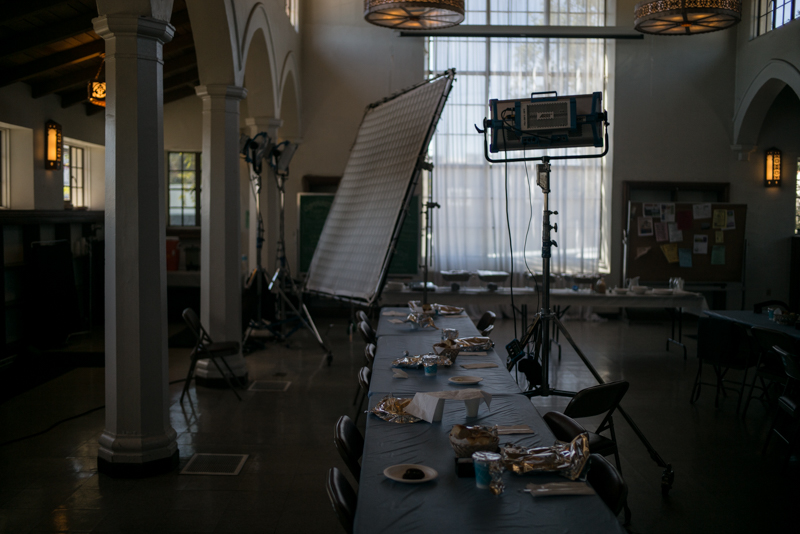
3 x Arri M40s
3 X Arri Skypanels
2 x Litemat 4s
8x8 1/4 grid
Various 4x4 diffusion frames
Roll of ND .6 (for windows)
Location Lighting: The Set Ups
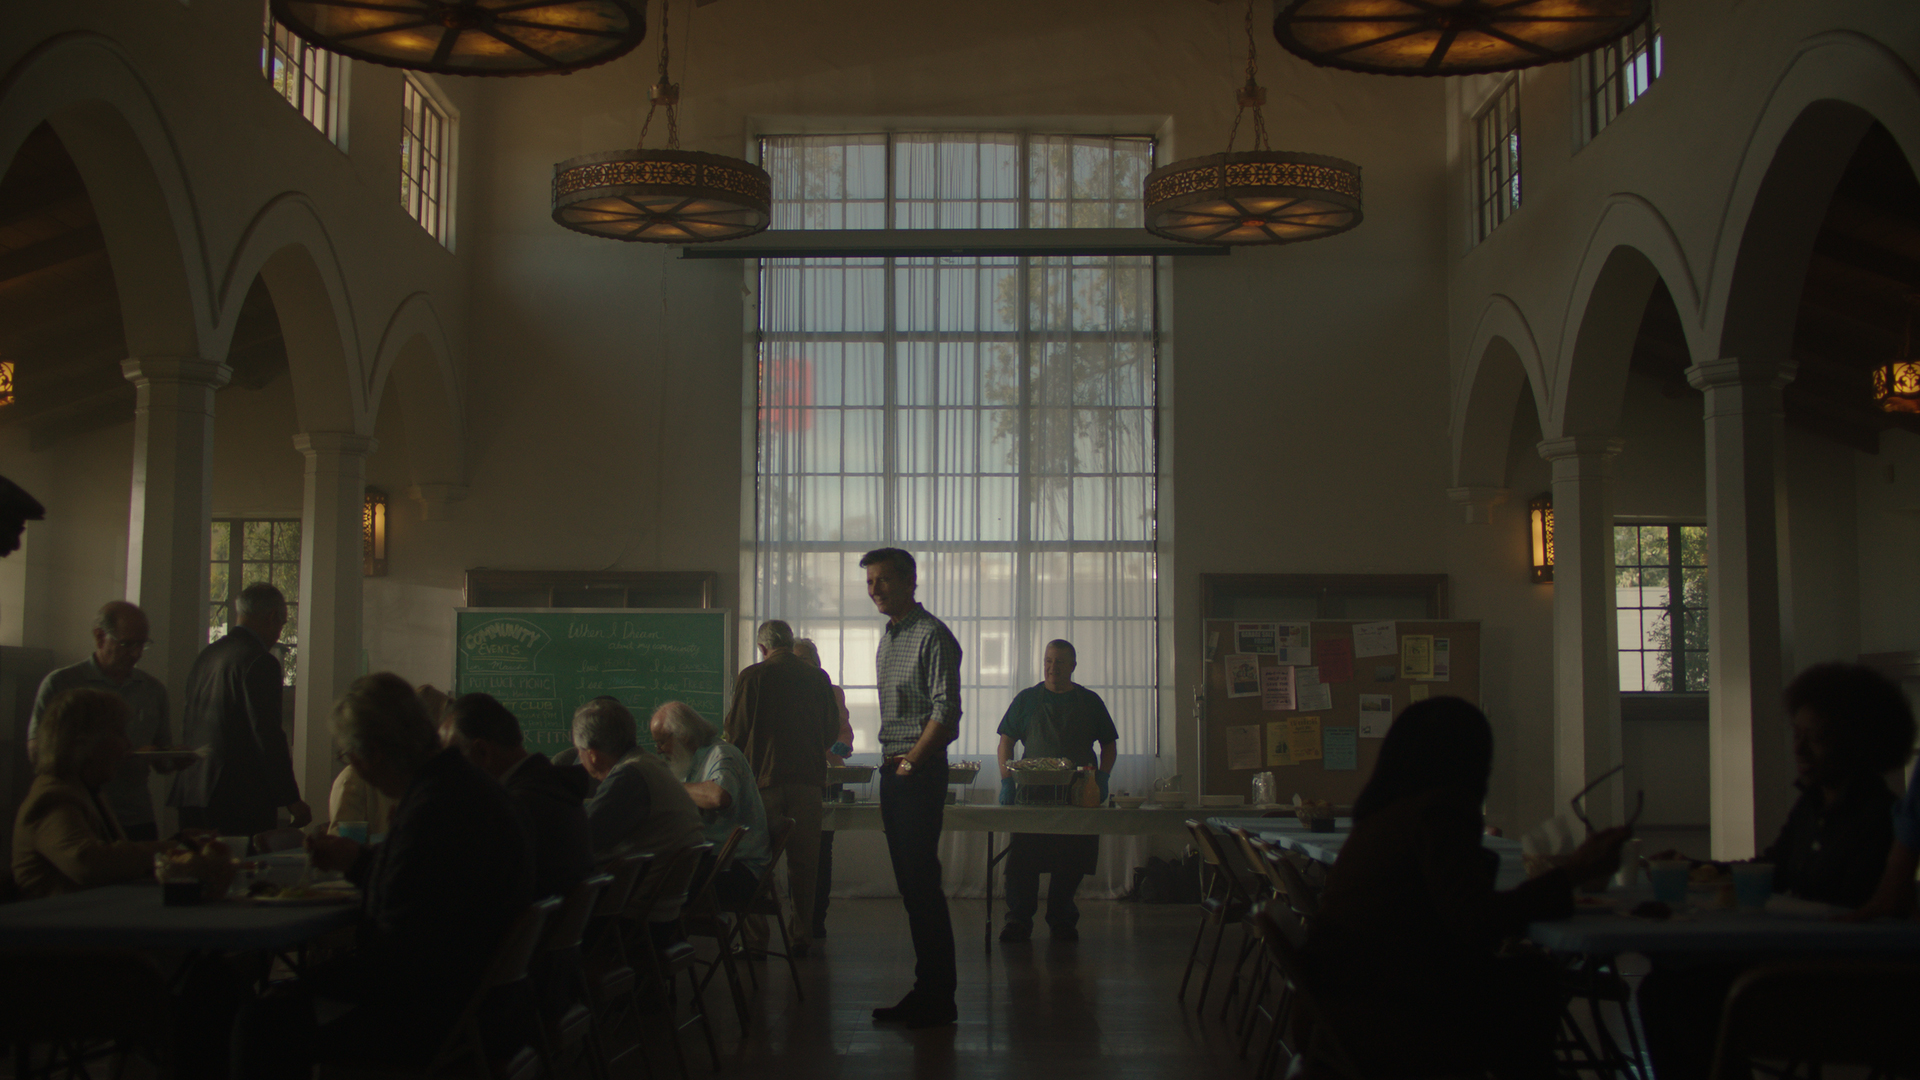
Shot #1 - The Moving Wide
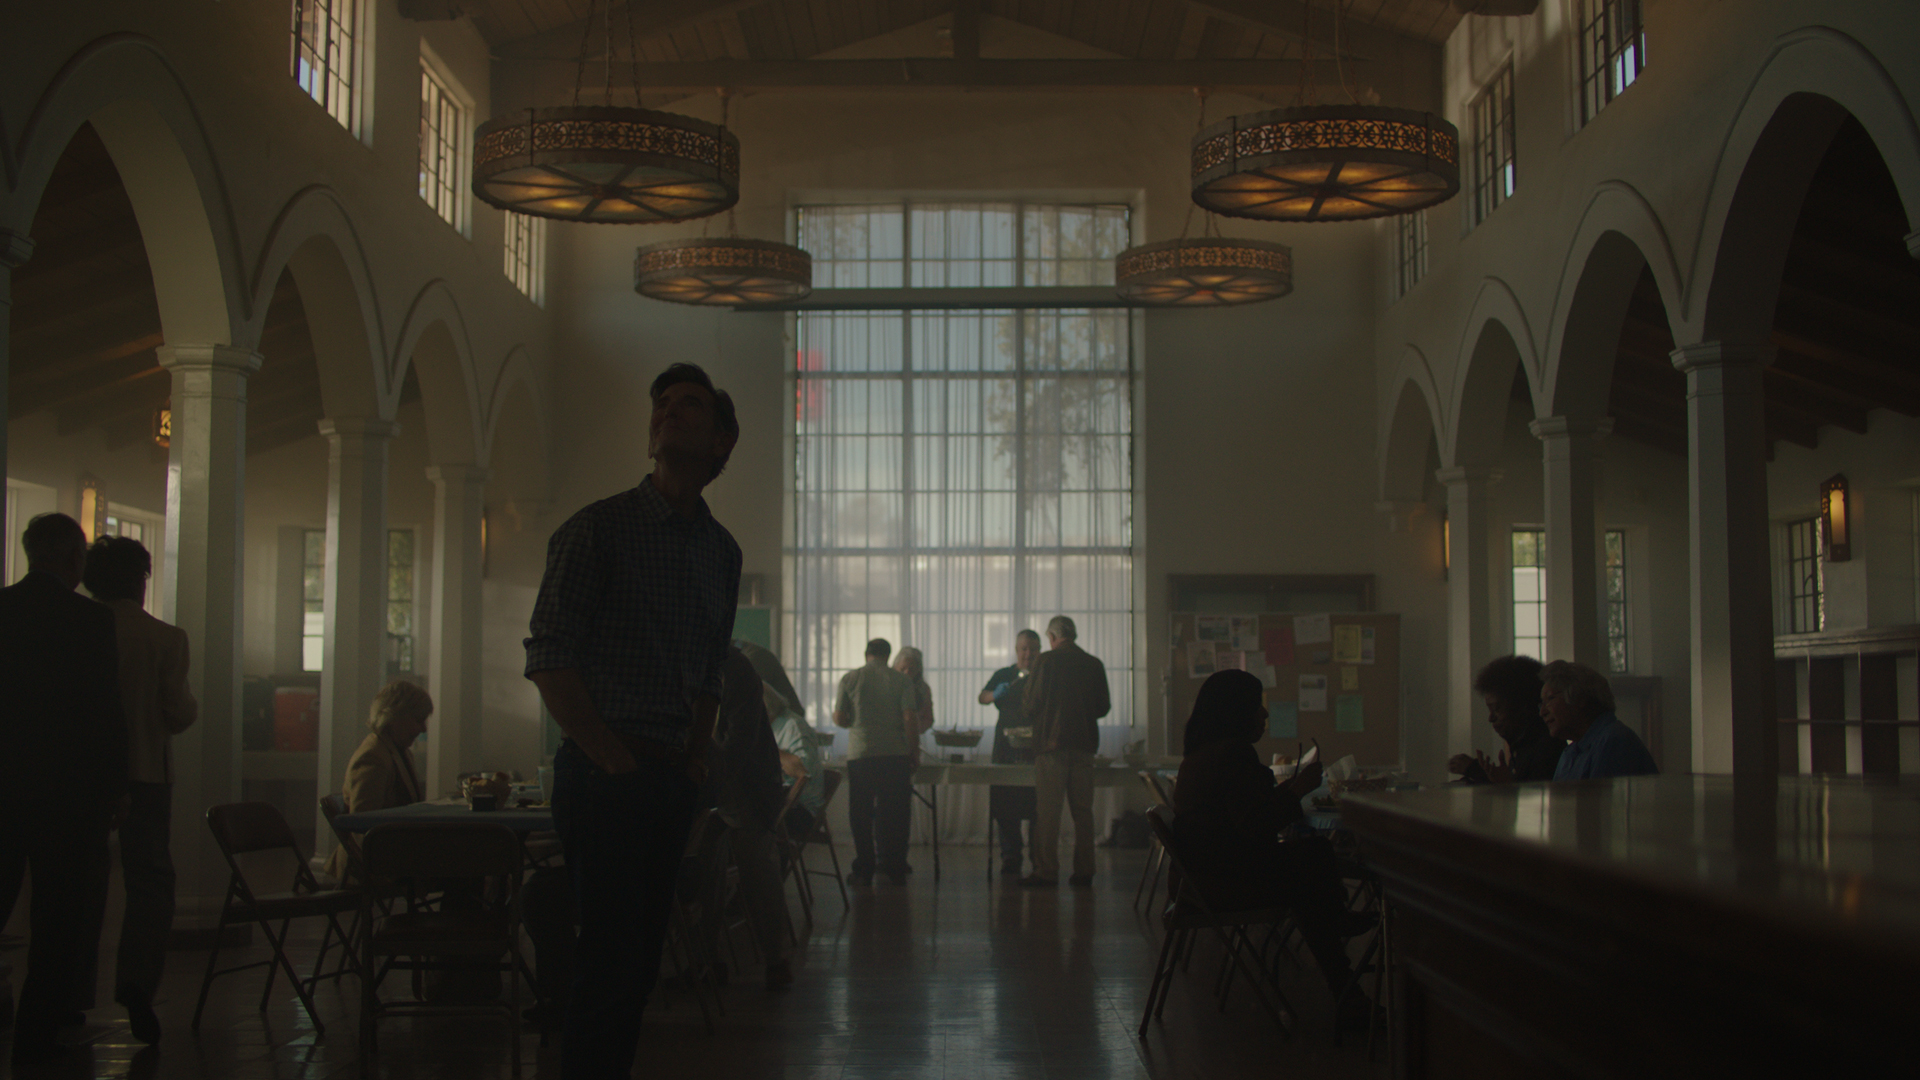
The Shot
This was the first shot of the day and the most important for dialing in our look. It is a long push in shot on the dolly where the camera travels forwards down the room towards the window.
The Lighting
The light on the first shot was the most important for the look. We needed to see the blocking, place the actors in their landing spots and then work backwards from there. Once we knew their final actions and positions we could light accordingly.
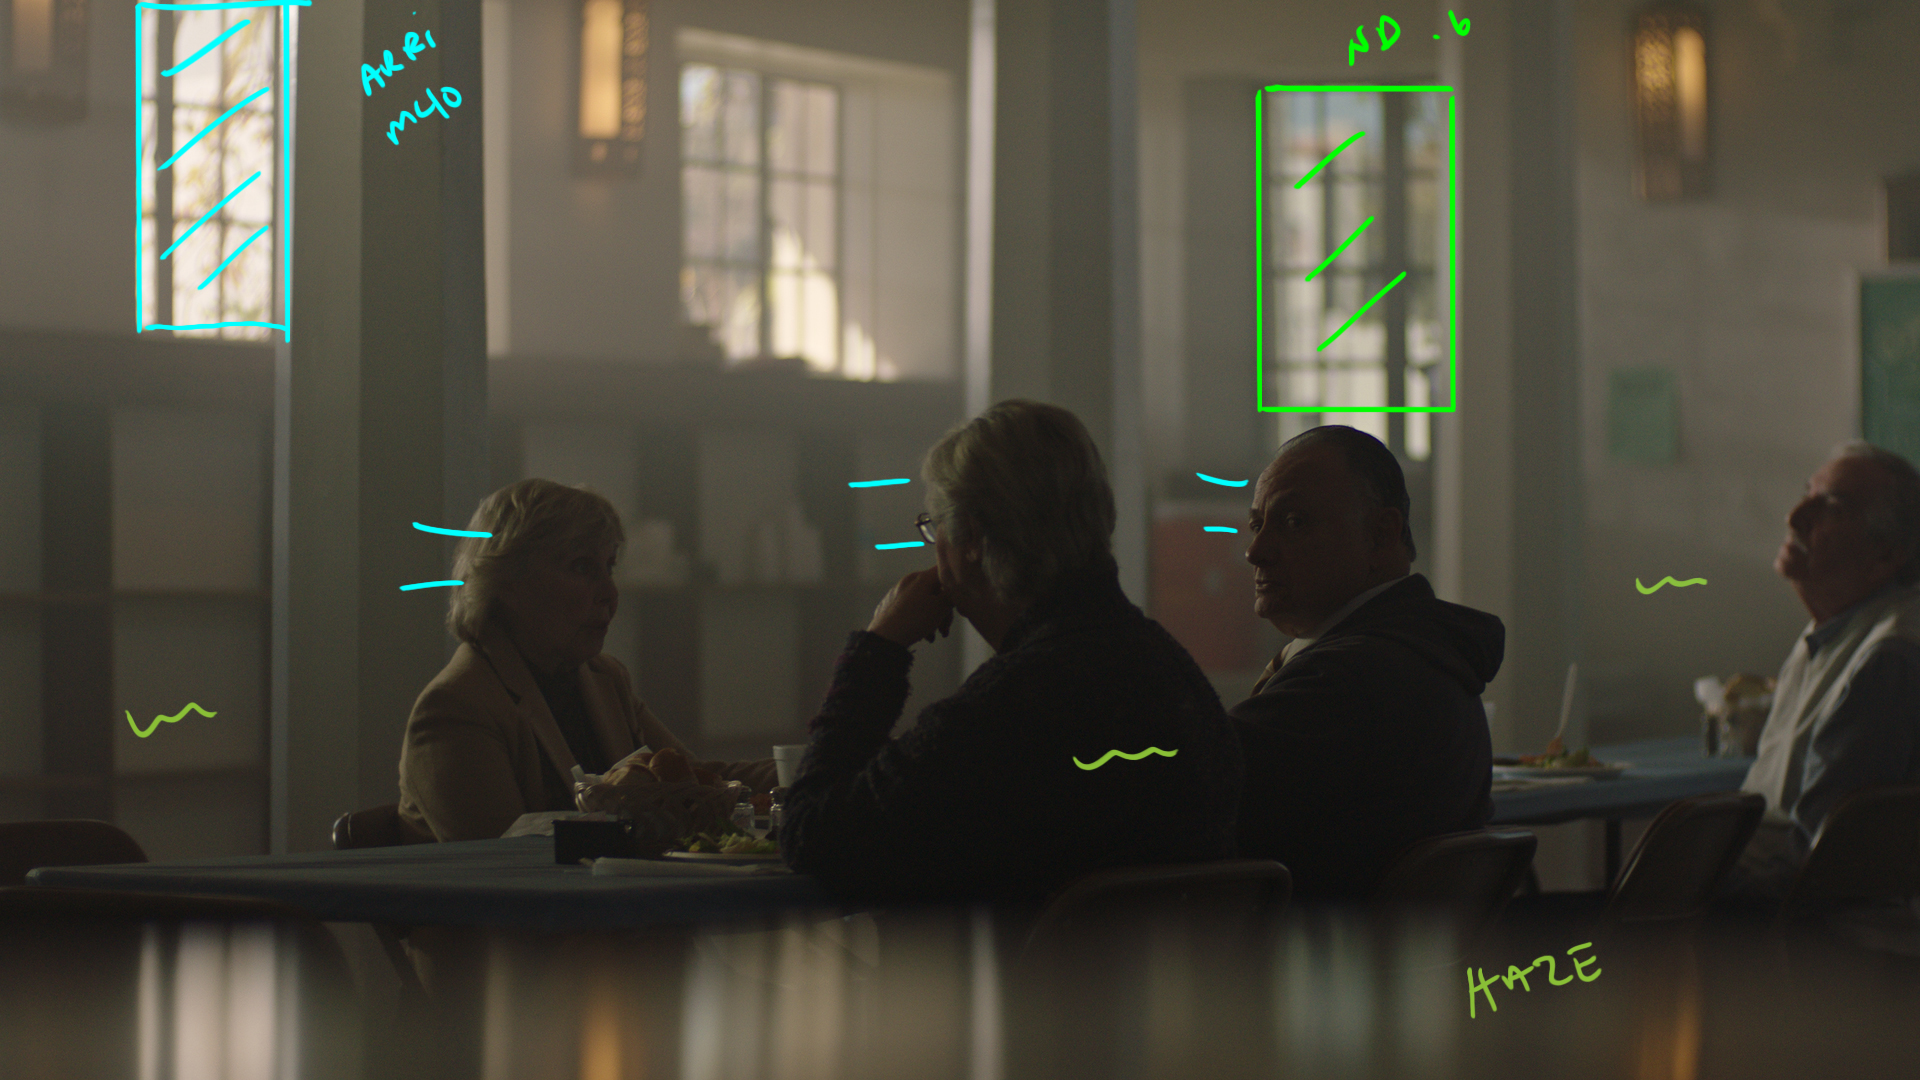
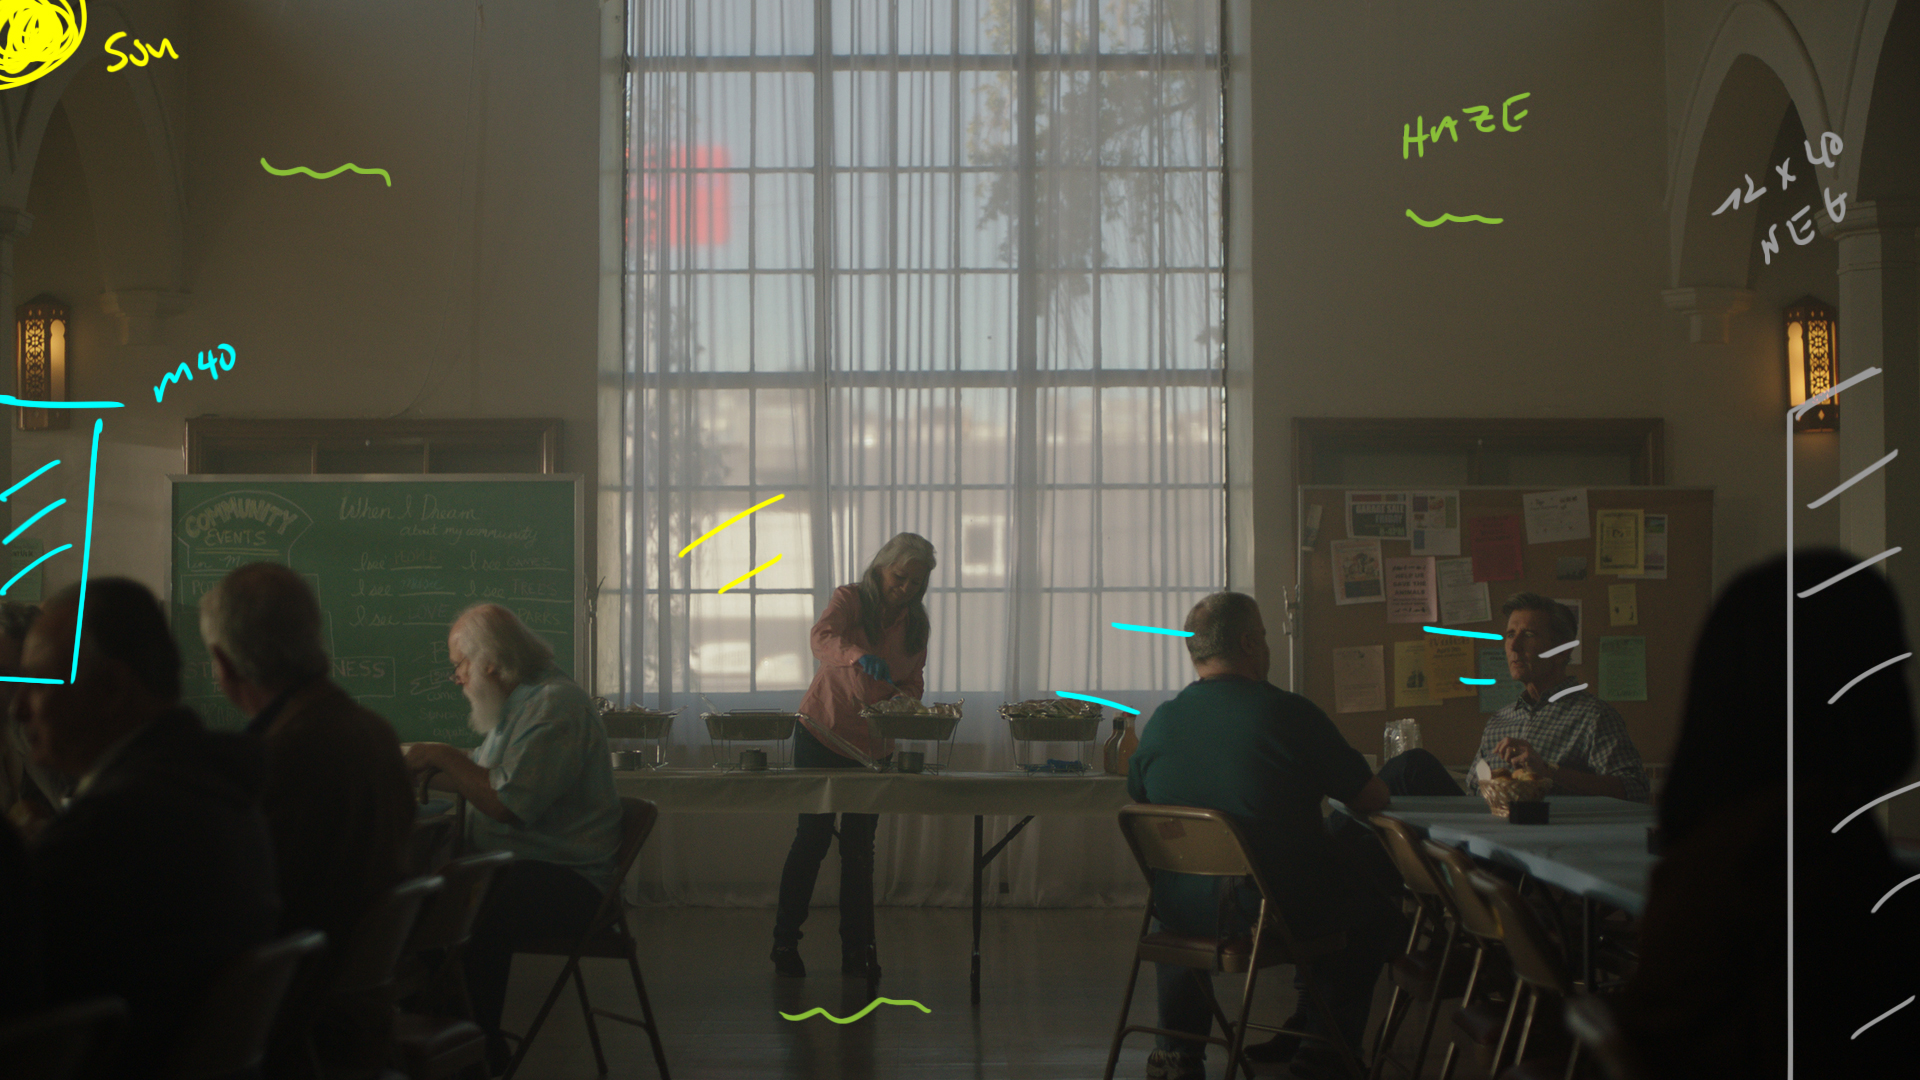
We used 3 Arri M40s (not ideal when lighting a big interior day shot) for the outside windows on the camera left side. We also scheduled this shot as early as possible so we would be competing with as little sun as possible.
Less sun hitting the building = less light to compete against.
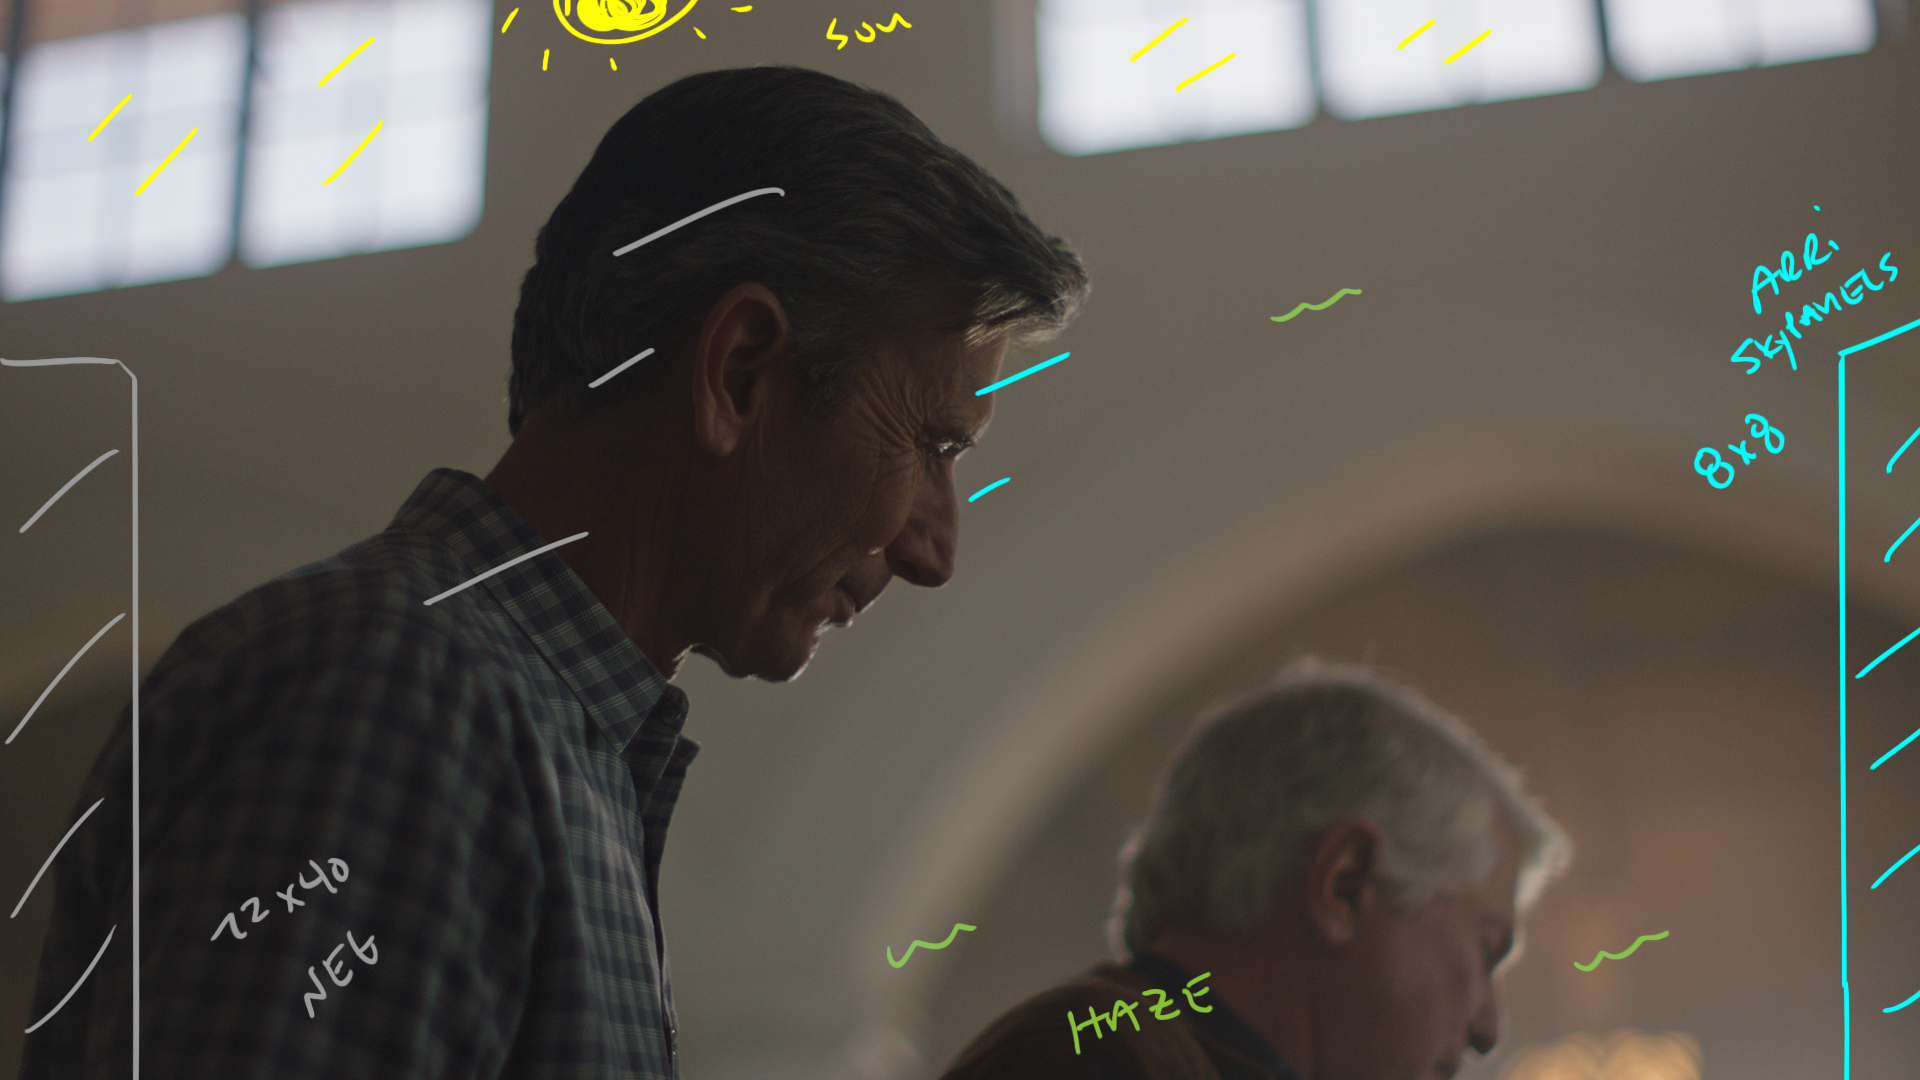
Then inside we had an Arri Skypanle as a fake window source. We used a 12 x 40 Neg and ran it all the way down t he right hand side of the building. Then we dimmed the practicals down to taste to add some warmth. WE also used some haze throughout the ad to cut down on some of the contrast and milk things up a little.
The Result
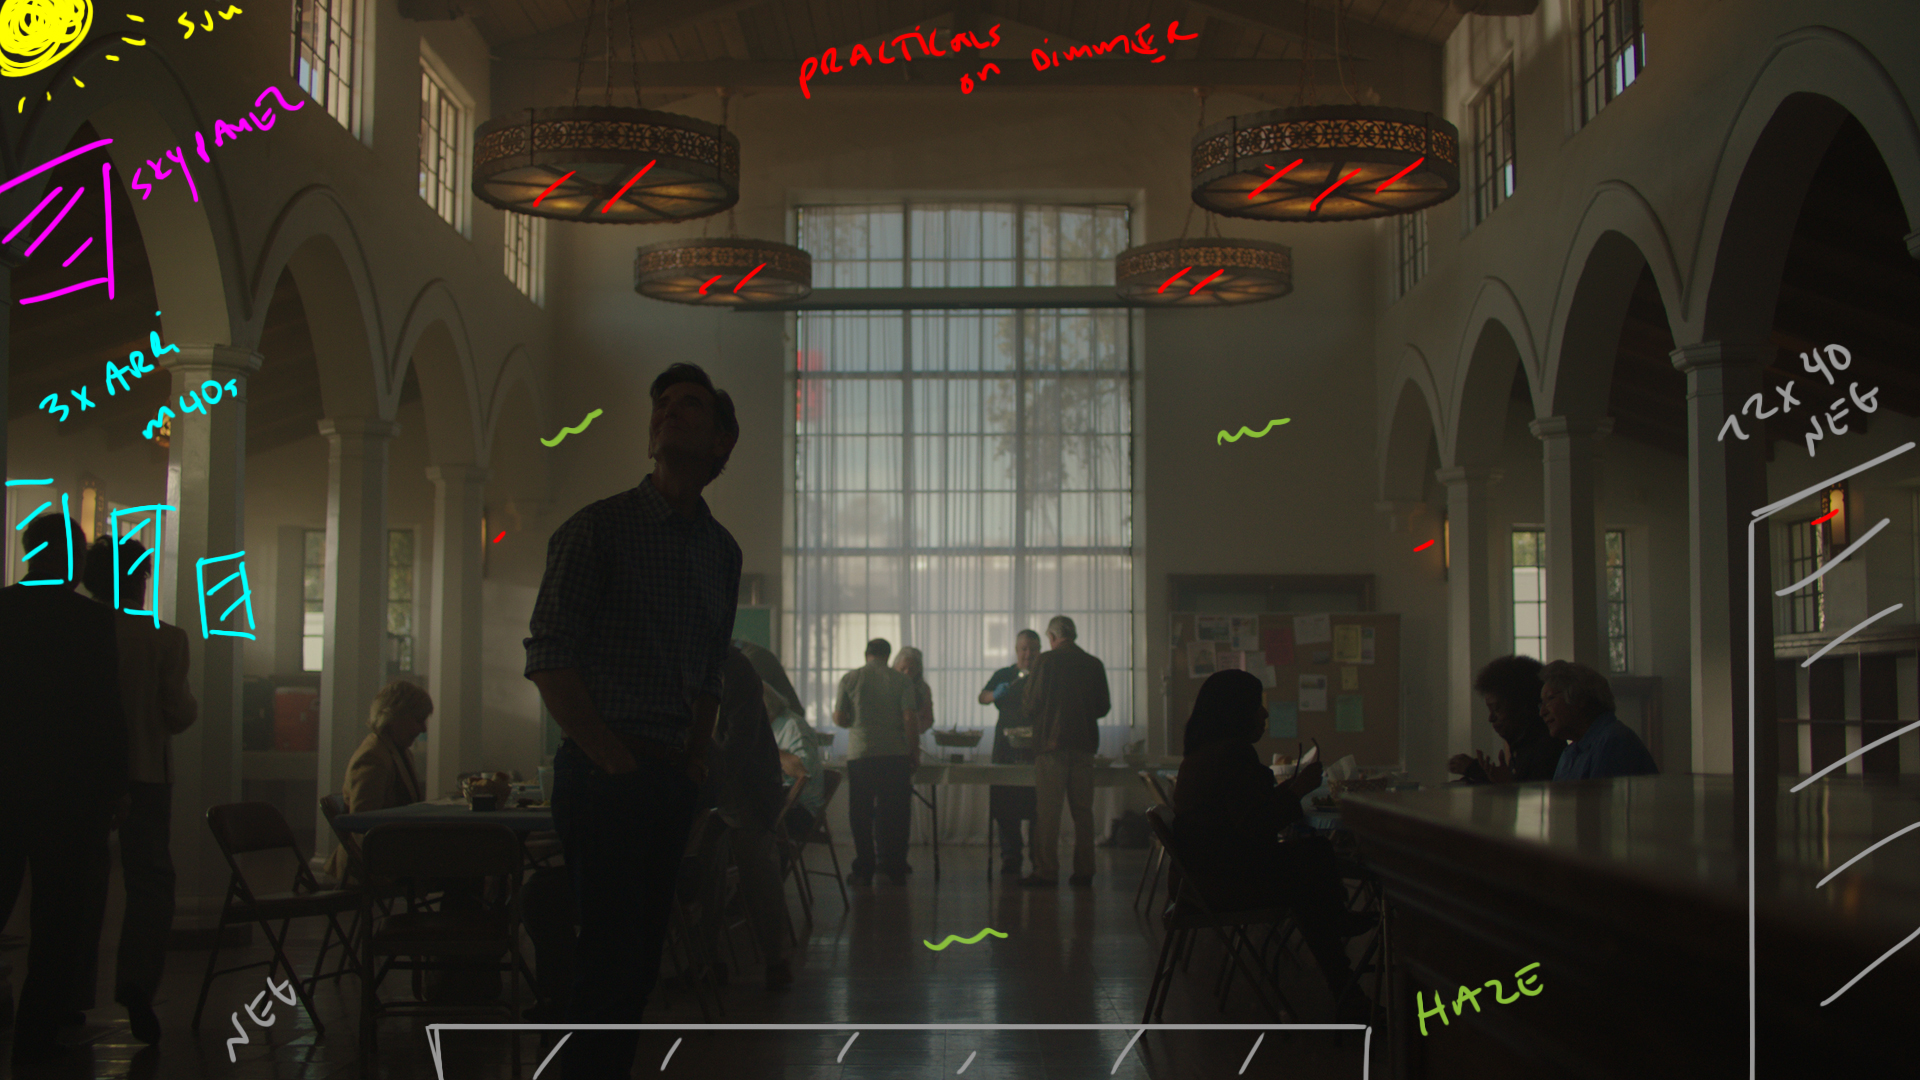
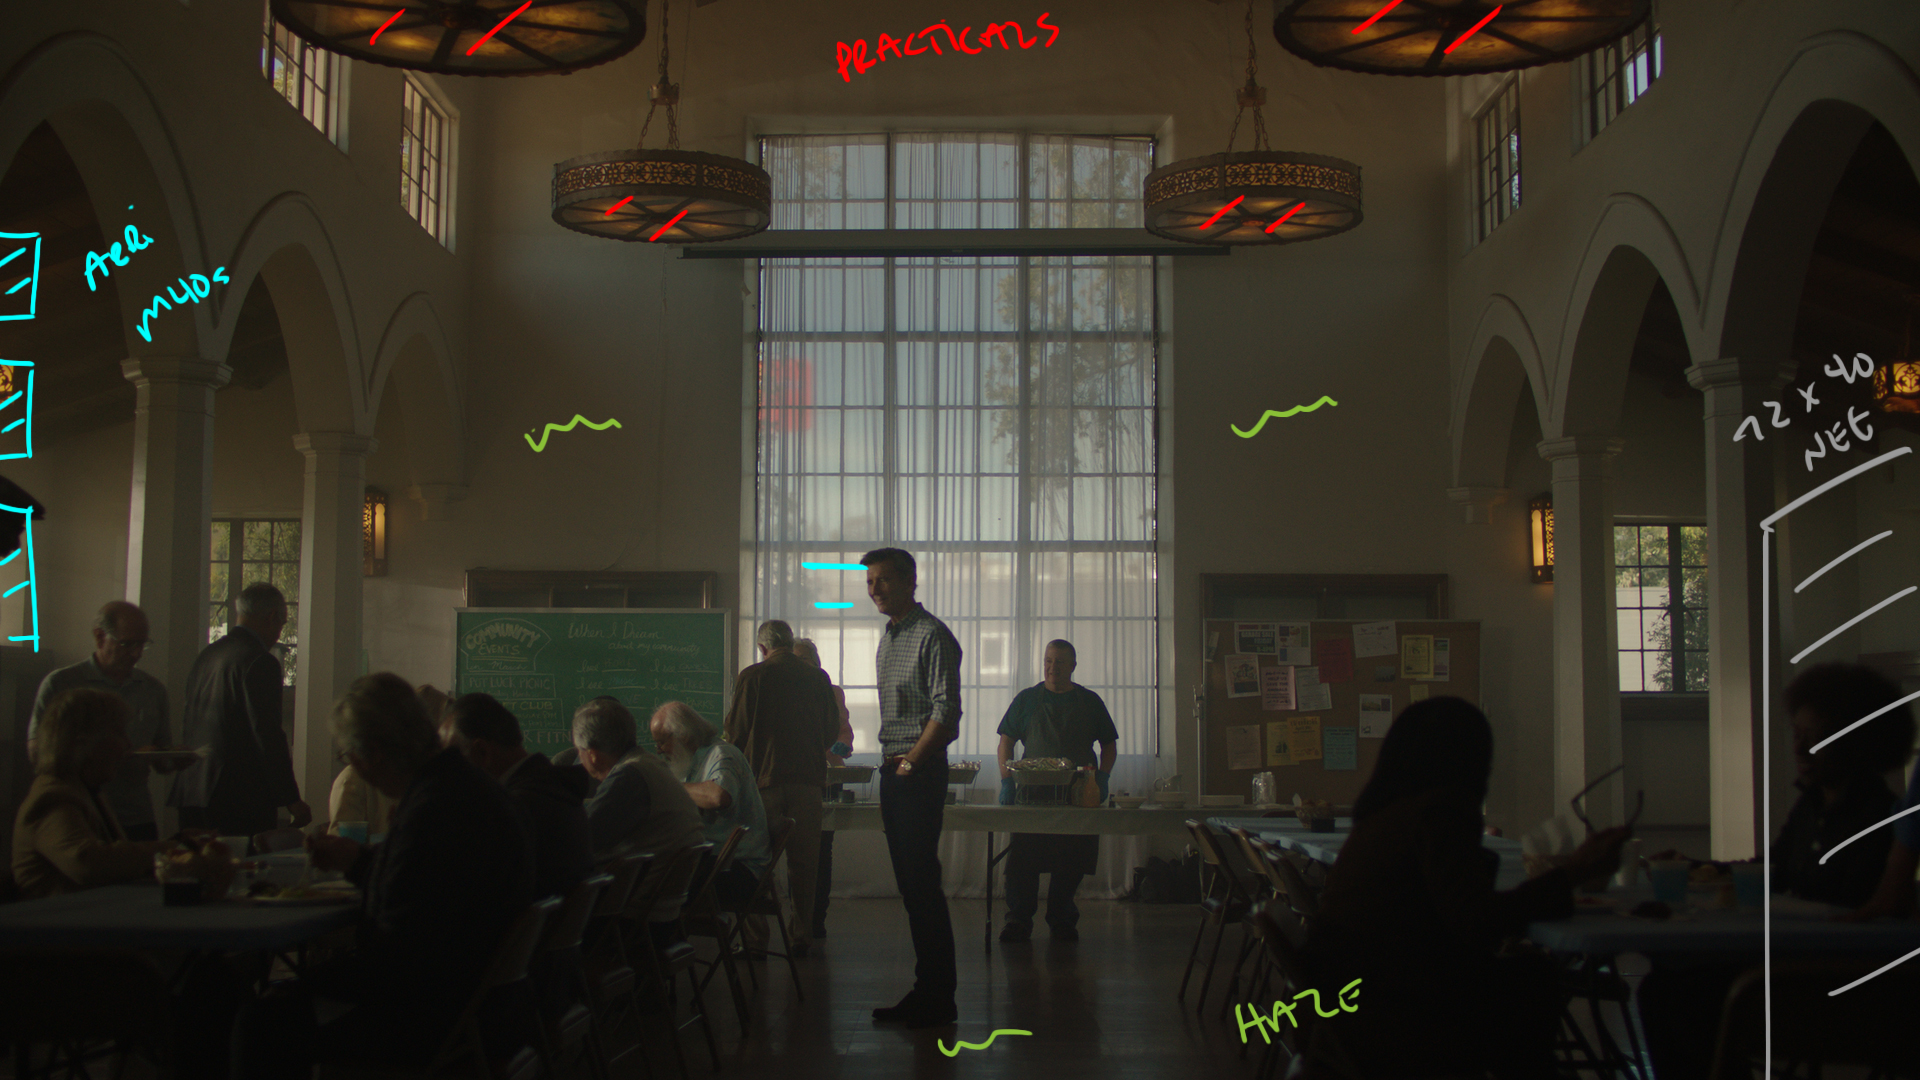
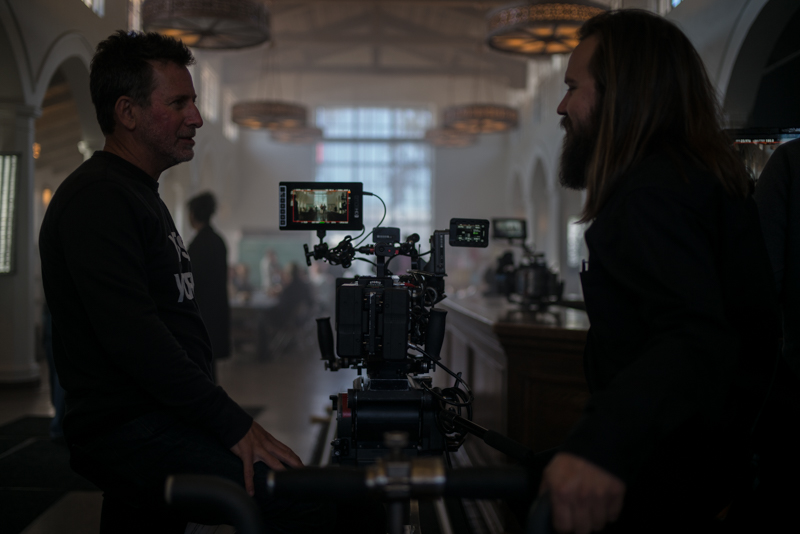
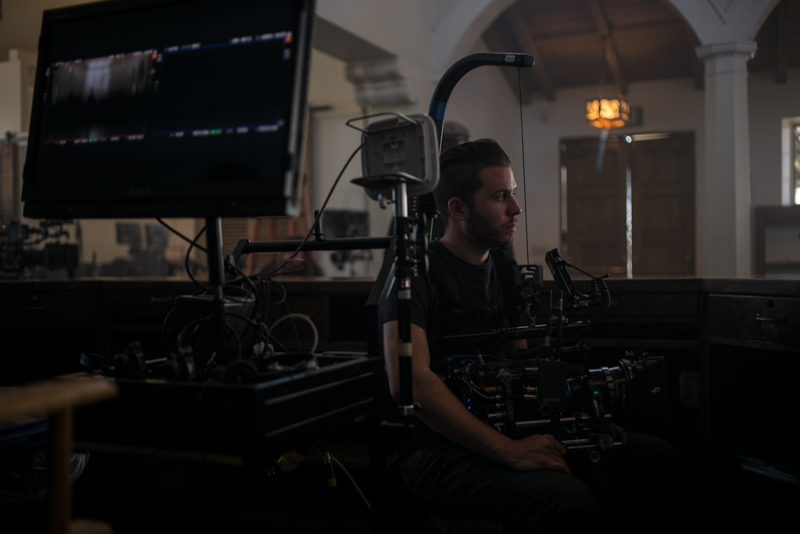
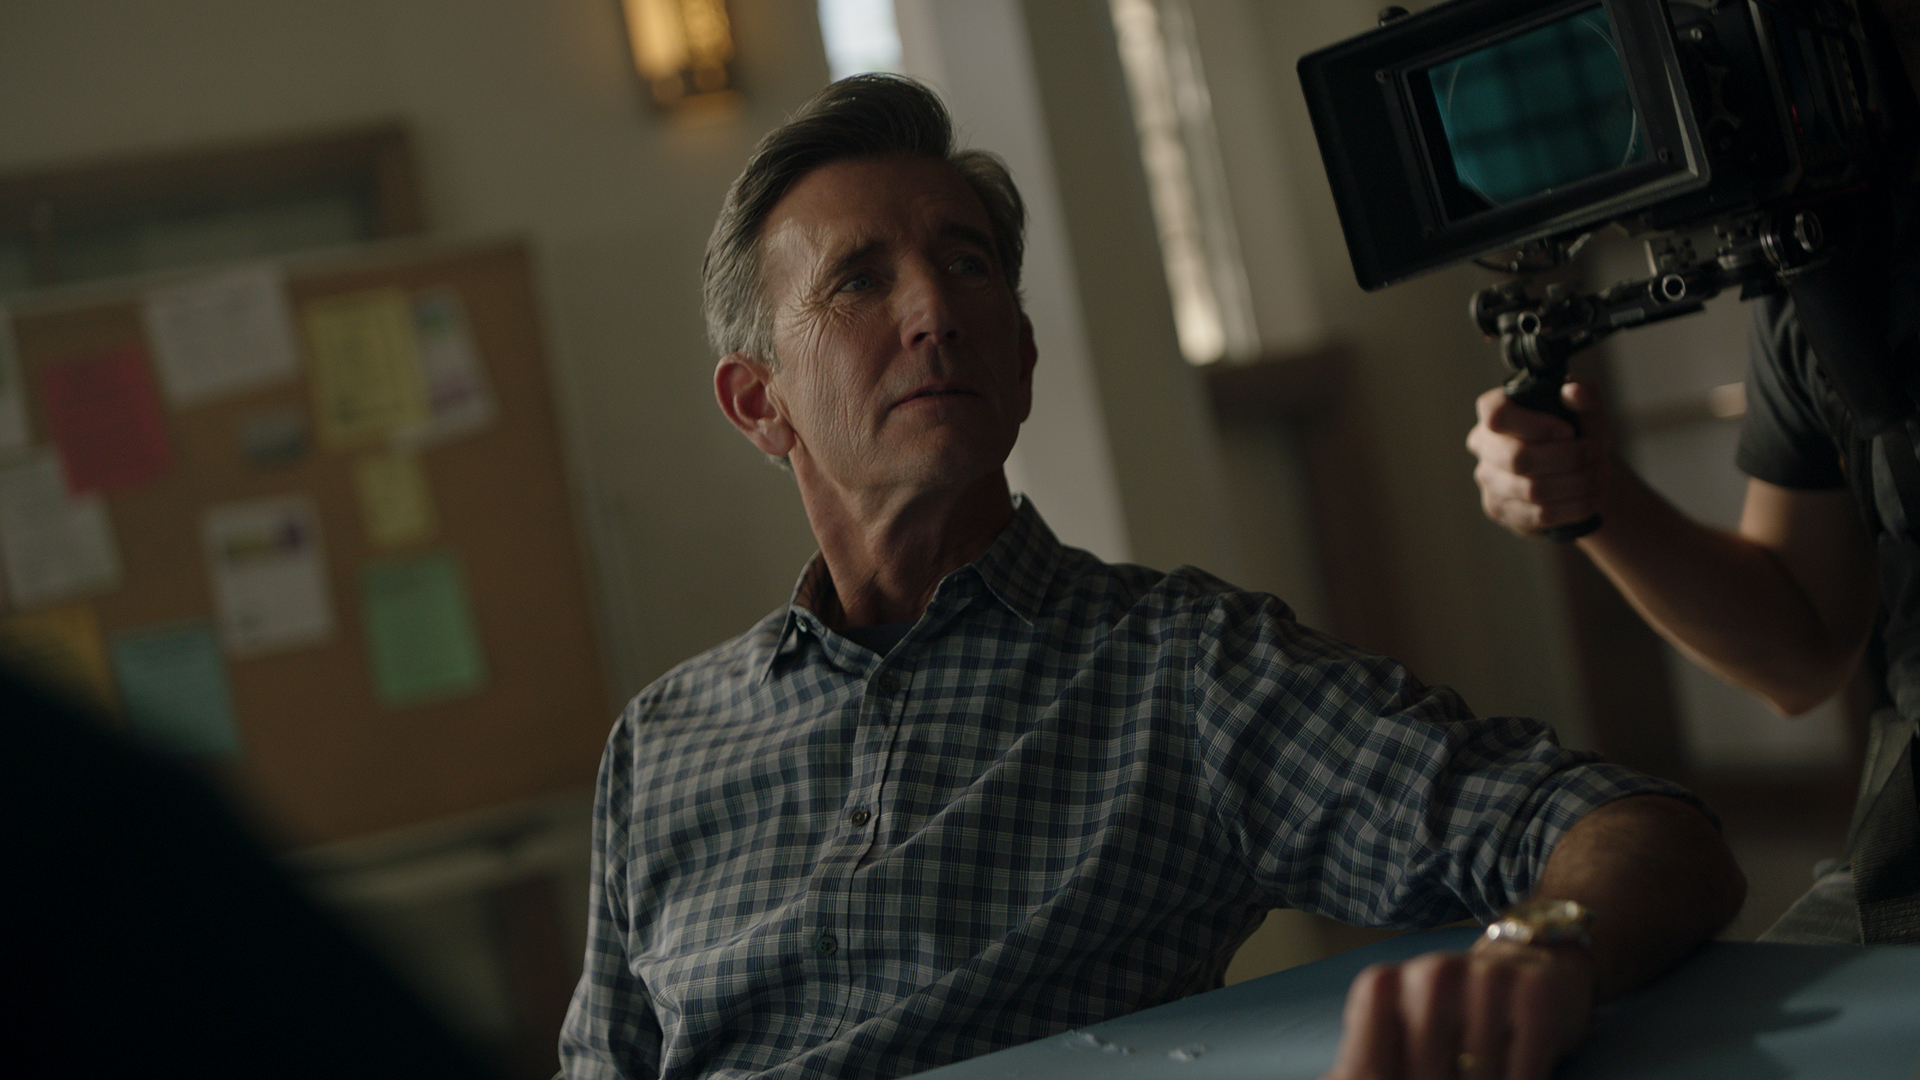
Behind the Scenes
Shot #1A - The Crowd
The Shot
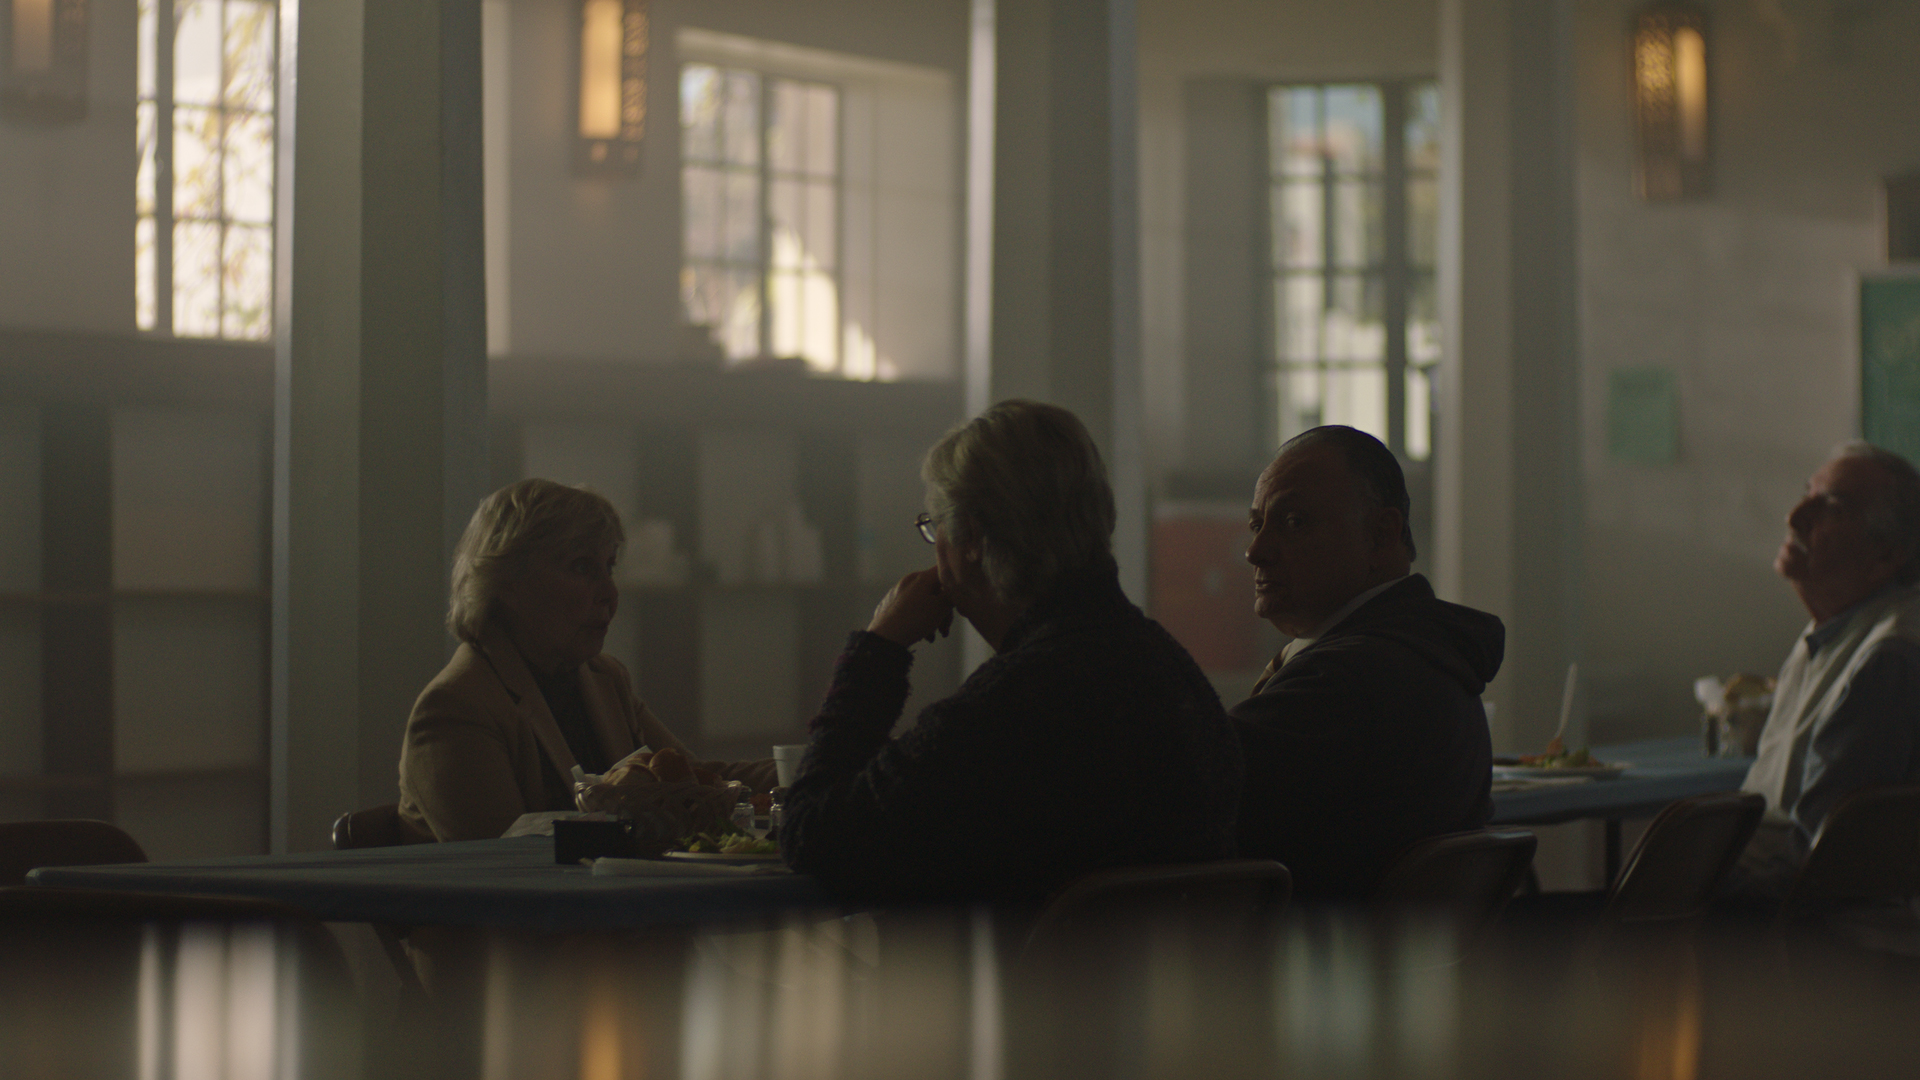
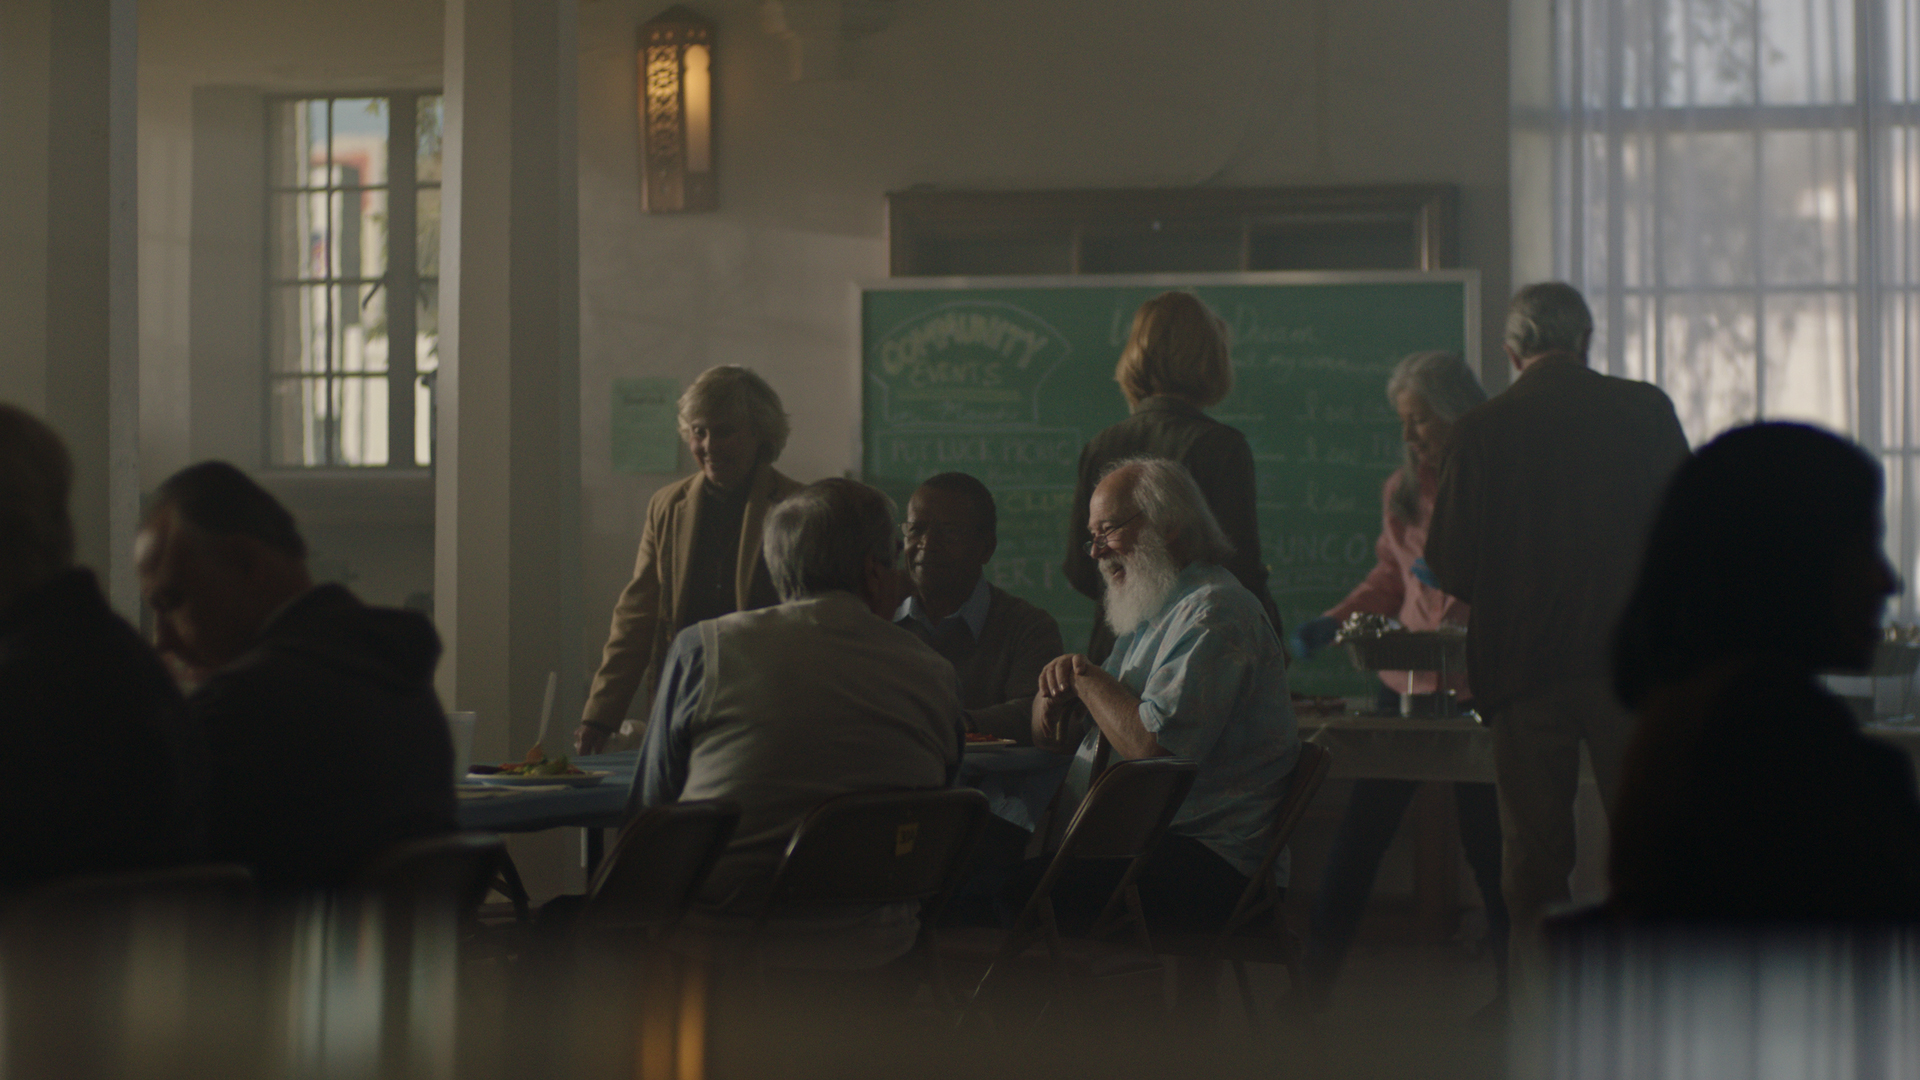
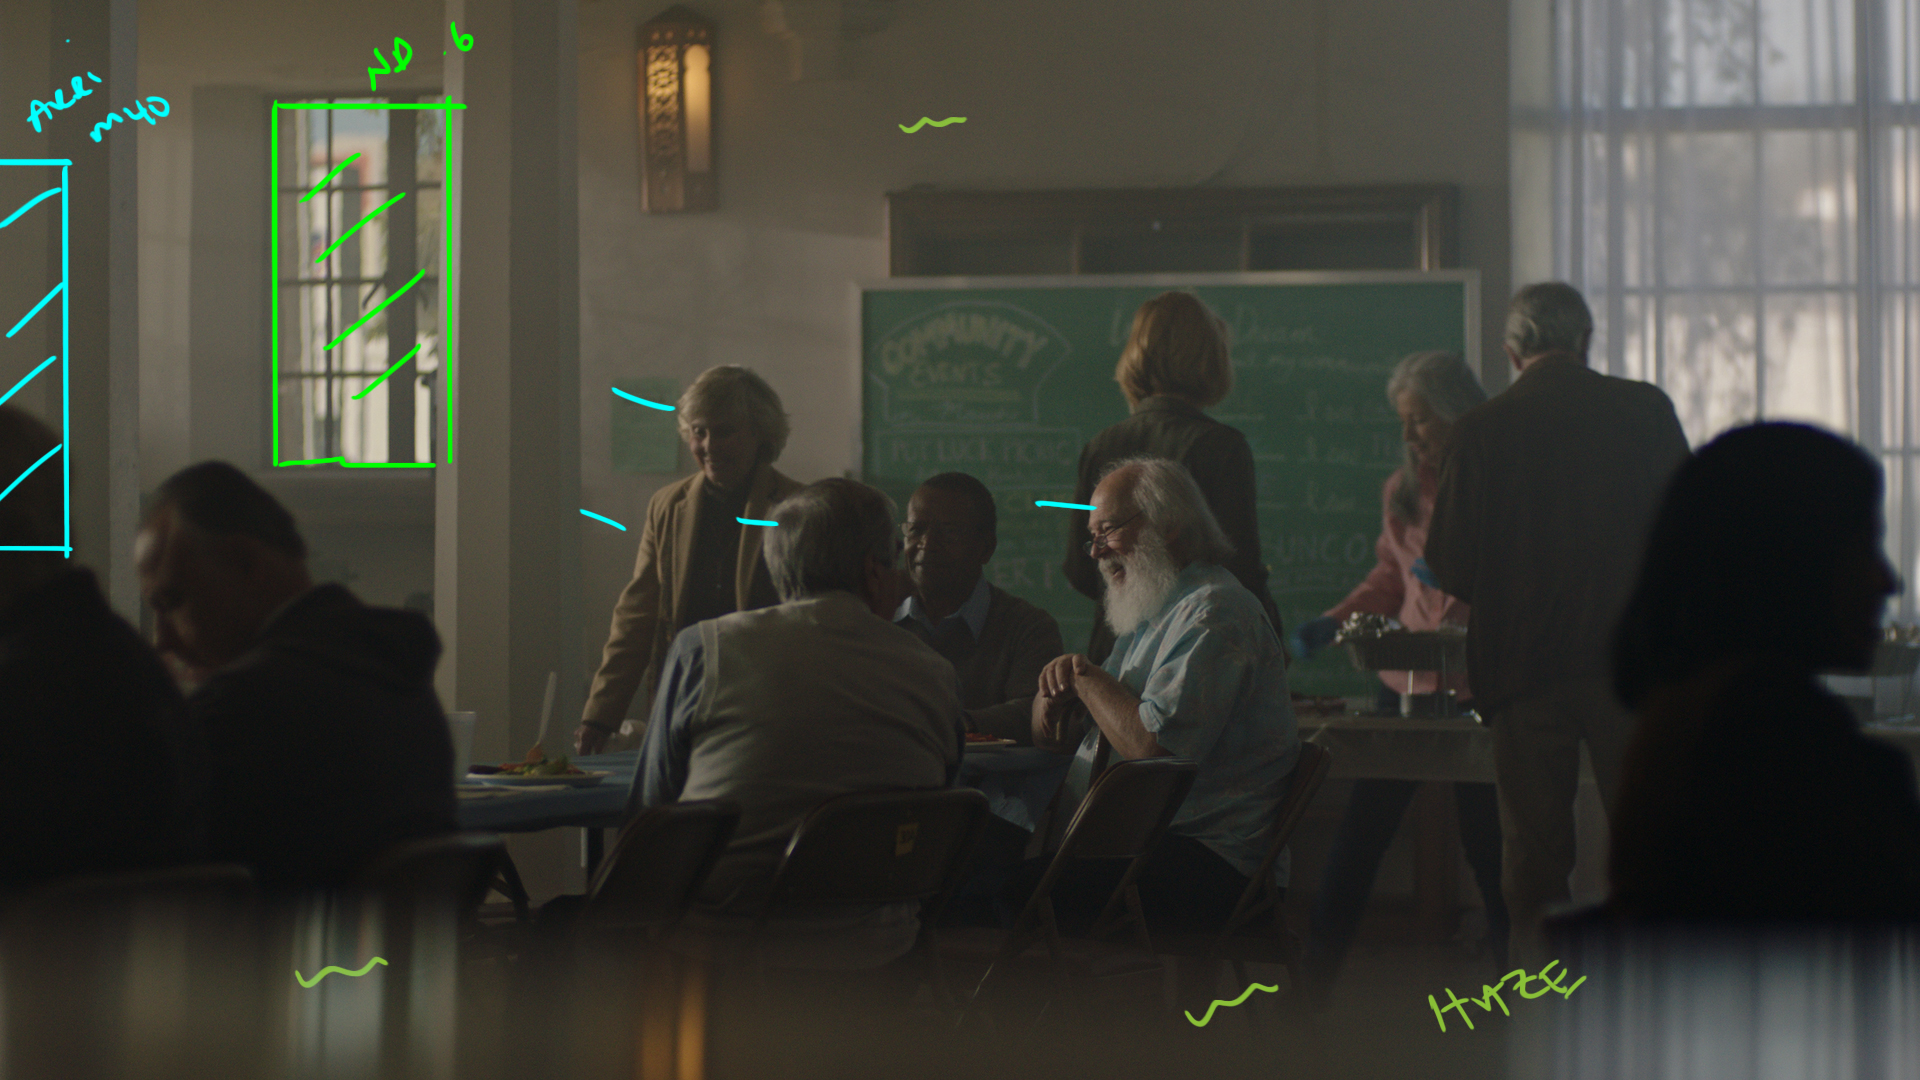
This was the B cam shot during our opening wide. We needed some textural moments of the scene and Jon provided that with a longer lens and using the foreground to dirty things up.
The Lighting
The lighting is the exact same as above but you can also see a window in the BG that we had a roll of ND .6 put on. The roll just goes straight on the window to take down the level coming through by 2 stops.
Everything else is the identical.
The Result
Shot #2 - The Wave
The Shot
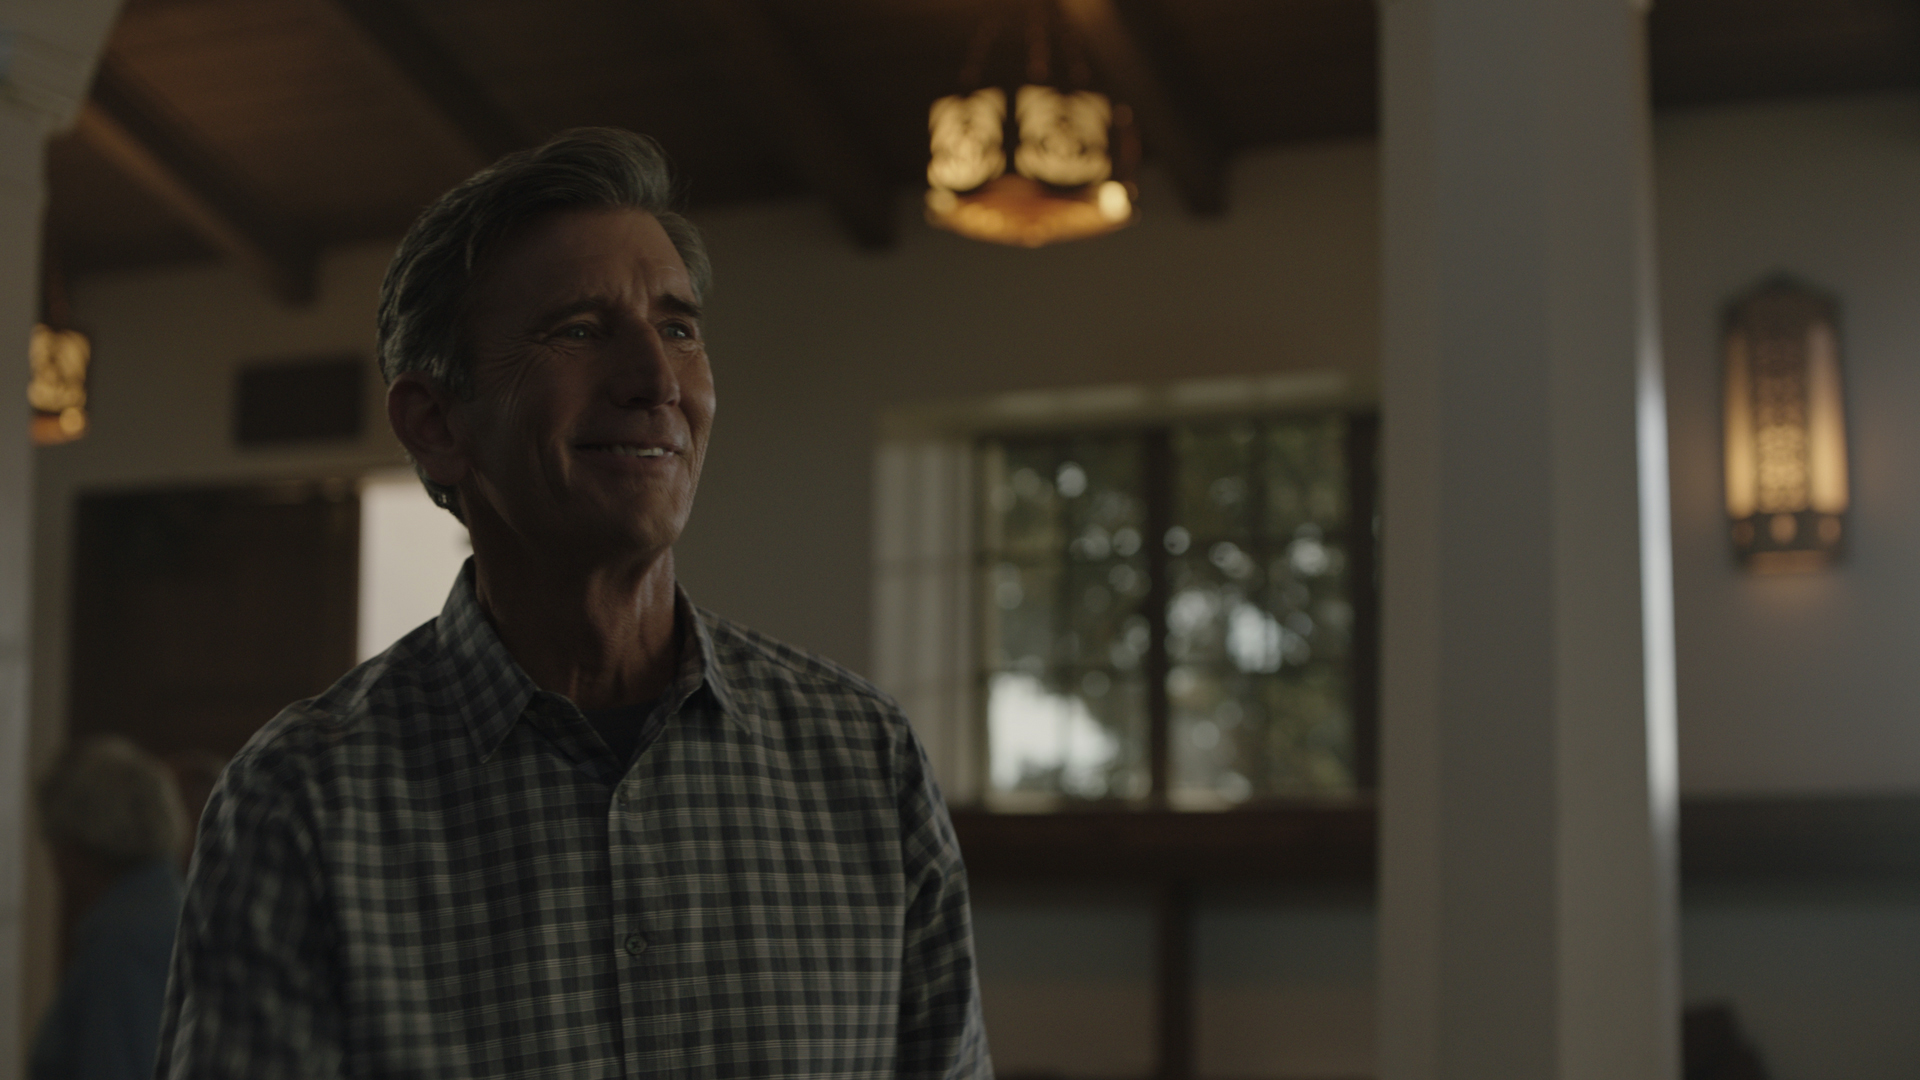
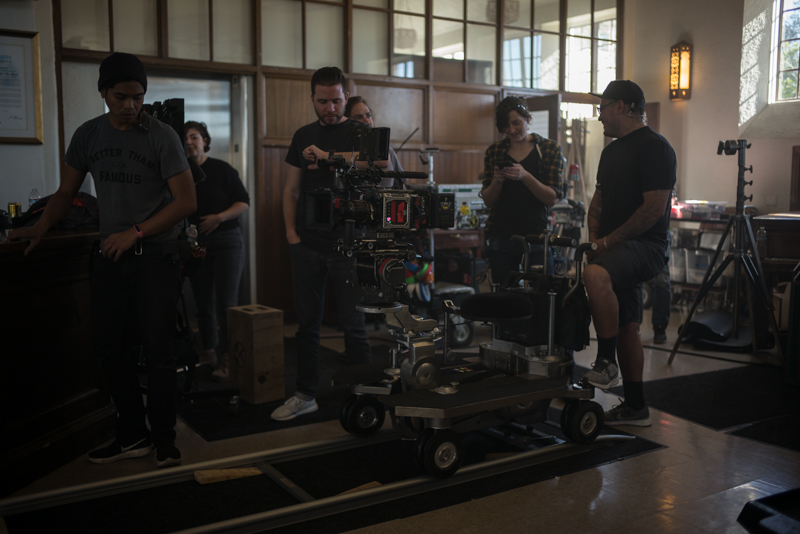
Now our spokesman has seen the person he is set to meet. We needed a shot of him waving to the customer. We set up a dolly track to track alongside the action so we wouldn't go from a wide dolly push in to a static waving shot.
The Lighting
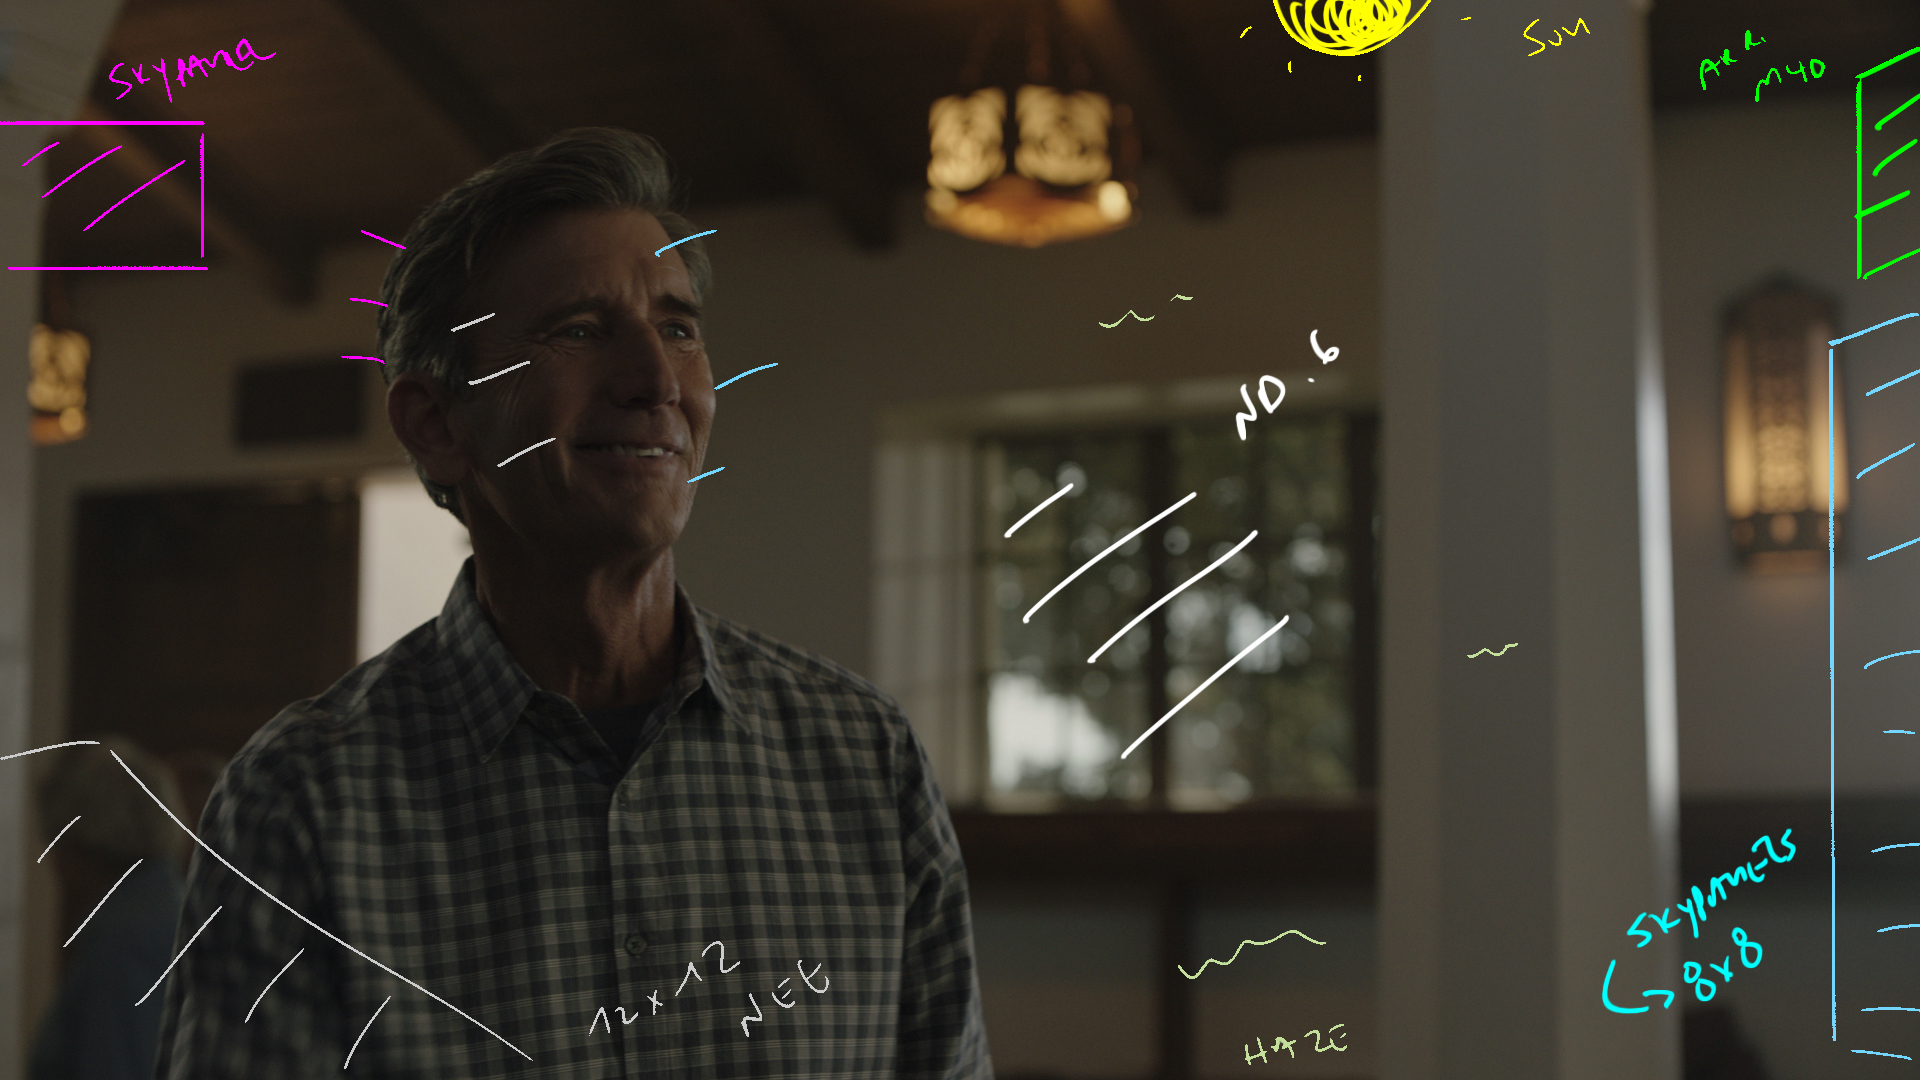
We still had our based level M40s blasting through the 3 windows camera right. Inside we added two Arri Skypanels through an 8x8 with a grid on it to help control and localize the light. The 8x8 was providing the "key light" levels here.
Then we brought in some neg camera left to help add some shape and finally we used the ND .6 gel again to keep the window in the background from becoming to distracting. We also had a 3rd skypanel rigged near the ceiling camera left to add just a hint of an edge.
The Result
Behind the Scenes
Shot #3 - The Walk
The Shot
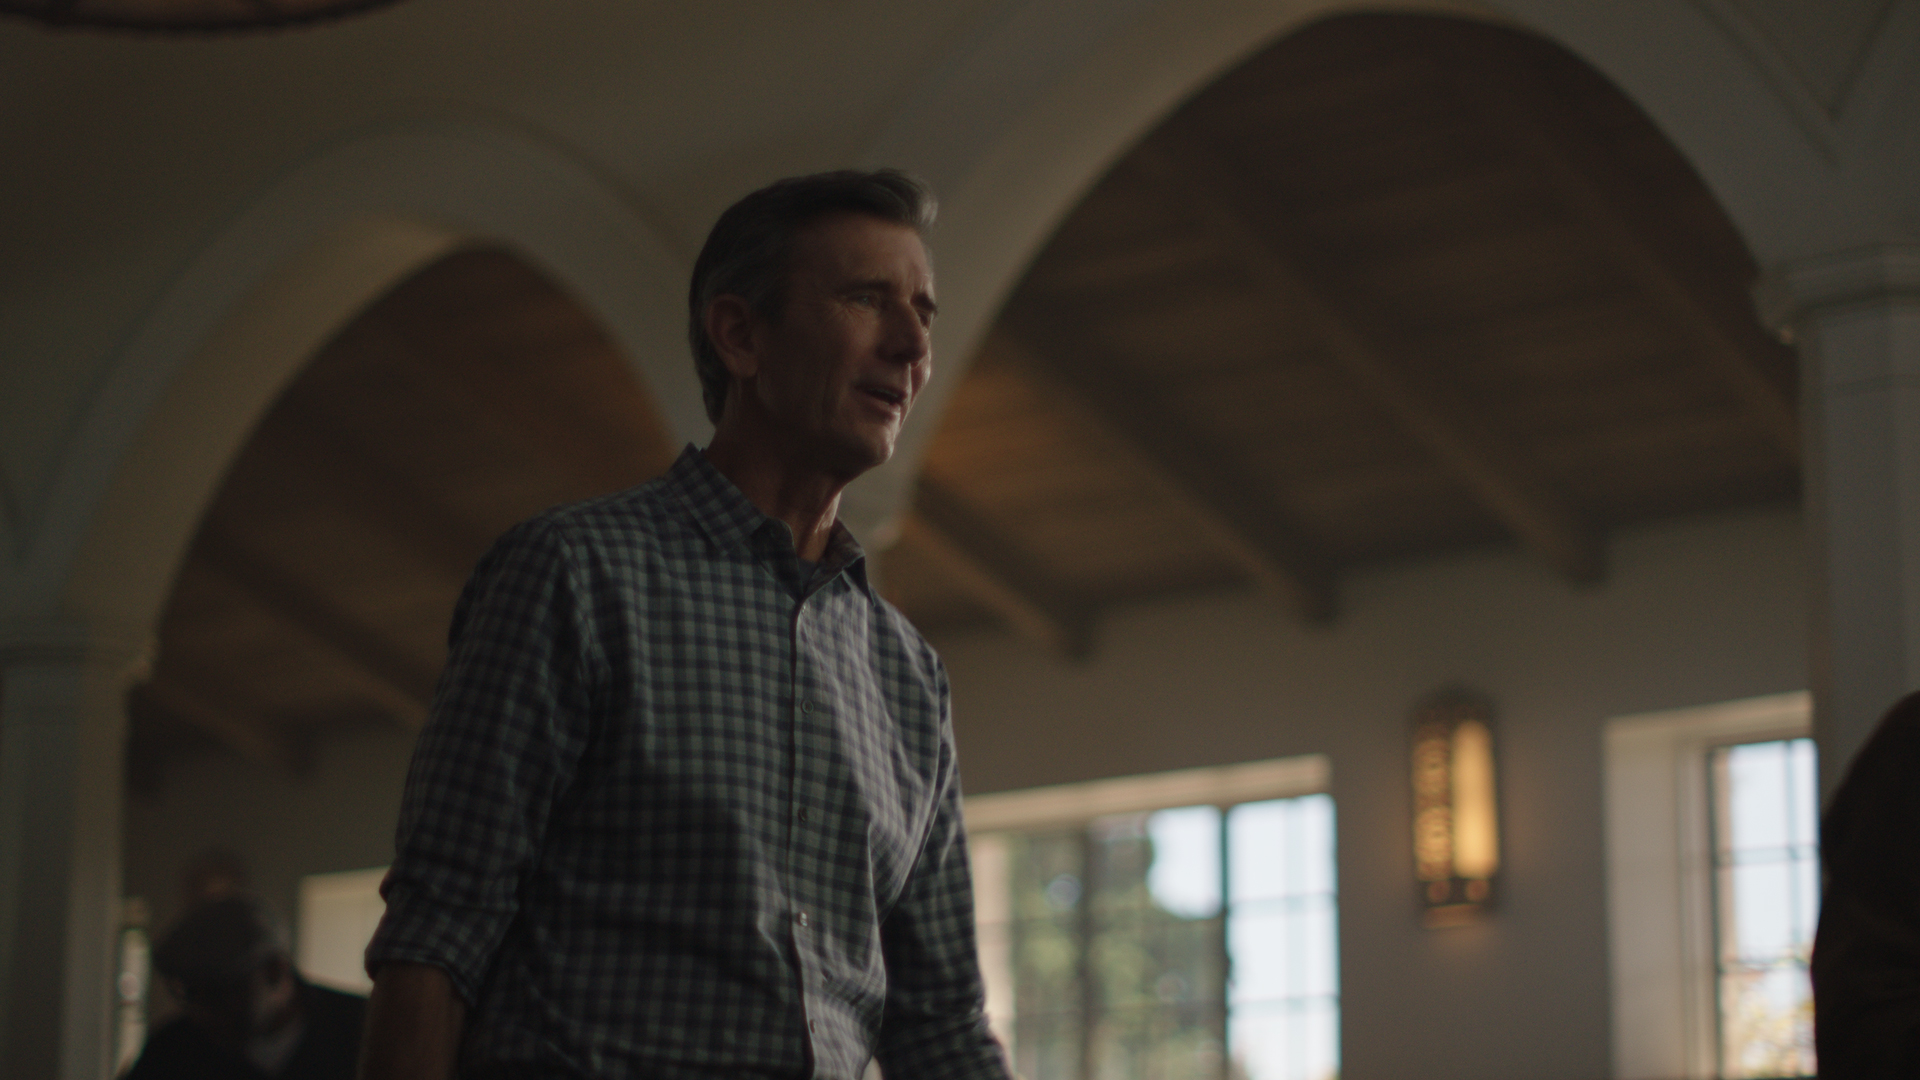
Our main tracking shot was used to get the character from the wave to the handshake.
We set up about 40 feet of dolly track but we knew we only had time in the edit for a few of the steps. We picked our key points and aimed to get the light just right in that zone.
The Lighting
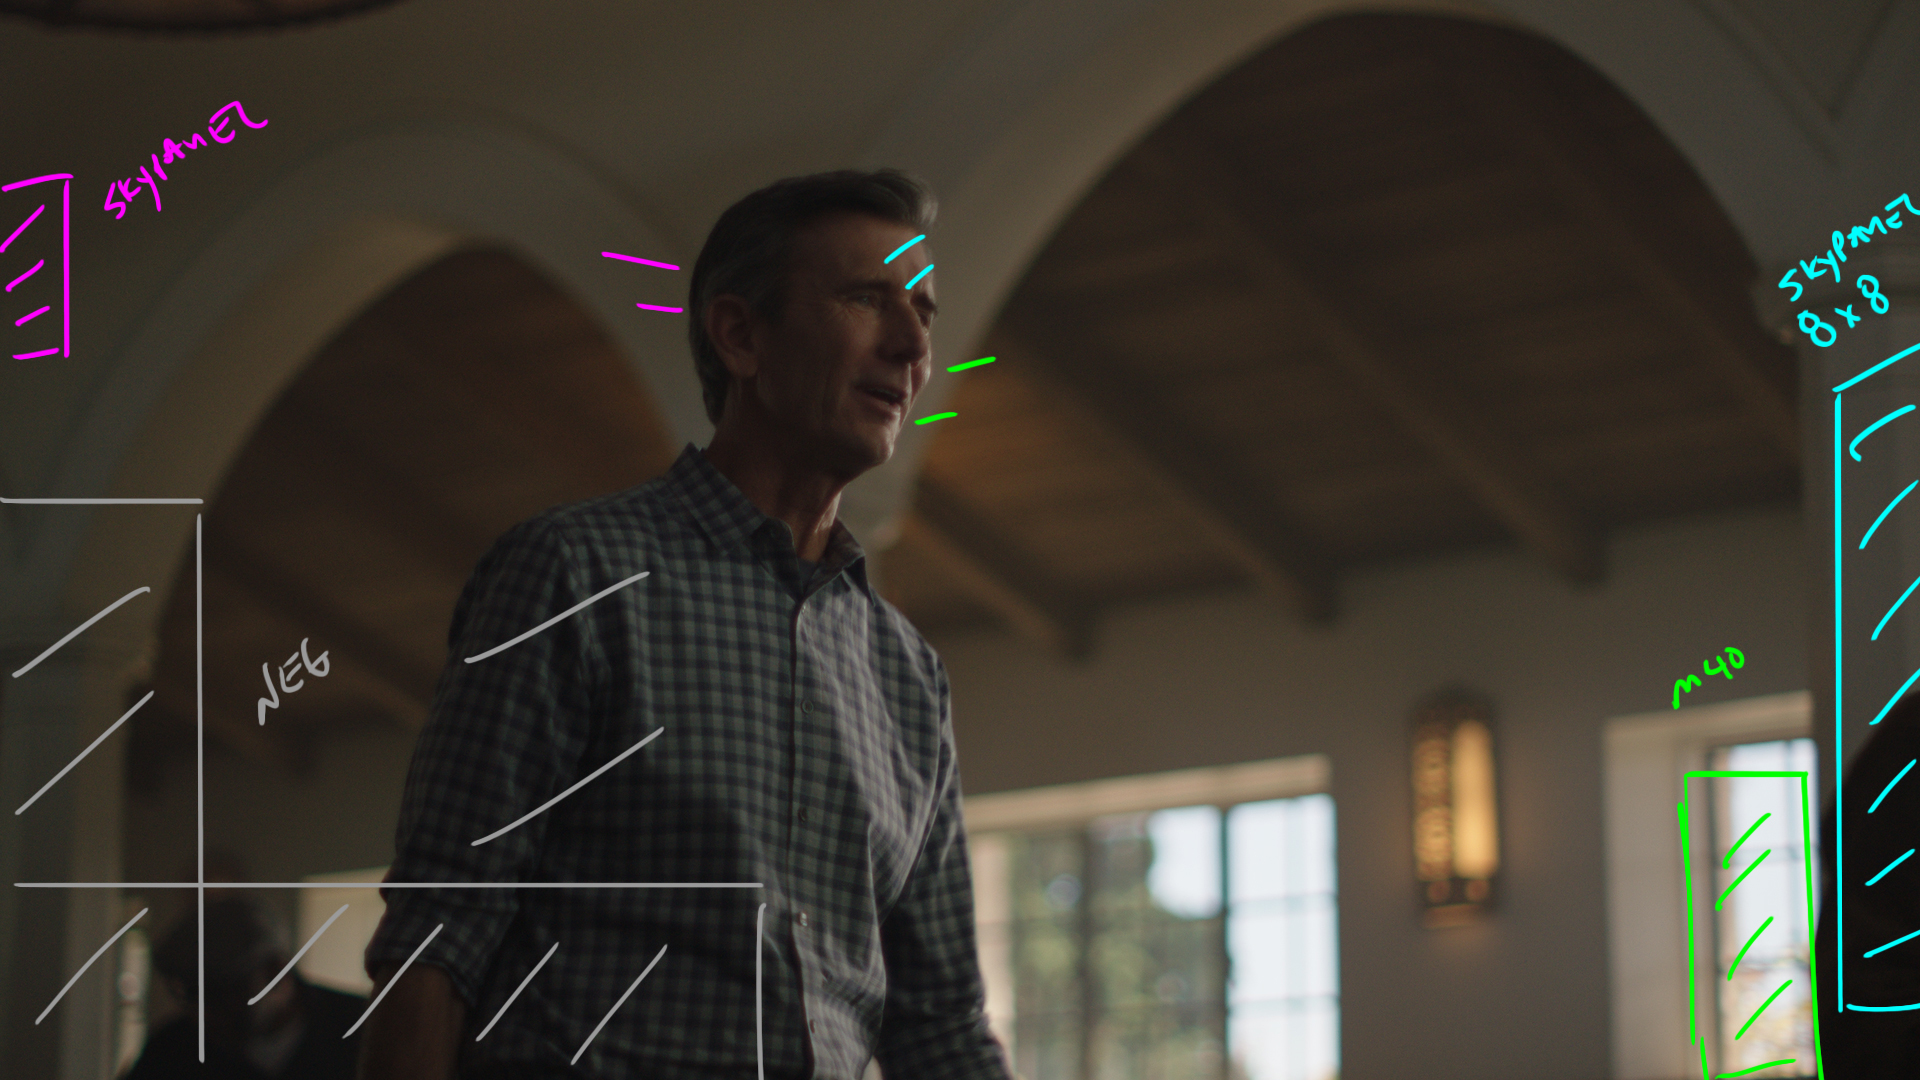
We were shooting at T1.0 on the Ultra speed 50mm here and the focus puller crushed it. You can see how the BG just fades away on that lens.
The lighting was similar to before as we are looking the same direction making sure to shoot into the shadow side to keep that look going.
We moved the 8x8 to be further back and upped the intestity so it spanned an even exposure over the enitre track.
Then we walked in the Neg camera left to make sure we were killing any unwanted fill.
The Result
Shot #4 - The Meet & Greet
The Shot
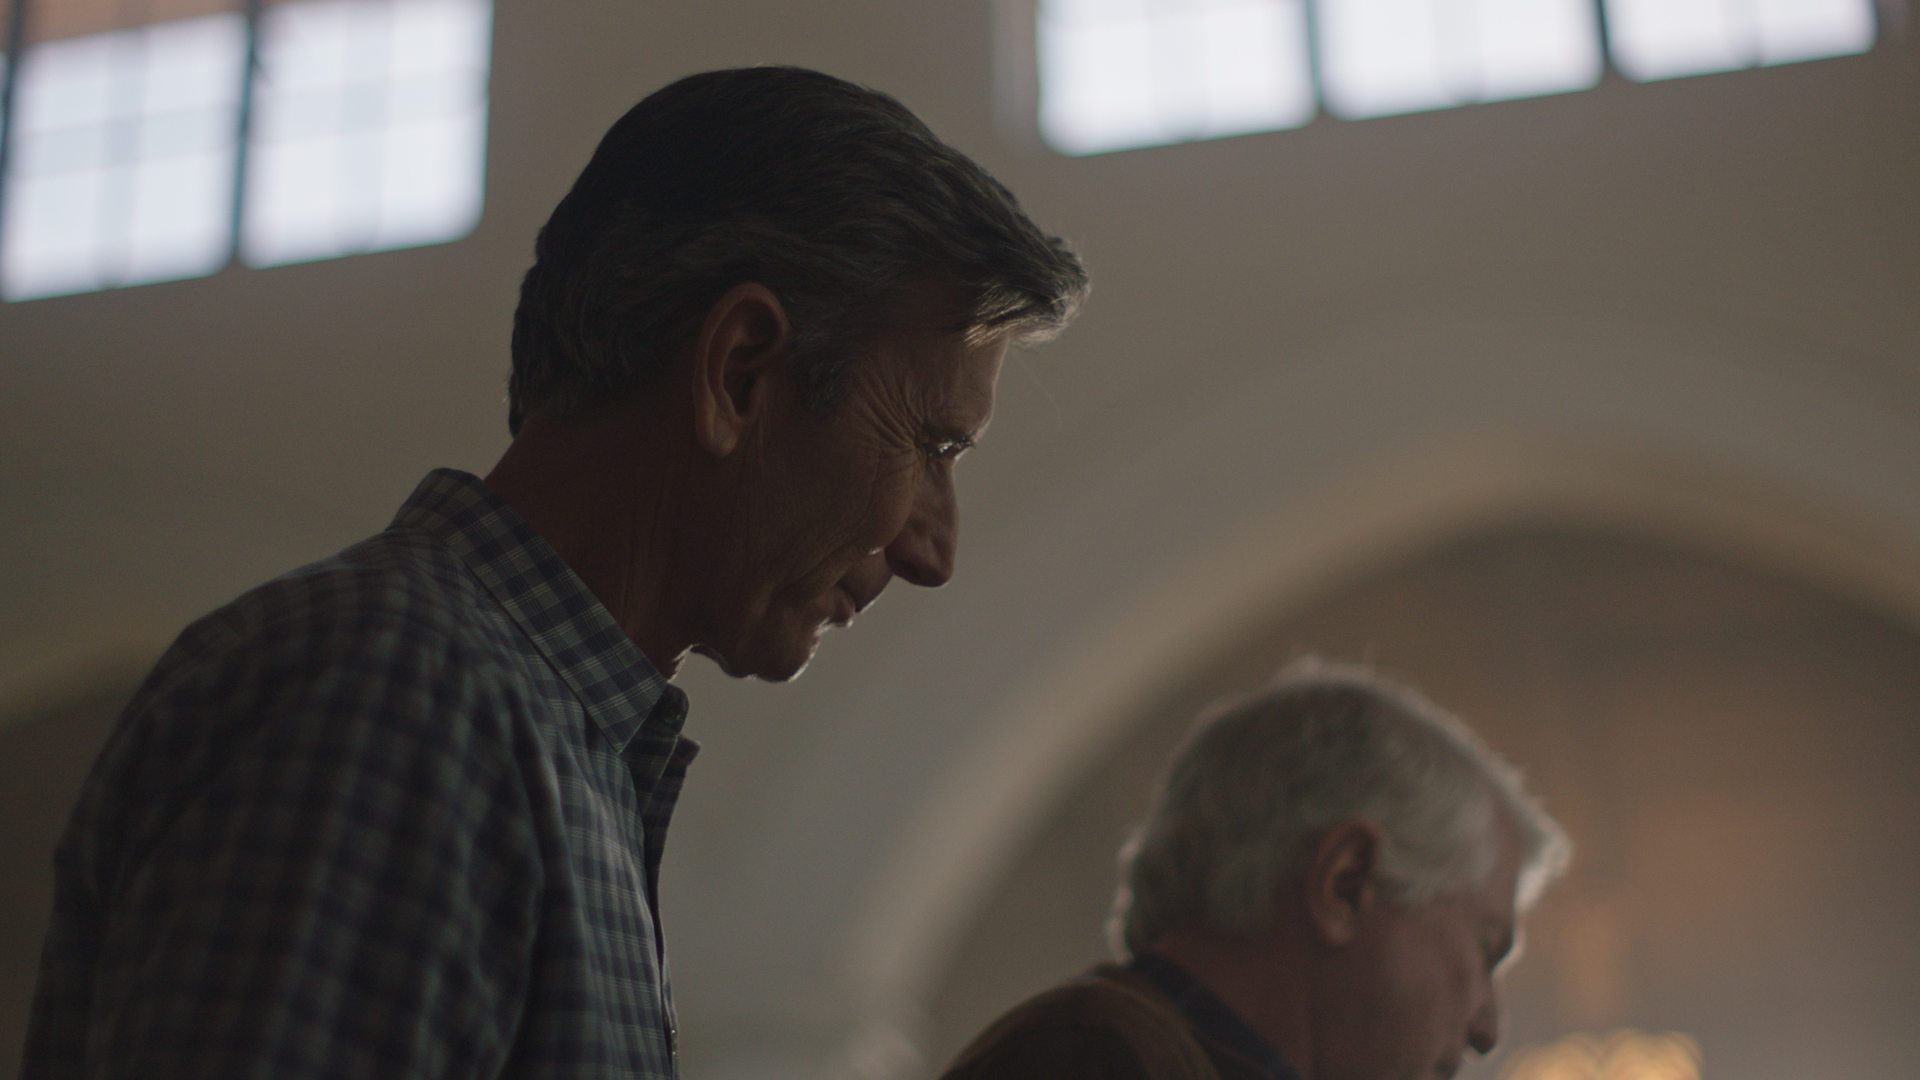
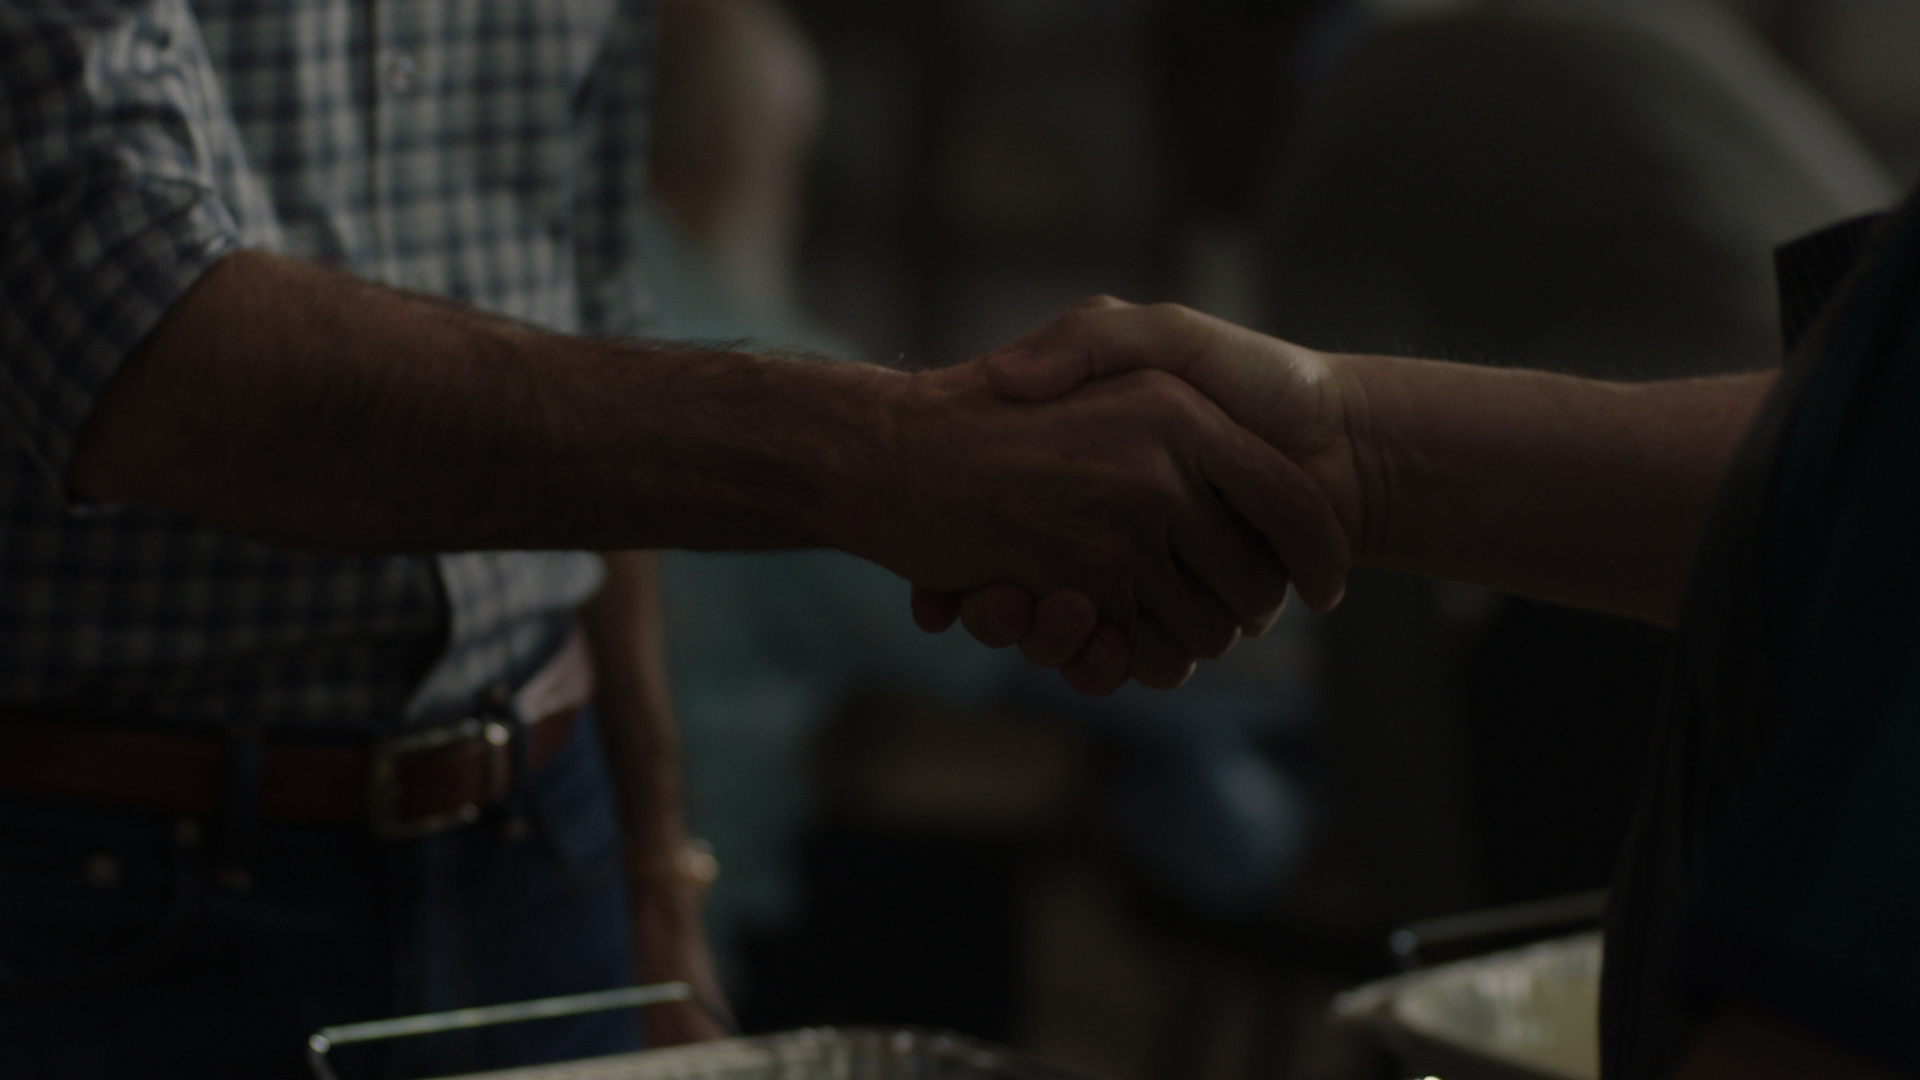
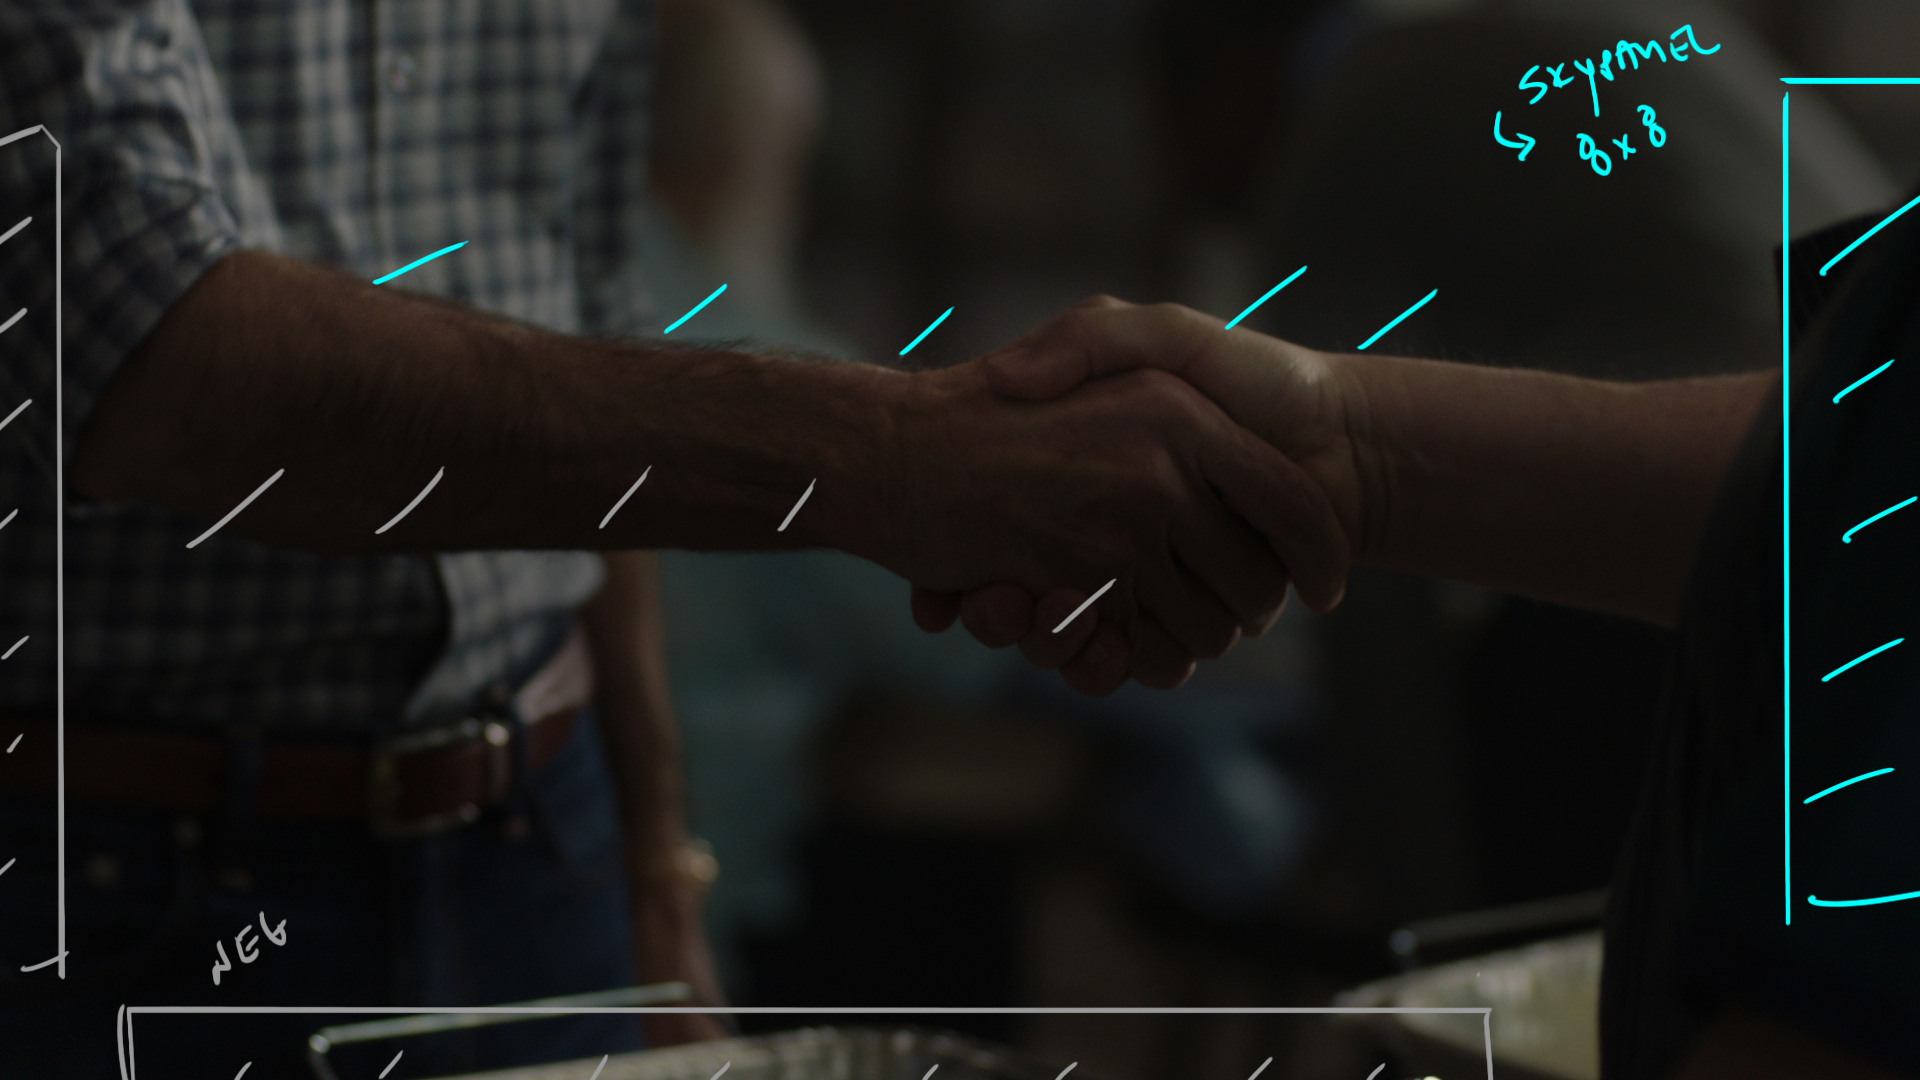
These are our meet and greet moments. The talent say hello and shake hands.
The Lighting
This was all happening right in front of the big window from the wide but because the sun hadn't come around yet we need to BYO source.
We again used the skypanels through the 8x8 and adjusted the angle to fit in the space. The haze helps cut the contrast with the BG windows and the Alexa does a great job with the dynamic range to make sure everything holds well.
The Result
Shot #5 - The Sit Down Wide
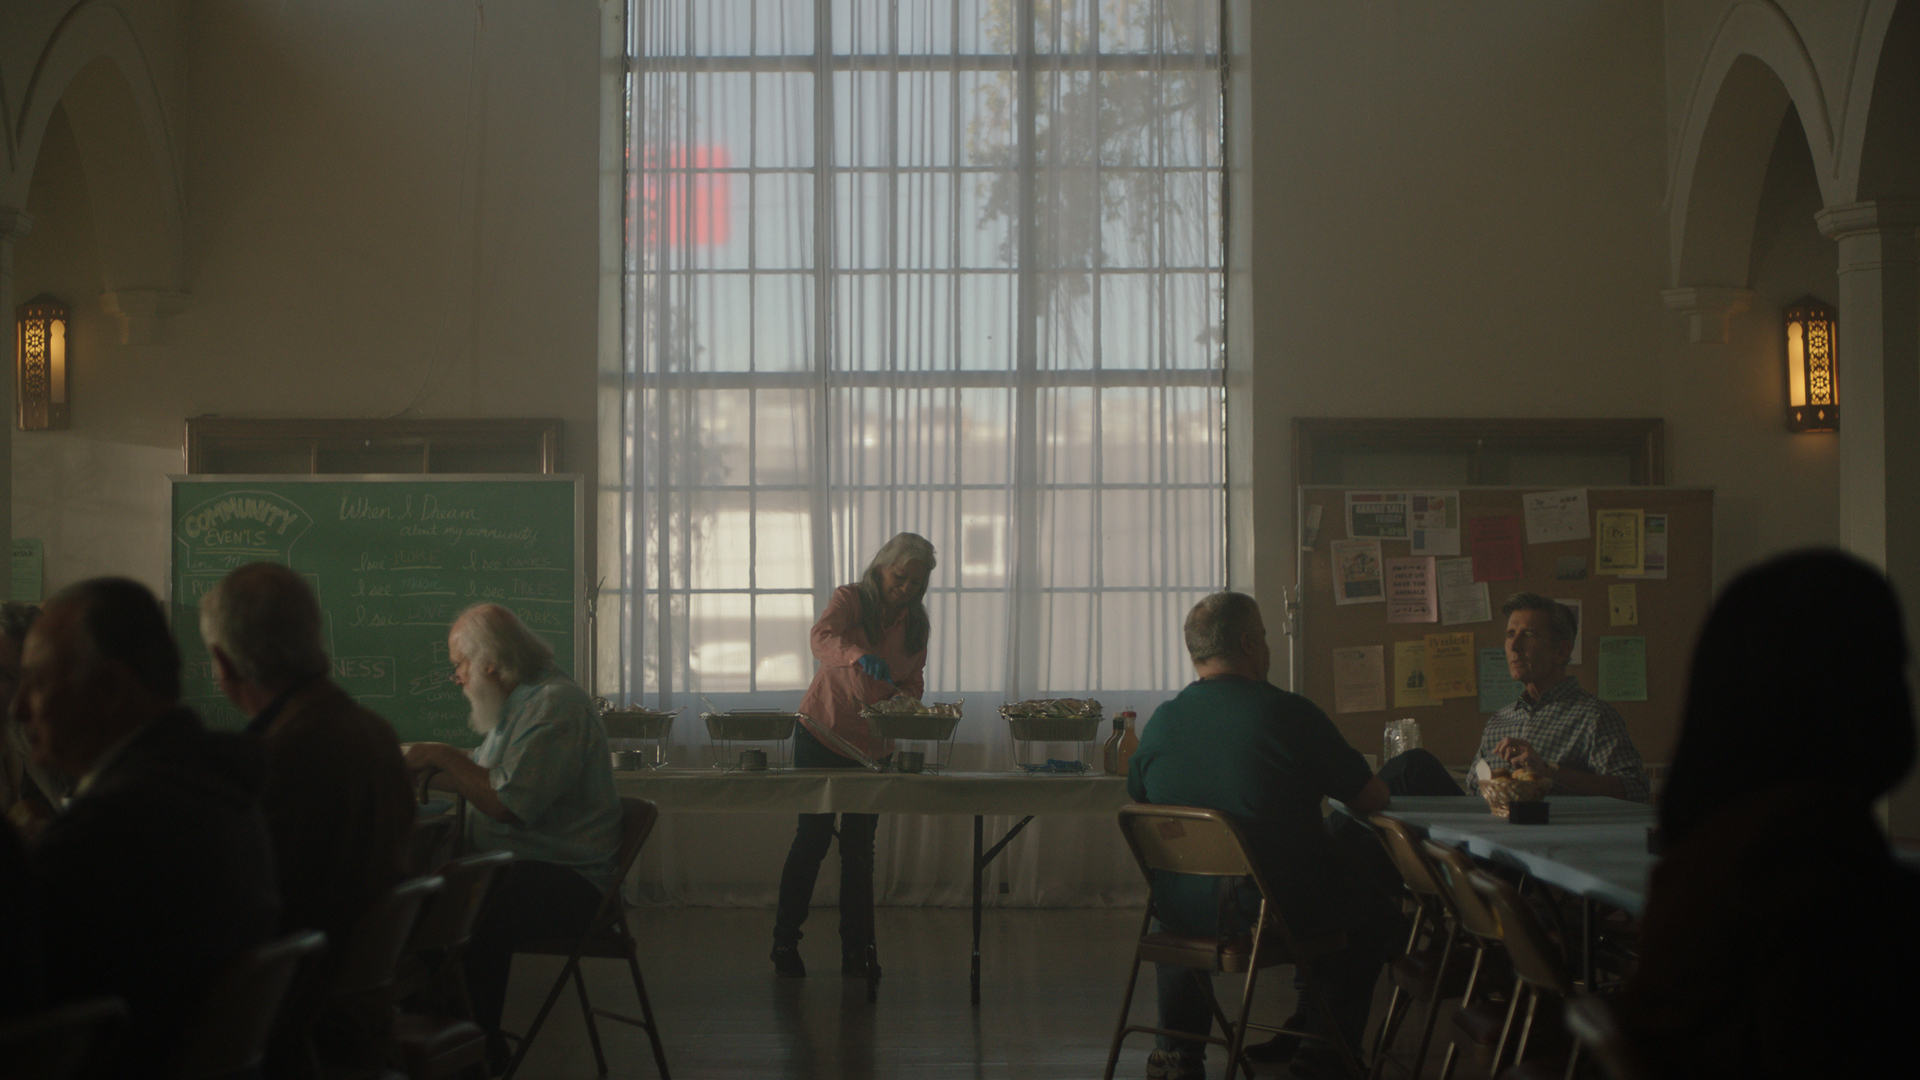
The Shot
Similar to the wide shot but we are slightly closer in and we wanted to see where the conversation between the two would take place.
We chose that table as it worked for the BGs on both of the mid shots we were about to do and because the angle worked for the wide.
The Lighting
The lighting is identical to the first set up. The one difference you can spot is the intensity of the sun outside has picked up and the building in the BG is getting hotter and hotter by the minute.
The Result
Shot #6 - The Conversation
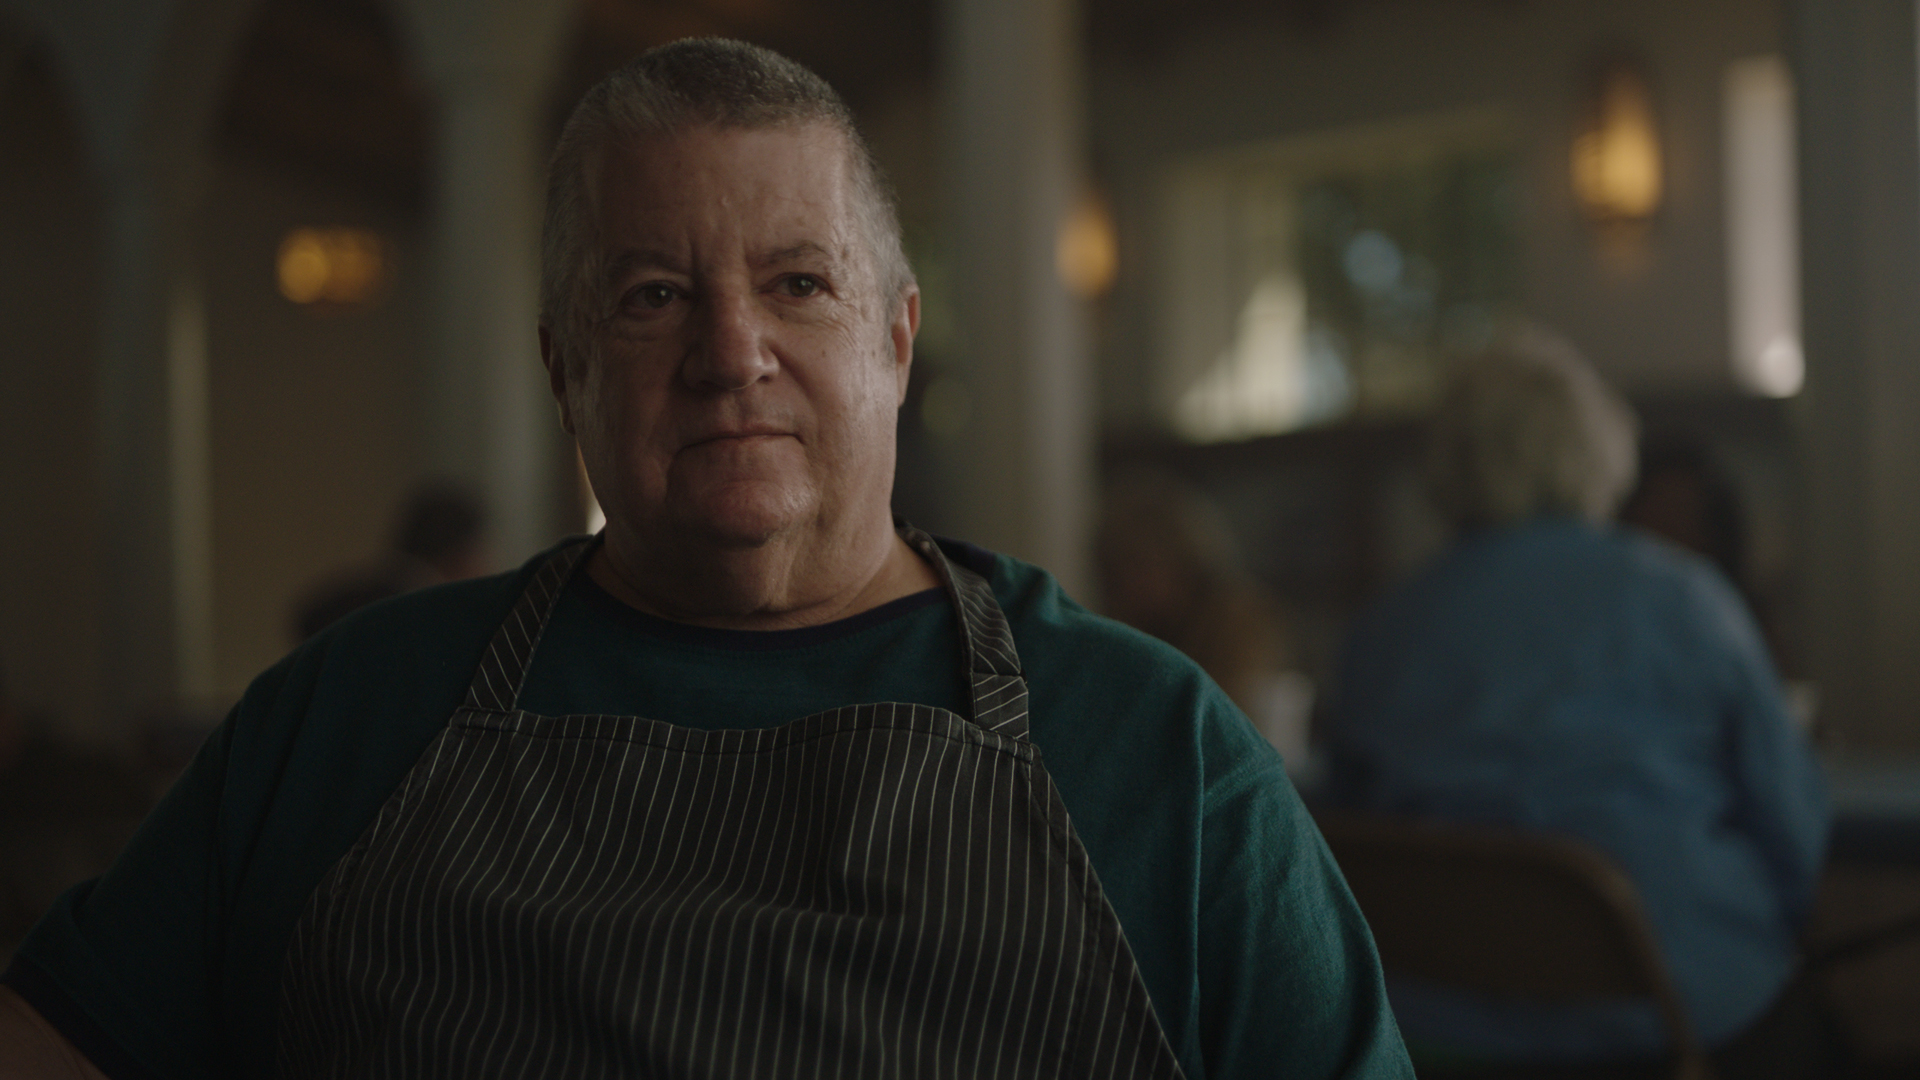
The Shot
Now we are in to the money shot of our talent. The two people have a conversation and we needed back forth medium shots.
The important thing for this shot was carrying over the look from before lunch here in the later hours of the day.
The Lighting
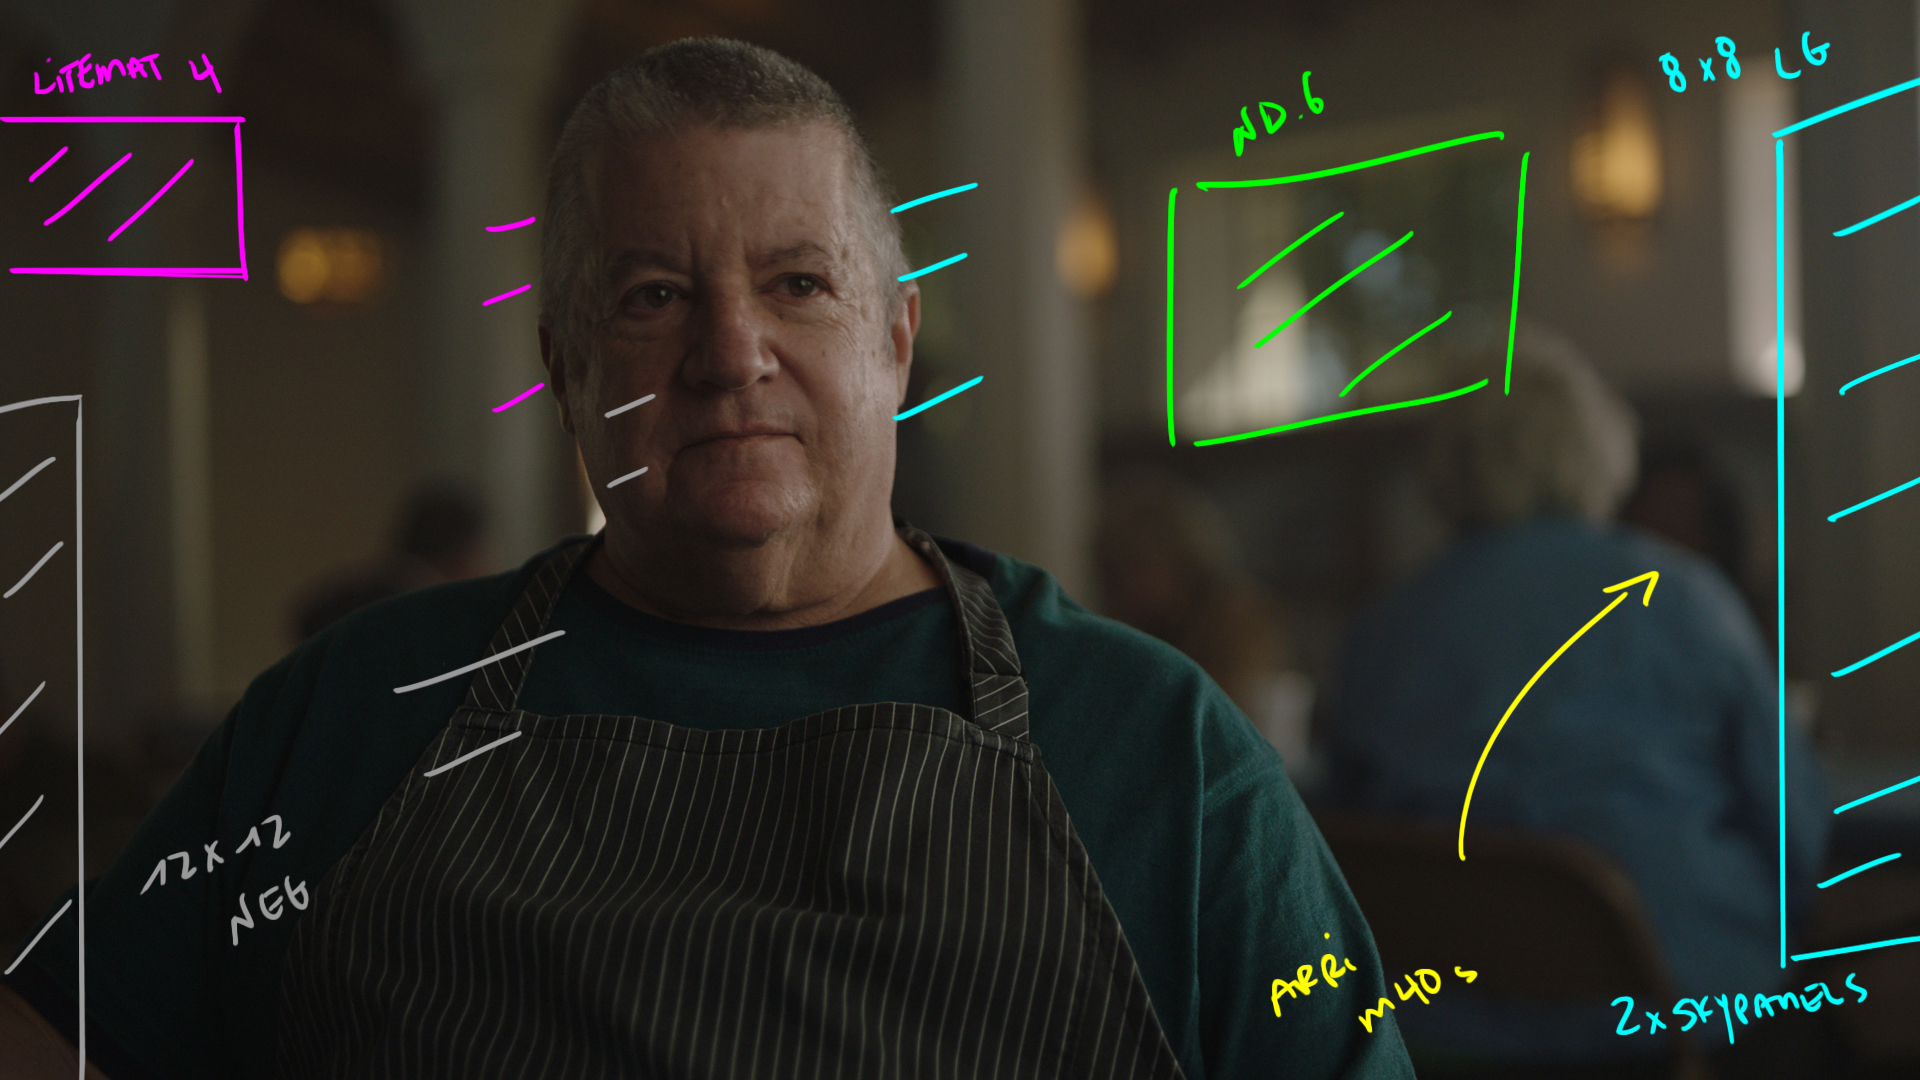
We used the 8x8 and skypanels set up to act as the key, with a little bit of level help from the Arri M40s outside. Then we brought in the neg to hel get the contrast right on camera left.
To seperate his fill side for the dark BG we used a Litemat 4 just off screen camera left and dimmed it way down. That just gave us a bit of an edge.
In the BG we had the haze going to help keep it moody and once again had .6 ND on the visible window.
The Result
Behind the Scenes
Shot #7 - The Reverse
The Shot
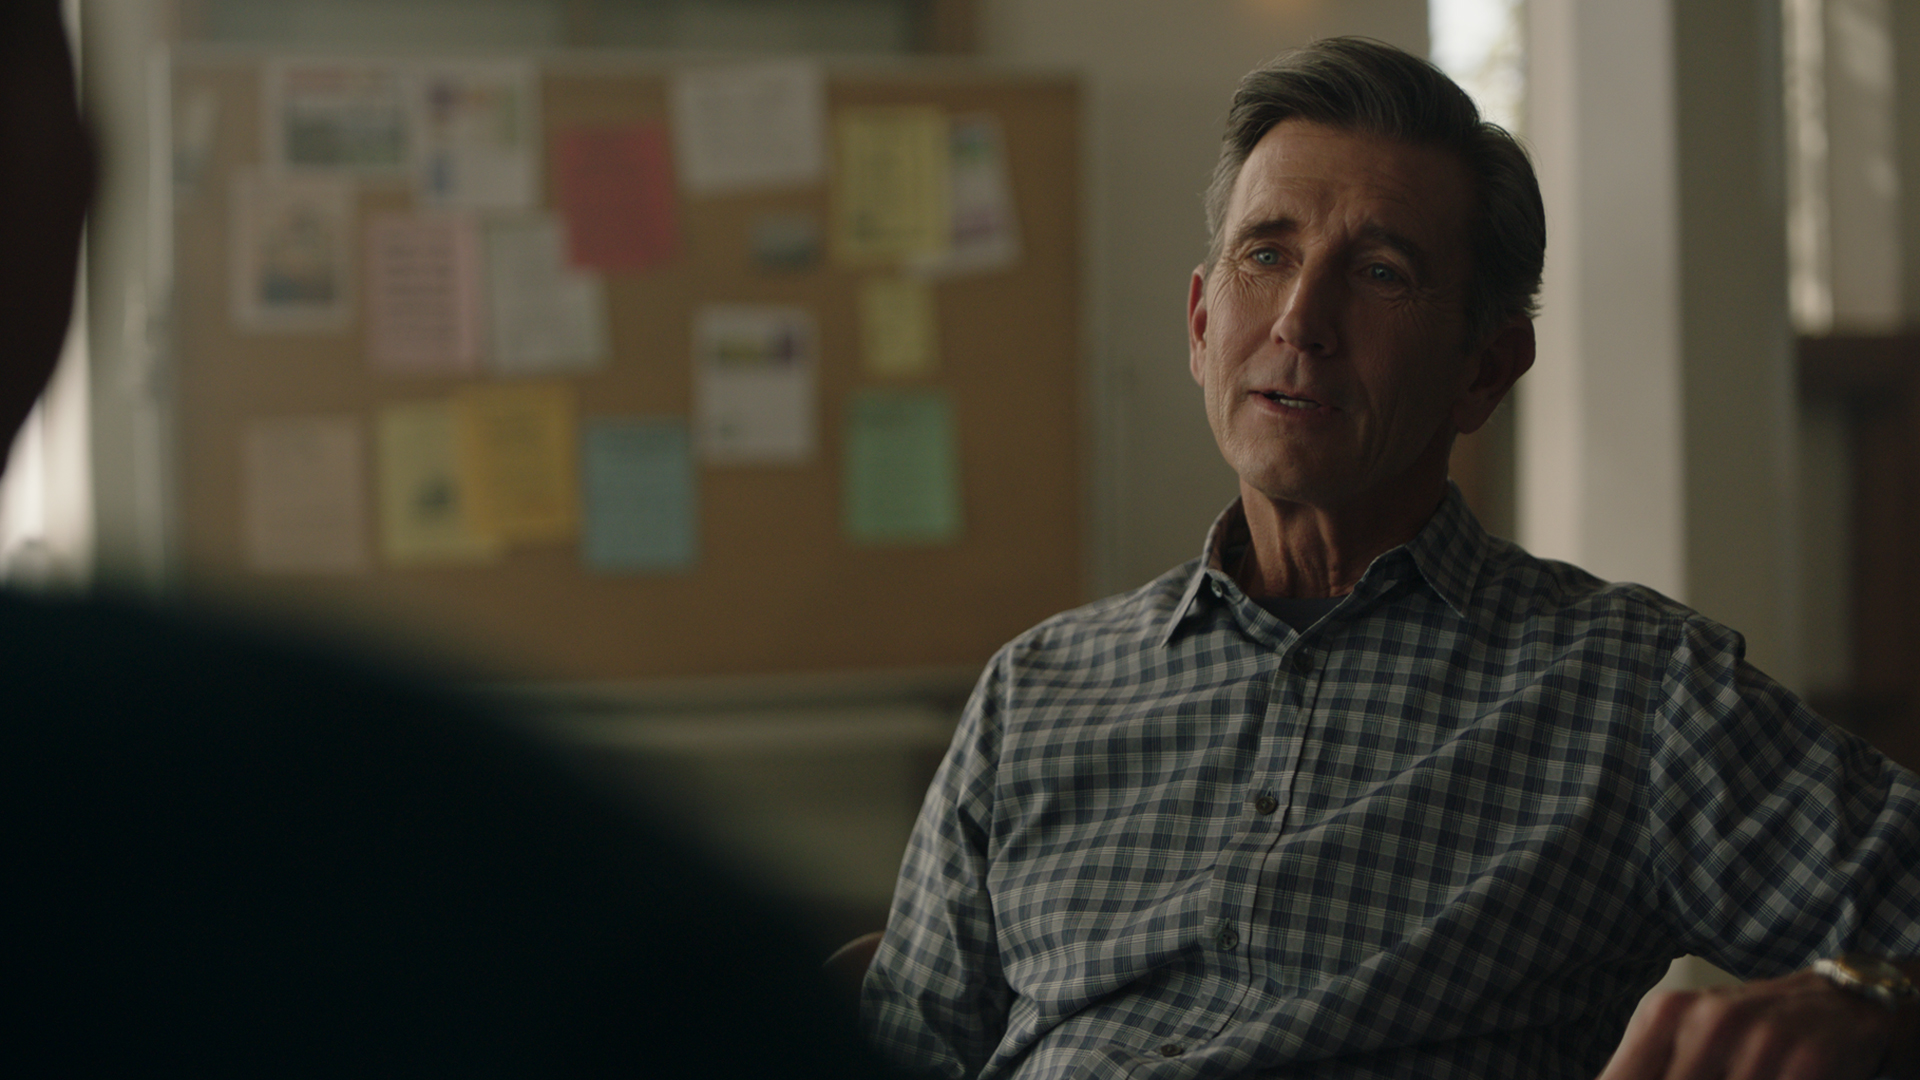
The reverse angle of the previous shot.
The Lighting
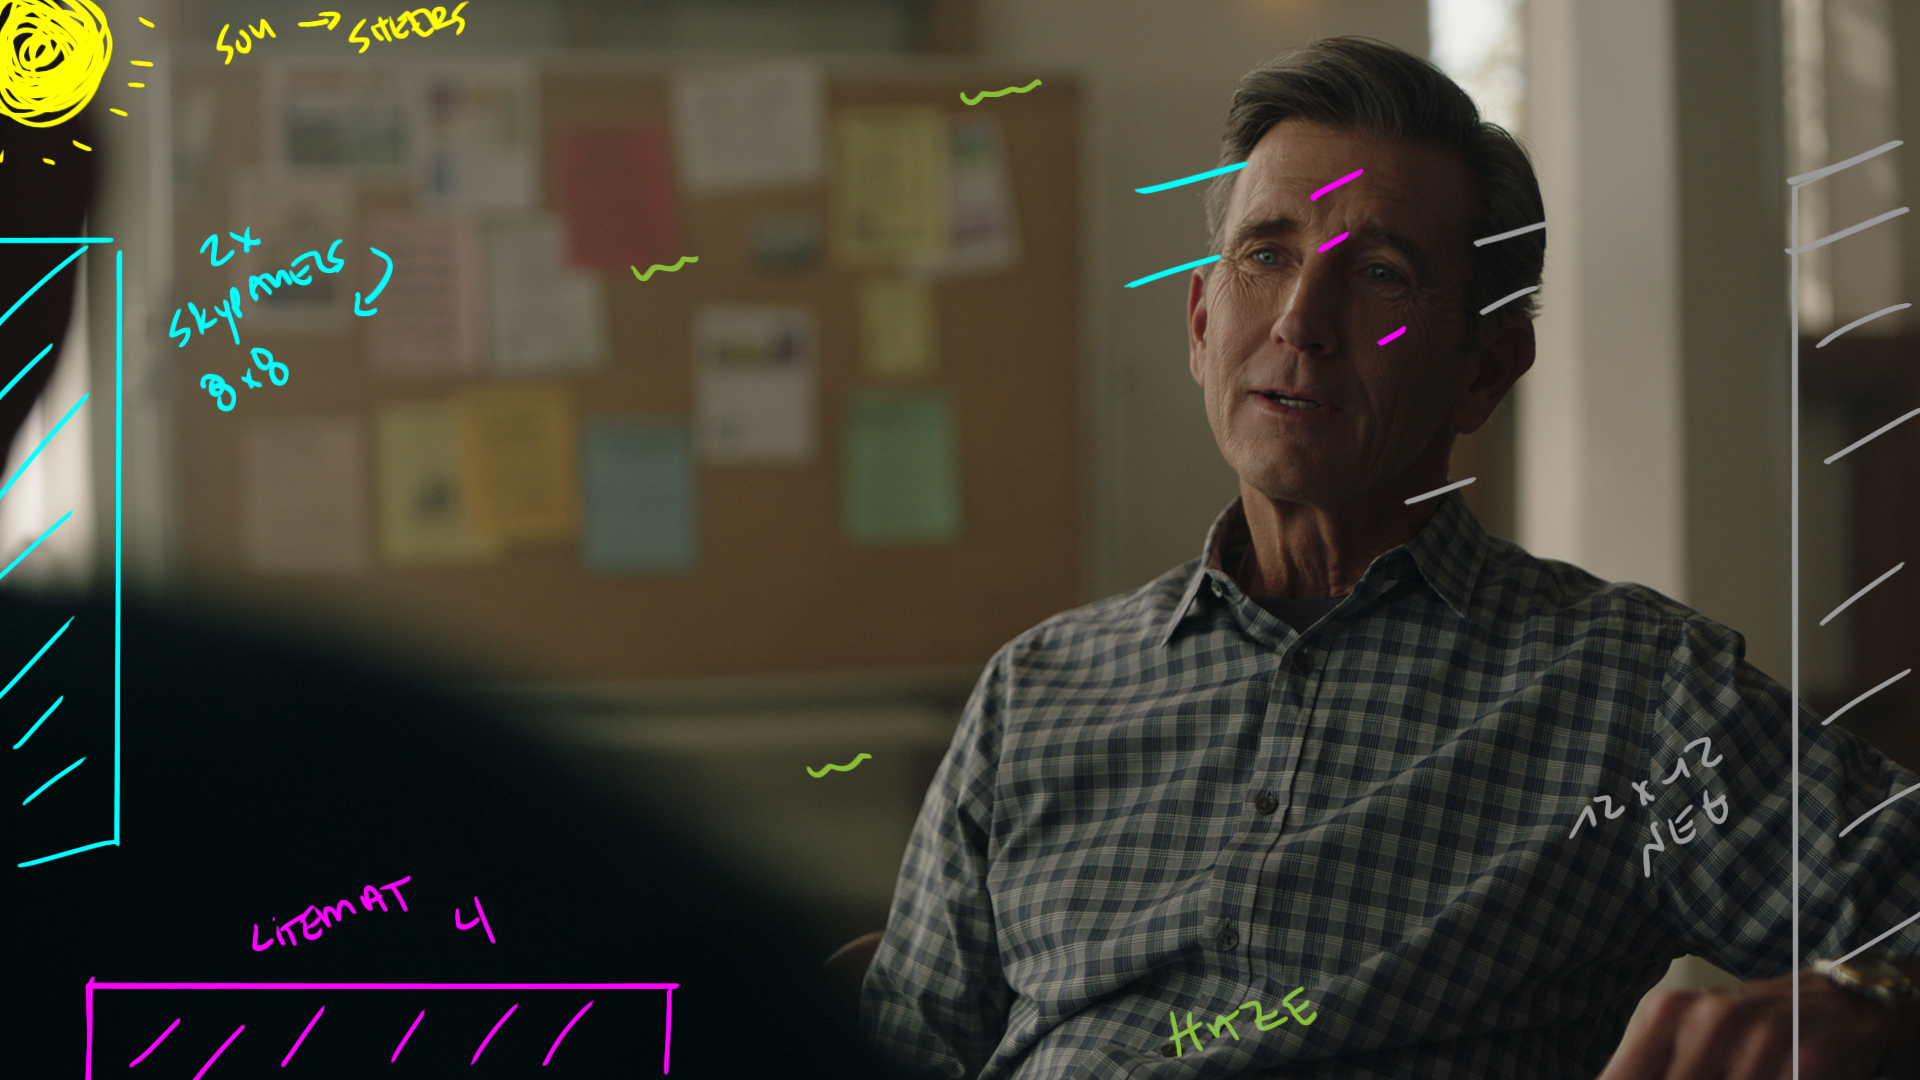
We were shooting two cameras in two opposing diorections by this point and this meant we had to slightly alter our lighting approach.
Shooting two angles means you need to keep frames and lights out of each other's shots.
Here we had the 8x8 providing the key level for both people but it needed to be at an odd angle to cover everyone so we had to add a Litemat 4 just above the camera to help fill in some of the darkness on his fill side.
The BG was also getting hot as the sun began to peak through so we added some localized diffusion to help keep it down and consistent with the look we got in the morning.
The Result
Behind the Scenes



My buddy got married at this location a couple years ago. We changed out every CFL for tungsten bulbs before the wedding. #itsnotajobitsalifestyle
Fantastic images man, really well shot as usual.
Love that you’re able to provide such an insight into these shoots – keep doing what you’re doing mate, you’re helping a lot of people!
Cheers