The show today is all about lighting inside of a moving car. Car lighting is always tricky and when you are low on resources it is even more challenging.
In our case study today we look at how to light when you have to hard mount the camera to the car and also how to do it if you find yourself on a low loader. We look at day example as well as a night exterior example.
Patreon: The Live Stream Version 2.0
While the new studio is being fitted out there is a pause on the old version of the live stream. This week we will continue with version 2.0 which is a screencast version of the show.
Tune in LIVE on Thursday @ 7PM PST to see the breakdown of Patreon users content.
We look at the work, discuss the lighting, and try and work out any mishaps that may have occurred on the shoot. By taking a strong technical look at the images it hopefully will give everyone some ideas on what to do if they are ever in a similar position.

If you are a fan of the podcast and want more video content the patreon group is the place to be. Each and every week I release an exclusive podcast, video, or live stream just for the Patreon members.
Patreon members also get access to the Private Facebook community for the show. The podcast couldn't exist without the Patreon support and I do my best to take care of the supporters.
Car Lighting: Maximizing the Budget

This was a B team job which meant I saw none of the locations/talent/vehicles before I showed up on set. Another cinematographer was originally slated to shoot the project but at the last second they had to pull out and yours truly filled in.
The lack of preproduction time meant we would have to be solving all of the problems on the go.
Camera Gear:
Check out the gear I use on all of my commercial shoots by clicking the link below:
Wandering DP Commercial Cinematography Gear
The only kit not listed on that page is the set of Cooke Anamorphics.
We had small set for the wider end of things with the 25, 32, 40, 50, and 75mm focal lengths. The 32 and the 50 ended up being the hero lenses.
Lighting Gear:

For the day stuff we used an 8x8 solid frame over the car and some smaller fixtures in and around the car.
We had one Arri Sky Panel for a little bit of extra window push and then an Icelight for eyelights inside the vehicle.
For the night time shoot we added two Area 48s to the Sky Panel and a few micro LEDs for various points around the vehicle. No big lights or generator and only a gaffer for the lighting department.
Car Lighting: The Set Ups
Shot #1 - The Wide
The Shot
Our opening car shot set the mood for the entire spot. We back lit as much as possible through time of day, road choice, and camera angle.
The Lighting
The 8x8 solid over the hood of the car took a lot of the toppy ambient light away and then the rest was done by the car's position to the sun. On the fill side of the car we negged as much as possible to help maintain some contrast.
The Result

Shot #2 - The B Cam Angle

The Shot
This was the B camera shot of the previous lighting set up.
The Lighting
We used the exact same set up as above as this was the B camera angle for that set up.
The Result

Behind the Scenes
Shot #3 - The 3 Shot

The Shot
We took out some ND and stopped down a little to get more of the car interior in focus. The appearance of the policeman in the back seat was the main reveal for the ad.
The Lighting
We chose a part of the road with the most side light and then added a sky panel camera left to help push more light into the vehicle.
On the driver seat we placed a white bounce sheet to help carry the sky panel light further into the cab.
Finally we used an ice light attached to the roof to help as an eye-light for the policeman.
The Result

Shot #4 - The Close Up

The Shot
In tight on our main character.
The Lighting
With the camera in the same position as before we added a +1 diopter and panned left to frame this shot up.
we brought the neg from camera right in as much as possible and then used a part of the road that gave us just the right amount of edge light seeping through the car window.
The Result

Shot #5 - Coming Around

The Shot
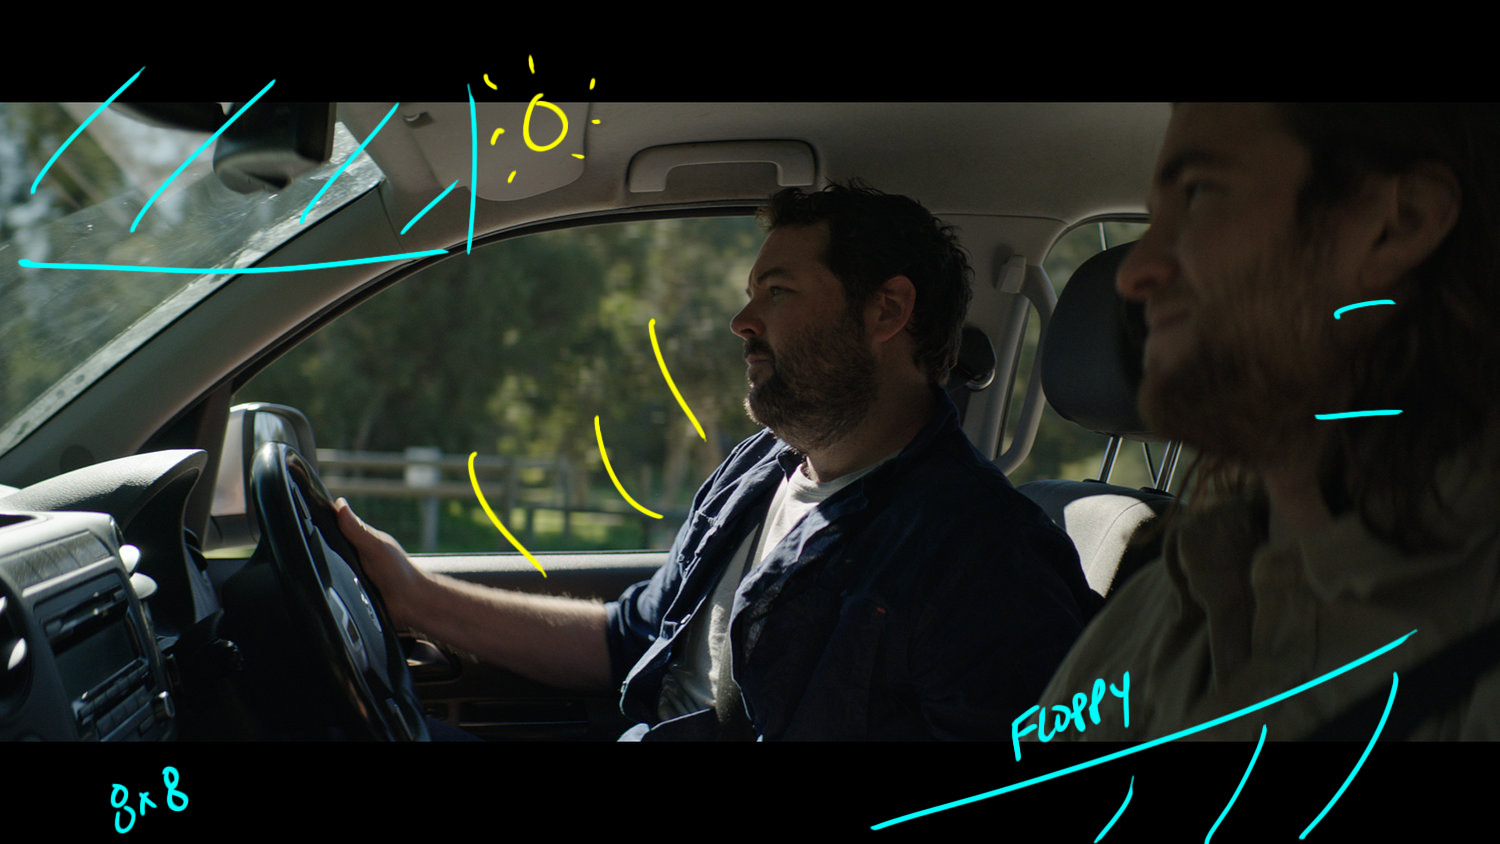
The last shot of the day during the daytime scene. We were running out of light quickly and had to move fast to get this shot off.
The Lighting
The two talent in the car are being lit by the sun through an 8x8 of hi-lite while the policeman is being lit with the sun through something lighter like a shower curtain.
On the camera side of the image we added neg in the form of 2 4x4 floppies.
The Result

Shot #6 - Car Light: The Night Time Look

The Shot
Our matching night shot of our talent driving on the road.
The Lighting
The challenging part of this set up was we were on a street that didn't have a trememdous amount of ambient light.
We found a spot with some streetlight level in the background and shaped our entire shot/light level around that source.
In the foreground we have an Area 48 for the headlight reflection gag. We used a sky panel for the mood ambience and inside the car we played the ice light as a bit of fill to lift the shadows.
The Result

Shot #7 - Tighter Still

The Shot
The close up of the talent driving.
The Lighting
In this angle you can much more clearly read what the sky panel is doing. Just out of frame left the sky panel is hung and pushing through the window as a cool source.
Inside is the ice light for rear seat ambient and then the Area 48 is camera left for an eye light/head light gag effect.
The Results

Shot #8 - The Finale

The Shot
Our final frame as the talent is pulled over by the Police.
The Lighting
Same set up as shot #6 but now you can see the effects of the Sky Panel much more clearly.
The Results

Hey Patrick!
Juste a quick word to say how much I appreciate your podcast ( which I discovered a year ago)
Thanks a lot for your work, the humor and the tone of the show!
Kisses from France
Phil ( gaffer, on my way to another day of car interior 😉
Interesting episode, thank you. I wonder what filters do you use for moonlight? Just 5600k light or something like steel blue/white moonlight? Cause it often has some green in it, but it can be post.
Hey Patrick, love the breakdowns and especially hearing the technical side of things. Can I ask what ISO/Stop you were on for the night scene – do you ever worry about too much noise in the shadows working at such low levels?
Hi Ty,
ISO was 800 and everything was wide open which if I remember correctly is T2.2. I don’t worry about noise.