On the show today we look at a commercial that had hints of 90s nostalgia mixed with minimal set up time and lots of scenes to get through.
The more I am in this business the more it becomes apparent that any tool that can help you move faster and more efficiently is worth it's weight in gold. Hopefully you can take some of the techniques discussed here and employ them on your own jobs in the future.
Enjoy the episode!
Patreon: When They See Us

If you are a Patreon supporter do not forget to sign up to the Discord channel. Lots of great conversations happening over there so make sure you don't miss out.
For the Mastermind group we are talking about a few different jobs in pre at the moment and all the decisions that go along with that.
For the Feature Breakdown we are looking at a Netflix series shot by Bradford Young ASC entitled When They See Us.
Lots to talk about so make sure you head over to Patreon to catch that episode.
You can find this week's Patreon content by clicking the link below:

If you are a fan of the podcast and want more video content the patreon group is the place to be. Each and every week I release an exclusive podcast, video, or live stream just for the Patreon members.
Patreon members also get access to the Private Facebook community for the show. The podcast couldn't exist without the Patreon support and I do my best to take care of the supporters.
Throwback Lighting - Less is More
A stock standard commercial for gear. The location and the schedule meant we didn't need any elaborate toys to get the job done. Just the usual suspects.
Camera Gear:
Check out the gear I use on all of my commercial shoots by clicking the link below:
Wandering DP Commercial Cinematography Gear
The only kit not listed on that page is the set of Lomo Anbamorphics.
For lighting we went with Arri HMIs (specifically the M40 and M18) with some skypanels and a set of 8 Astera Titan Tubes.
The Spot - Lighting the Space
Set Up #1 - The Open

The Shots
The door slides open and we get a glimpse of our first character checking out his dad's computer.
The Lighting
It is always nice to light from the outside when you are on location and we tried to stay true to that in this scene.
The most important thing from a lighting standpoint was actually getting the camera angles and blocking to do most of the heavy lifting. WE set up the action and angles to play parallel to the existing window so we could use our bigger lights outside to set the mood.
We used an Arri M40 outside for the main light then used an M18 for the back wall. Inside we had Neg on every wall not in shot and then used a skypanel to set our room tone.
The Result

Set Up #2 - The Reverse

The Shots
We swap sides as the Dad enters from frame left.
The Lighting
We had the majority of the work done from the previous shot. Lighting from outside meant we didn't have to change much. We killed the M18 and changed the angle on the M40 and we were done.
The Result

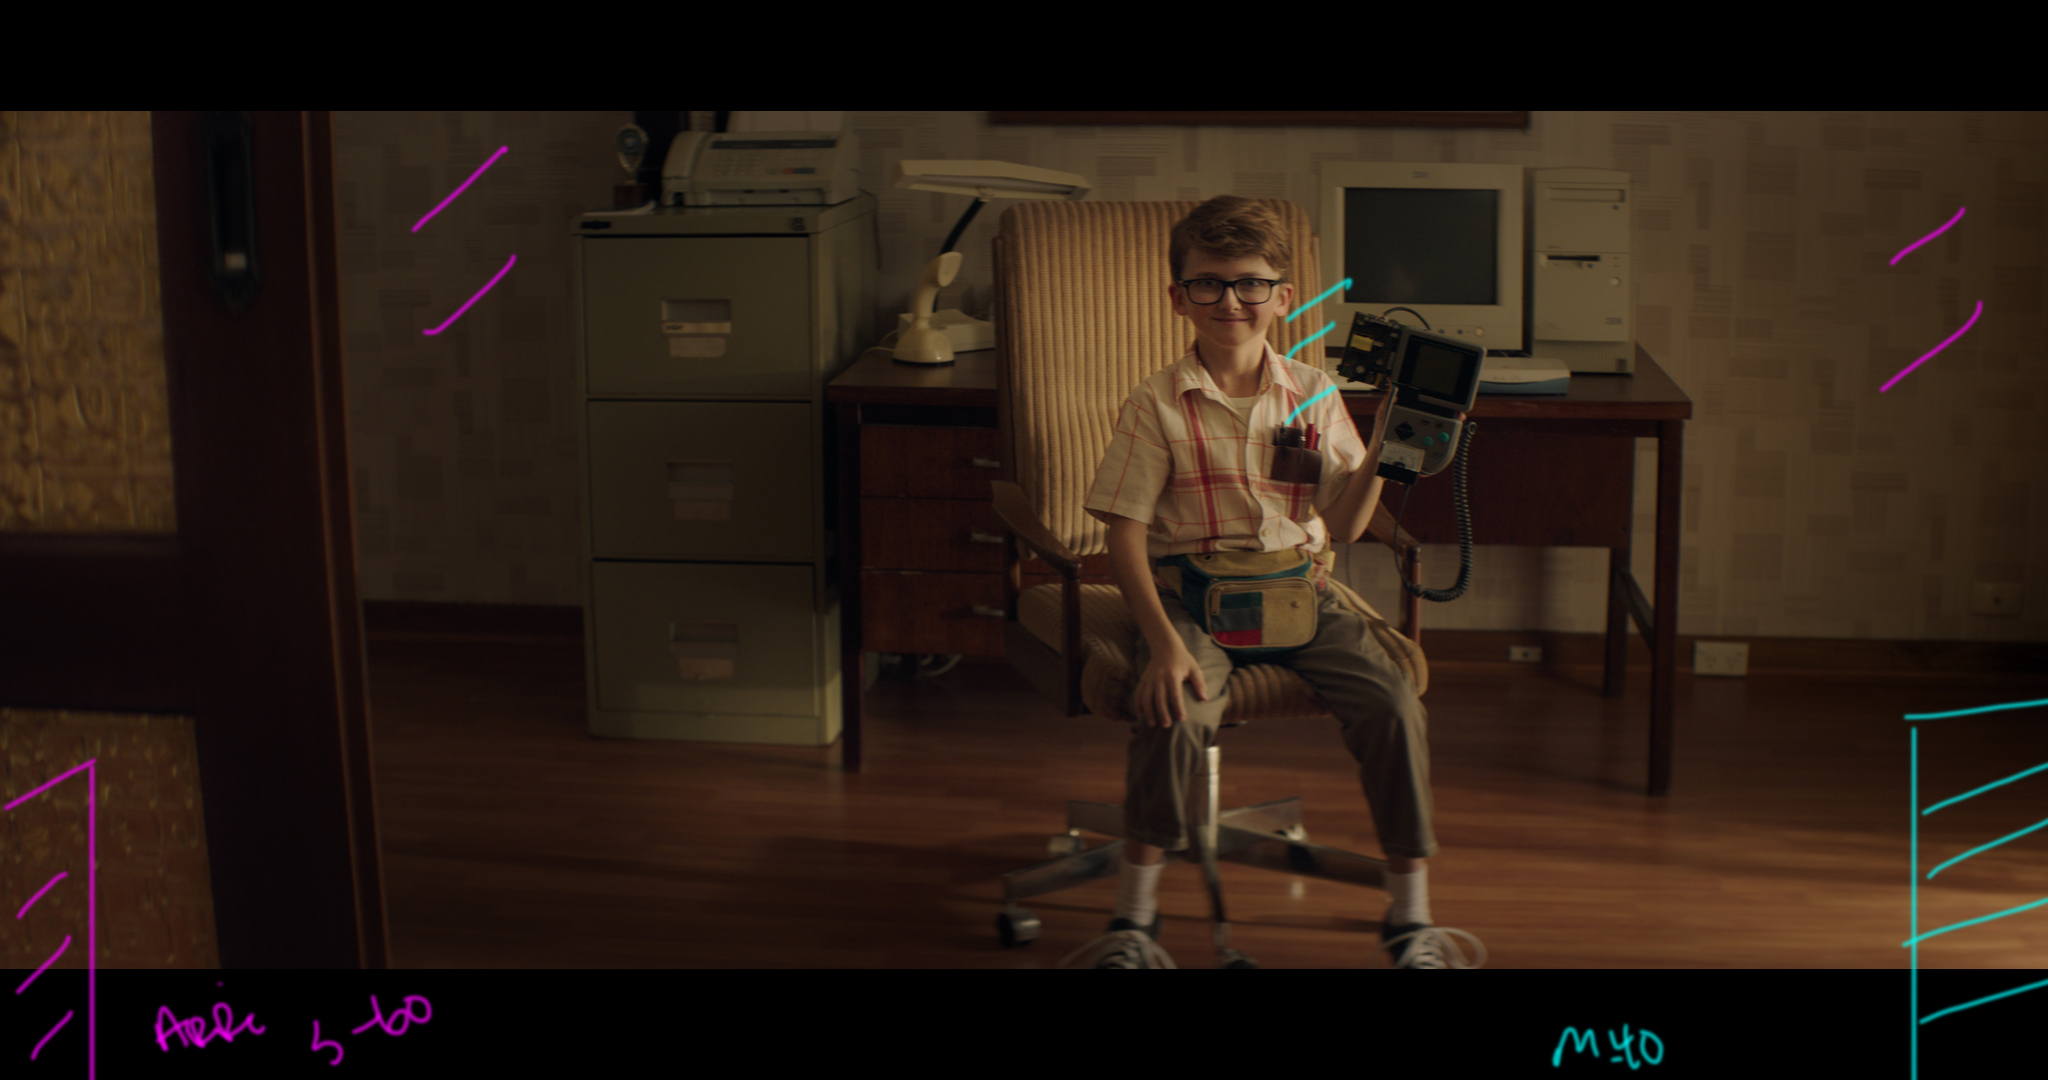
Set Up #3 -The Details

The Shot
A Close Up on the screen to reveal what the little kid is doing.
The Lighting
Again most of the look here was dictated by the blocking.
We rotated the talent's arm around more towards the window, softened the M40 inside with a 4x4 frame to get more spread on the Gameboy and we brought in a 4x4 floppy frame left to help create more contrast.
The Result

Set Up #4 - The Bait & Switch

The Shots
The little kid runs down the hallway.
The Lighting
This shot went through a variety of changes and in the end we went with something more broad and less dark and pool-y.
We used a skypanel for the main level at the end of the hallway.
Closer to camera frame left we had another skypanel with a grid on it to help highlight the balustrade. In each of the rooms we used an Astera Titan Tube to act as faux practicals.
The Result

Set Up #5 - The Quickie

The Shots
A last minute shot of the door closing on the room.
The Lighting
We quickly got two of the Titan tubes as everyone was packing up the trucks, set one inside the room for when the door is open, and one outside to help bring out the sign once the door was closed.
Quick and easy.
The Result

Set Up #5 - The Dark Castle

The Shot
Now inside the room we are at ground level to see the young boy's creation.
The Lighting
WE used all titan tubes and their color tune-ability to dial in a combination of faux practical tungsten light along with some blue-ish moonlight out the door.
The Result

Shot #6 - The Push In


The Shots
The camera pushes in as the boy plugs in the power cord on his creation.
The Lighting
Here we used the same Titan tubes as in the previous shot but swung them around as we changed angles. Outside is another single tube inside of a black 4x4 floppy tent (as we shot this in the middle of the day) to help re-create moonlight hitting the window inside.
The Result

Shot #7 - The Canopy


The Shots
A matching push in to the previous shot.
The Lighting
Shooting under covert outside in bright daylight conditions is always tricky. Here we oriented the action parallel to the openings so we could push day light in with a 12x12 from frame right.
We used a bunch of 12x12 Neg to the side and behind the camera to try and kill the flatness created by all the ambient light.
Then we softened our bounce light with a 12x12 of 1/2 grid then added an M18 in the BG frame left to help edge out the talent.
The Result

