Watch the Episode:
The grand finale of our 5 part series breaking down a recent television commercial. Today we see the challenges behind balancing harsh lighting conditions in matching interior and exterior locations.
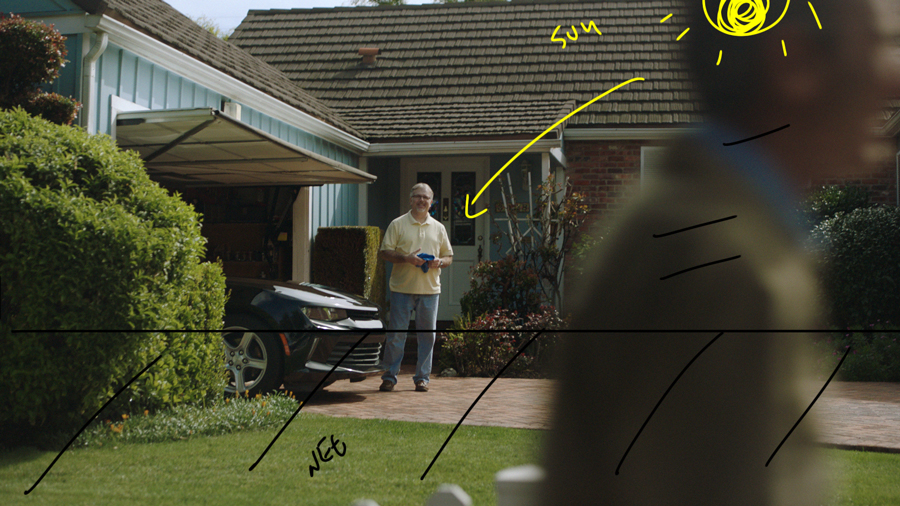
Shooting during the day and balancing levels between the inside and outside is always a challenge and in this episode we look at how adjusting the storyboards can speed up a shoot and help you get better images.
Podcast Sponsors:

Remember to use the coupon code "Wandering20" to save 20% off your next on site license.
Patreon Episodes: A Peek Into the Live Stream
Patreon is the home of the live stream each and every week. In those live stream we look at listener submitted projects, go over the lighting, framing, and more.
Watch the series above on youtube to get a small glimpse of what goes on each week on the Patreon Live Stream.
If you are interested in checking out this week's Live Stream plus the library of over 50 videos, podcasts, and live stream replays click on the link below to become a Patreon member :
If you are a fan of the podcast and want more video content the patreon group is the place to be. Each and every week I release an exclusive podcast, video, or live stream just for the Patreon members.
Patreon members also get access to the Private Facebook community for the show. The podcast couldn't exist without the Patreon support and I do my best to take care of the supporters.
Hit the Hotline:
Hit the Hotline
Click the link below to leave your question or message for the show and get it featured on next week's episode
Storyboards: Expanding the Vision
Today we are breaking down the final spot in a 5 ad series that we have been looking at for the past month on the show.
The central theme of the campaign was our hero talent visiting real world locations and interacting with real customers.
Each customer had a specific location relevant to their story and in today's episode the location was a large hall. The main action in the ad is our spokesman comes in, greets the customer, and they sit down to have a chat.
The Location
We were in a residential area in Los Angeles with full sun forecasted for the enitre day. The challenge in the location was finding a garage and a driveway that would line up with a backlit shot scenario.
The location we found then dictated the schedule for making sure we were getting the best looking matreial possible.
The Schedule
The orientation of the house relative to the sun meant we would shoot the exterior sequences in the morning and then move inside once the sun got to high in the sky.
We wanted to keep things backlit but once inside we knew we would need some time to tent the garage and then bring in our own sun. So we shot exteriors for the first part of the day and then over the lunch break the team tented and set up the interior shots.
.
The Gear Package: Camera & Lighting
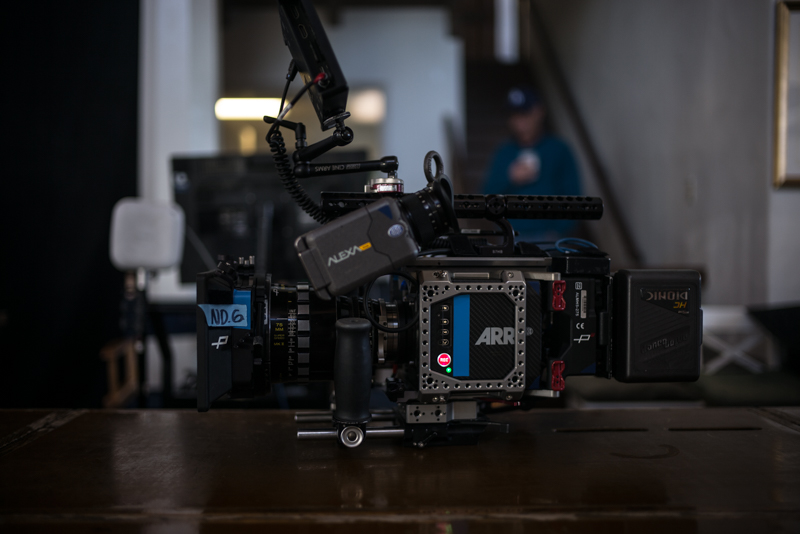
We shot this ad on two Panavised Arri Alexa Minis with a combination of Panavision Ultra Speeds and Super Speeds.
For lighting on this shoot day we had:
2 x Arri M40s
3 X 4' Quasar Tubes
8x8 1/4 grid
Various 4x4 diffusion frames
20x12 Black
12x12 Black
Practical Lamps
Storyboards: The Set Ups
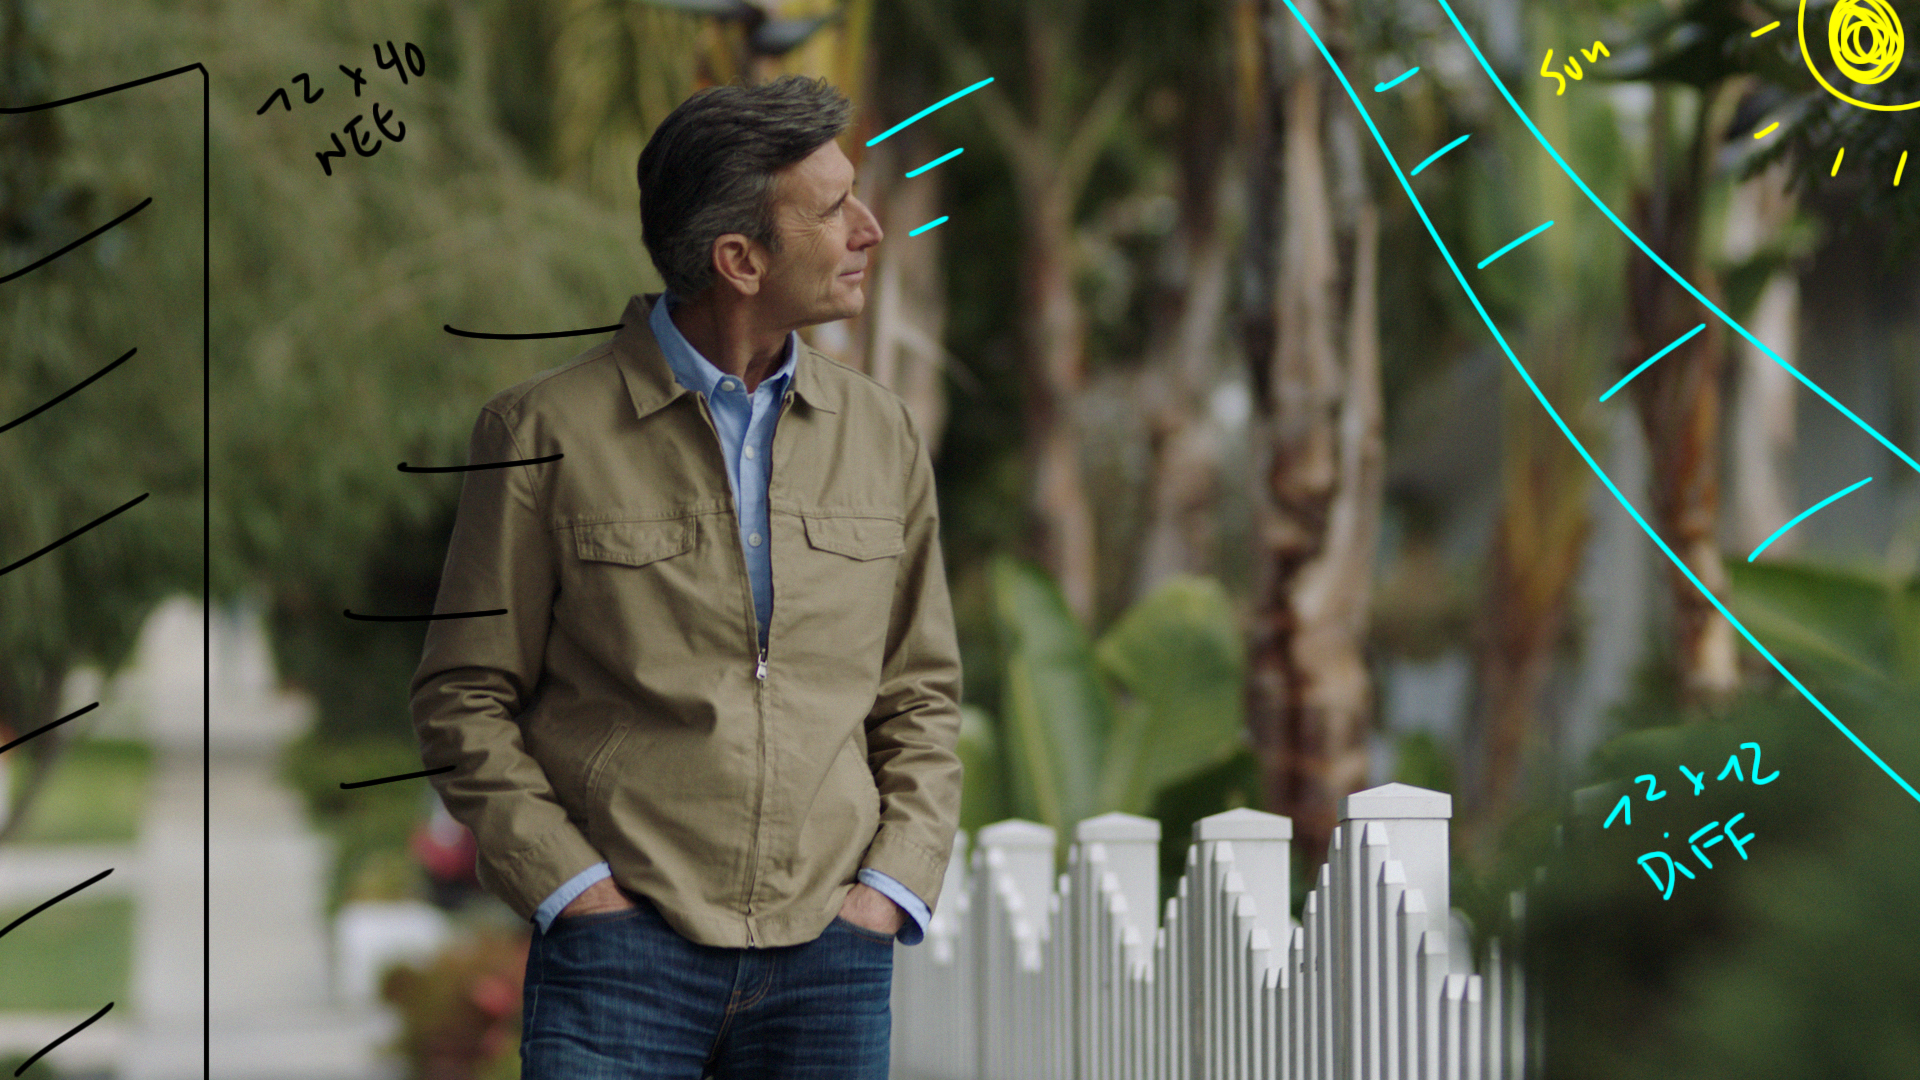
Shot #1 - The Walking Intro

The Shot
This was the first shot of the day and the first shot of the ad. We left some space on camera right for titles to be placed in.
The Lighting
We used a 12x12 High Light from camera right to diffuse the sun, a 20x12 and a 12x12 Neg on camera left to take away some of the ambient and then chose two angles where we were shooting into a darker background.
For this set up both cameras were positioned close to one another on two different lenses. A cam was on a 100mm and B cam was on a 150mm.
The Result
Shot #2 - Changing the Storyboards

The Shot
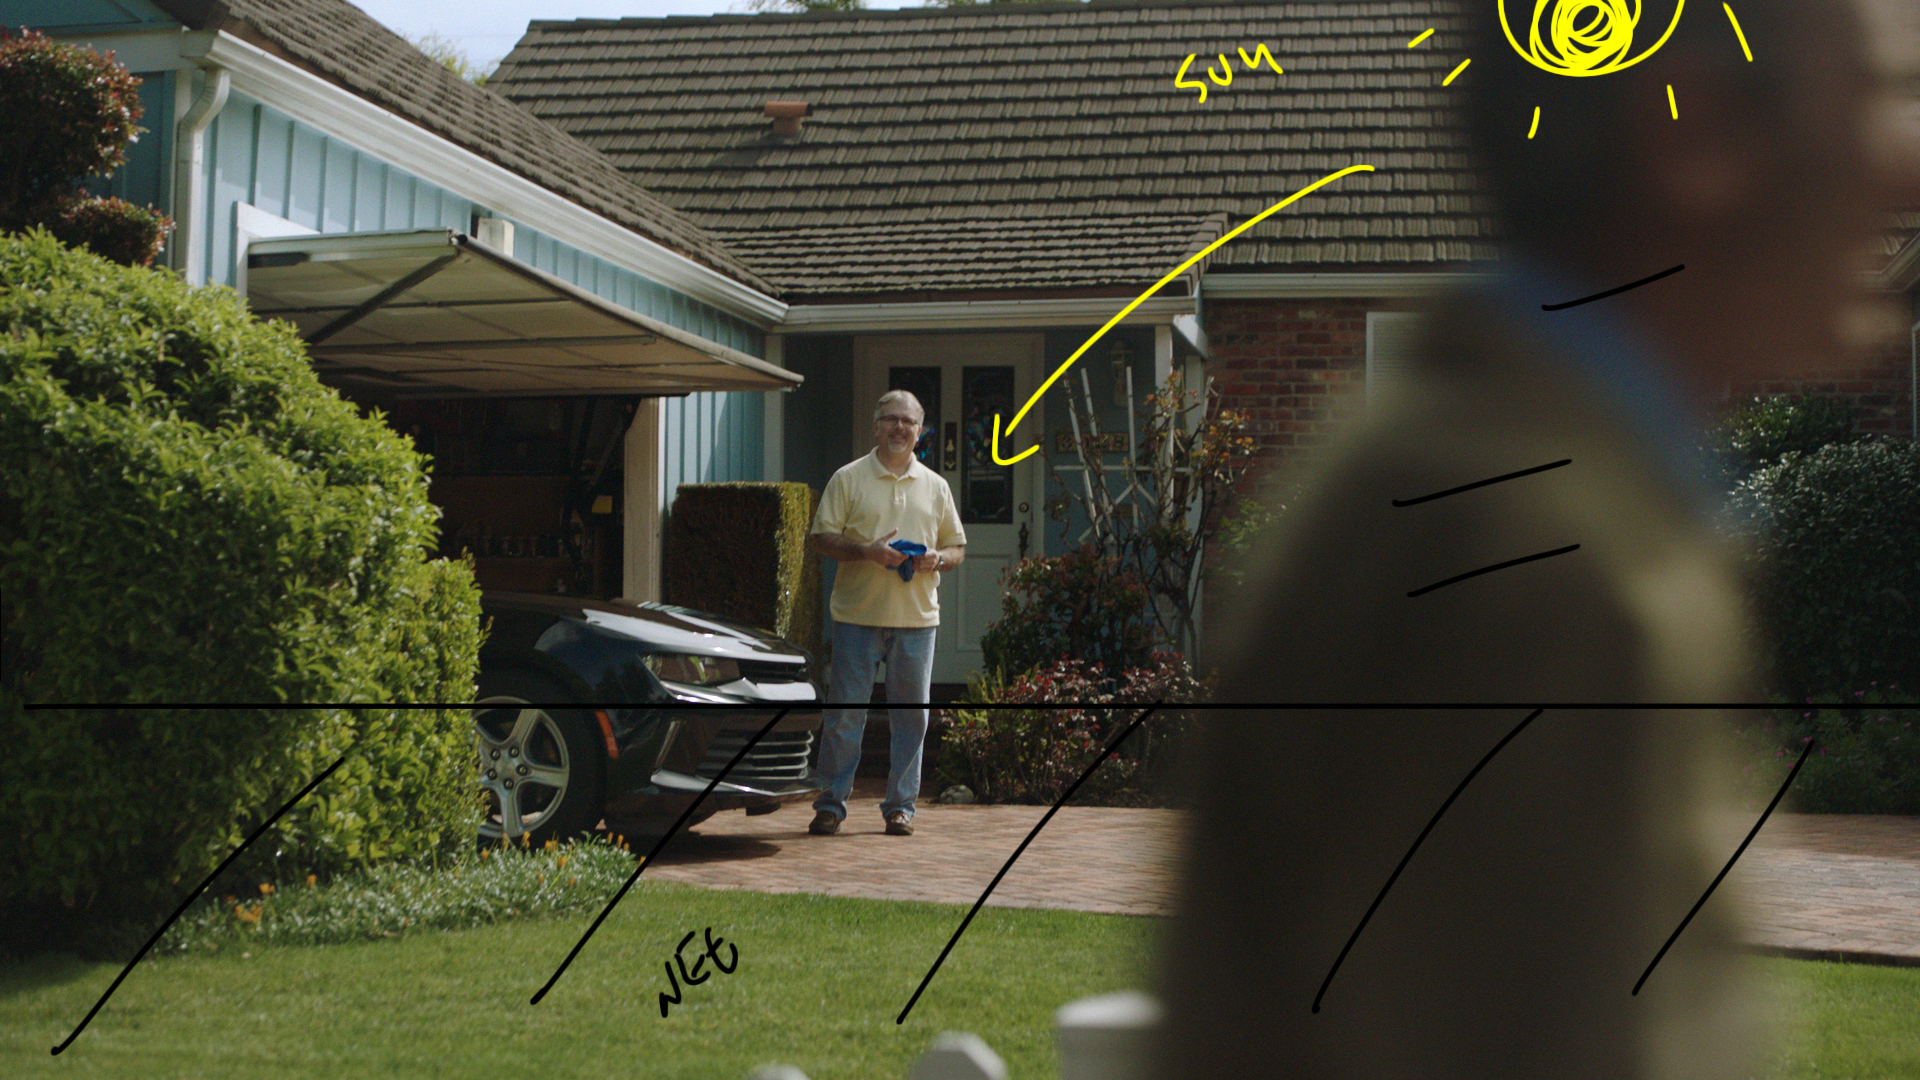
We needed to link the customer and the car to our spokesman on the street. We changed the boards based on the location and figured out that this shot was the quickest and easiest way to place the rest of the action for the spot.
The Lighting
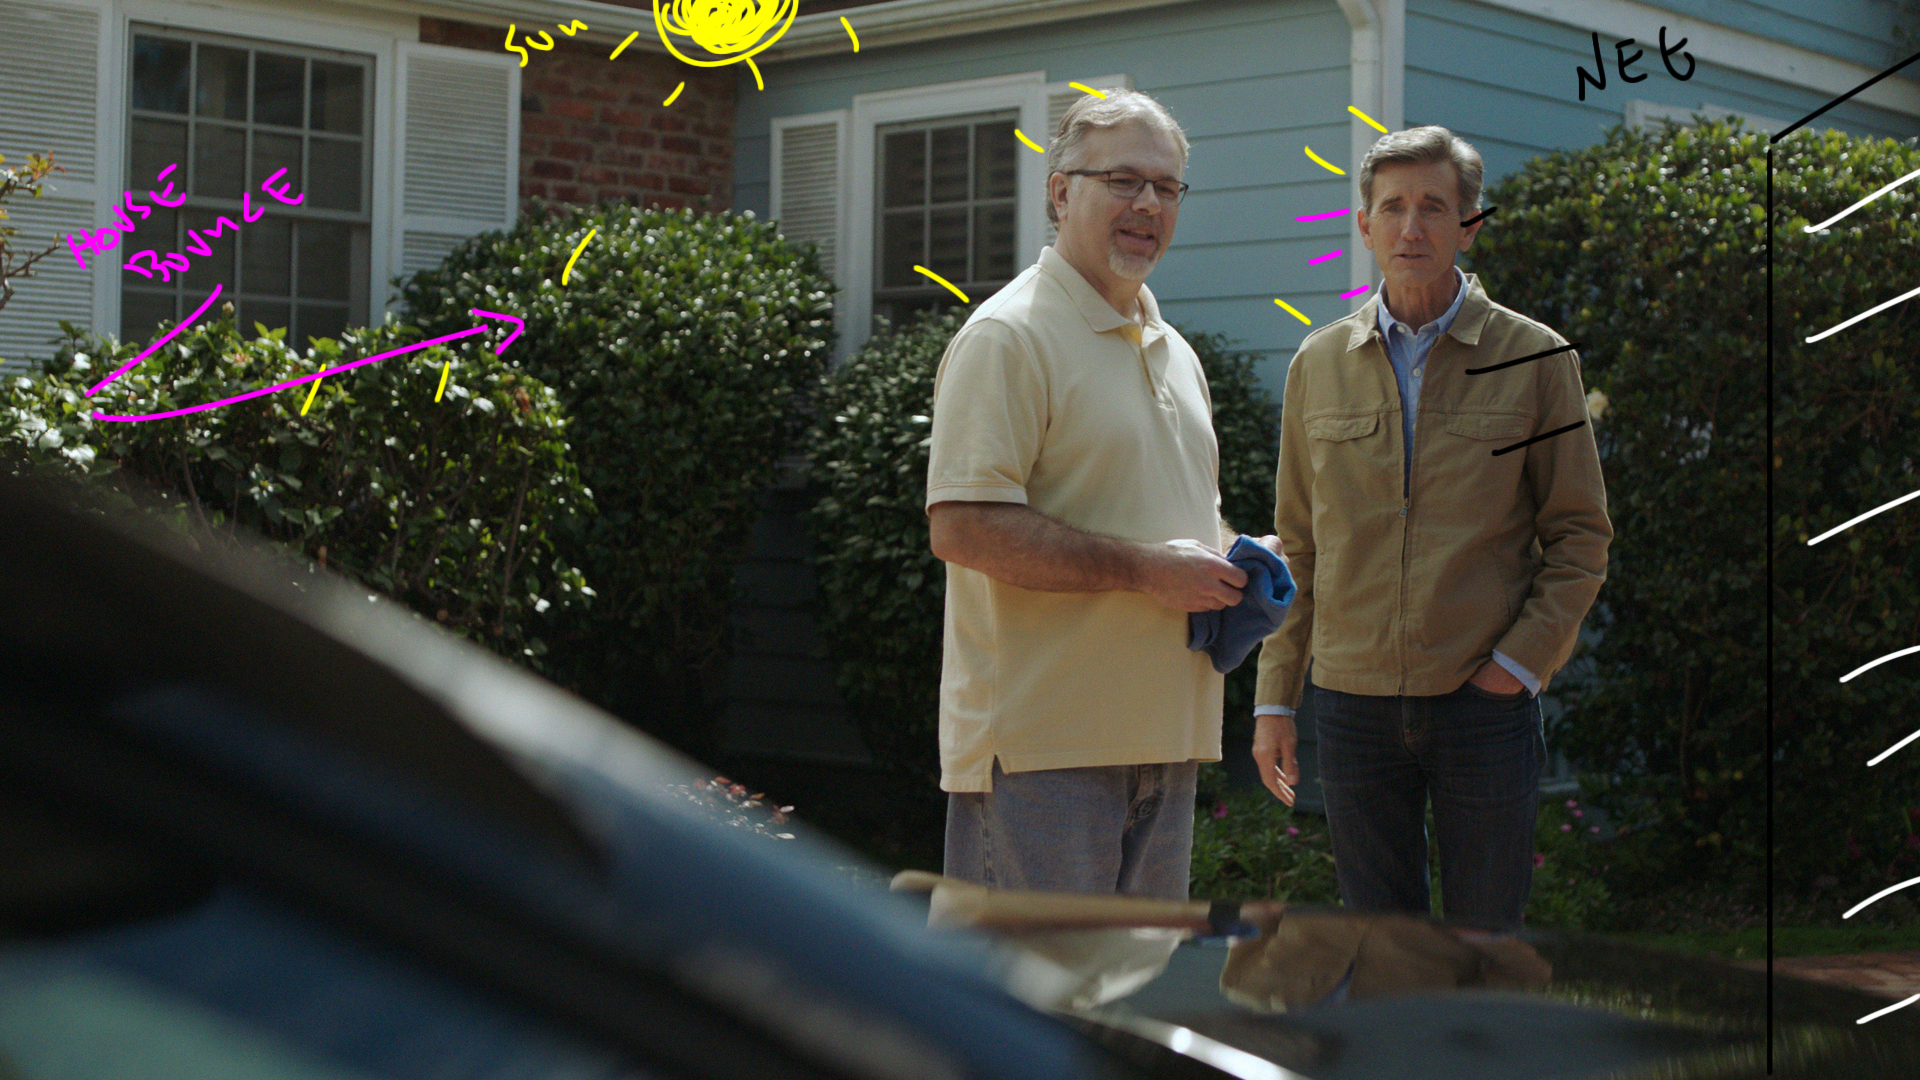
This shot was all about schedule and sun position. Being at the location in the morning meant we could use the backlight and then push all the blacks right behind the camera to add some shape and interest to the foreground.
The Result
Shot #3 - #5 - Two Cameras, One Storyboard


The Shot
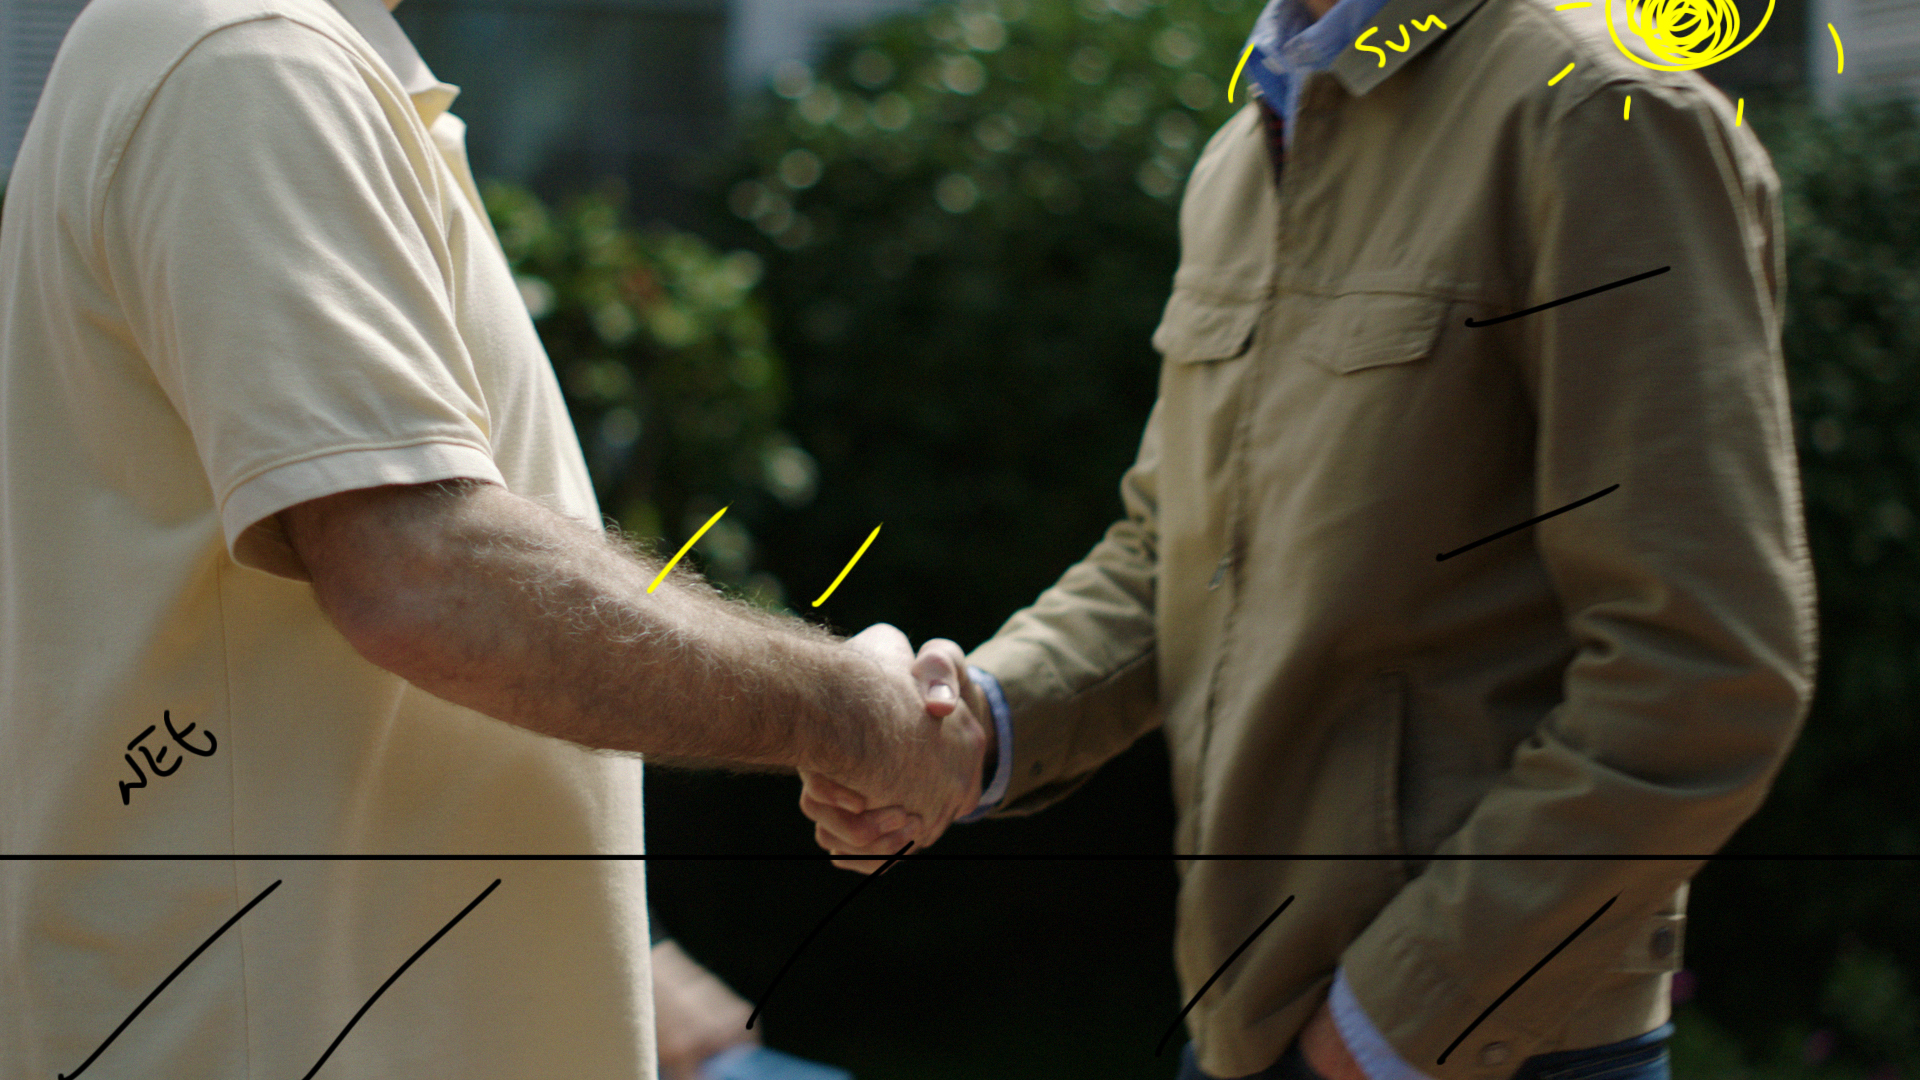
Our meet and greet moment brought our two talent from the outside of the garage to the inside.
Finding a way to intelligently deal with the exposure difference between the inside and outside of the garage was our main focus. We needed to find angles and cut points that would make the most sense but at the same time creating the best looking scenario.
The Lighting
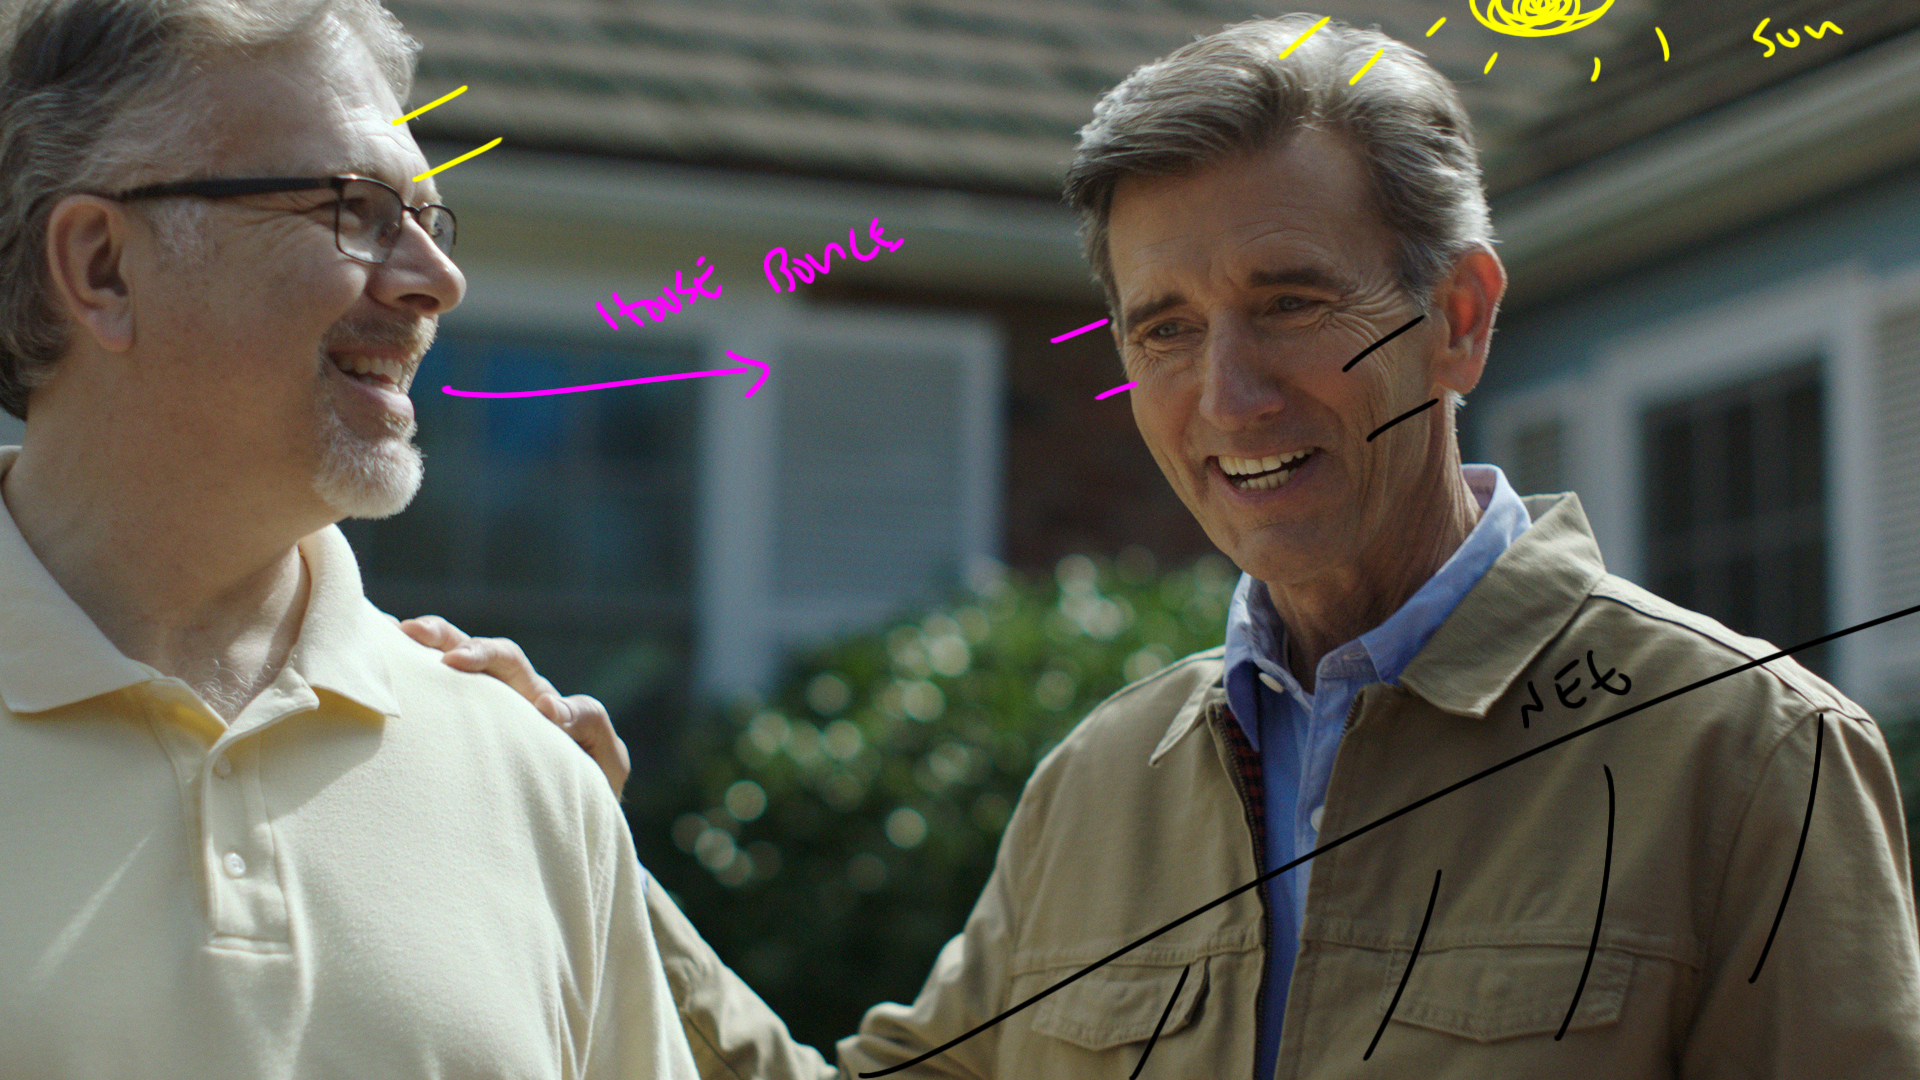
We used the sun as a backlight for the talent and the house in the background. Behind the camera we used 12x12 blacks to take the ambient light away.
The camera positions and angles made sure the look stayed interesting and consistent.
The Result
Shot #6 - The Transition

The Shot
The most difficult shot of the day was transitioning from outside to inside. We chose to do it with cuts and this was our first look inside the garage.
The Lighting
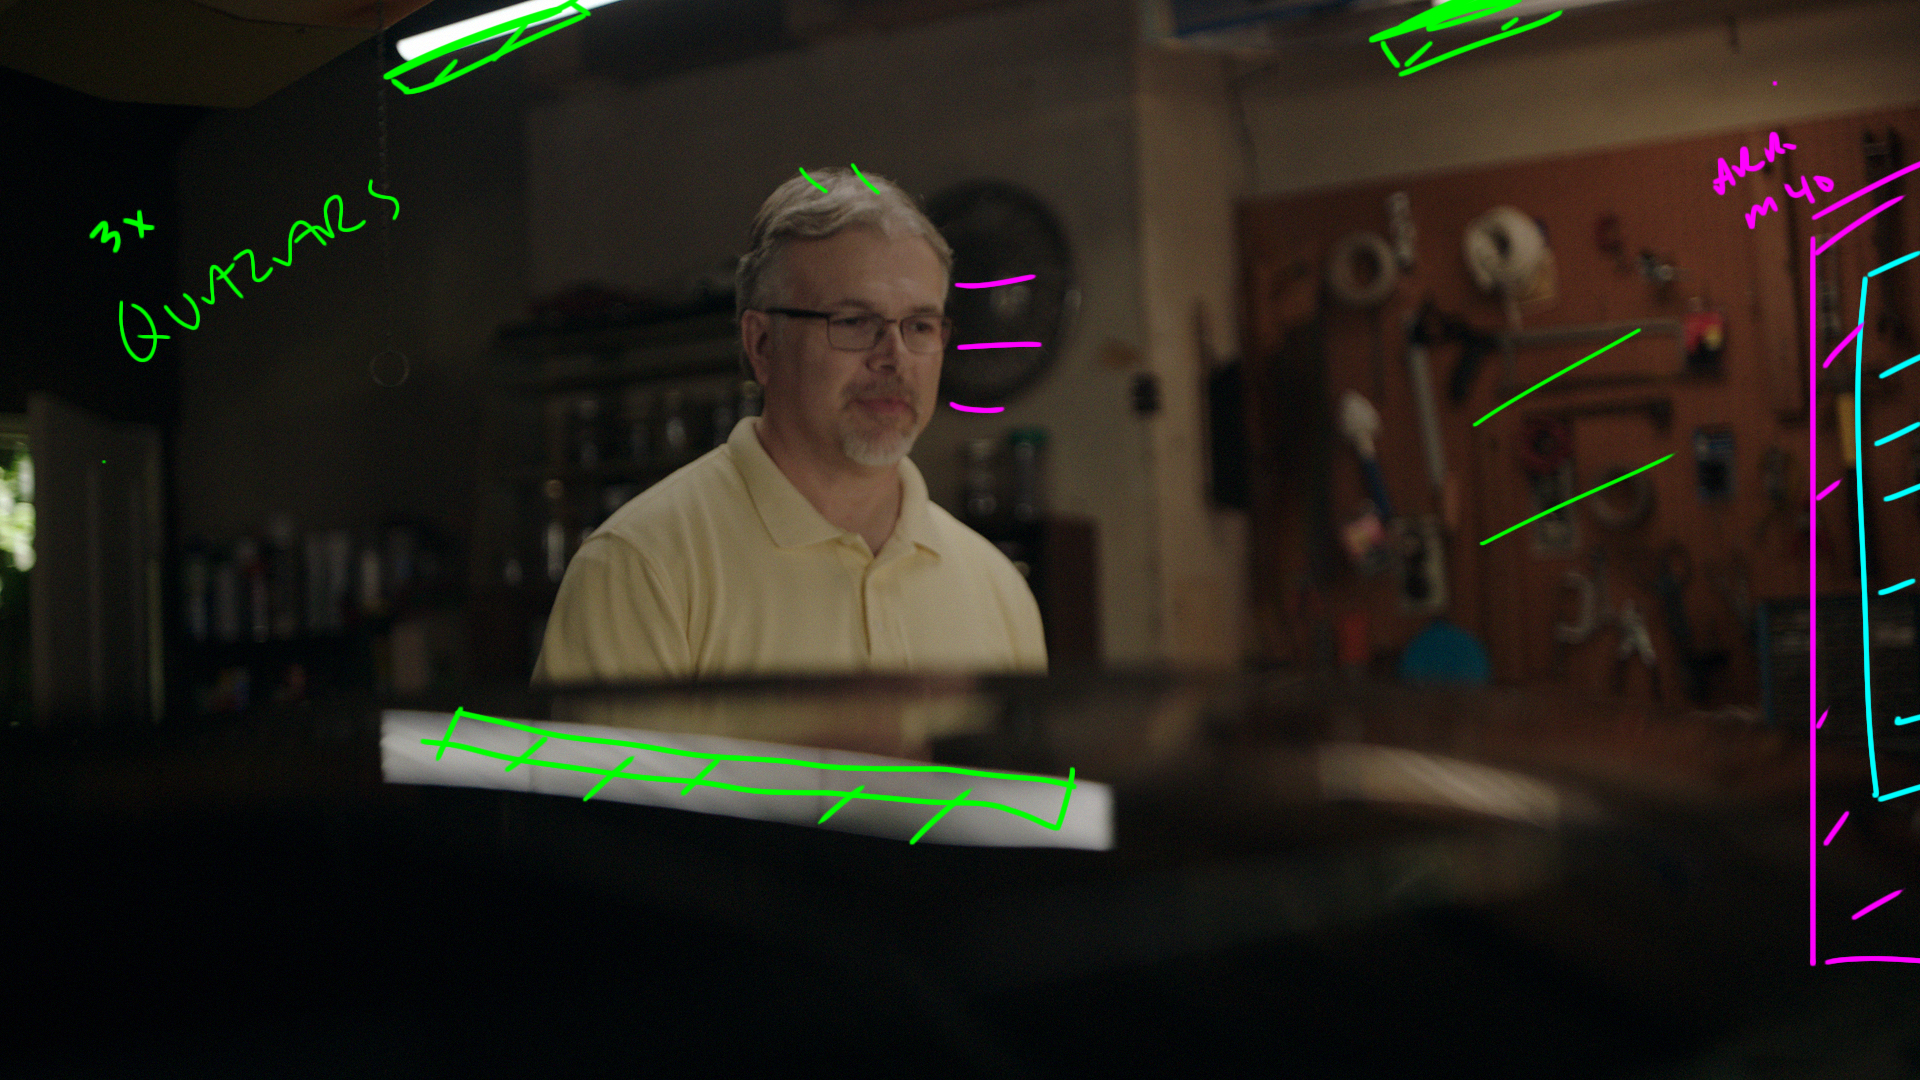
We tented off the garage and used an Arri M40 through a few pieces of diffusion (the last being an 8x8 of 1/4 grid) to act as our sun.
Inside we used accent lights for the gar and background. The car had a few 4' Quasar tube above it and in the background a few 2' tubes played.
The Result
Shot #7 - The Walk Around

The Shot
This shot is in the back of the garage. The important part of this shot is the angle of the talent towards the light and the position of the camera.
The Lighting
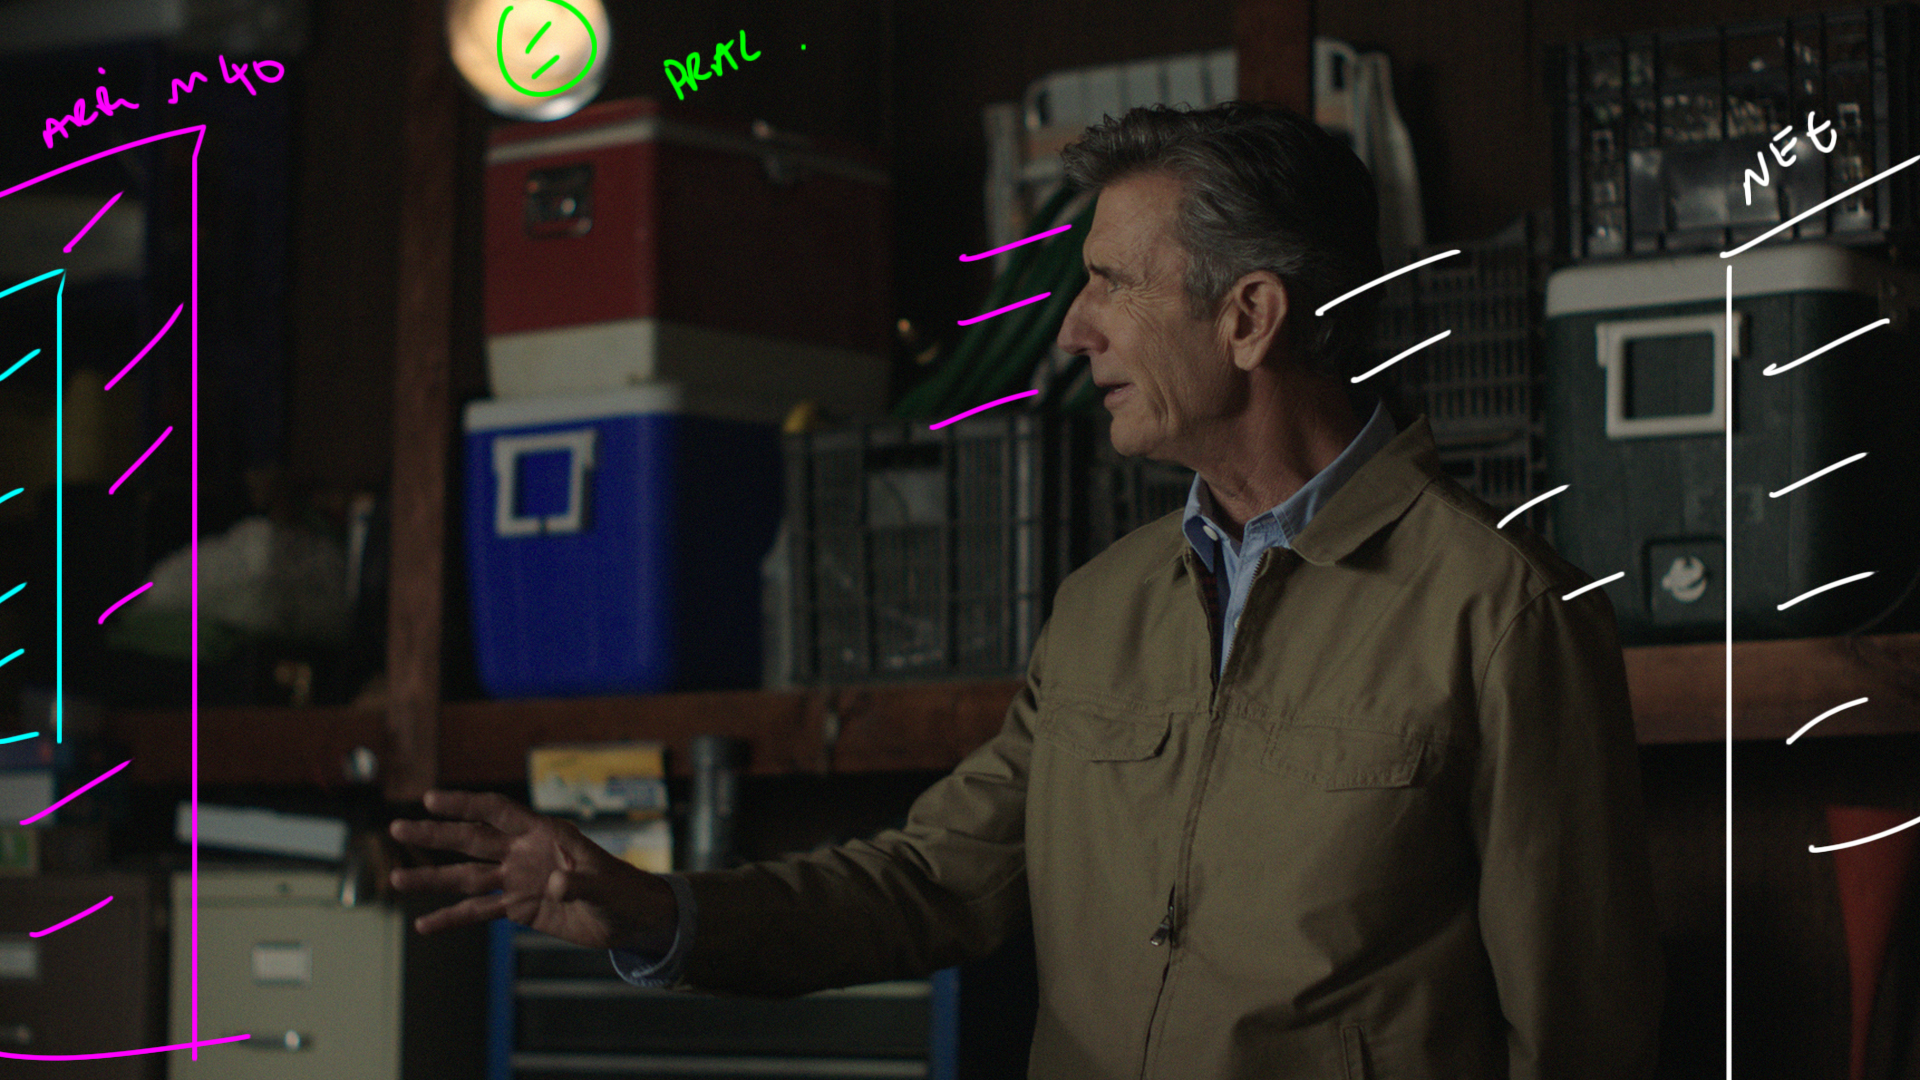
This is the exact same set up as the previous shot but we are further in the garage. We turned of the tubes and added some practical tungsten lights on dimmers in the background for some accent lighting.
Also camera right there are some 4x4 floppies to control the level of fill.
The Result
Shot #8 - Settling In

The Shot
In this shot we transitioned from meet and greet to the sit down portion of the spot.
The Lighting
Same as the previous shot with the Arri M40 for a key and the Quasar tubes over the car off. In the background we have the practicals and the quasar tubes as accent lights.
Camera left the floppies add some shape.
The Result
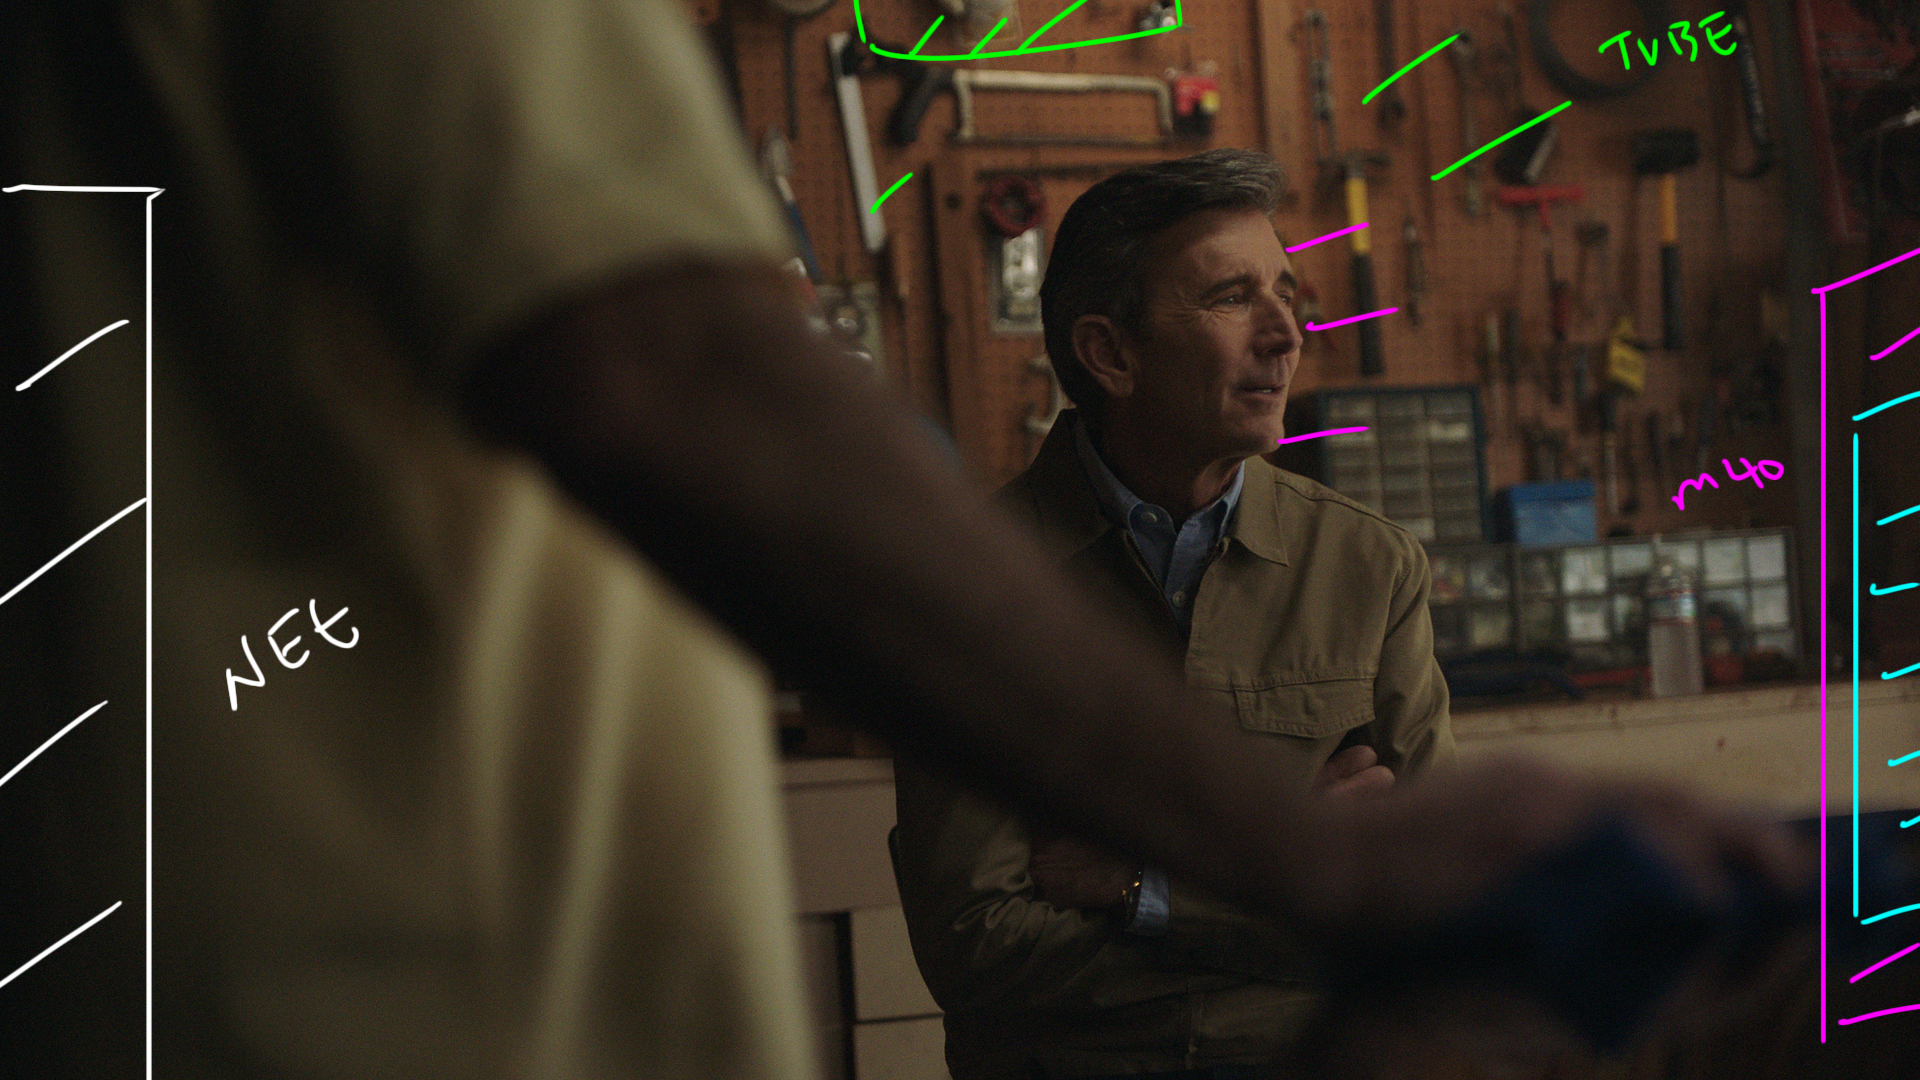
Shot #9 - The Storyboard Money Shot

The Shot
The single most important shot of the day from a client perspective. We shot two camera facing the same direction in different sizes for the customer's story.
The Lighting
We moved the Arri M40 around as the key and then used the practical light from the previous shot as the backlight. The color difference between the tungsten and the daylight played nicely and then finally we used the 4x4 floppies camera right to control the level of contrast.
The Result
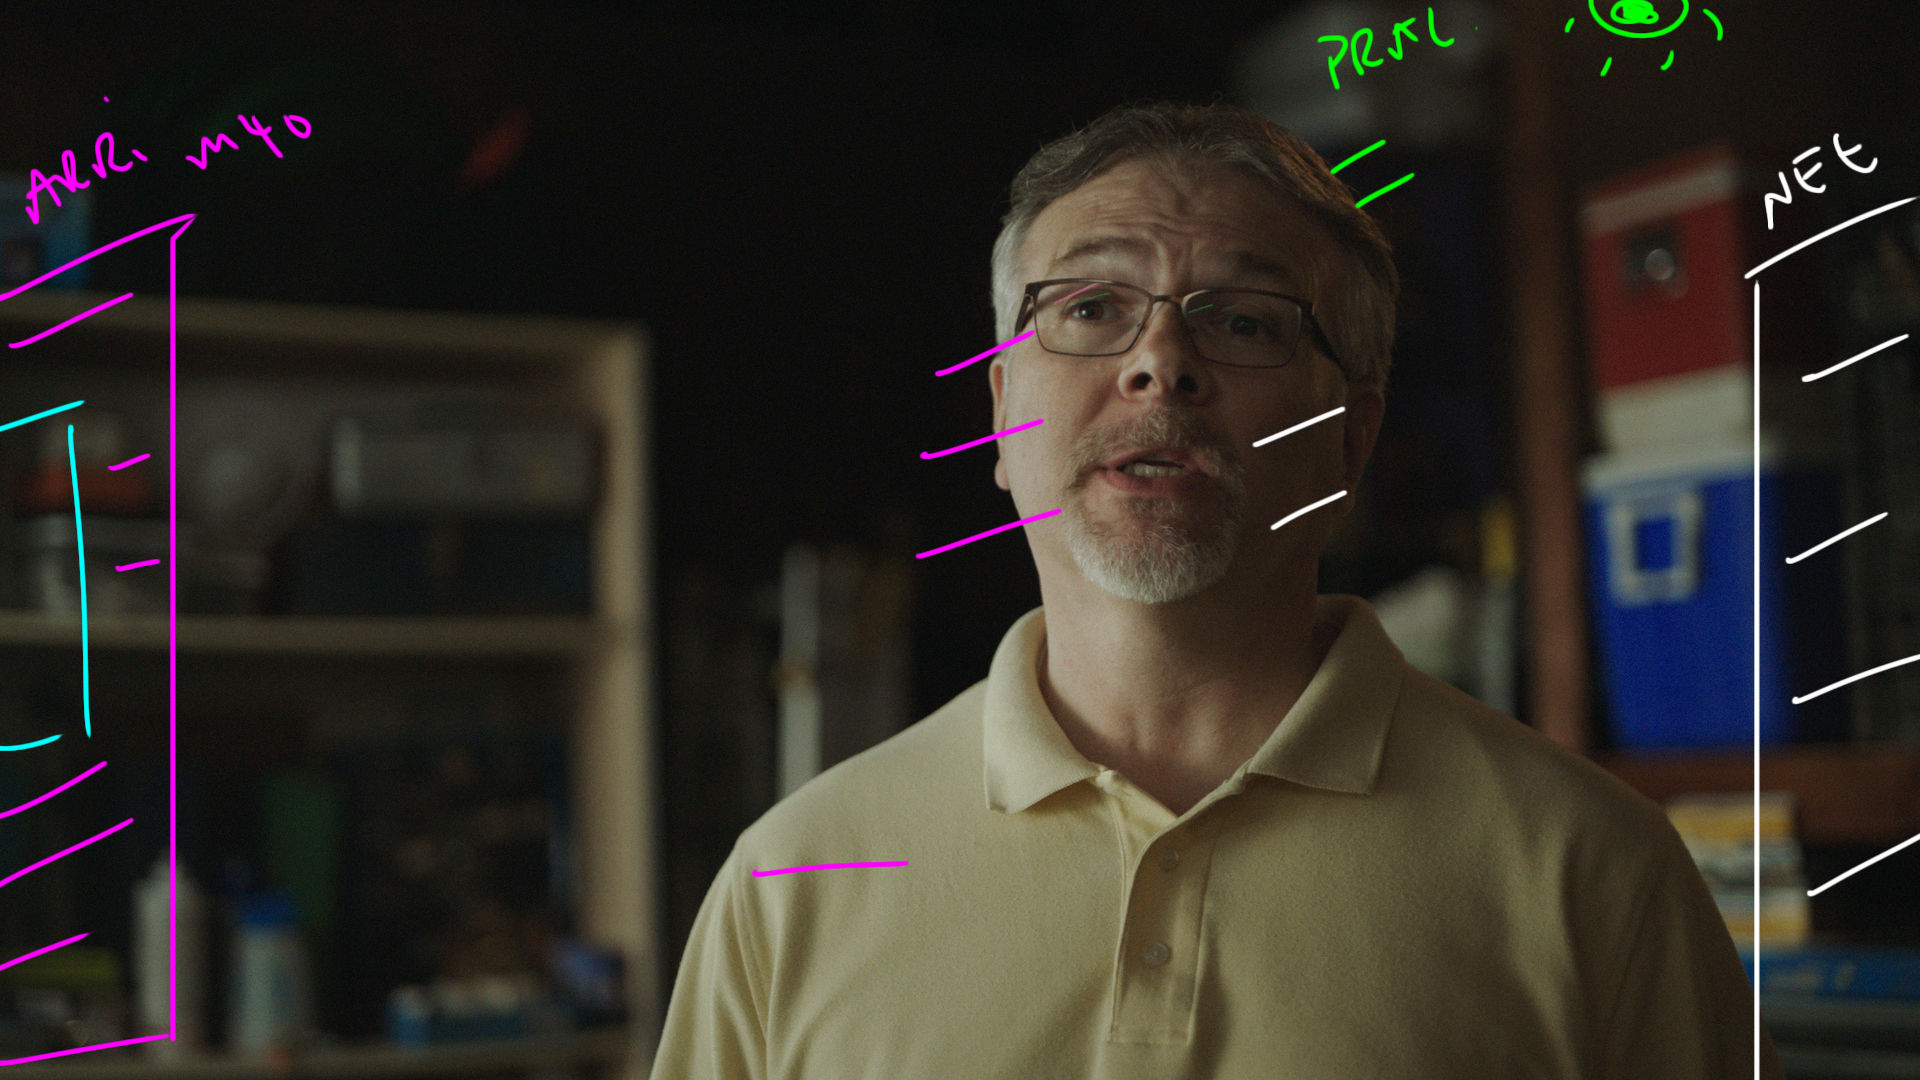
Shot #10 - The Dirty Over

The Shot
The matching shot to our conversation sequence.
The Lighting
Same as above but we made sure to flop sides so that we were shooting in to the shadow side of our customer who is now frame right. The darkness there helps guide the viewers eyes to where we want them to go.
The Result
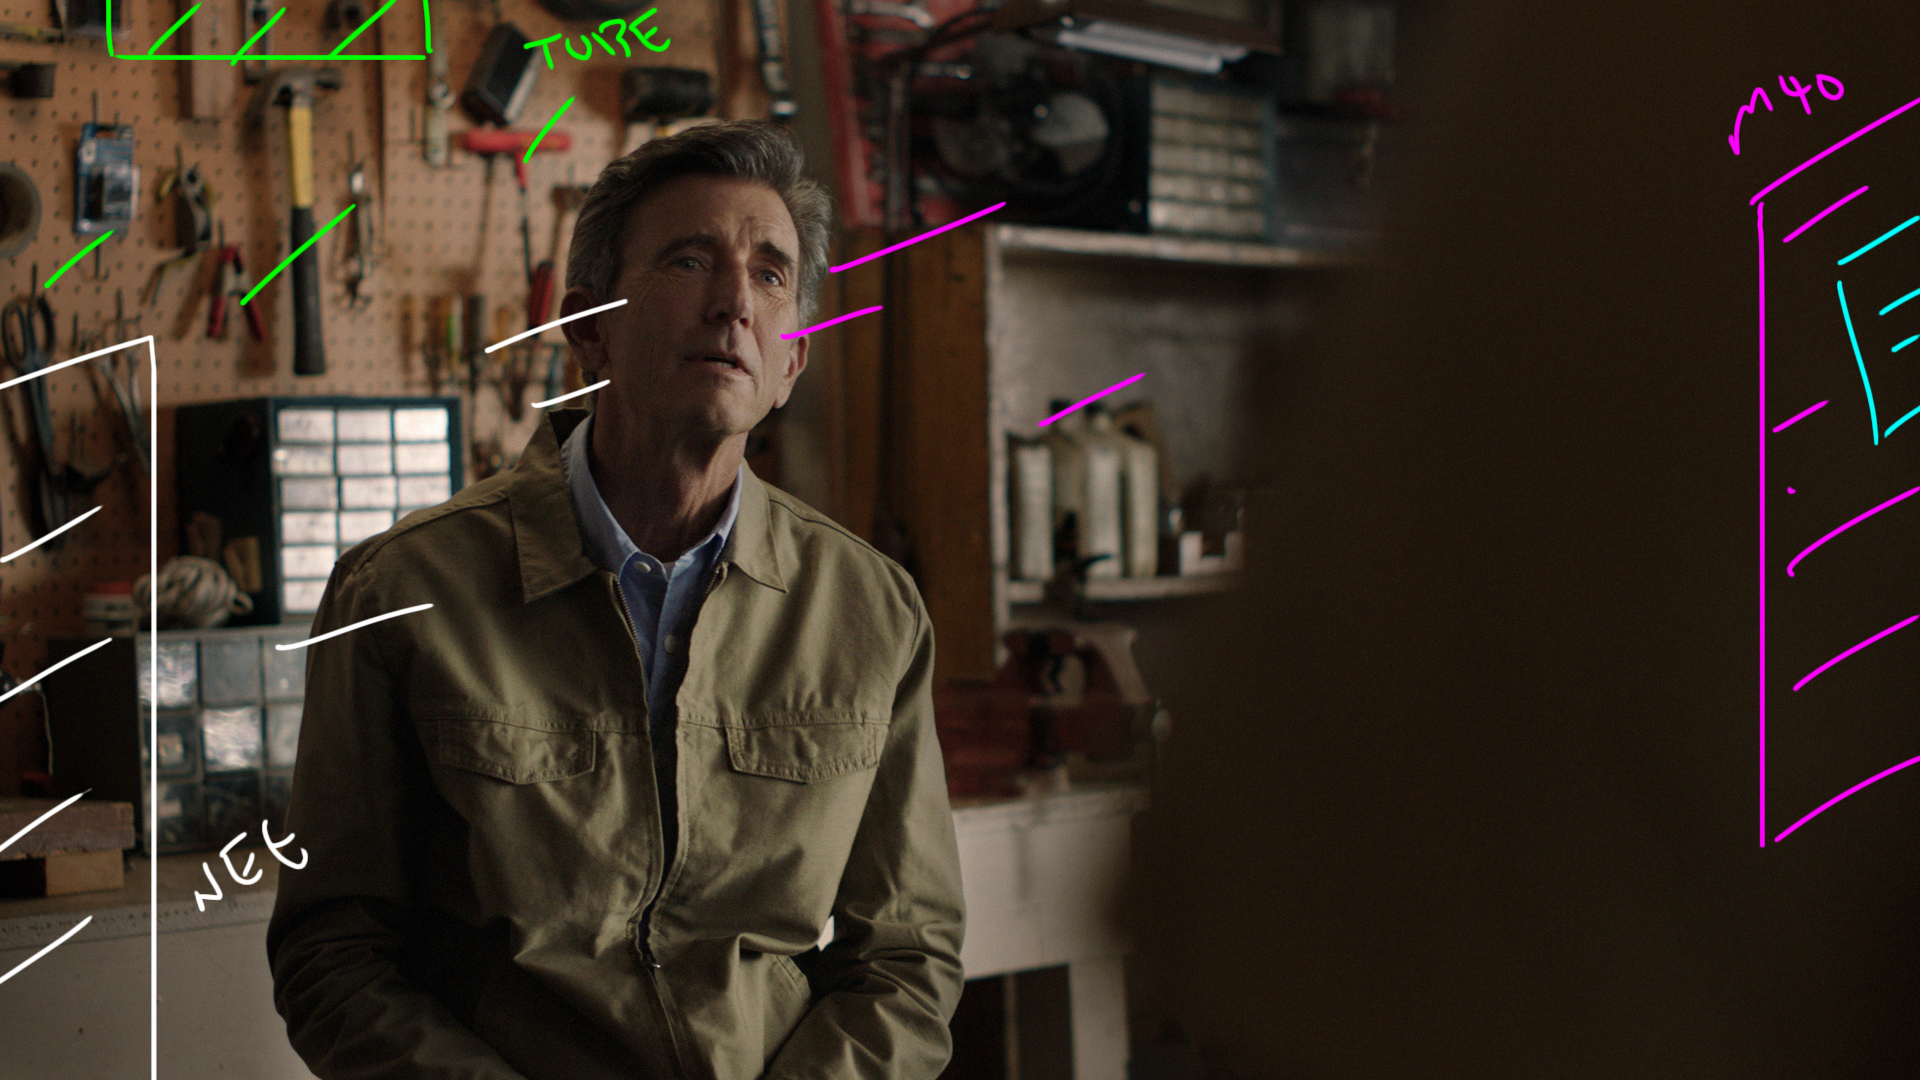
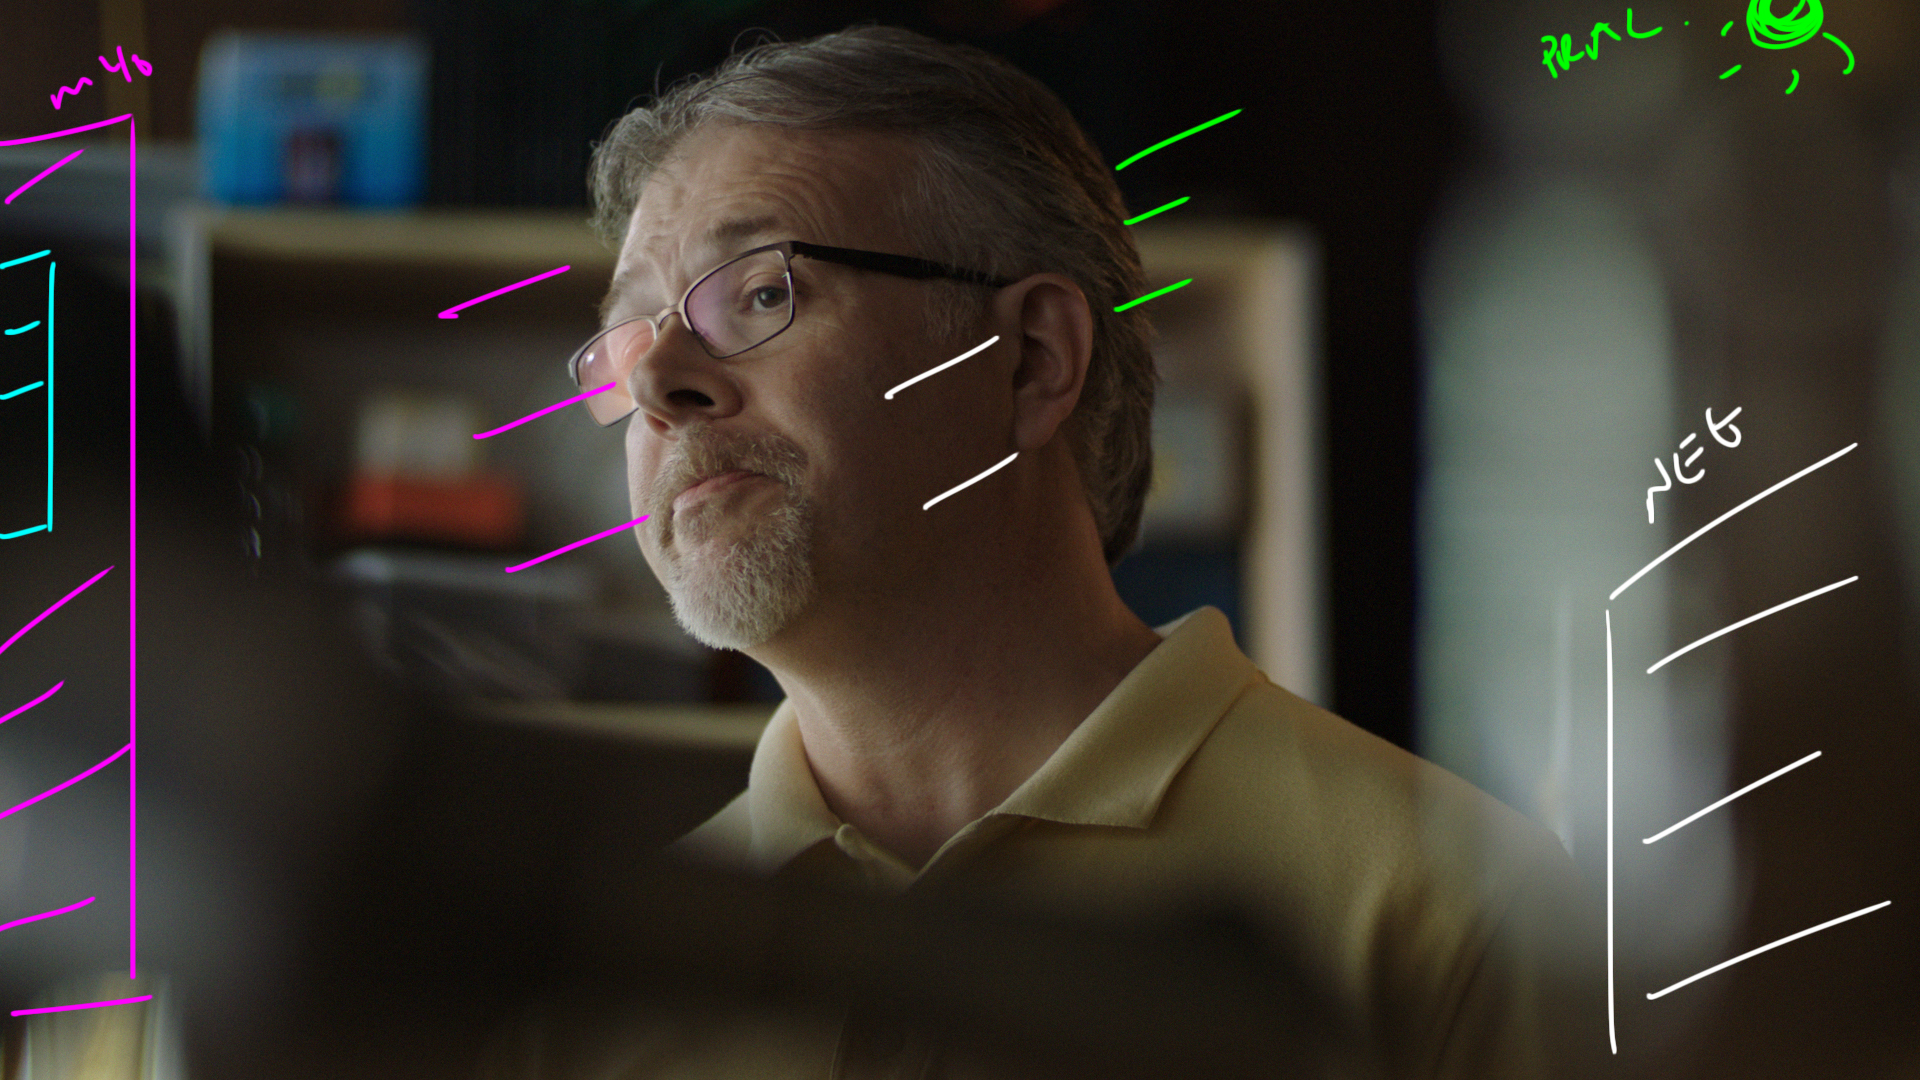
Shot #11 - B Camera

The Shot
The tighter version of our customer conversation shot.
The Lighting
Same as Shot #9.
The Result


Hey Patrick, killing it with the site, podcast and youtube, and the work of course, wanted to know where are the lighting diagram you mentioned in the episode can’t find link, thanx in advance and keep up the awesome work.