New week, new podcast.
Breakdown episode. Let's go.
Enjoy!
Cinematography Course: Mastering Exposure
Mastering Exposure is out now. It is the latest course in the line up and so far the reviews have been awesome.
In the course I detail how I learned exposure and I share how I would get up to speed the fastest way possible if I was starting over today.
Cinematography can seem incredibly complex but underneath it all there are some fundamental decisions that must be made if you are going to get images you are happy with. Exposure and understanding how to best manipulate exposure and why one way is better or more efficient than another is absolutely essential if you are going to work with a crew and on schedule.
THis course is my attempt at sharing my exact process so you don't have to struggle to find answers like I did.
If you are interested you can check out the course here:
Patreon Podcast - 1%ers
This week on the Patreon podcast I talk through some seemingly small workflow improvements that can add up to a big benefit when combined.
They aren't all straightforward but if you have been on set long enough you will recognize a few of these different efficiency savers.
If you want to hear the podcast or check out any of the past content you can find it all by clicking the link below:
The Spot(s) - Same Location, New Look

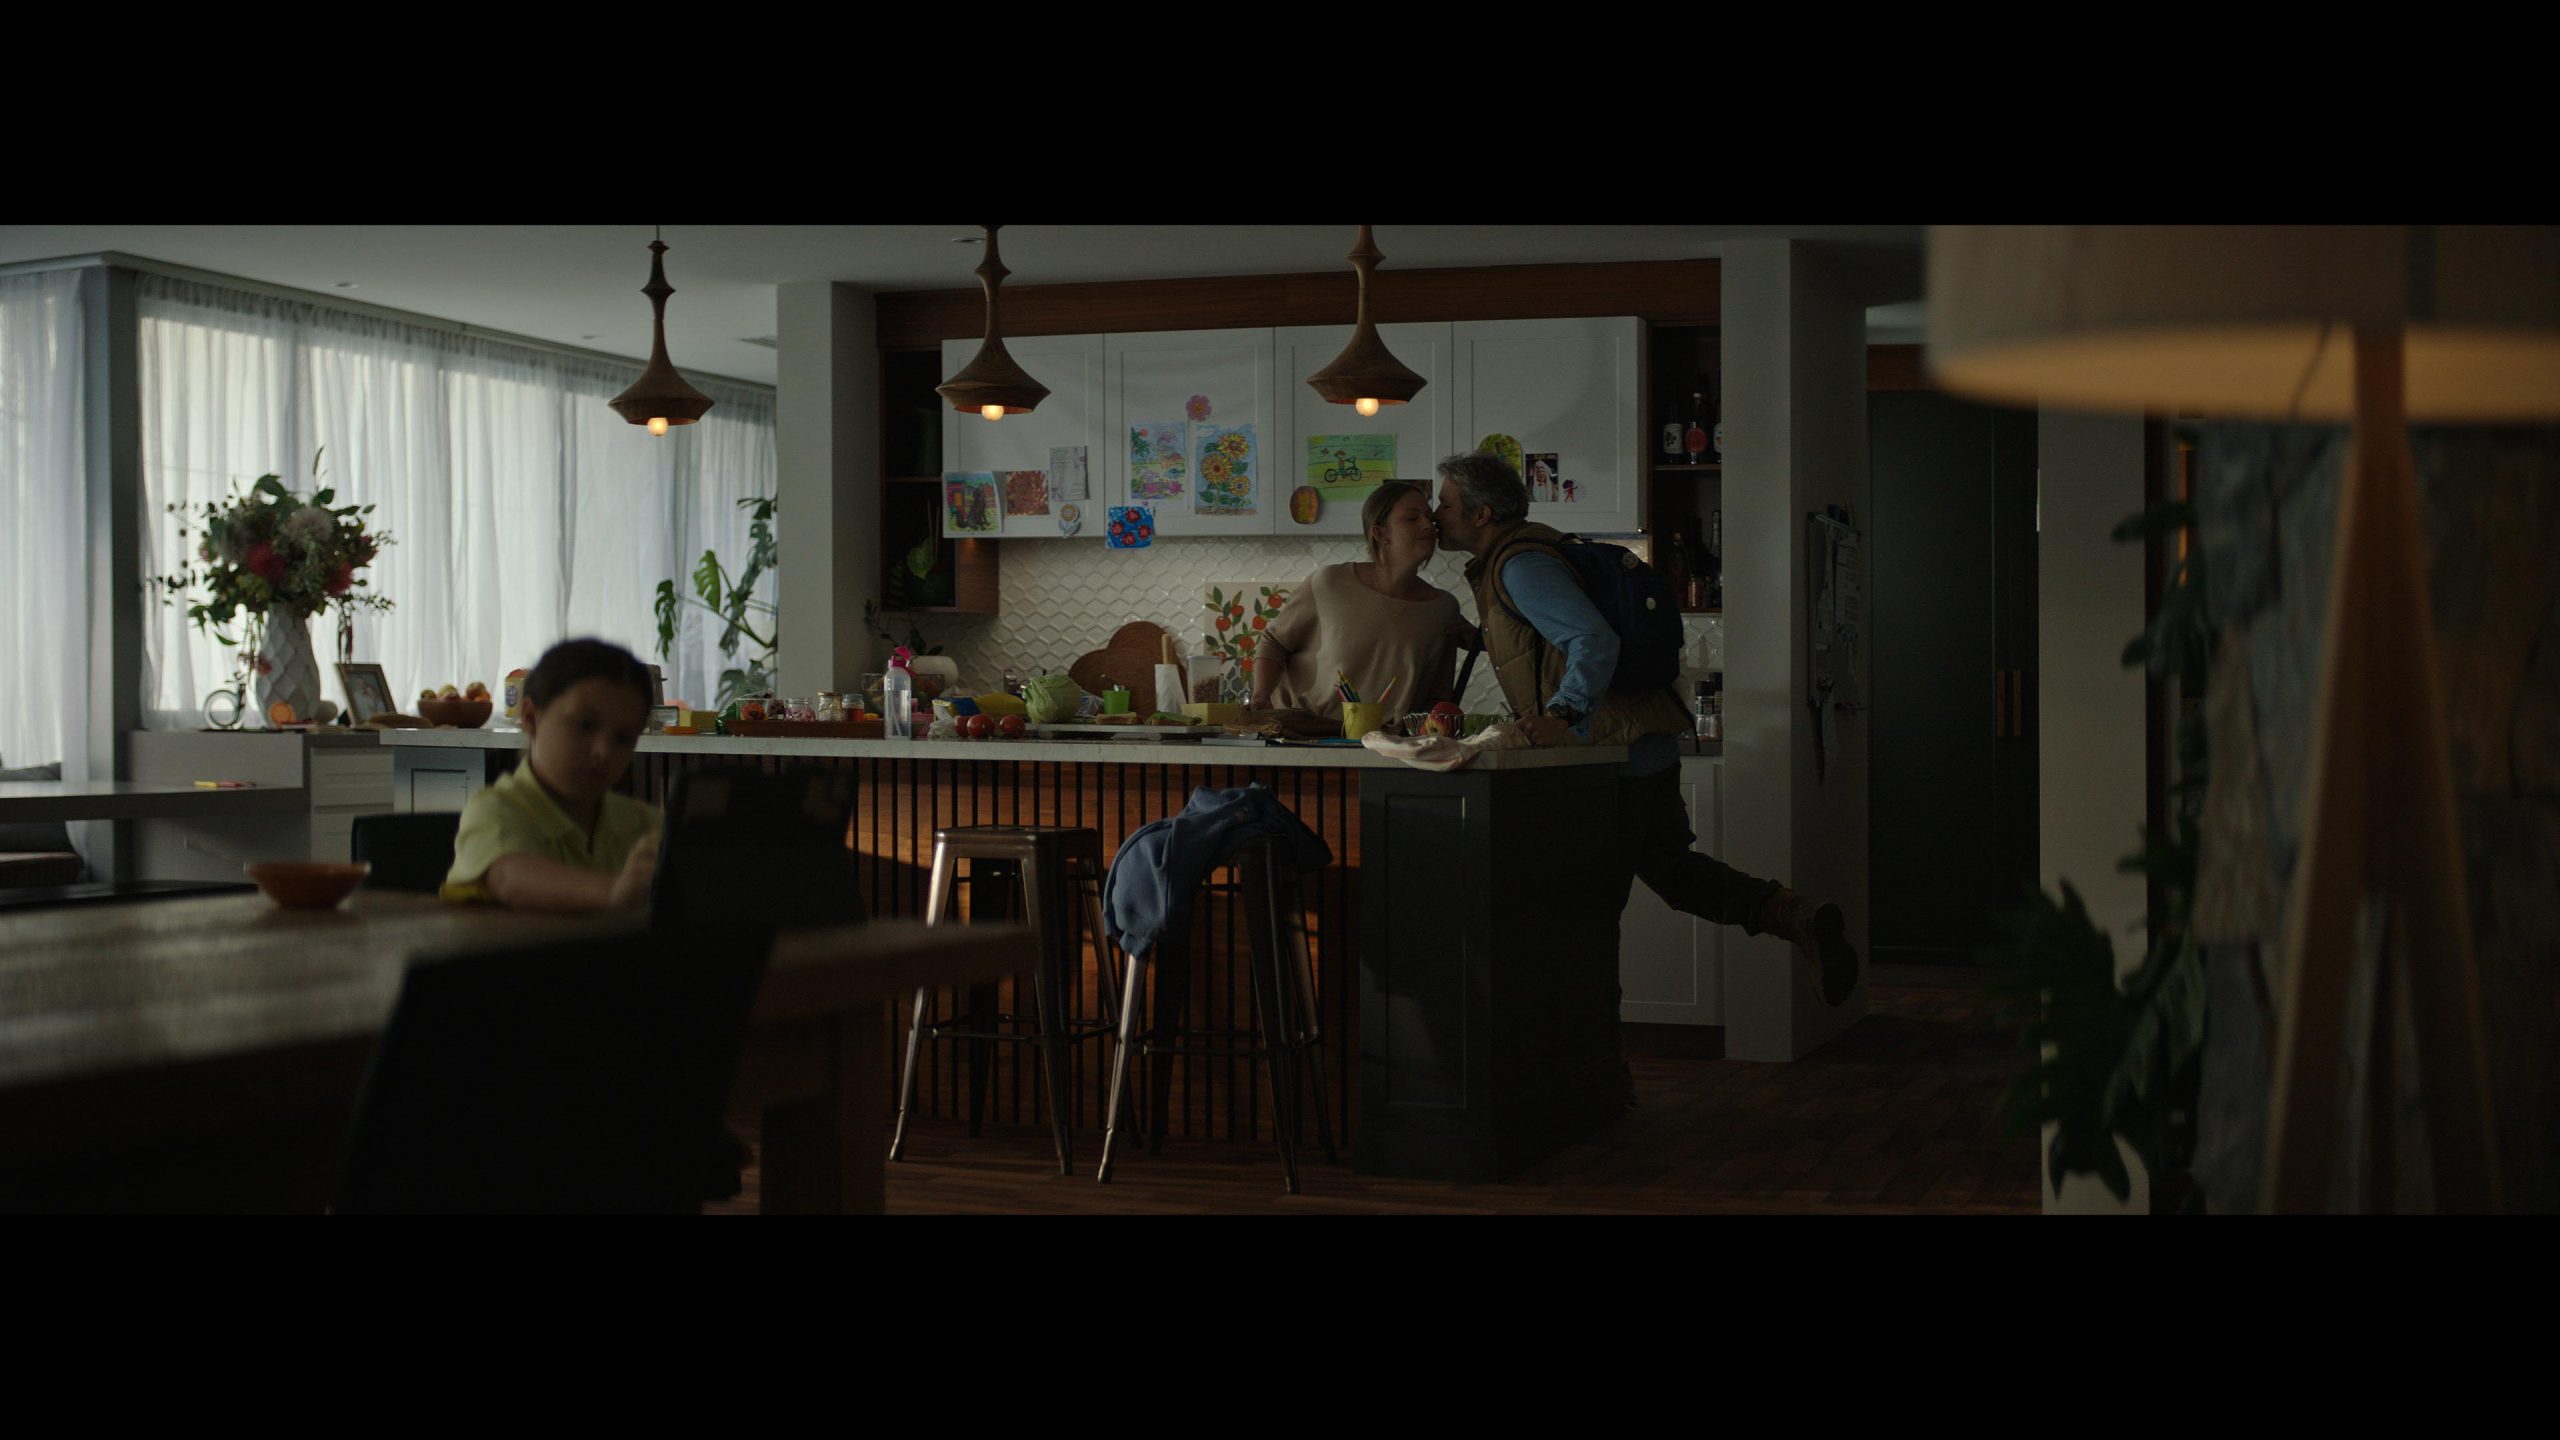
Shot #1 - The Wide
The Shot
The Master wide shot as Dad enters and says good morning.
The Lighting
Outside the windows frame left are the big HMIs pushing through 12x12s. The hard slash is creating using a 4k HMI and flagging off some of the spill to get the directional push we needed.
Inside there are practicals all over the place paired with a Creamsource Vortex in a softbox through a 4x4 frame with a grid to add some wrap to the young girl's face in the foreground.
The Result

Shot #2 - The B Cam Angle

The Shot
Same as above but from a longer lens and off axis to the light at a more extreme angle.
The Lighting
Same as above.
The Result

Shot #3 - The Second Day

The Shot
The hero shot from the ad. A slow push in as the Mom realizes that her husband is going to get in to an accident.
The Lighting
Same as the previous shot but now we are able to control the levels more precisely by moving in the diffusion frame for the key light and also adding neg fill via 2 4x4 floppies frame right.
The Result

Shot #4 - The B Cam Angle

The Shot
Same as the previous shot.
The Lighting
Same as above but at a more extreme angle to the key light means it feels darker.
The Result

Shot #5 - The Pop Out

The Shot
The camera pops out to reveal the Dad and daughter interaction with Mom in the background.
The Lighting
The lighting is all the same as the wide set up here and the only thing that has shifted is the placement of the 4x4 frame and Vortex in the foreground to help get a bit more wrap from it.
The Result

Shot #6 - The Flop

The Shot
Our first look at the opposite side of the room. We see the Dad and daughter interacting from Mom's point of view.
The Lighting
Here we are not seeing the key light source (the windows) frame right so we can open them up a bit to get some more shape. It is still the exact same fixtures but the level has shifted because we can control them all individually now.
The Result

Shot #7 - Looking at the Sheers


The Shot
The camera follows the dad through a series of hallways and out in to the main room as he gets ready to leave the house.
The Lighting
This was the flopped lighting and because we were walking the entirety of the house we had to go full sheers mode on the windows which meant very little ambient would make it to the other side of the room.
This was a classic light the space and just let it go.
The Result

Shot #8 - Inserts


The Shot
Insert shots at various set ups throughout the day. these were just in case we needed to cut dialogue in the edit so we were hunting for any detail shots that could be montaged together to add ease in the edit.
The Lighting
Stay on the dark side of the 180 degree line and you are ok.
The Result
