We are back at it with another cinematography breakdown this week on the podcast. In this episode we are looking at retail commercial spot that is a little bit brighter than what we normally breakdown on the podcast.
One of the biggest joys of working in commercials in the sheer variety of jobs that a DP will get exposed to over a period of time. You can go from something dark and gritty on Monday to light and bright on Tuesday.
Today's show is all about trying to keep shape when lighting things up a bit more than usual.
Patreon Podcast: More Breakdowns, More Fun

We are alternating between our pros vs pats breakdowns over on Patreon and this week we take another look at a Patreon supporters recent project. This is part two looking at this great little TV spot from Nik Pilecki. ]
If you love the breakdown episodes and you want more of them each week then Patreon is the spot for you. Next week we are looking at Greig Fraser's work on one of my personal favorites for the cinematography, Killing Them Softly.
You can find this week's Patreon content by clicking the link below:

If you are a fan of the podcast and want more video content the patreon group is the place to be. Each and every week I release an exclusive podcast, video, or live stream just for the Patreon members.
Patreon members also get access to the Private Facebook community for the show. The podcast couldn't exist without the Patreon support and I do my best to take care of the supporters.
High Key Lighting - Creating Shape
This commercial was the stock standard goodies for gear and lighting. No special toys to mention but we did shoot Prores 4444 on the Alexa XT with a set of Ultra Primes.
Camera Gear:
Check out the gear I use on all of my commercial shoots by clicking the link below:
The Spot - High Key Lighting
Set Up #1 - The Crane


The Shots
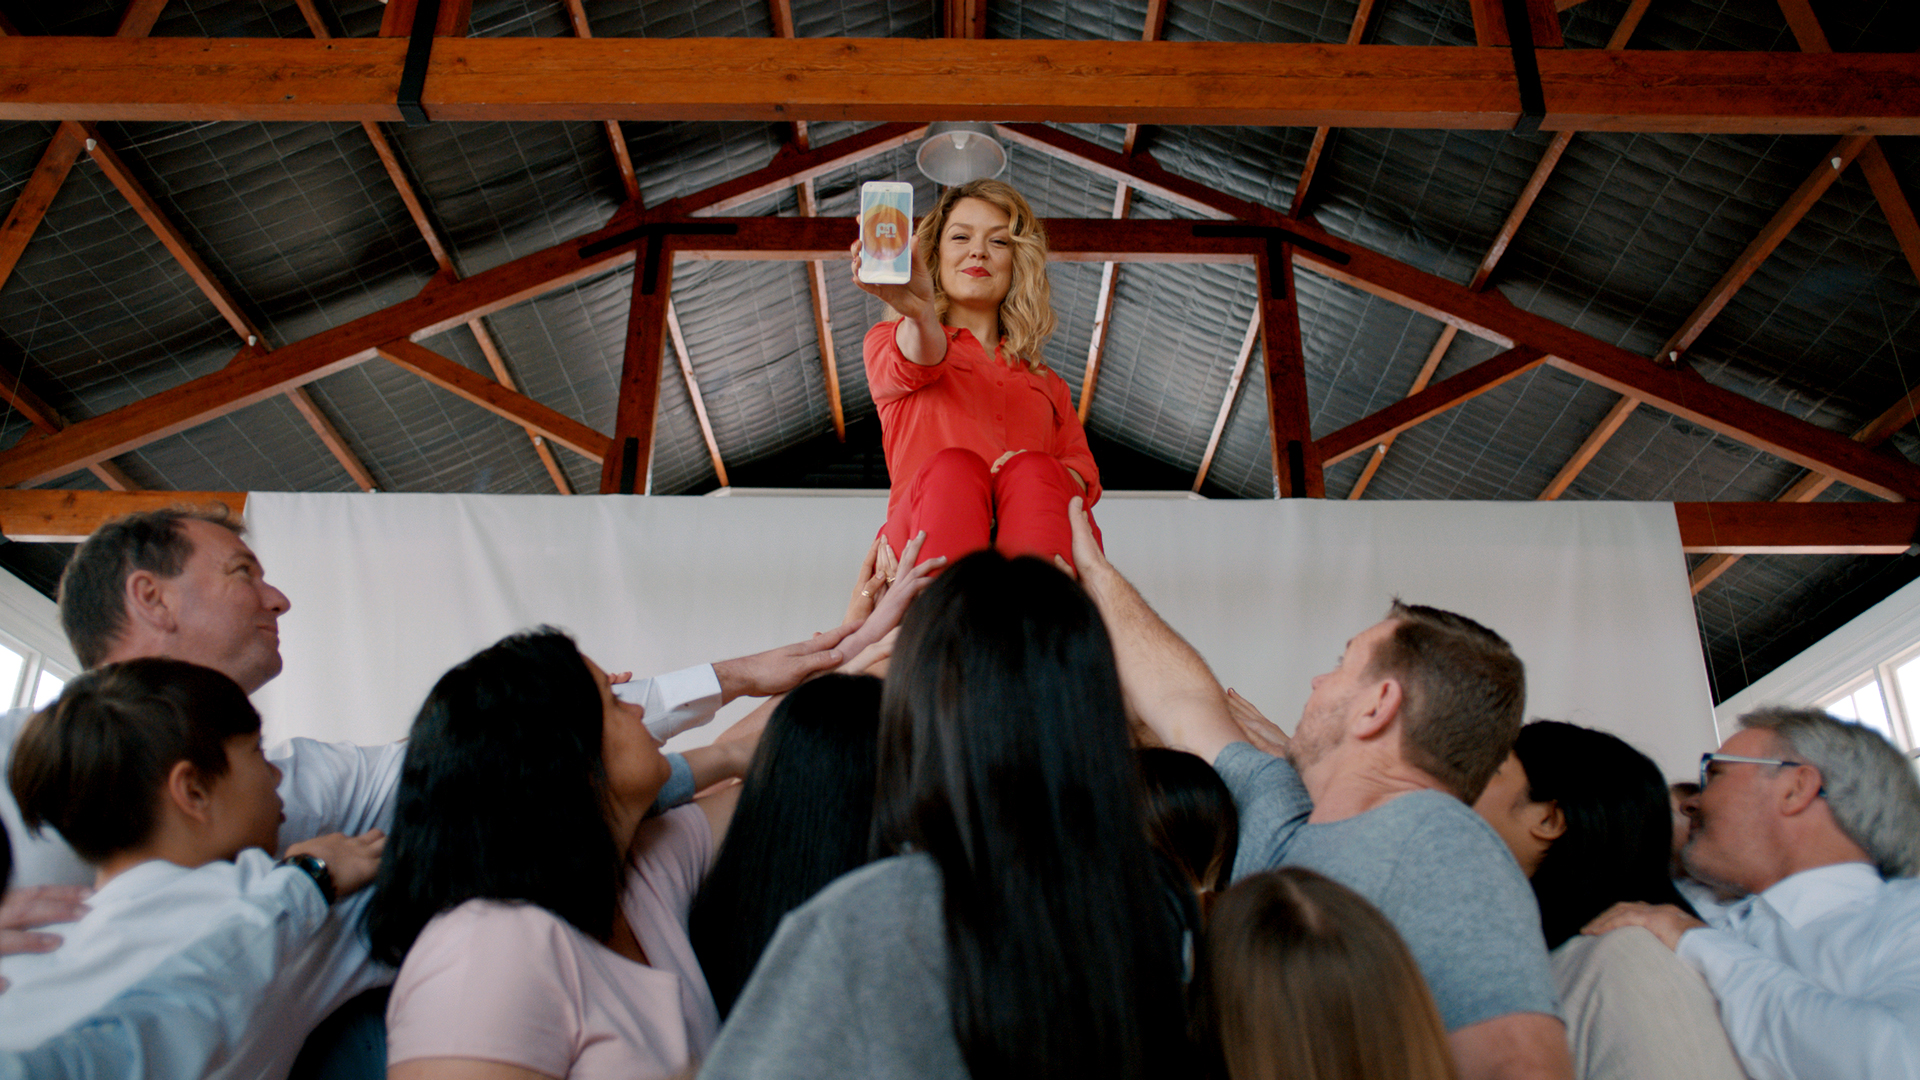
The camera start was up above the talent and then rushes down towards the floor as the extra lift the spokeswoman in to the air.
The Lighting
The most challenging part of the lighting was keeping it consistent with the rapid weather changes happening outside.
We used a 12k and an M40 inside to provide the key and the wrap. Both of those lights were frame left and qwuite fronty. They were pushed through multiple layers of diffusion to get the right amount of softness yet still have enough level to balance with the outside light.
Outside was a series of smaller HMIs with a 6k and a few M40s punching through the windows.
The Result

Behind the Scenes

Set Up #2 - The Close

The Shot
A tighter version of the previous shot for the final cut in the ad.
The Lighting
The lighting stayed exactly the same but the diffusion was brought closer to the edge of frame to help make the light a little bit more flattering.
The Result

Set Up #3 - The Walk & Talk

The Shot
Now we use the crane to push in and follow the talent as she makes her way in to the center of the circle.
The Lighting
The main challenge here was keeping exposure consistent over the entire length of the walk and move. The location wasn't the biggest so we actually had to park the crane outside and push all of the lights up against the wall in order to get the length of walk we needed.
The Result

Set Up #4 - The Reveal


The Shots
The opposite of the previous shot. Now the camera pulls out while the talent remains in her spot.
The Lighting
We kept everything the same but moved the diffusion just to the edge of frame at position #2.
The Result


Set Up #5 - The Flat Wide

The Shot
This was just a static flatter wide for the 2nd spot in the series.
The Lighting
The lighting was drastically different at this point because of what was happening outside with the weather and cloud cover.
We added an M18 inside frame right to help edge the talent out of the background.
The Result
