The Wandering DP Podcast: Episode #64 – Eye Lights
In today’s episode of the podcast we look at a crecent commercial breakdown and go over the easiest way to create natural feeling eye lights.
Eye lights are a bit of a mystery when you are first starting out but once you understand the basic concept they can help up the quality of your final images.
The Final Sequence
The Location
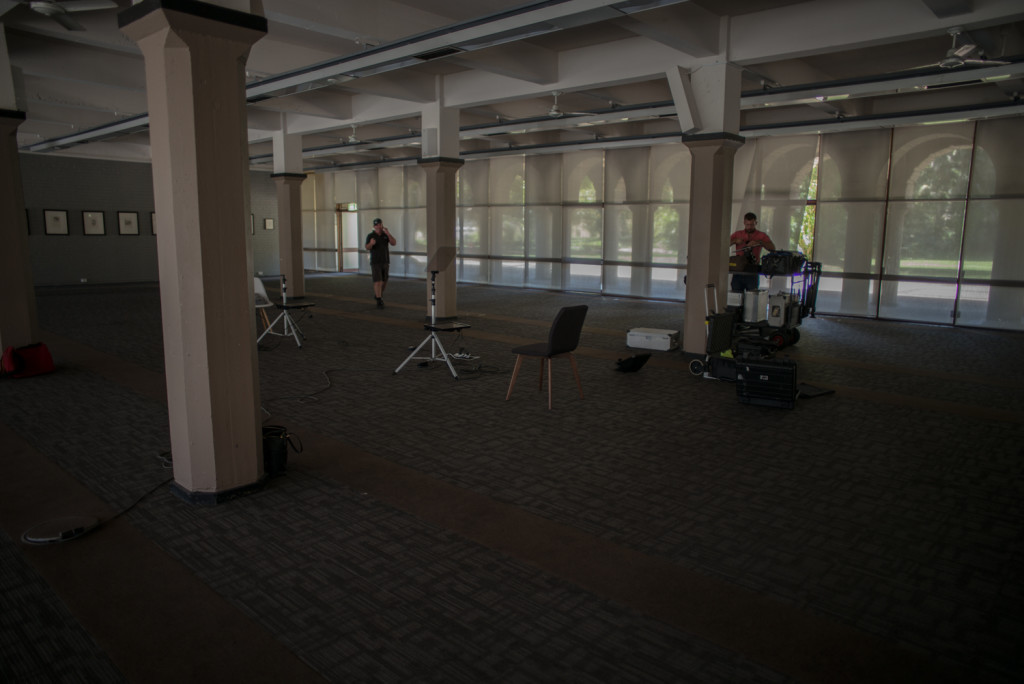
First issue you should see is the floor to ceiling windows. Not ideal for a space we are trying to make look identical over a 12 hour day.
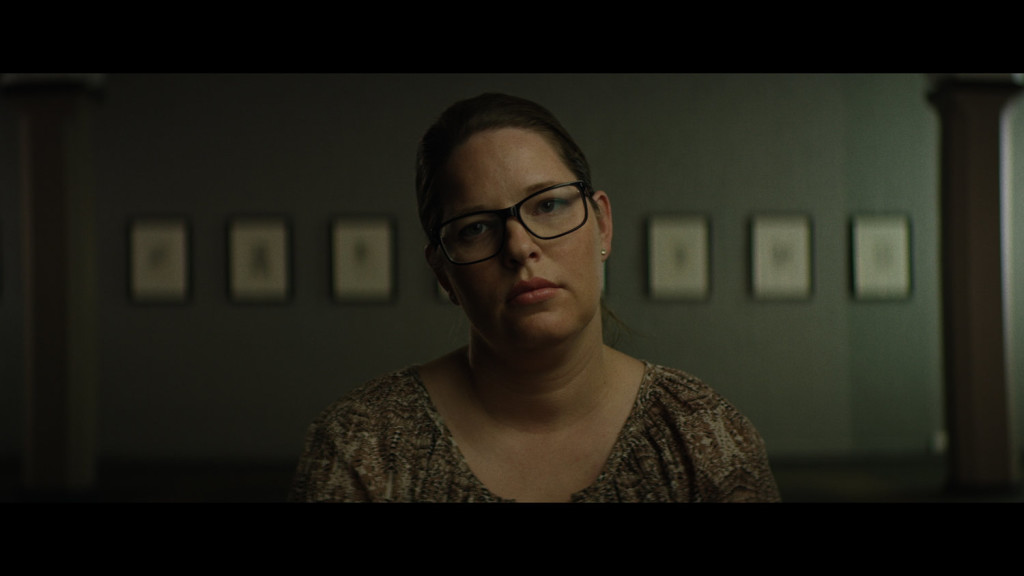
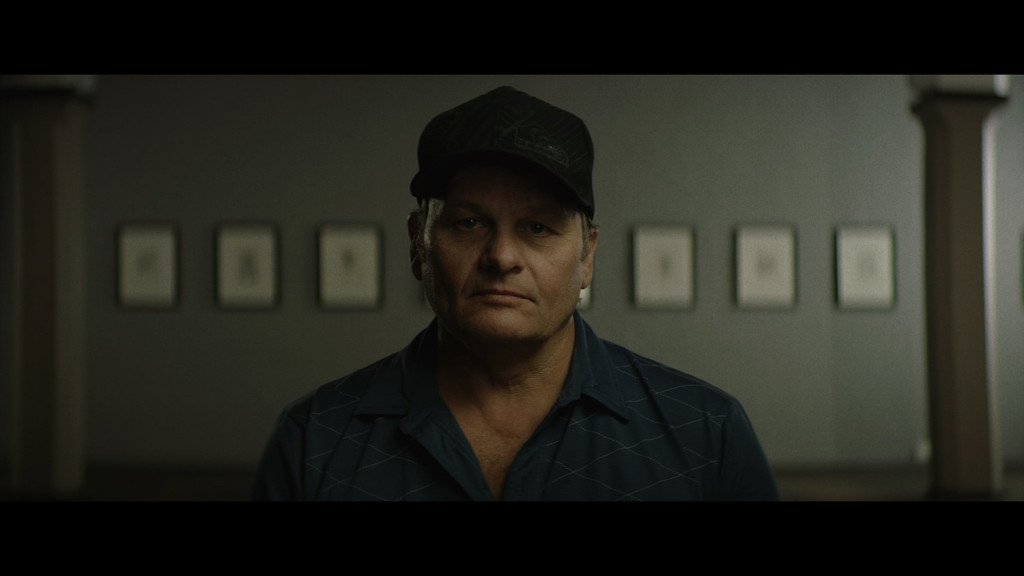
Second issue was making sure we were happy enough with both of our angles. The stair case angle was nice because we could use some light to create layers and separation. The second angle of the paintings was less exciting as there wasn’t as much flexibility.
The upside was there was lots of room either side of the camera to place things exactly where they needed to be.
The Tech Info
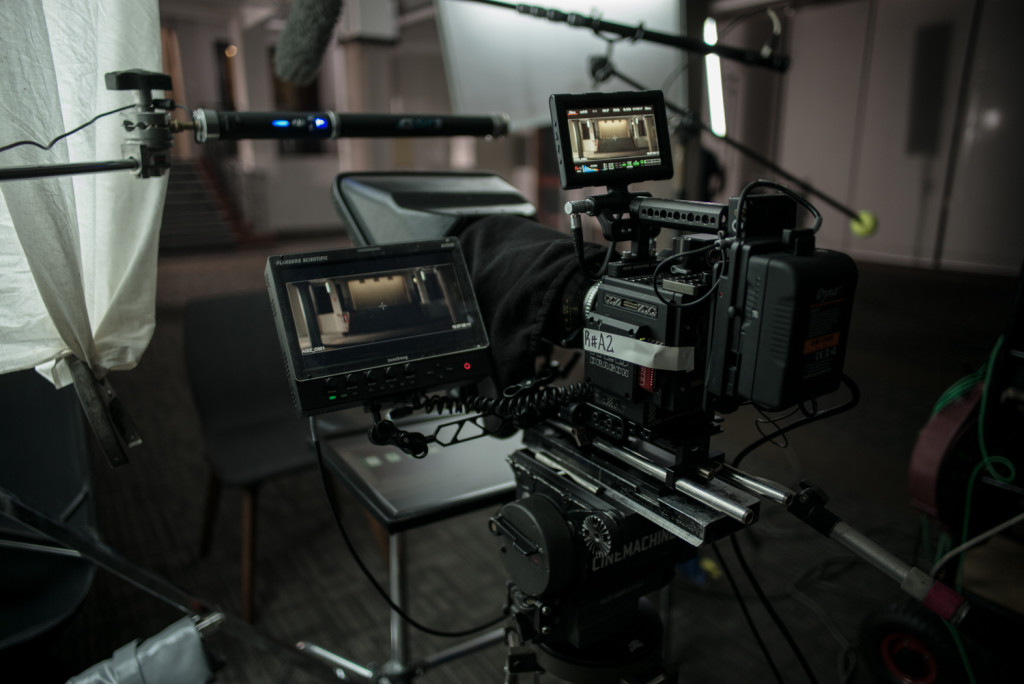
The Camera(s):
2x RED Weapons
ISO: 640
Shutter: 180 degrees
FPS: 25fps
RAW 6:1
The Lens Package:
Cooke Anamorphic 2x (40mm & 75mm)
Everything was pretty standard for the camera packages. Normal iso, shutter speed, and fps. The only fun thing was the lens package. A beautiful set of Cooke Anamorphics.
Breaking Down the Eye Light
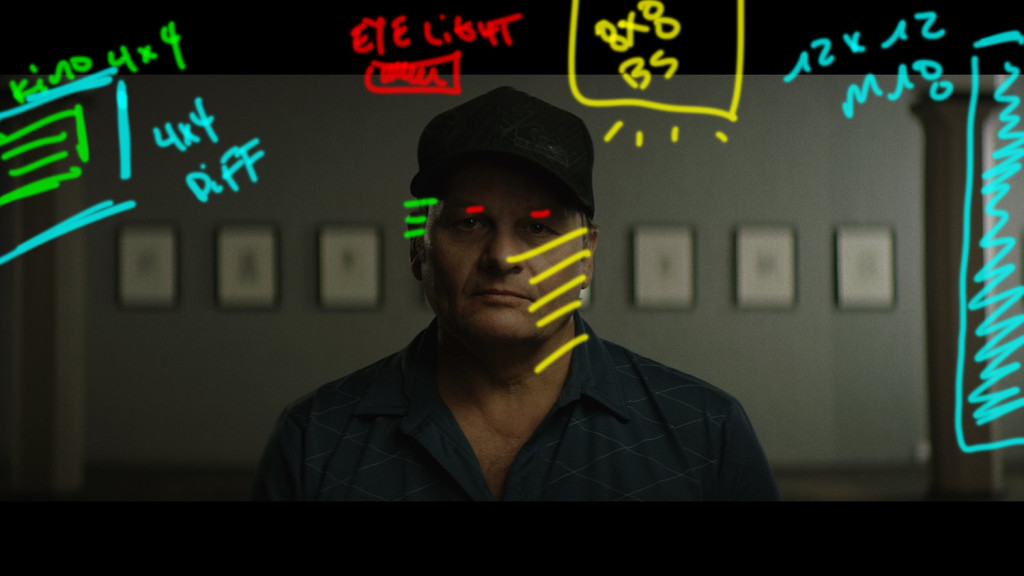
Below are the finals set ups broken down light by light. In the next section you can see the exact lights used, bts stills of the placement of the units, and also a bit more info on creating the perfect eye light.
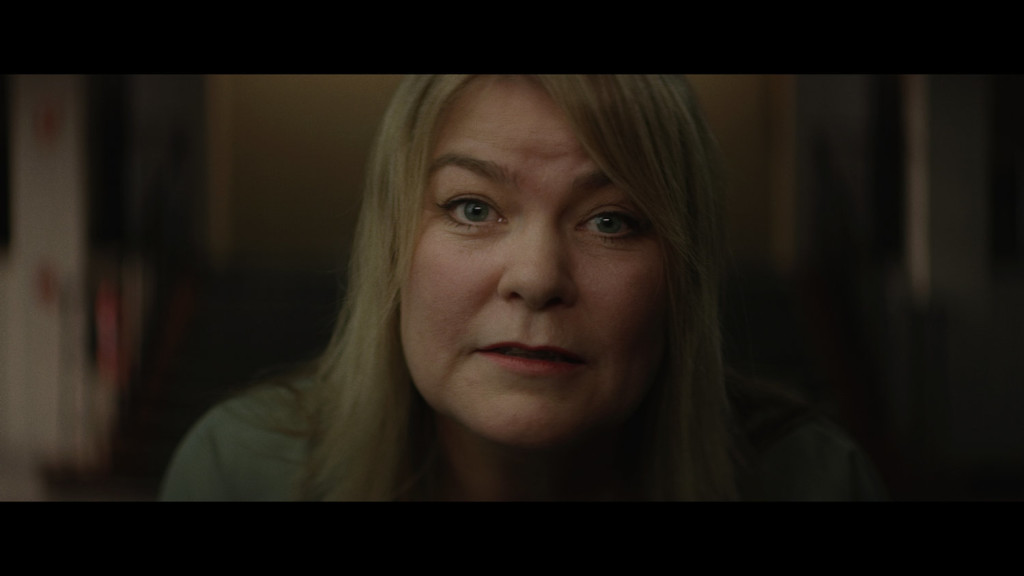
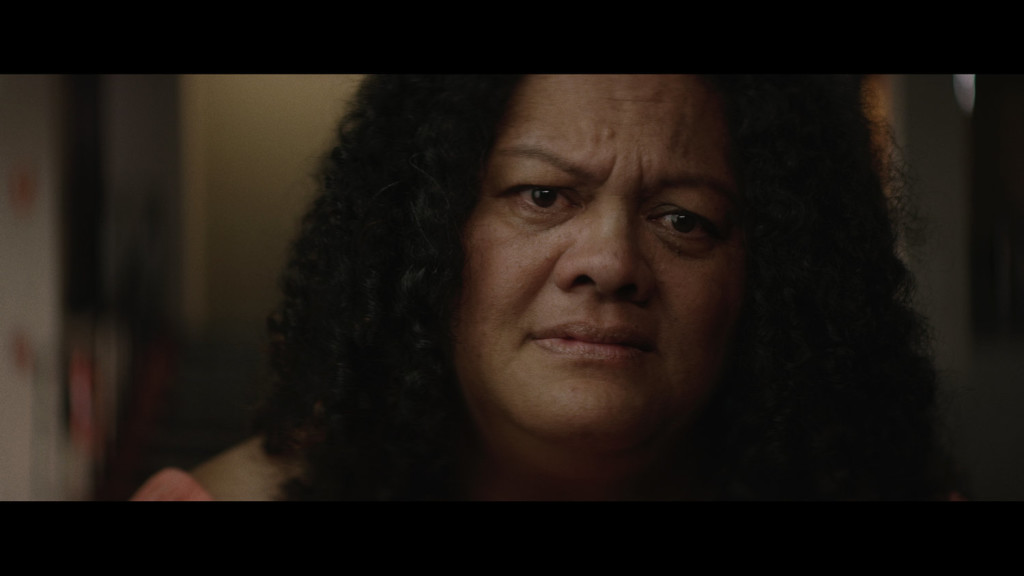
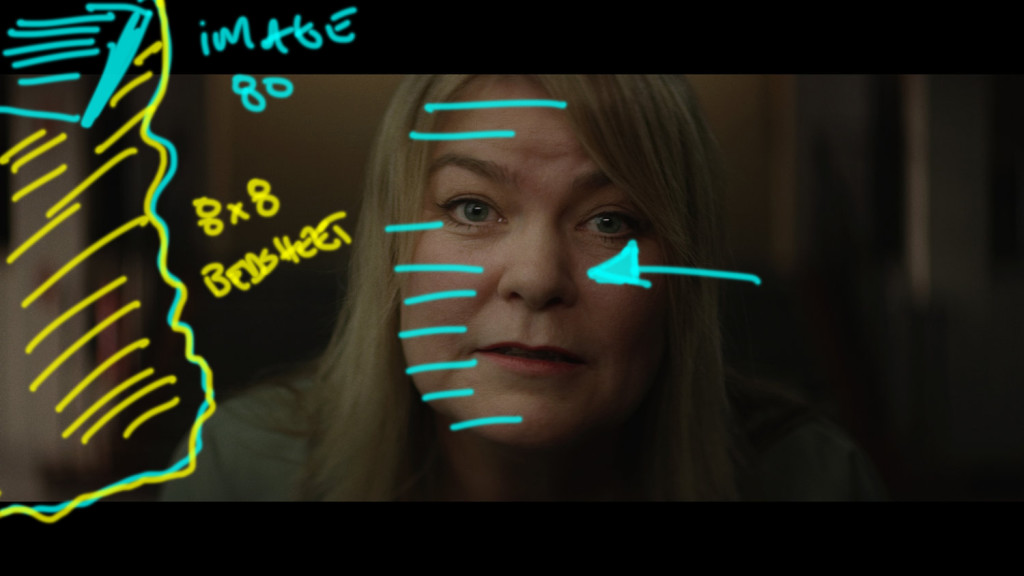
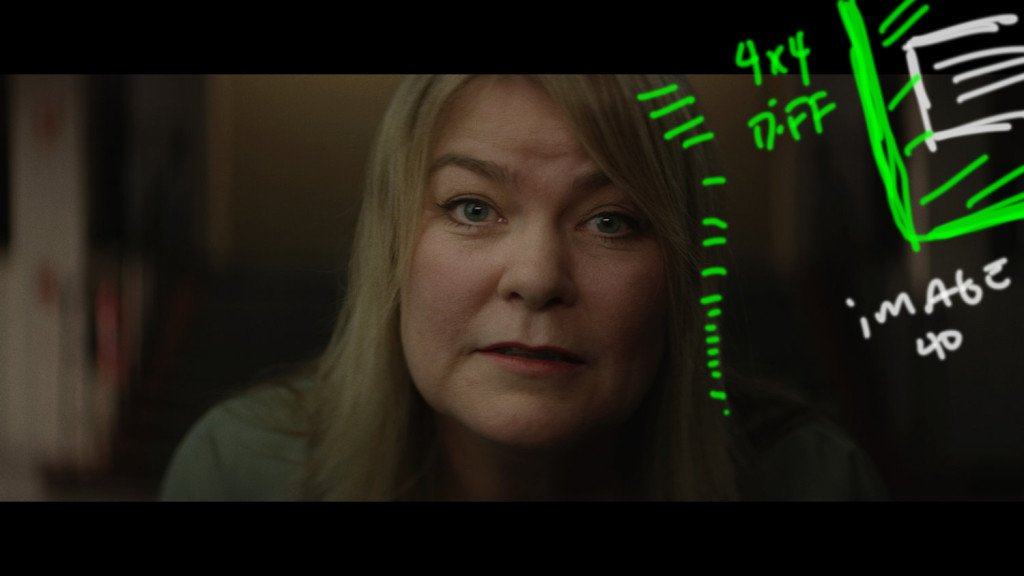
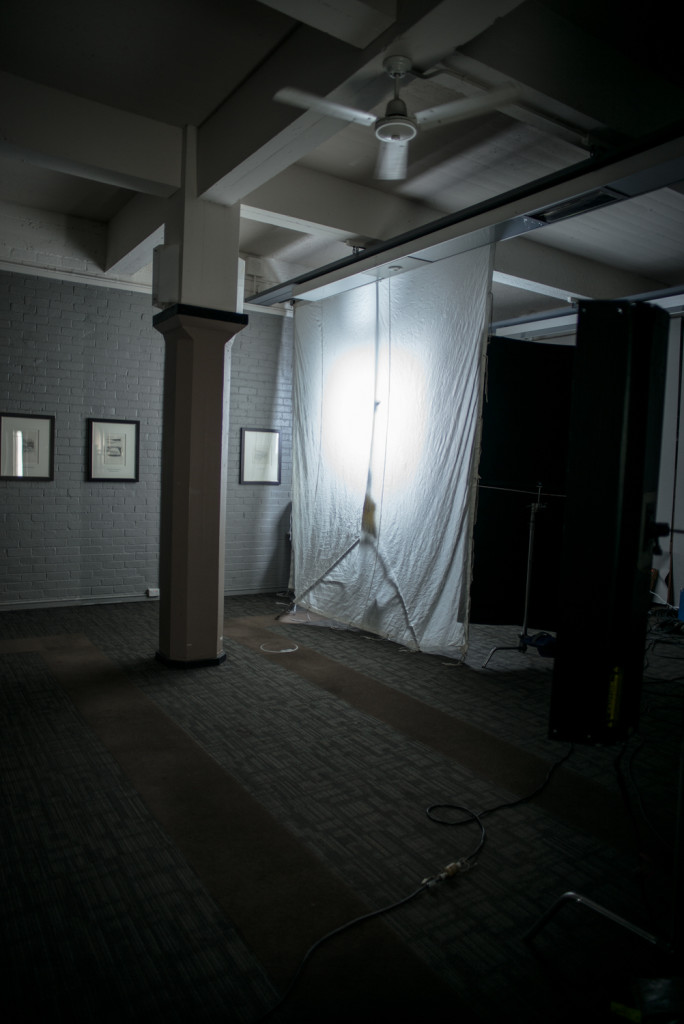
- Starting with the key light. An Image 80 through a 8×8 ghosted bed sheet. Lots of beautifully soft level. Placement is key and the angle is what creates the nice bit of soft nose shadow.
 2. Next up is the hair light. Nothing crazy just an Image 40 Kino Flo with maybe two bulbs on through a 4×4 of diffusion.
 3. Next is the eye light placement. An Icelight just over the top of the lens. Dimmed to as low as it can go.
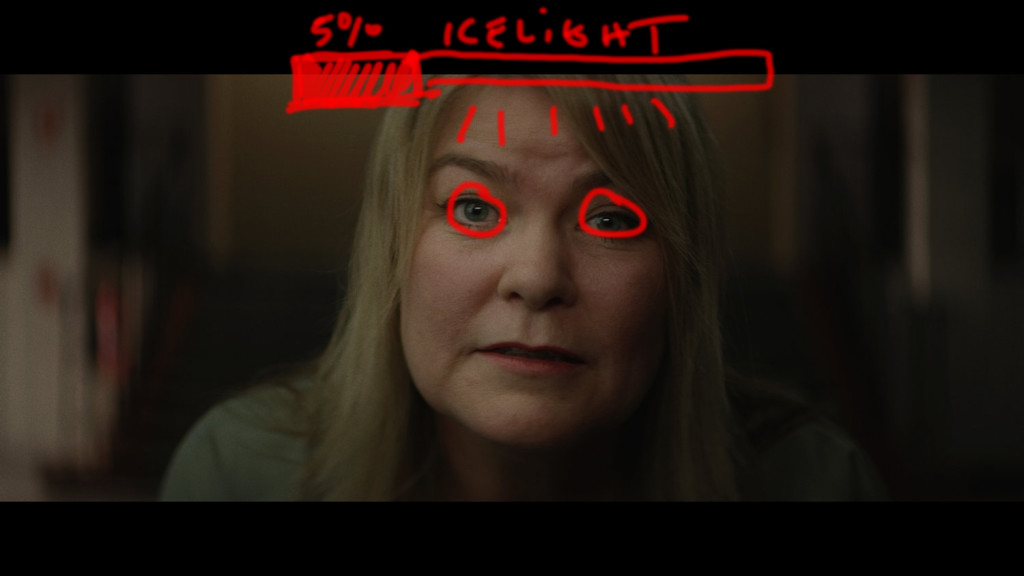
4. The background/ambient comes from a 6k through a 4×4 just out of the room on camera left. The last touch of background fill comes from a kino 4×4 with a single bulb on illuminating the front of the columns.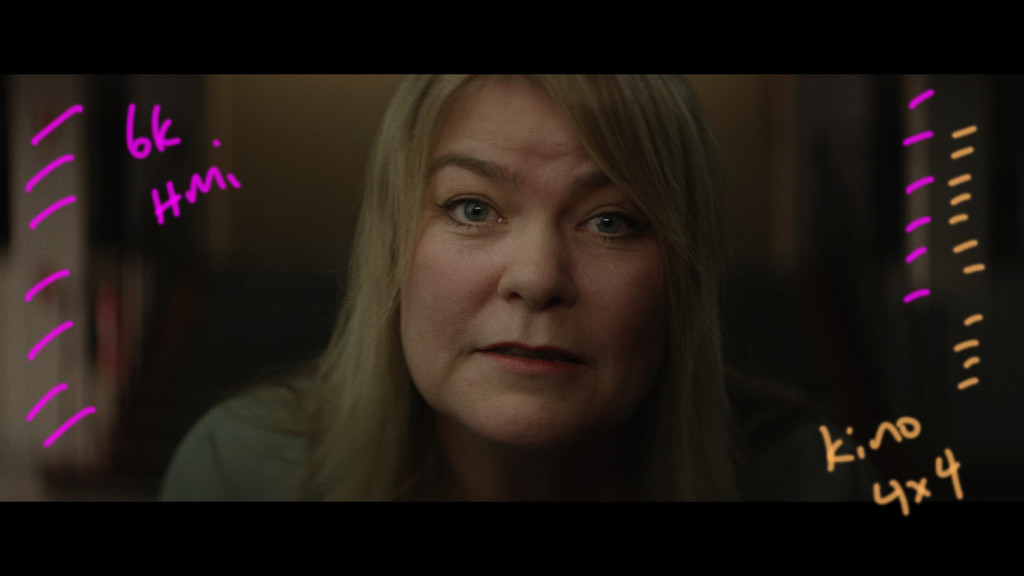
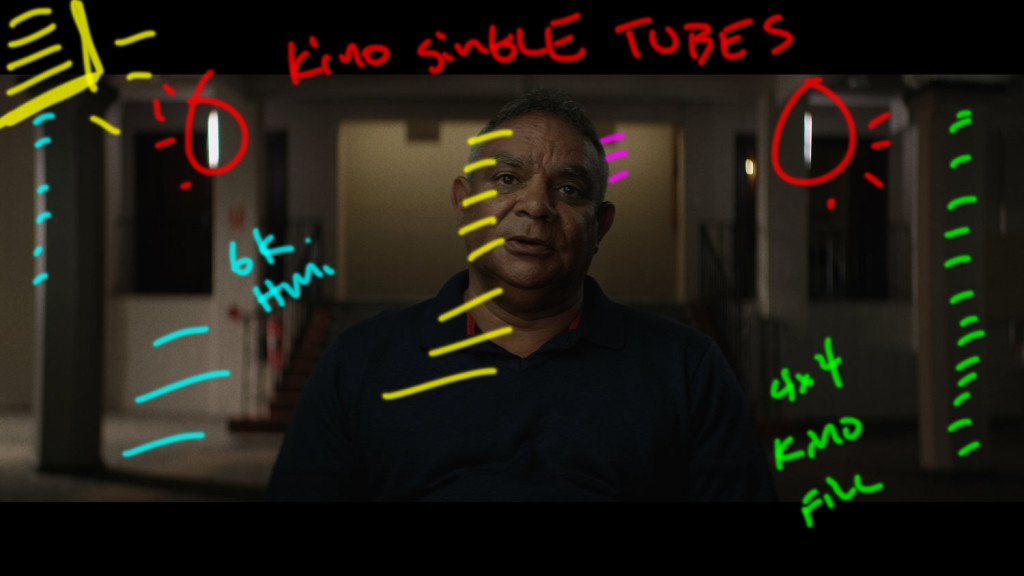
5. This is the same set up as before but on the 40mm lens. Now you can see the single kino tubes placed in the background to look like practicals.
6. The opposite side of the conversation. Light almost identically. Only difference is in the background there is an M18 through a 12×12 and a bit of flag city to make the nice gradient on the back wall.
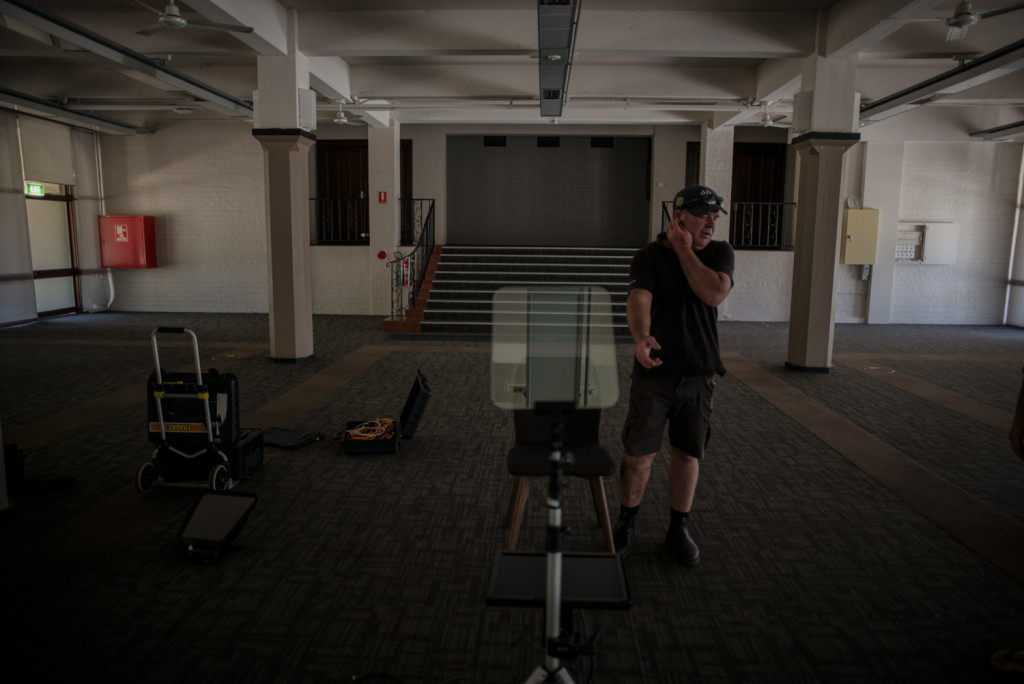
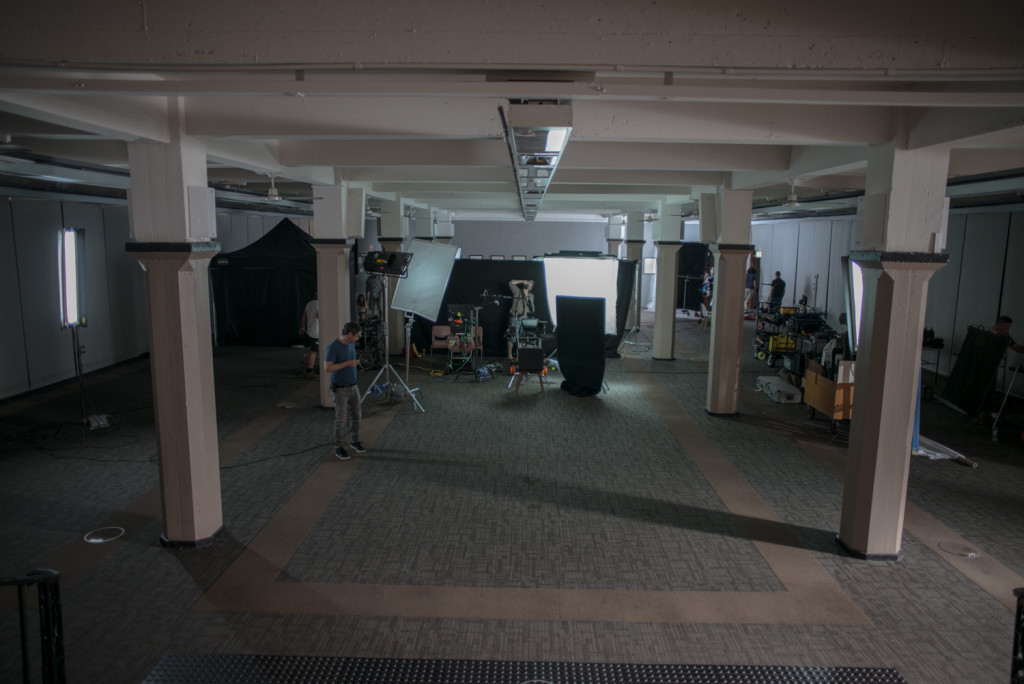
The Lighting Set Up
The room was quite a large space and we wanted to pull the talent away from the walls so that they would disappear in to the blobby abyss of anamorphic goodness.
The main issue is we were in a practical locations (for the backgrounds) that had pre-existing floor to ceiling windows. We were scheduled to be filming all day and any stray window light would expose the gag of all of these conversations happening at the same time.
So the first step was to get the grip team blacking out both sides of the building. A big pain in the ass but they did a great job.
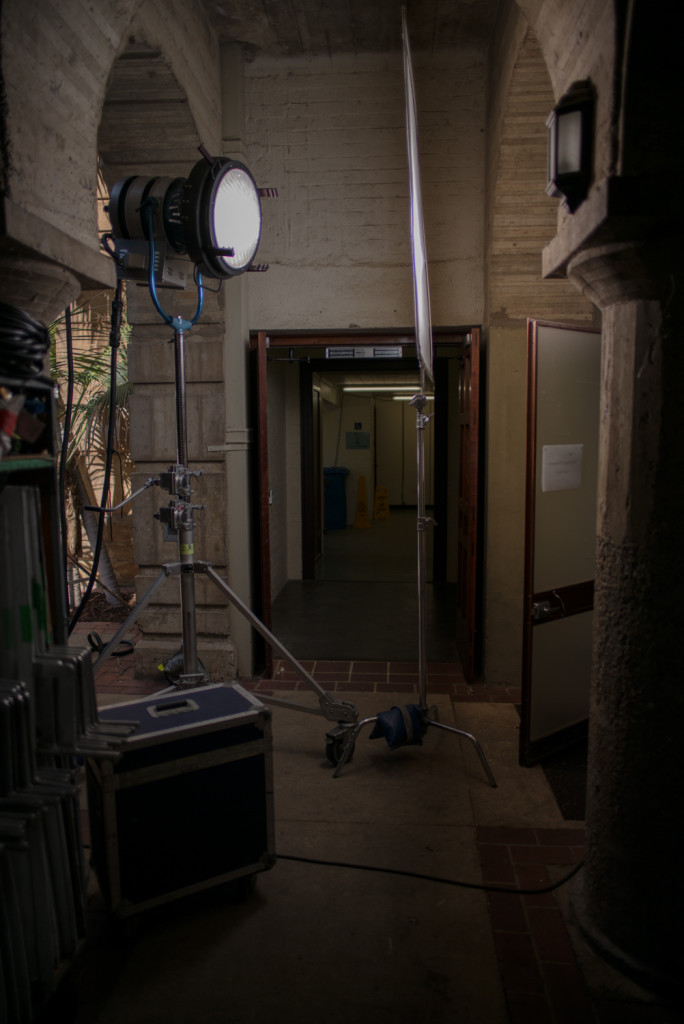
Then we needed to fill the ambient in as the blacking out had canned all our nice ambient. For that we went with the 6k in the main set up facing the stairs. This gave us two things.
#1 We got a nice slash of light which broke up the boring background with some nice contrast.
#2 The lamp was powerful enough to get nice travel and bounce of some different surfaces to make things feel a bit more natural. Not quite so sterile.
Next we moved in with our key light. The lighting for the foreground had to be slightly mobile as each talent had slightly different facial features that we would have to adjust for.
We went with aKino Flo Image 80 ghosted with an 8×8 bed sheet.
The Image 80 spits out quite a bit of level, especially when it is in just off of camera, as we had it. The bed sheet to some stop out of it but we wanted lots of level to make our eye light nice and easy.
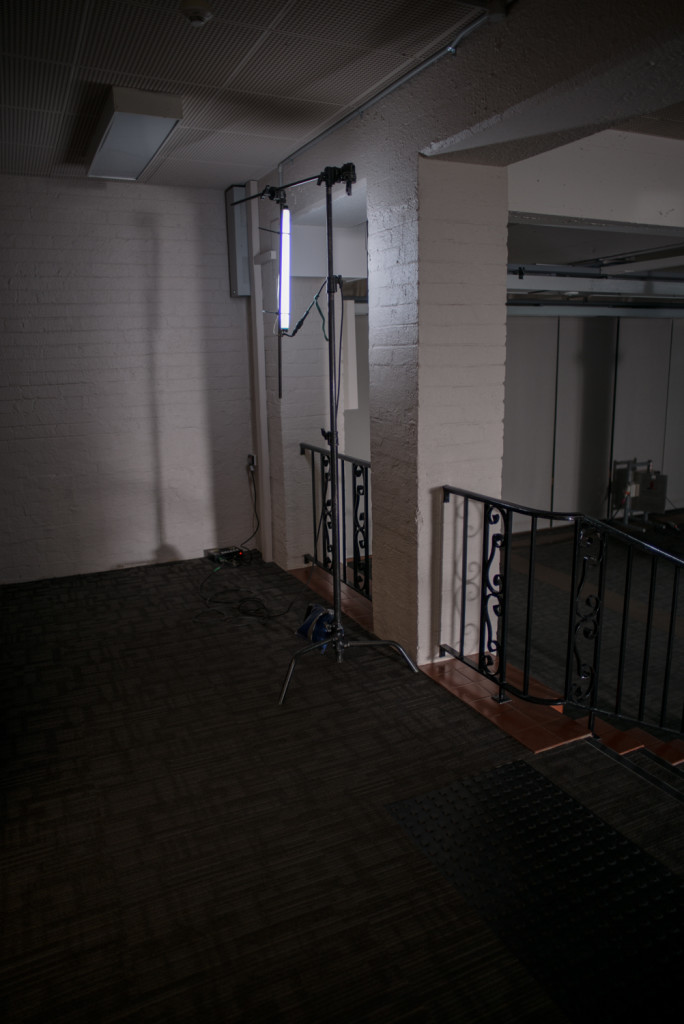
Next was the edge/hair light. Nothing to drastic just very subtle separation between our talent and the background. We went with an Image 40 through a 4×4 frame. Chances are we were down a tube as well.
As we start to finesse the levels, getting closer and closer to shooting, the camera right background needed just a hint of level so we threw up a kino 4×4 with just a single tube on.
The last bit of interest was two single kino tubes rigged to look like practicals in the background.
Full Equipment:
1x Arri 6k HMI
1x Arri M18
2x Image 80 Kino Flo
2x Image 40 Kino Flow
3x Kino 4×4
2x Single 2 foot Kino Tubes
2x Icelight ** The eye lights
2x 8×8 Bedsheet
1x 12×12 1/2 Grid
2x 4×4 Diff


The Eye lights – The Last Piece
So we had a hefty amount of level that you could say might be a bit excessive for what we were doing. Why, you ask?
Because lots of level makes eye lights easier. You get eye lights by placing a light some where very close to the lens on the camera. The lubrication in the eye causes the reflections just like on a glossy car and you get a nice glint of light in the talent’s eye.
The problem is if you don’t have lots of level and little bit from the eye light will start to effect your entire look. Not ideal.
So to make things easier you up the entire level that way the ratios become more favorable for the eye light not bleeding into your key or more important your fill side.
Hi. Love the podcast.
Been enjoying it.
Quick question. You talked about levels. Rather than using so much ND in camera and needing such big fixtures, couldn’t you use ND on the eye light to bring that down?
Hi Patrick,
Great job on the recent breakdown with eyelights. I’ve always assumed that eyelights (and backlight too) should always have a hard intensity…great to find out I was headed in the opposite direction haha.
I have a quick question about your Dyna battery experience. I recently picked up a 150wh gold mount and I’m loving it- great you can charge without a clunky charger.
However, I’m worried that I’m going to have issues flying internationally with this thing. The lithium ion laws seems to vary slightly by airline/country- it seems a big liability to not know whether or not my batteries will make it through security. Do you have any experience/advice on traveling with 100wh+ batteries through airports?
Thanks again- can’t wait to hear the Patreon supporter episode.
Love your breakdown so much, and the final images are gorgeous!
Also love your use of the ice light for eye lights. Are there any other type of lights you use for eye lights? Like for someone doing a passion project with barely a budget, what would you use instead?
Stunning work, so beautifully subtle and love the choice of lens. Thanks for this!
Amazing!!! Thank you so much for your tips. This beats film school by a long shot.
Can you show a photo of the ghosted light?
I found the video on YT that showed the BTS. Hope this helps!
https://www.youtube.com/watch?v=80gkwcx314w
Nice find Zavier, good looking out, man.
Also, I’m sure you’d agree…that’s some epic facial hair game at the 10 second mark.
Does this waveform look right to you guys? It seems really low.Is my waveform settings messed up or is this what its supposed to look like in post?
http://i68.tinypic.com/25s7loh.png