Listen to the Podcast
On the show today we are looking behind the scenes at a recent television commercial where we decided to approach the lighting from a single source point of view.
The script and the location meant we had to find interest in a rather uninteresting set. White walls, low ceilings, and a tiny room meant we would have to be on our A game to bring this thing home.
We take a look at all the little tricks we used to help guide the viewers eyes and keep the tones and mood where we wanted them.
Patreon Podcast
This week on the Patreon Podcast it is all about learning to light. The single most asked question in the Patreon group is, "How can I learn to light?", and in today's podcast I give it my best attempt to guide you how I would start.
It can be a frustrating and never ending process but if you can nail down the basics you should be able to set yourself up for success.
Single Source Lighting: The Spot
This week's commercial called for an older gentleman seated in front of his piano. He sits down to play a tune and we see him fumble his way through a tune looking for inspiration.
The easy part is that the spot was all in one location. The hard part was the spot was all in one location.
Location and production design are two gigantic pieces to any cinematography puzzle and for a variety of reasons we started this spot with our backs against the wall.
The location was a small white room with low ceilings, the window was north facing but on the day it was raining and overcast. We had to come up with a strategy to keep us on schedule and looking good.
The Gear: Camera & Lighting
In the camera department we decided to shoot on the Alexa XT paired with Lomo Anamorphics. We shot in Arriraw using the 4:3 mode in the camera.
Initially there was some concern over shooting anamorphic so rather than shooting Prores at 2048x858 we chose to shoot Arriraw so that we could center crop to 16x9 if necessary later on down the line and not take a huge resolution hit. Shooting Arriraw in 4:4 meant we had a capture resolution of 2880x2160.
Camera Gear
- Arri Alexa XT - Arriraw 4:3 @ 50fps, 5000k, 180 degree shutter
- Lomo Anamorphics 2x Lens Set
- Bright Tangerine VIV 3 Stage Matte Box
- Arri WCU-4 Wireless FF
- Firecrest IRND Filter Set
- OConnor 2075 Fluid Head
- Cmotion Cfinder III Range Finder
- SmallHD 703 High Bright Monitor
- Flanders CM240 - Director's Monitor
Lighting Gear
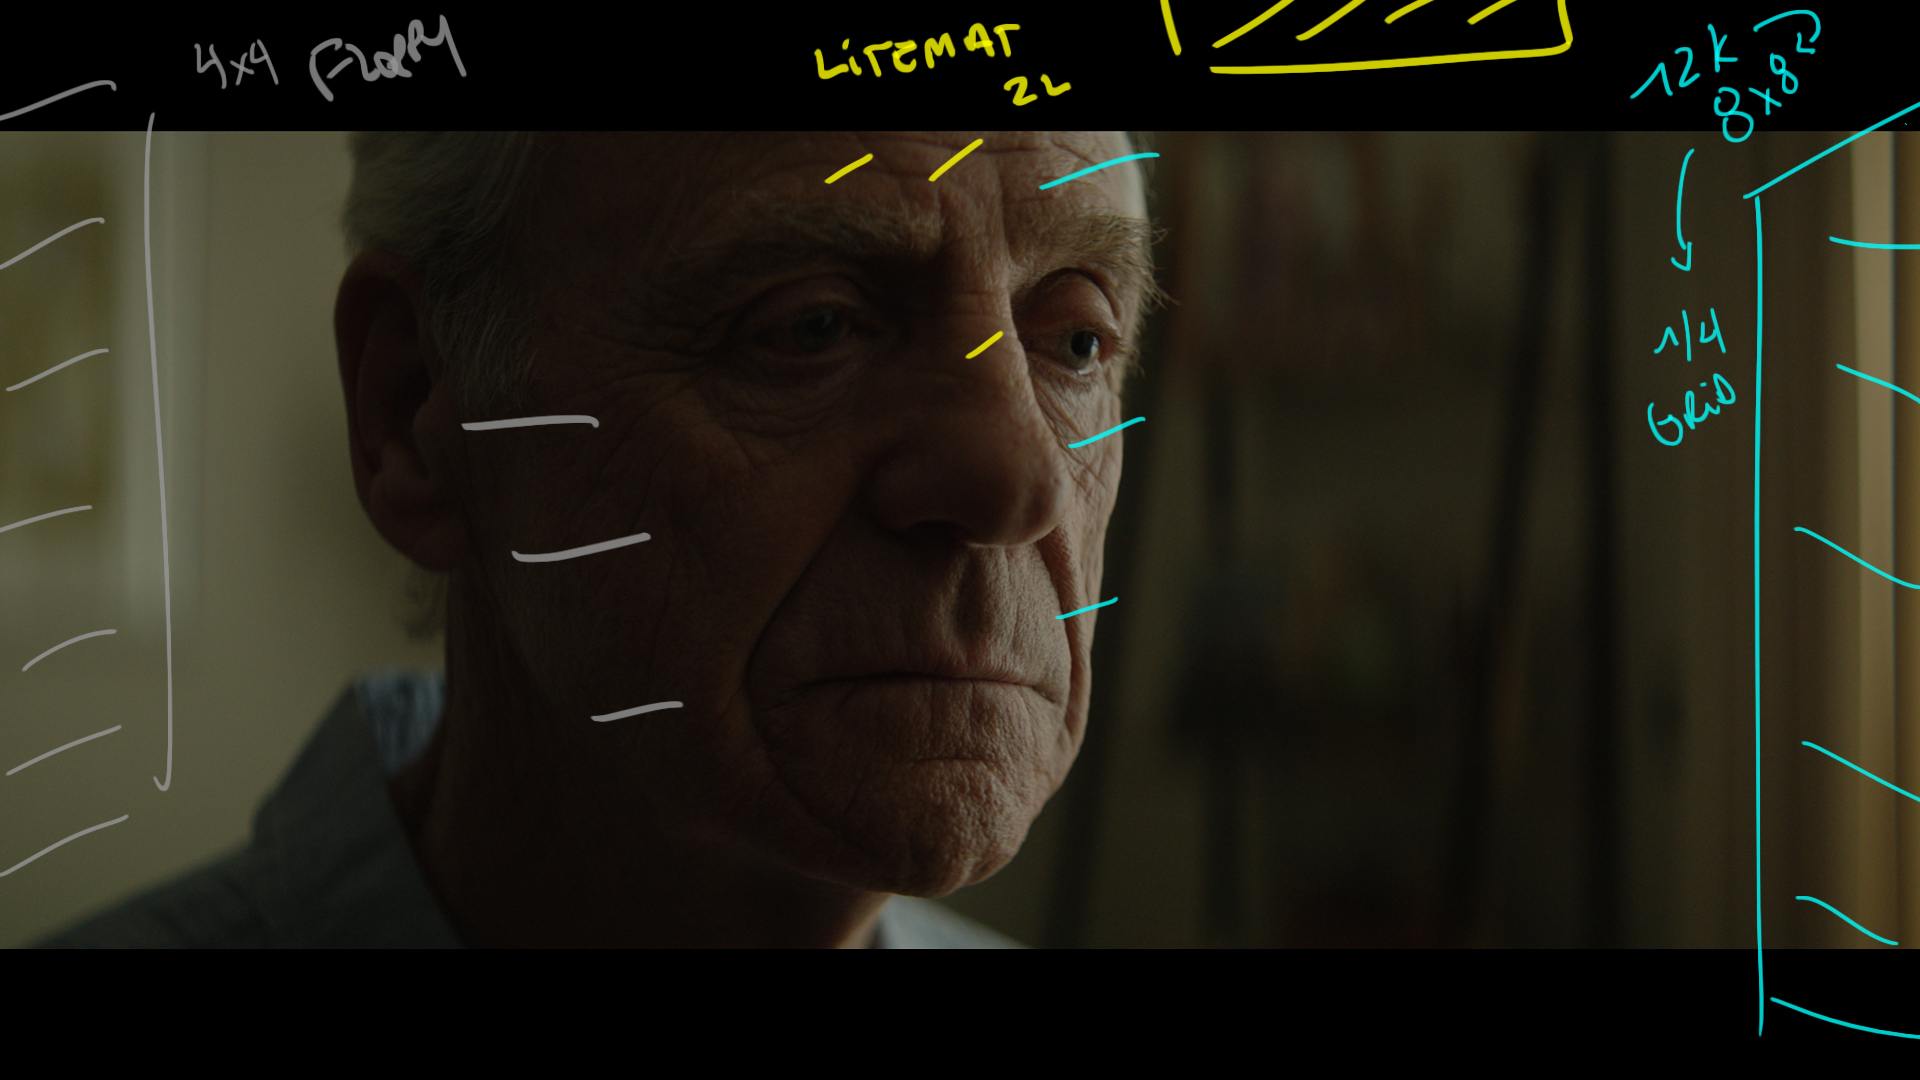
- Arrimax 12k HMI
- 8x8 1/4 Grid Textile
- 4x4 Frame of 216 Diffusion
- Litemat 2L and 1 Sets
- Arri M18
- 4x4 Floppies
- 12x12 Black
Single Source Lighting: The Set Ups
The Intro - Establish the Single Source

The Shot
This was the opening of the commercial and a shot that went for 8 seconds on screen. The camera starts slightly wider and as the music kicks in the camera slowly pushes in and over the piano into a close up.
The Lighting
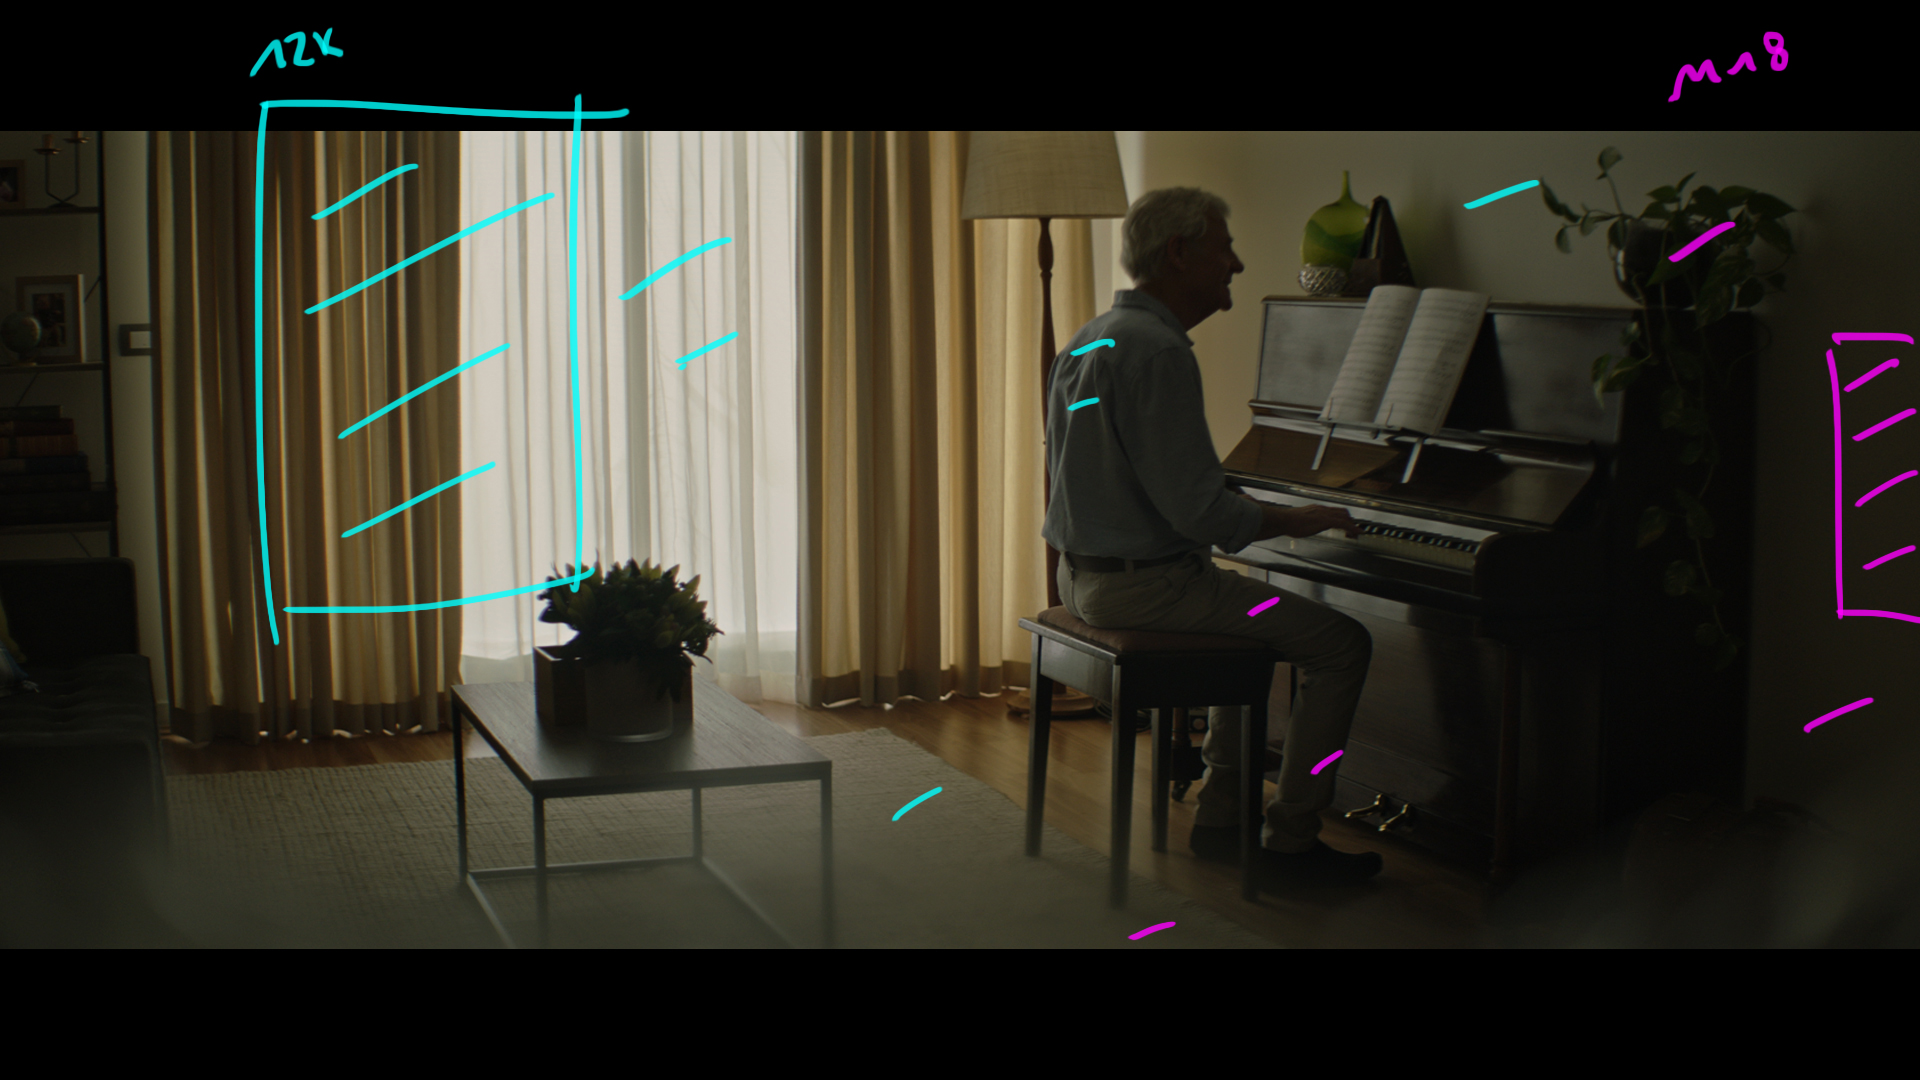
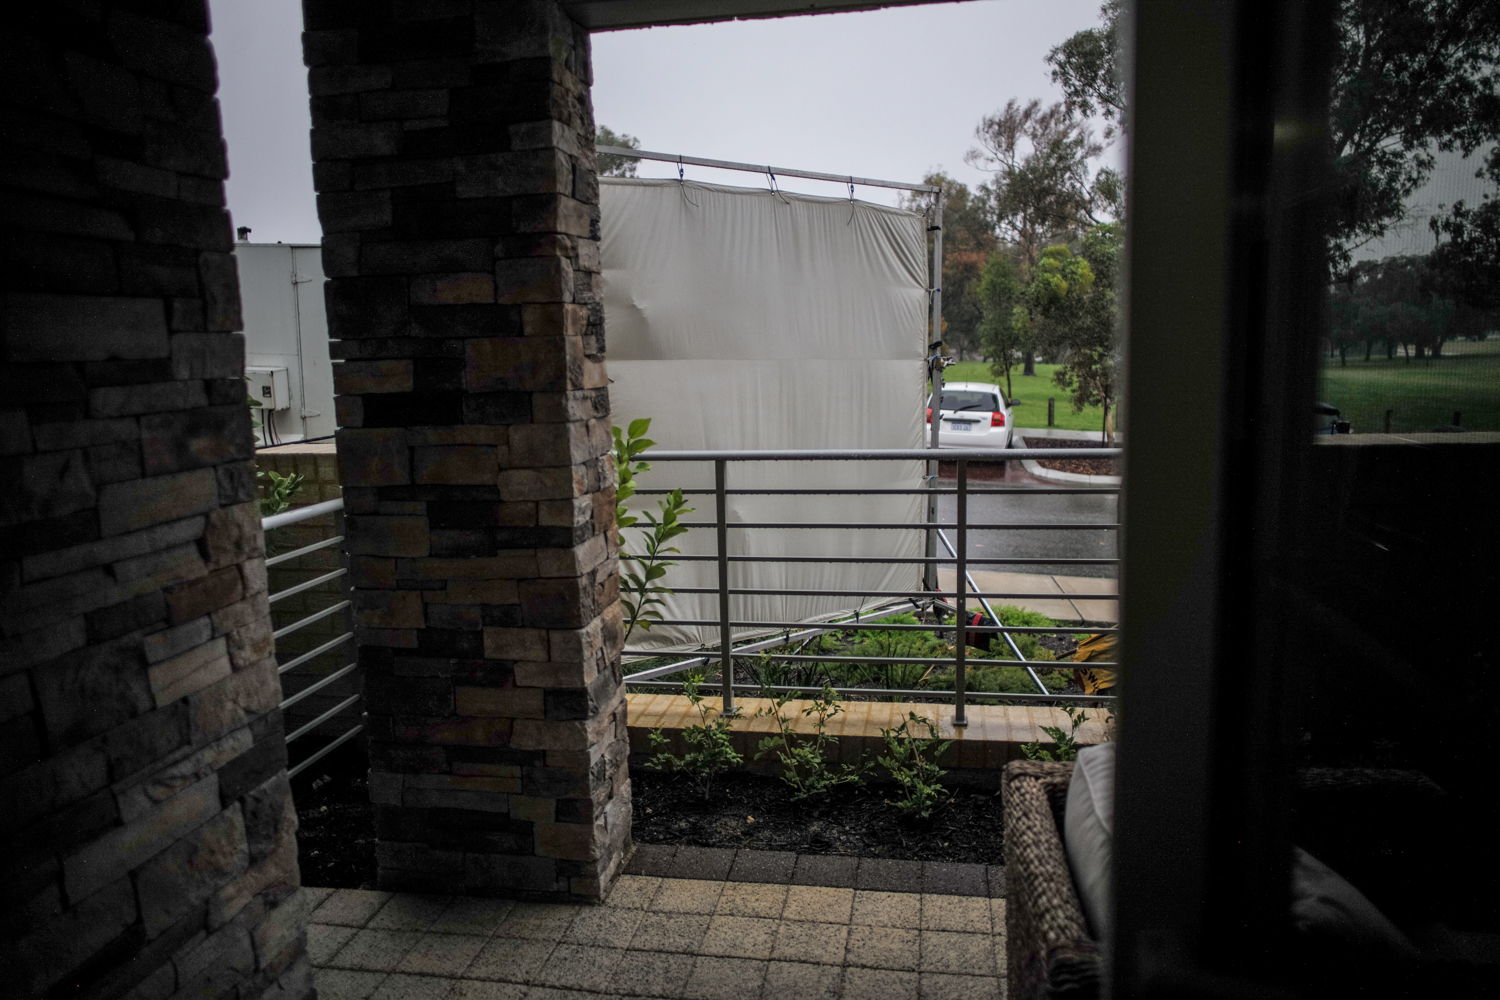
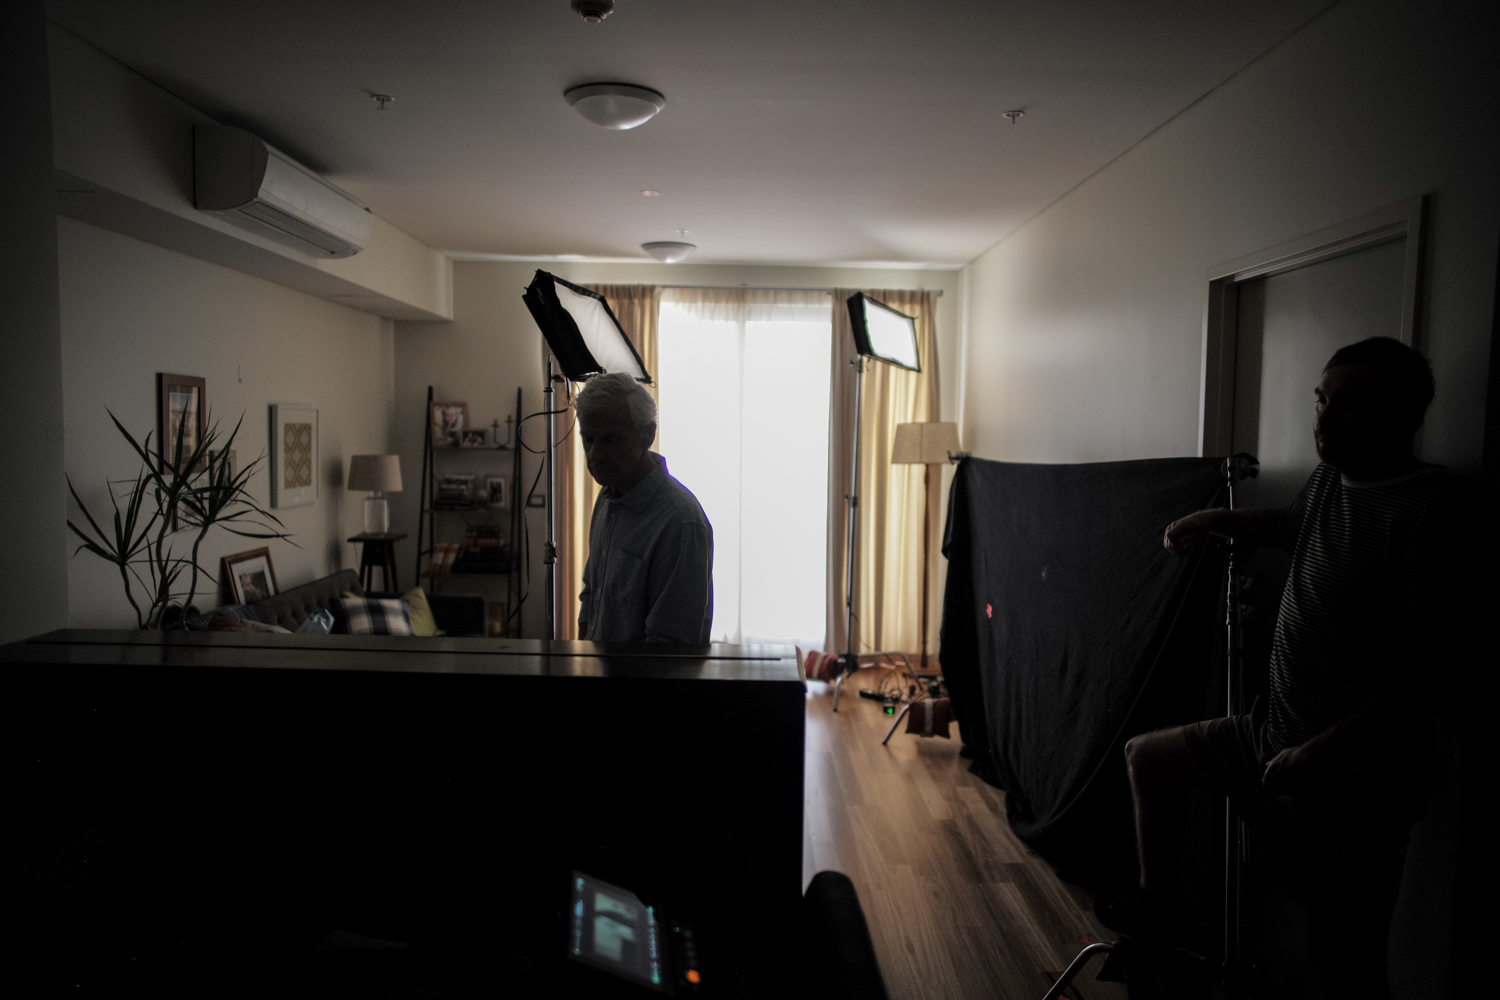
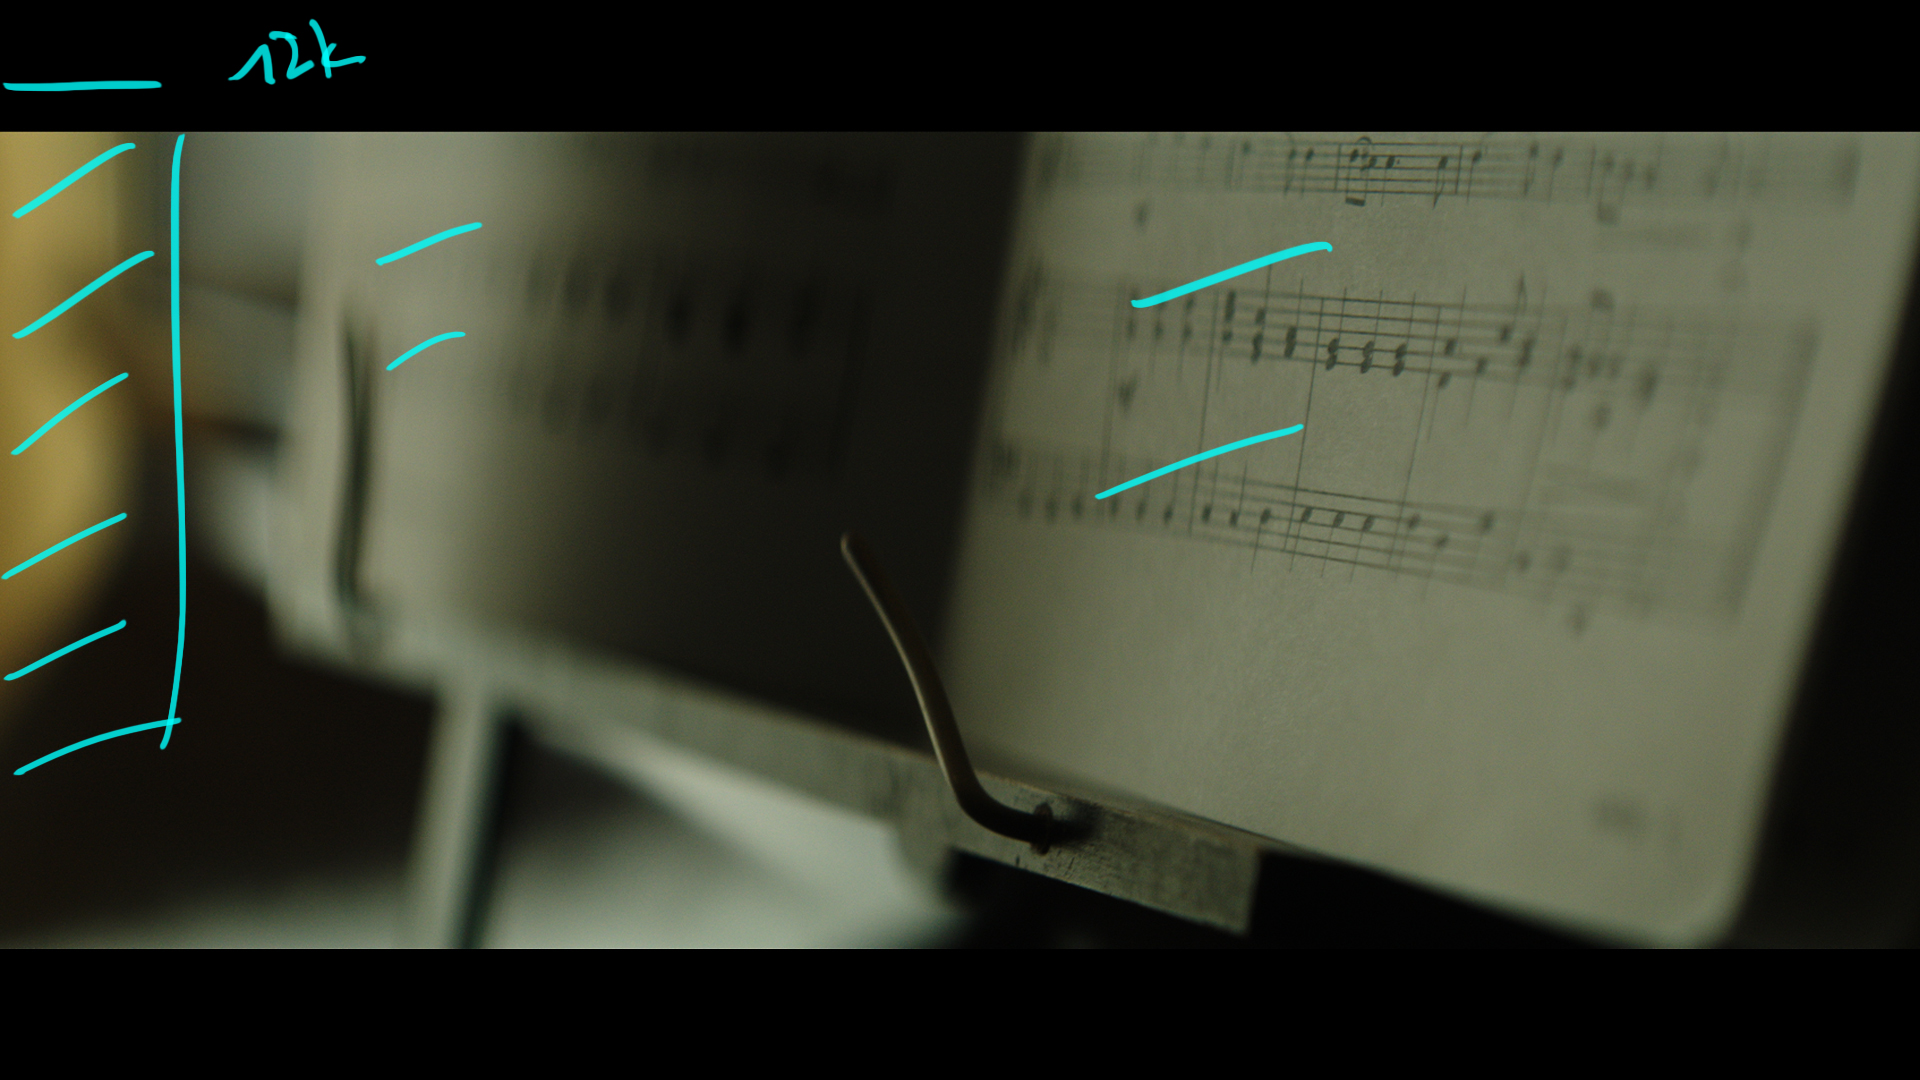
This was our first shot of the day so we had to set the scene here with the lighting. We chose to use the placement of the piano to our advantage and then light everything from outside with a 12k through a 4x4 frame then through the 8x8 of 1/4 grid.
The day was raining and overcast and we wanted a bit more warmth and direction to the light so that is the way played it.
Inside for shape we added 4x4 floppies and blacks to help shape light and set the contrast.
The Results
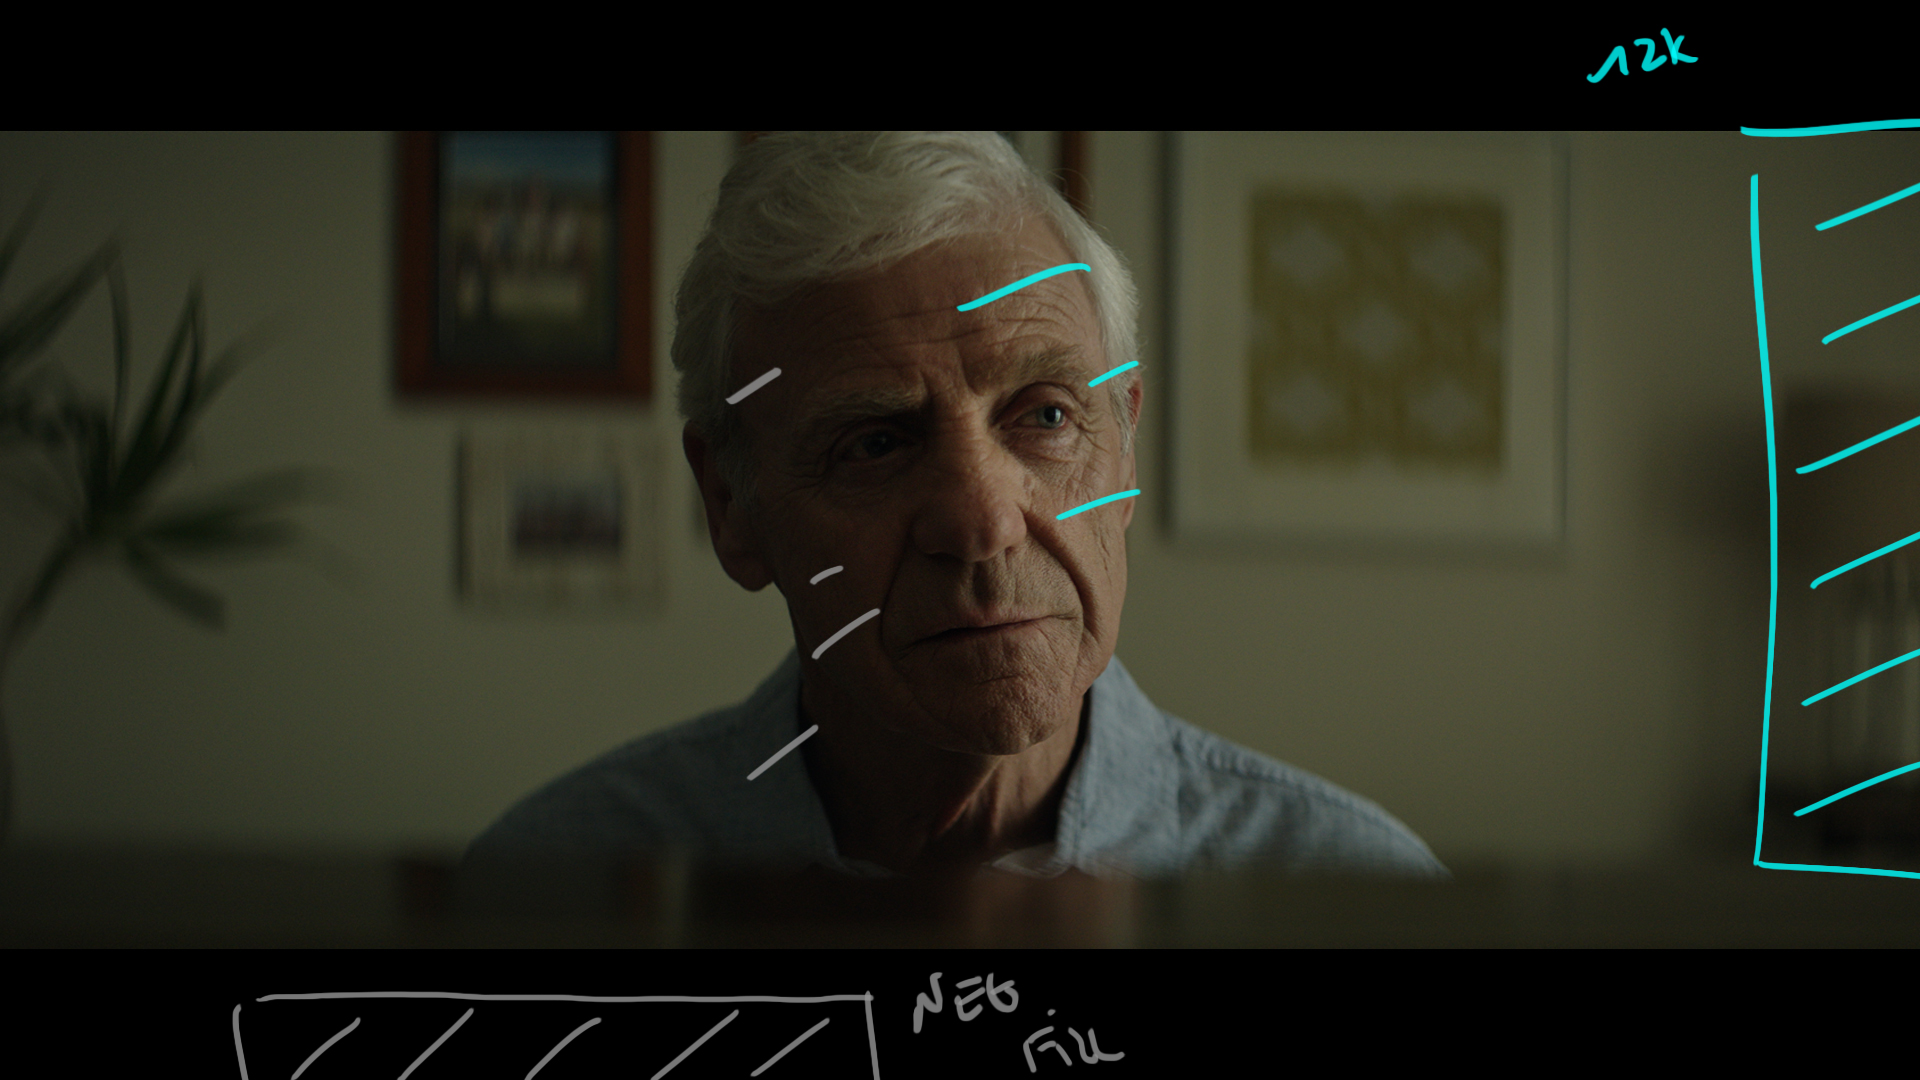
Behind the Scenes
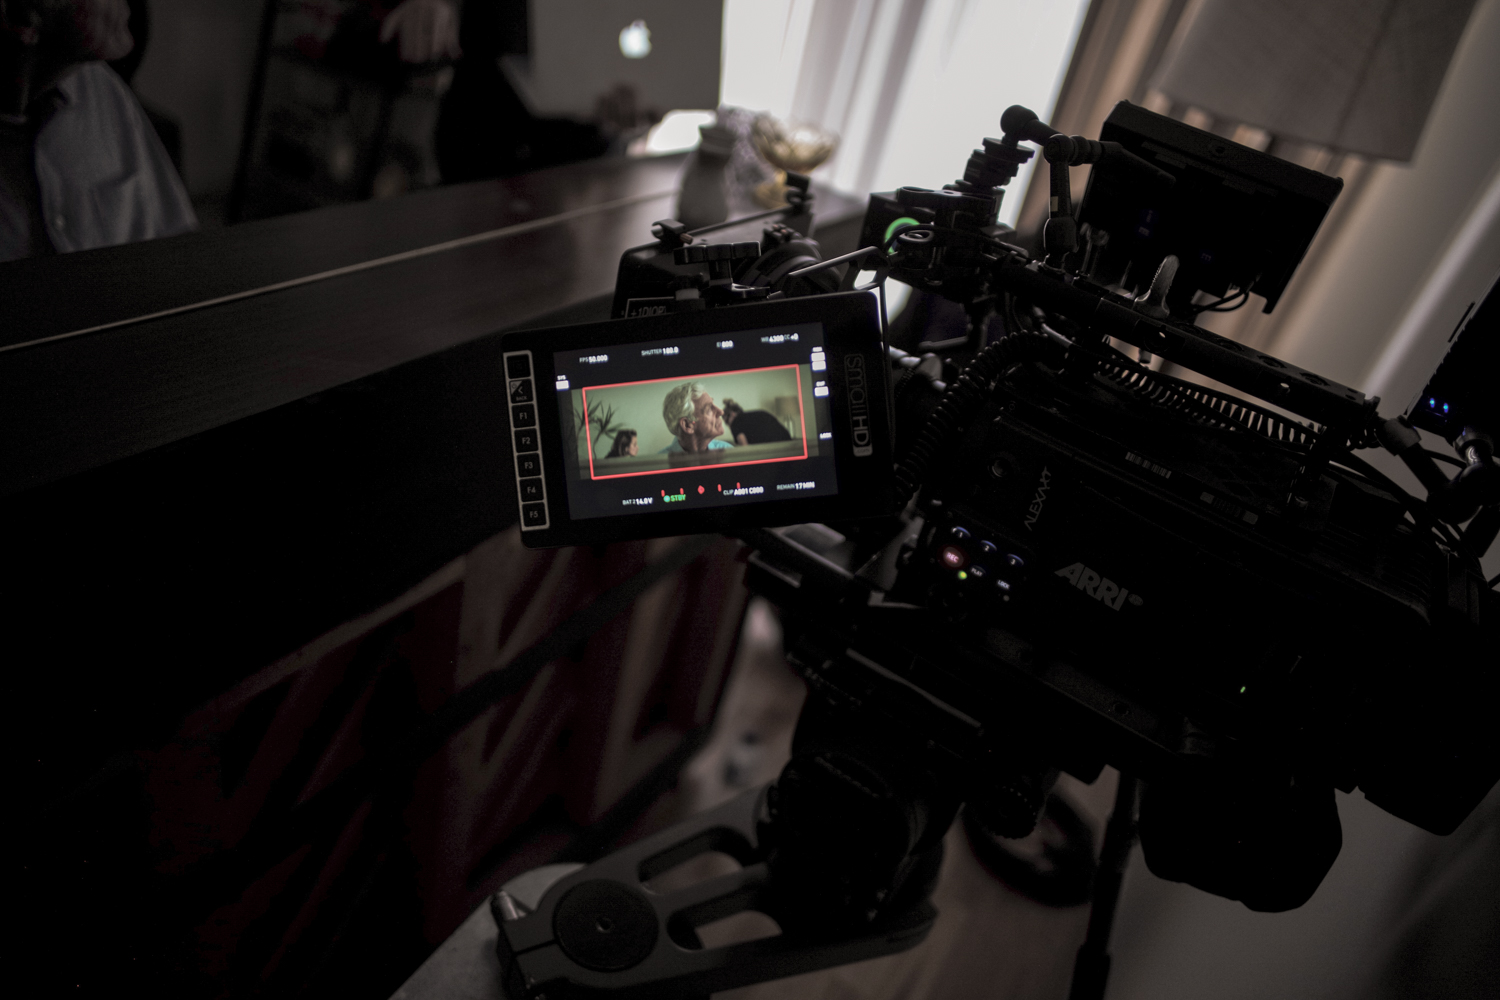
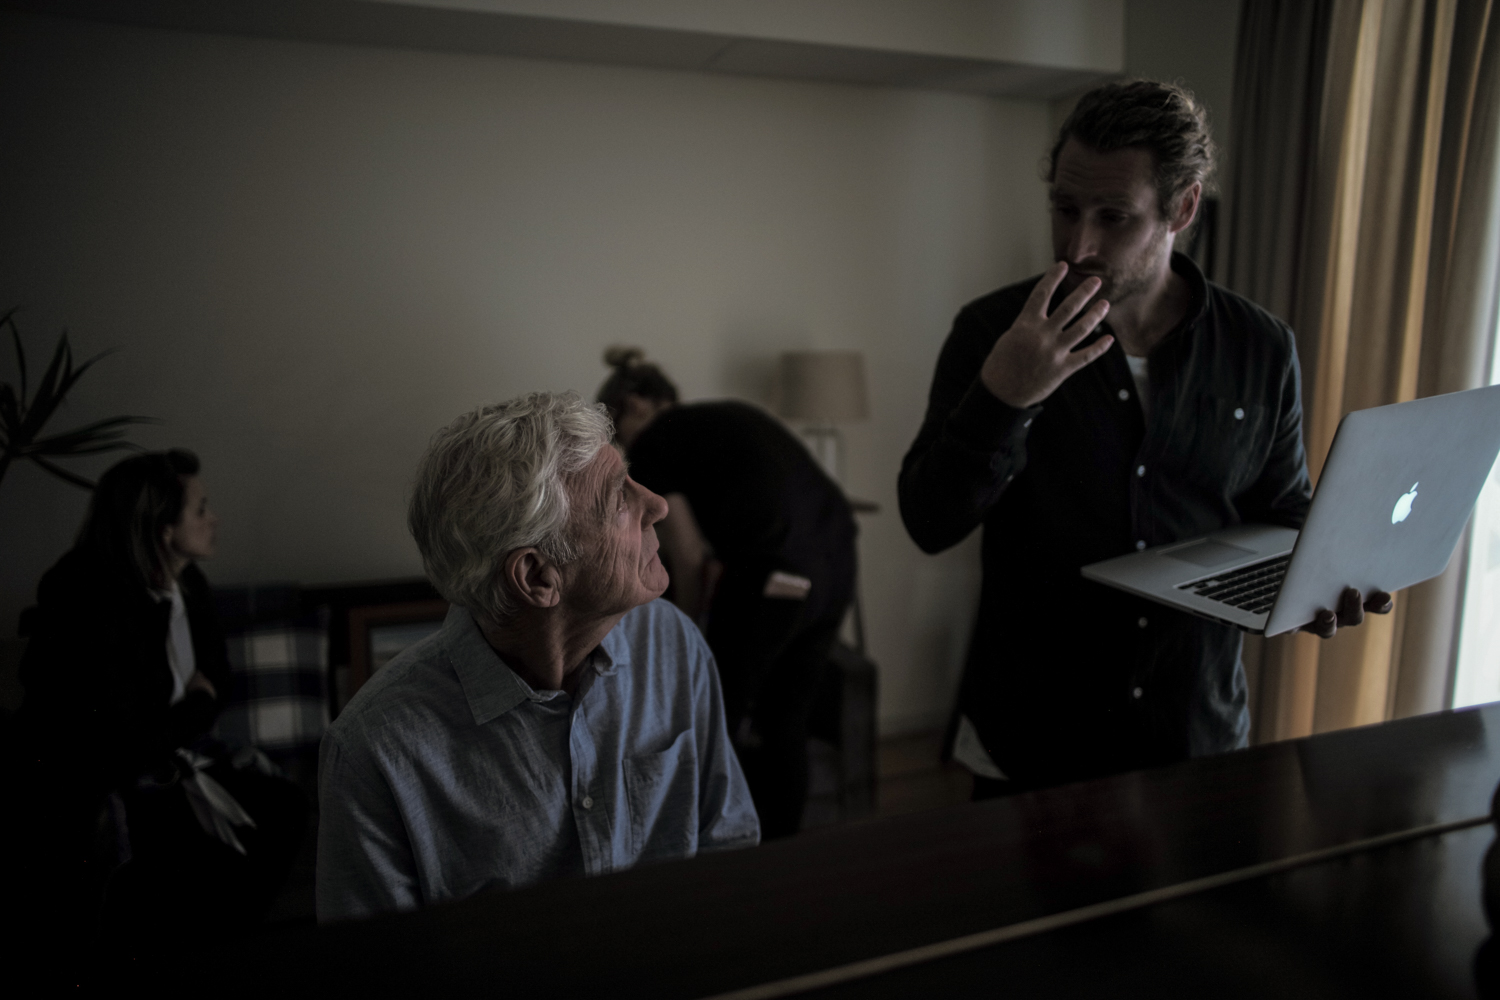
Moving In
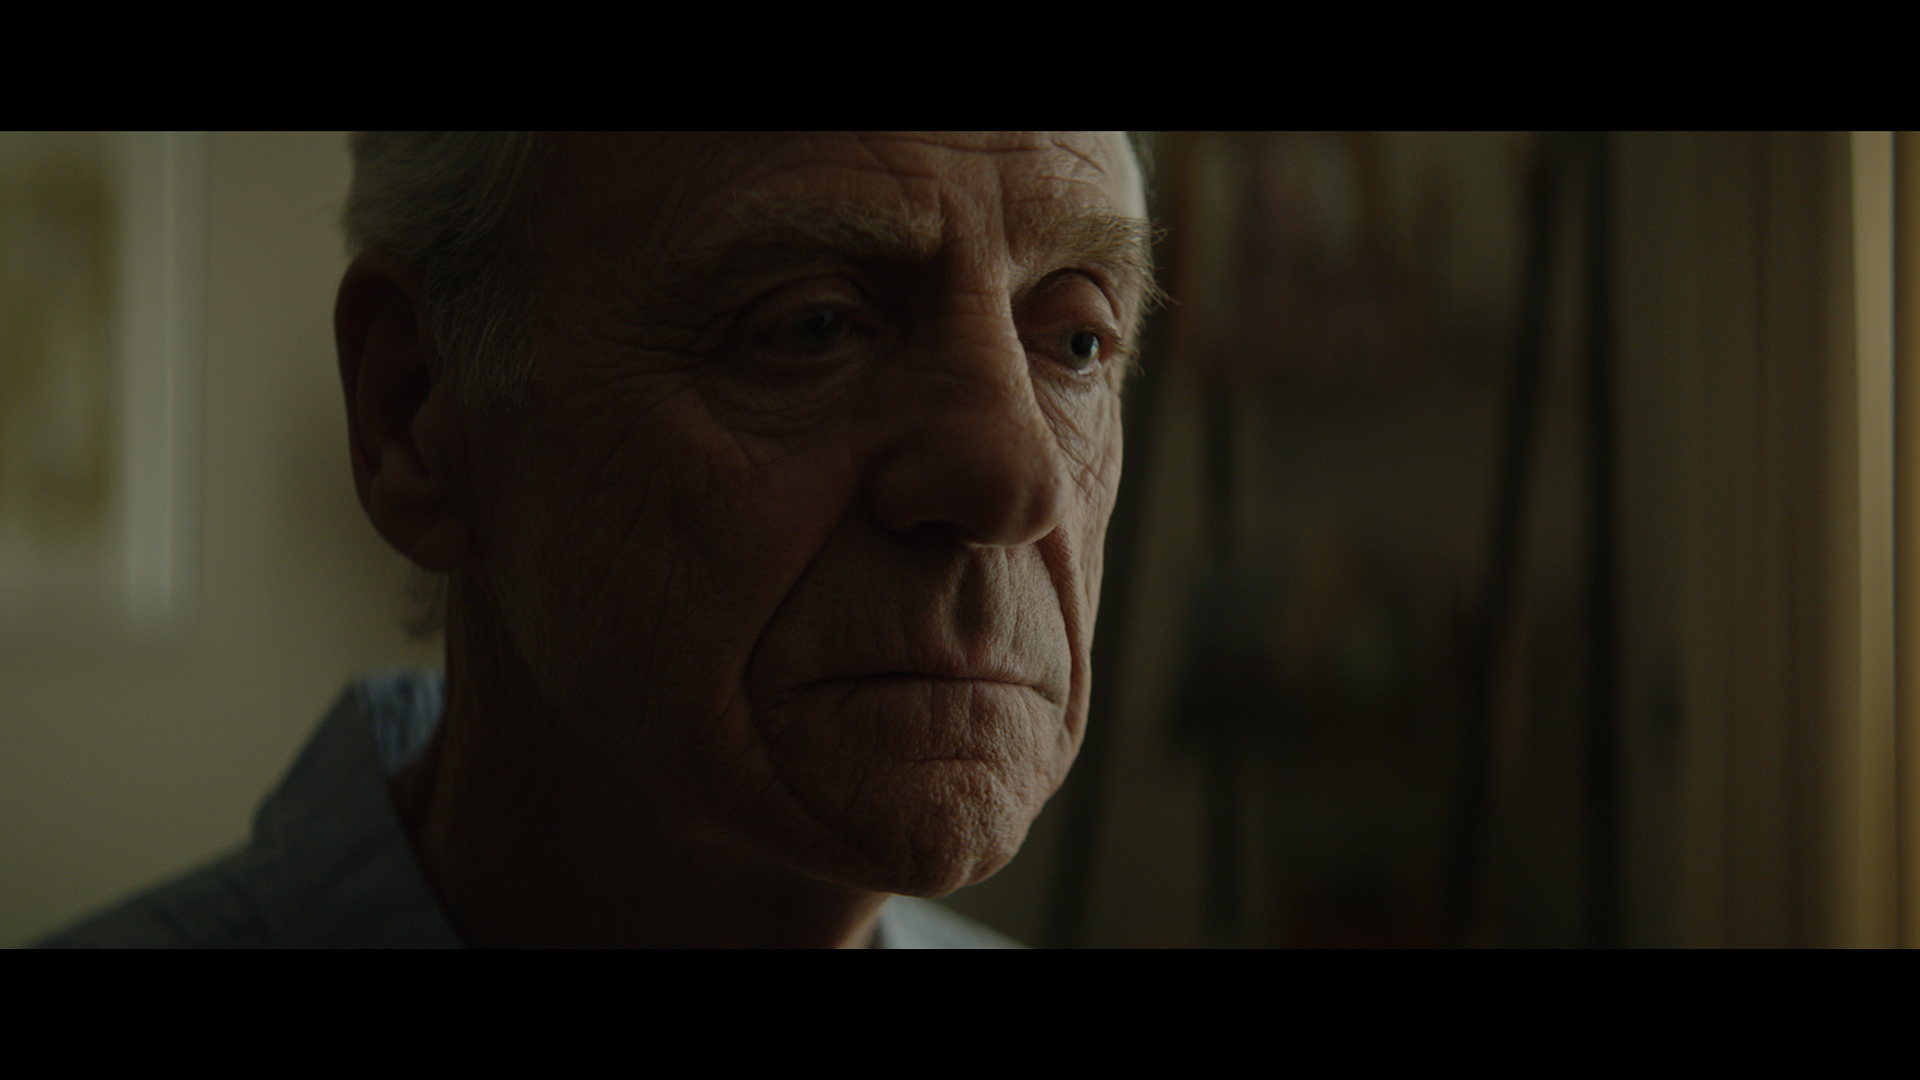
The Shot
The camera comes around for a closer shot.
The Lighting
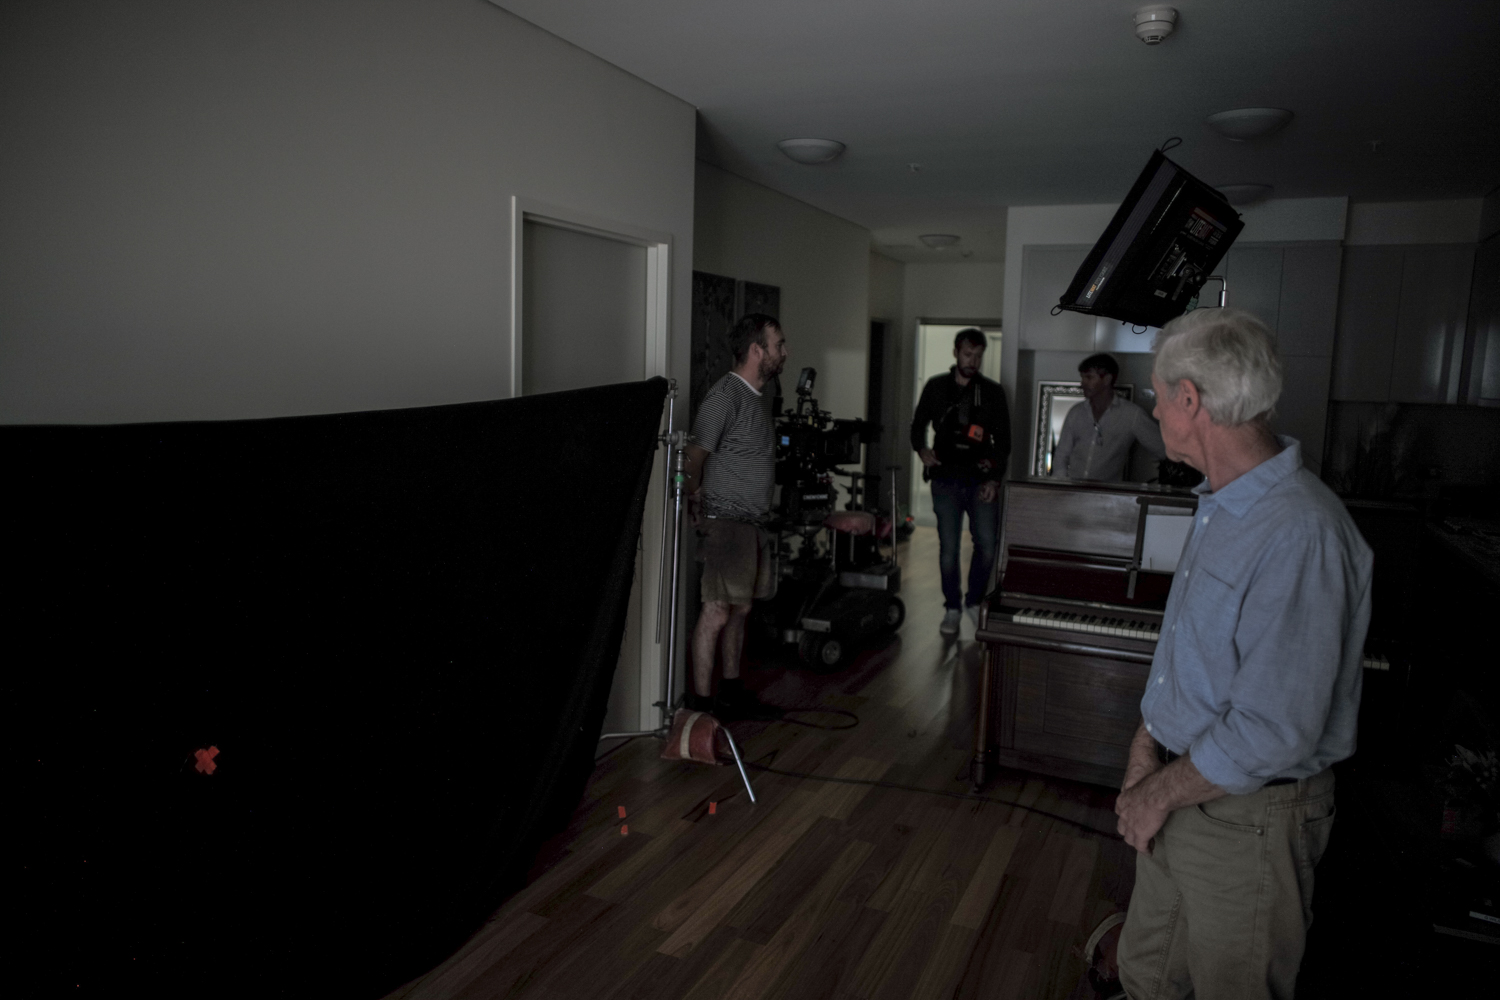
The difficult part here was that we needed to move the piano out of the way so we could physically get the camera into position to pull this shot off.
To replace what the piano was doing to the light from outside we hung some 12x12 blacks at about waist high and that recreated what we were seeing before.
Then inside to help push the 12k just a bit further around our talent's shadow side of his face we used a Litemat (slightly cooled in color temperature). Again we used 4x4 floppies to keep the shadow side down.
The Result
Behind the Scenes
Extreme Close Up - Diopters
The Shot
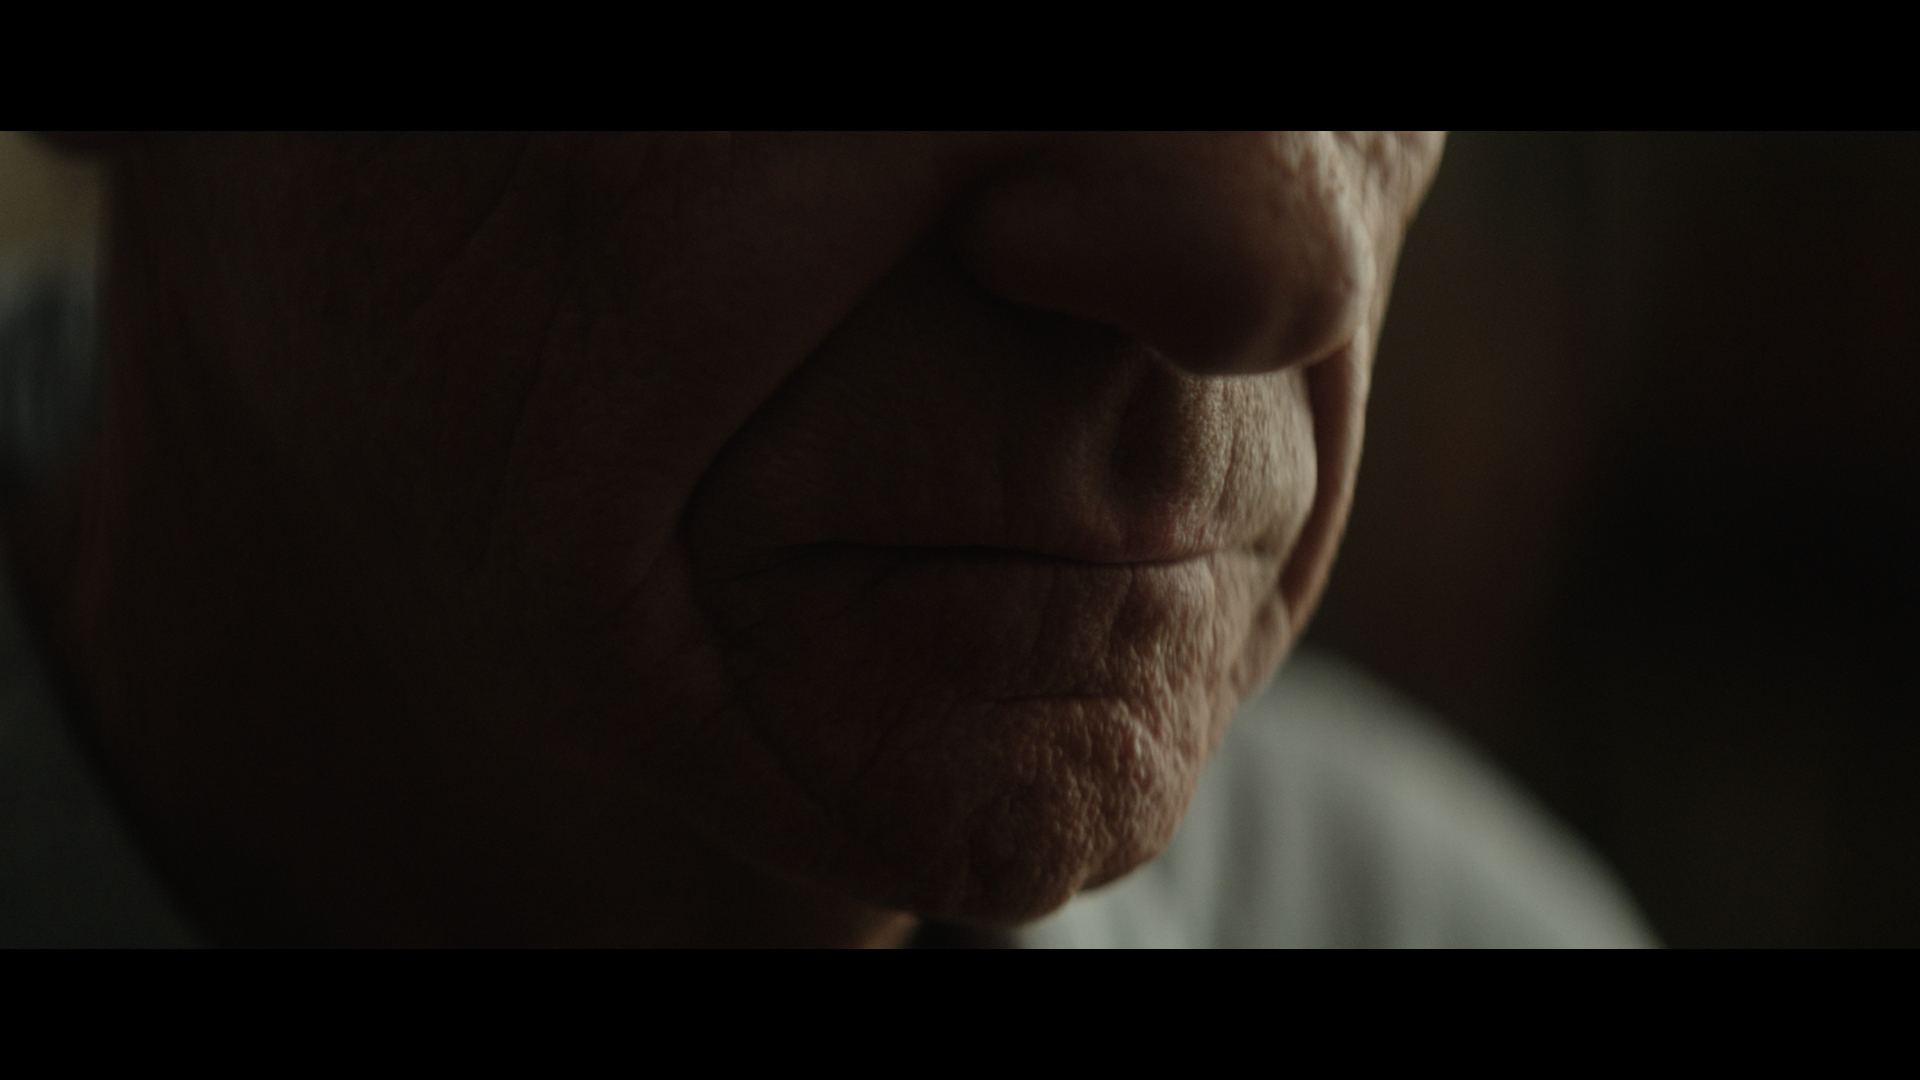
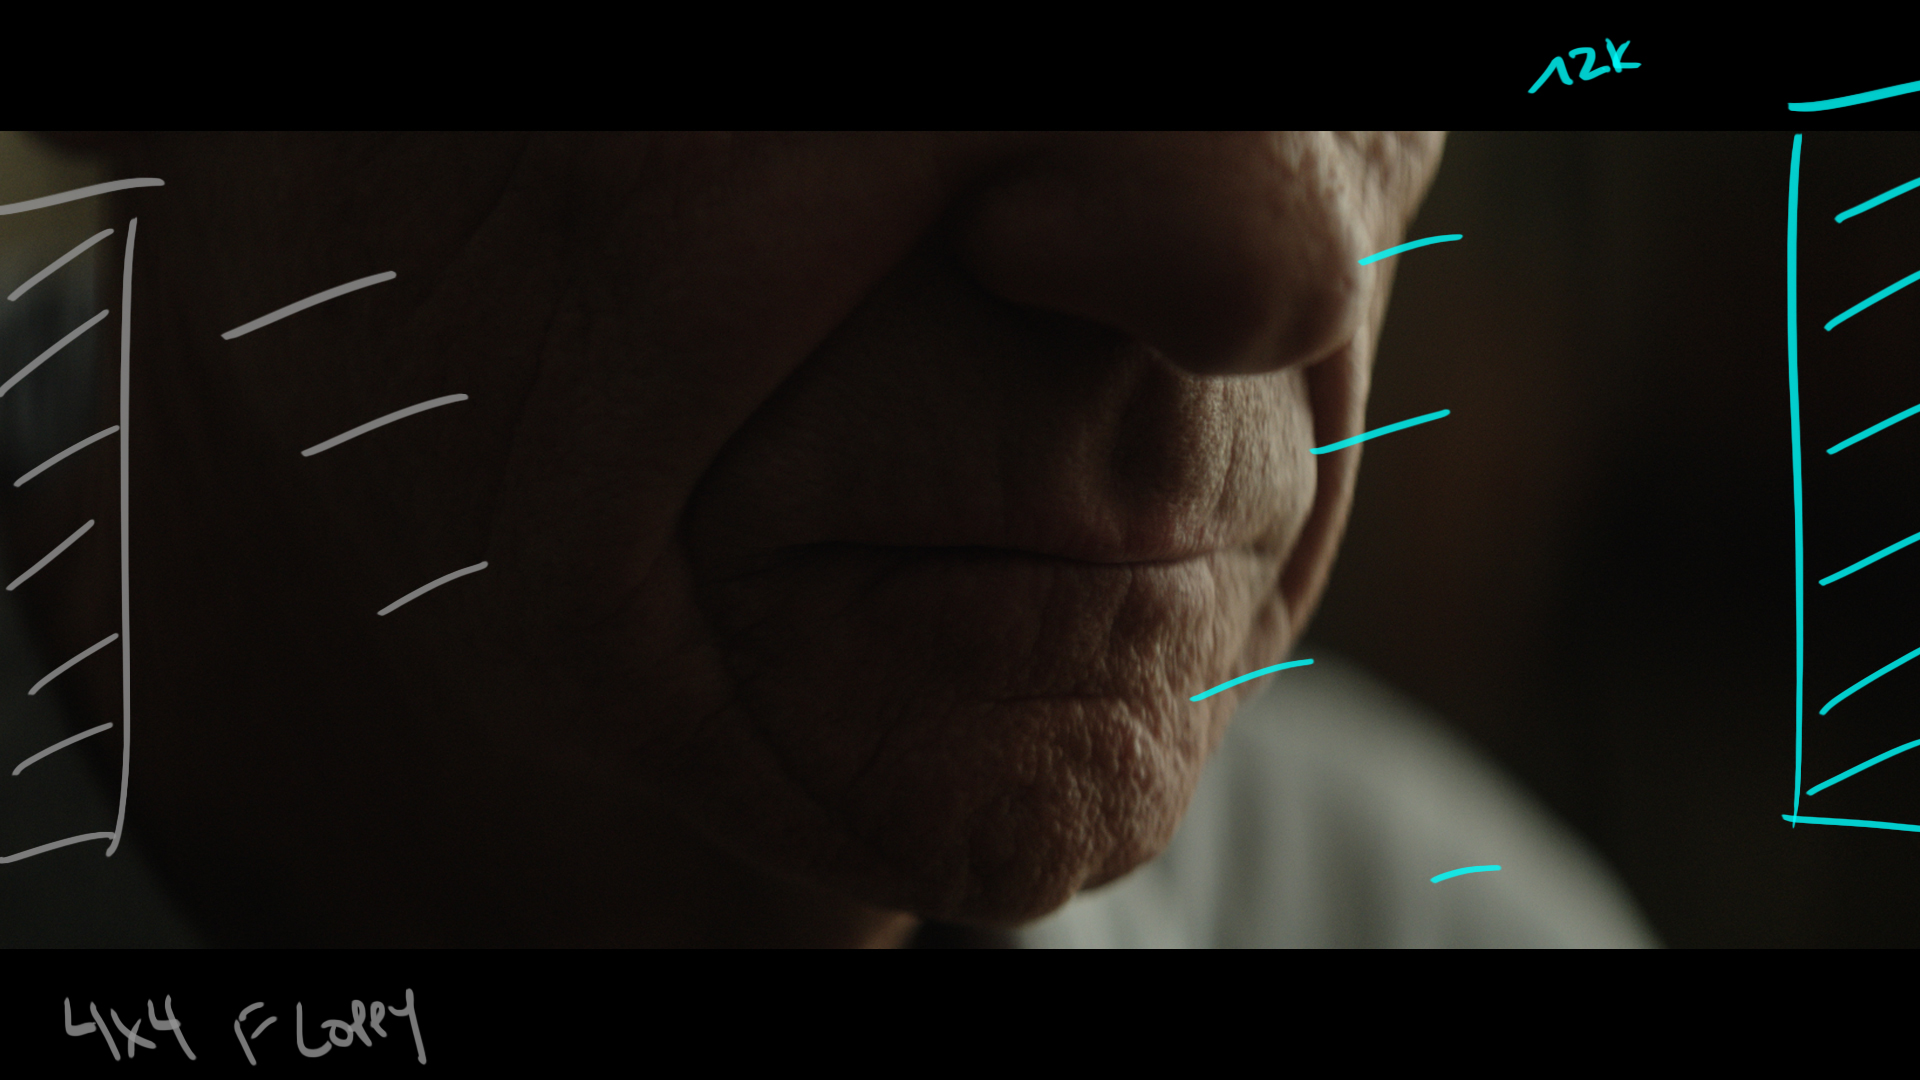
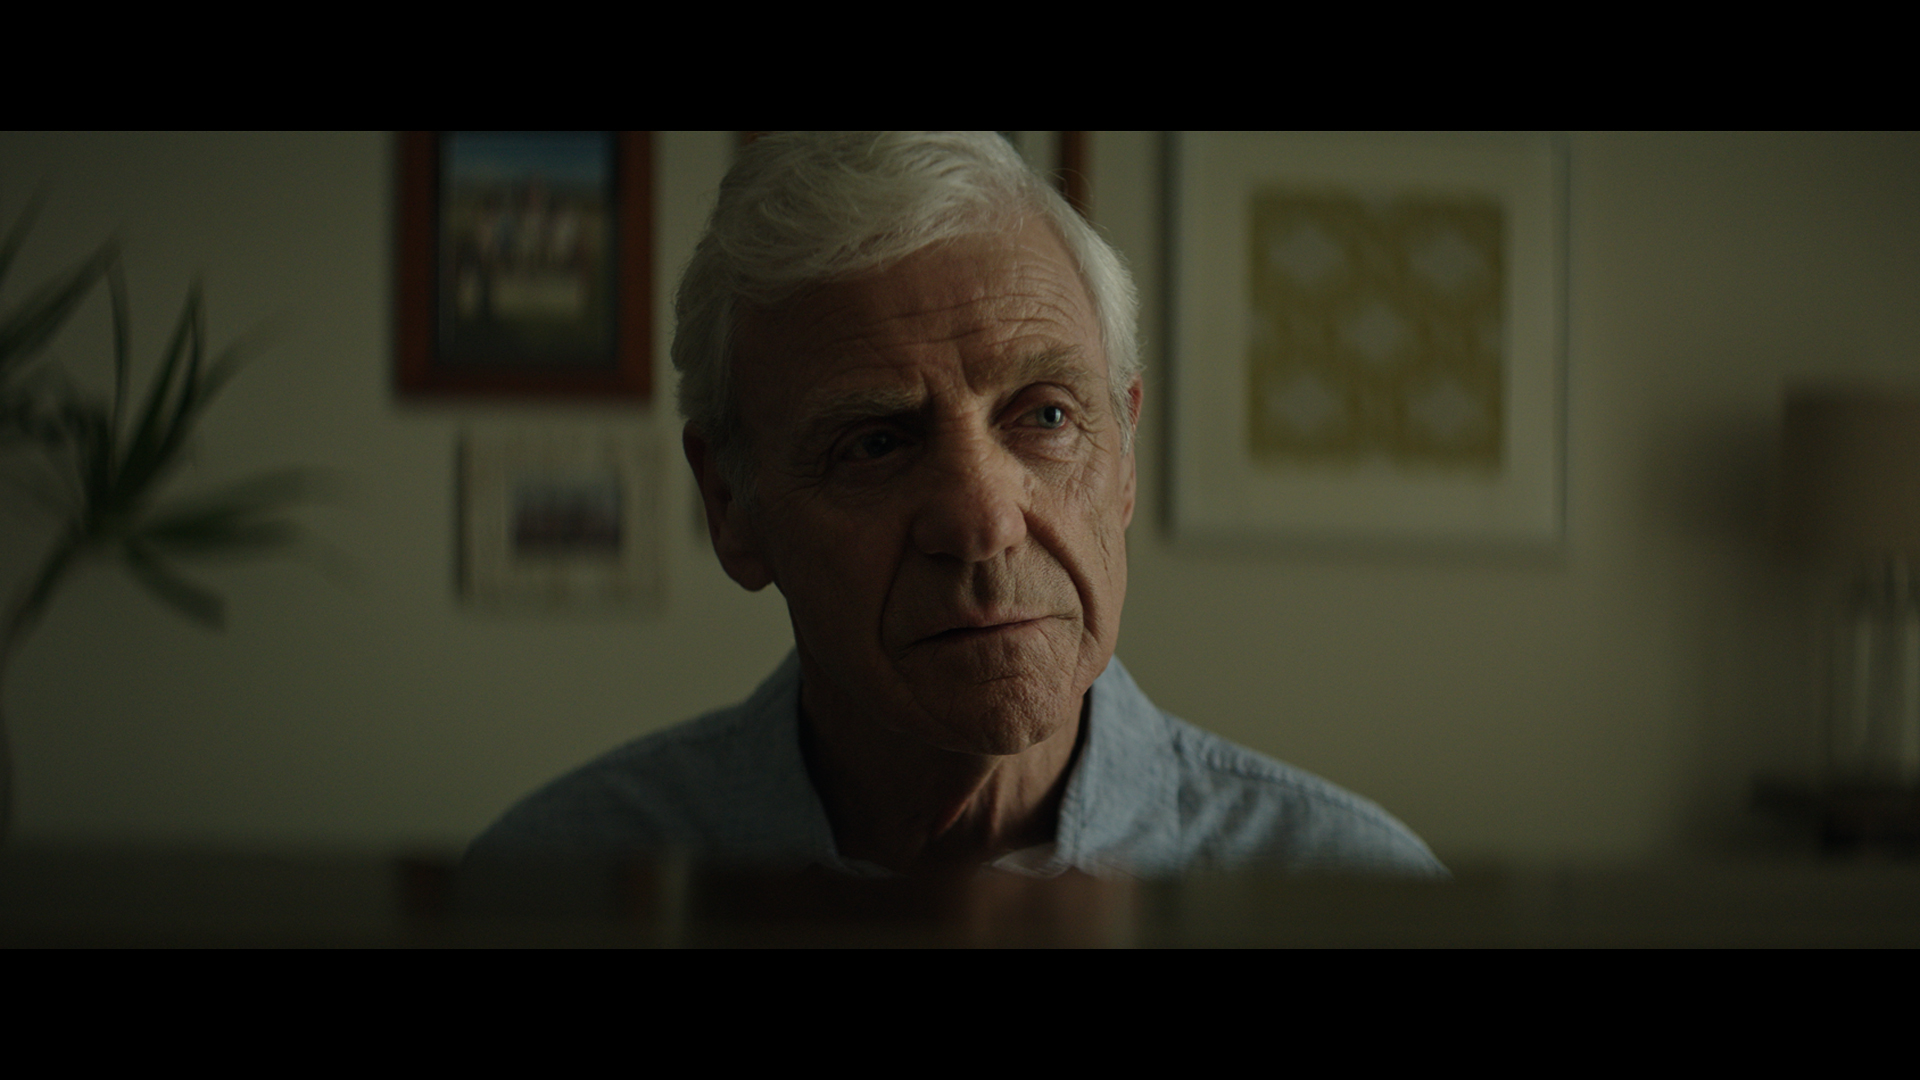
We wanted to capture the details in the talent's face and skin.
The Lighting
This was more about positioning the actor rather than moving the lights. We wanted to keep the angle of the light consistent but we had to find a spot that picked up all the contrast of the wrinkles on the talent.
We also wanted to be shooting off into a darker background.
The Results
The Wide - Seeing the Source
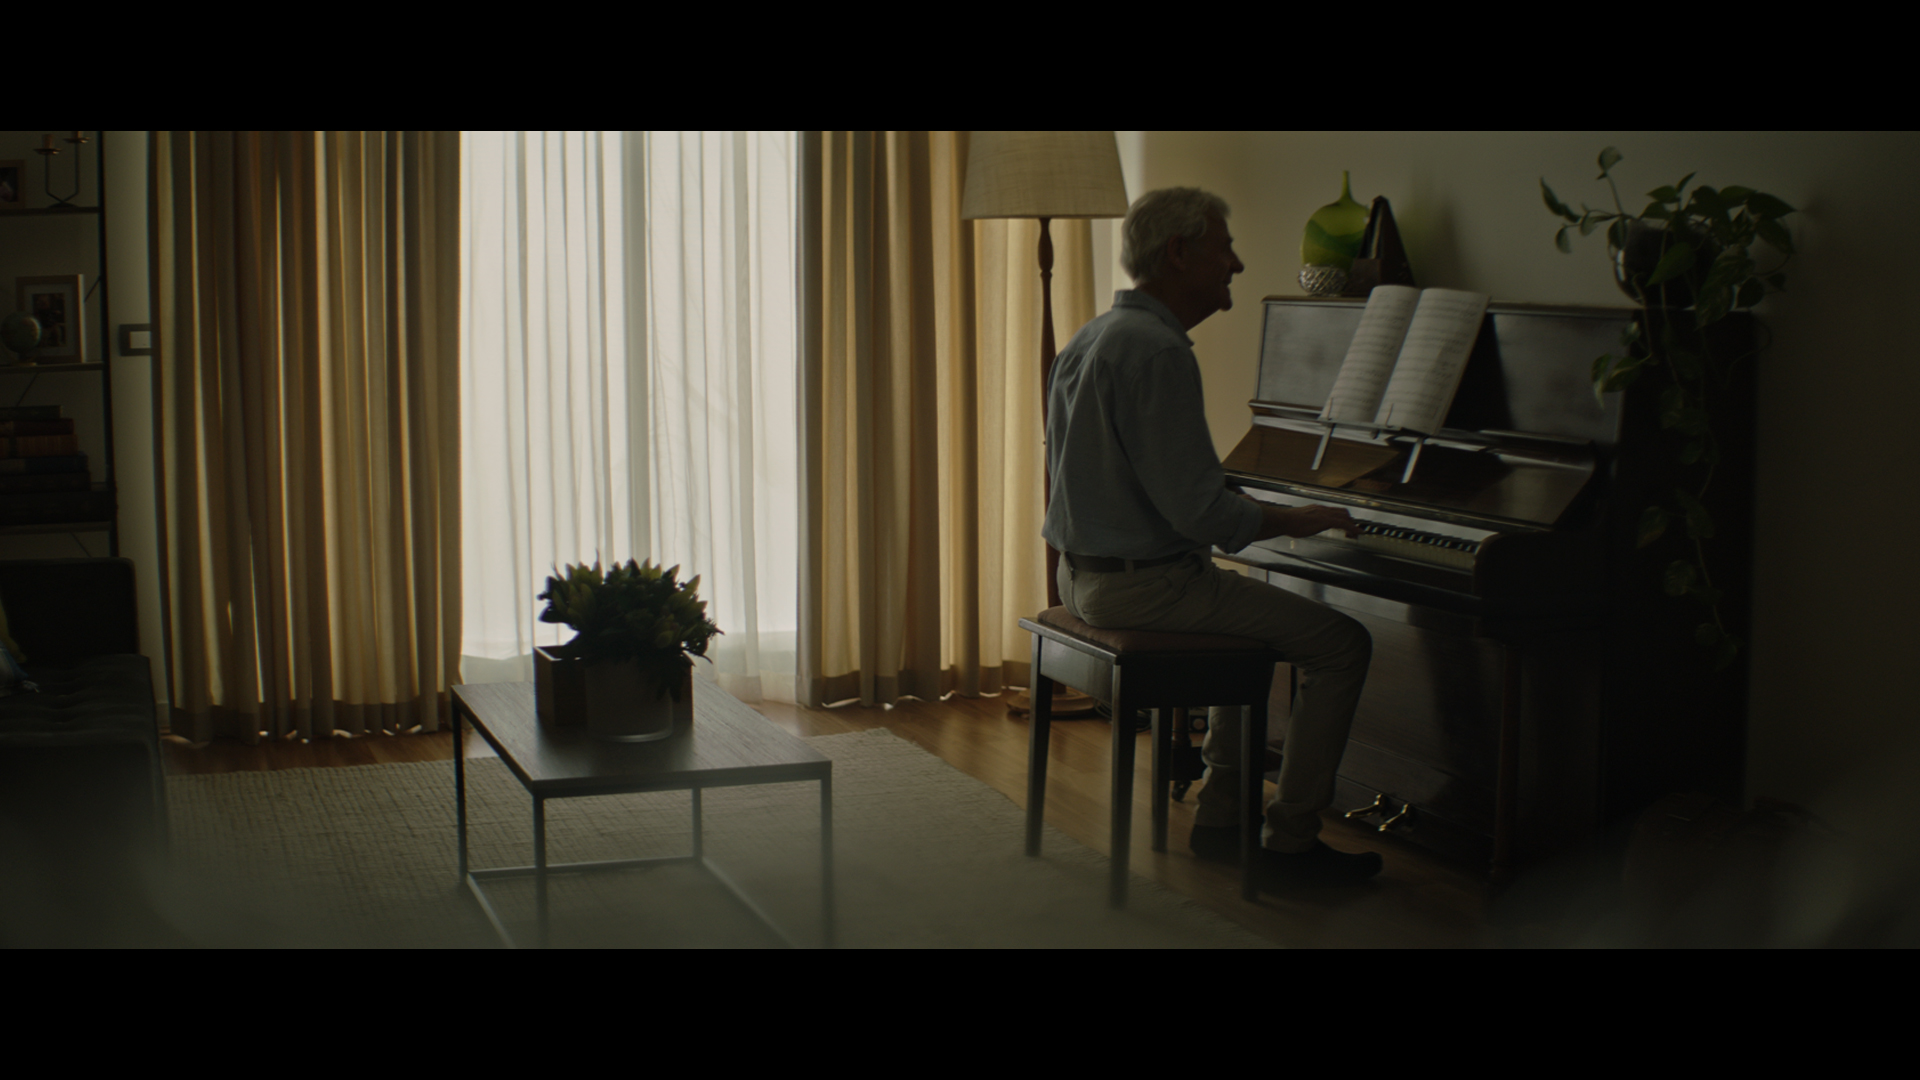
The Shot
This was our first wide and the time when we were shooting directly into the lighting source.
The Lighting
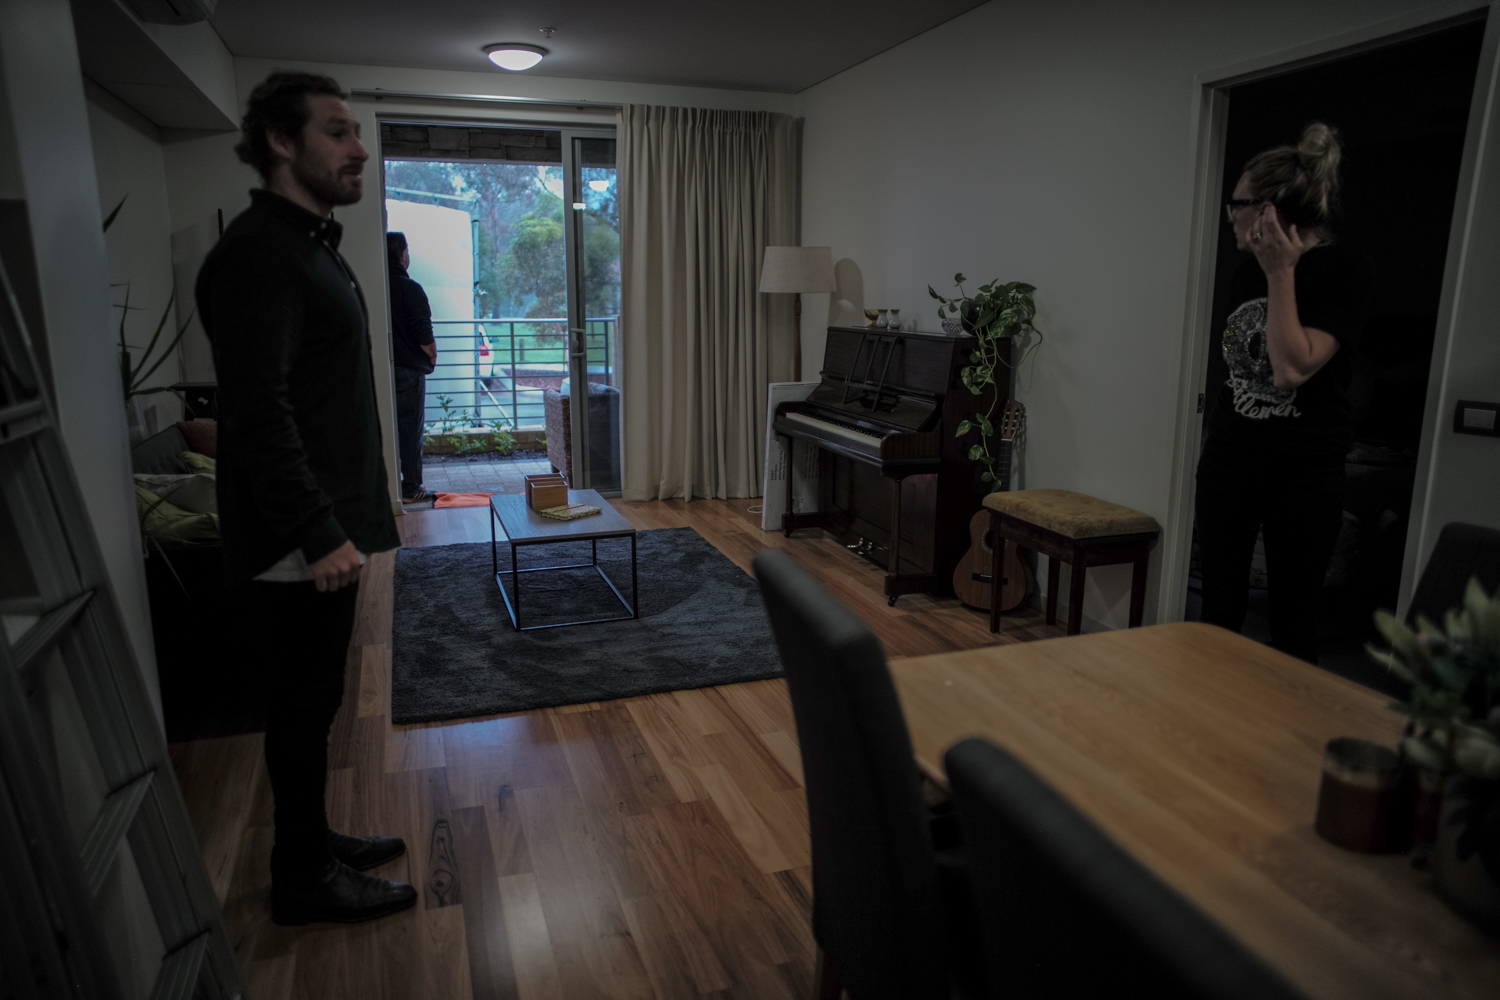
We shot directly in to the 12k outside but luckily we had it positioned to fire into the room from camera left across to camera right. This meant the light came racking across the room rather than straight down the middle.
We kept all our settings and exposure the same but to add a touch of ambient we used an M18 in the adjacent room to help lift the shadows just a little bit.
The Results
Behind the Scenes
The Other Wide
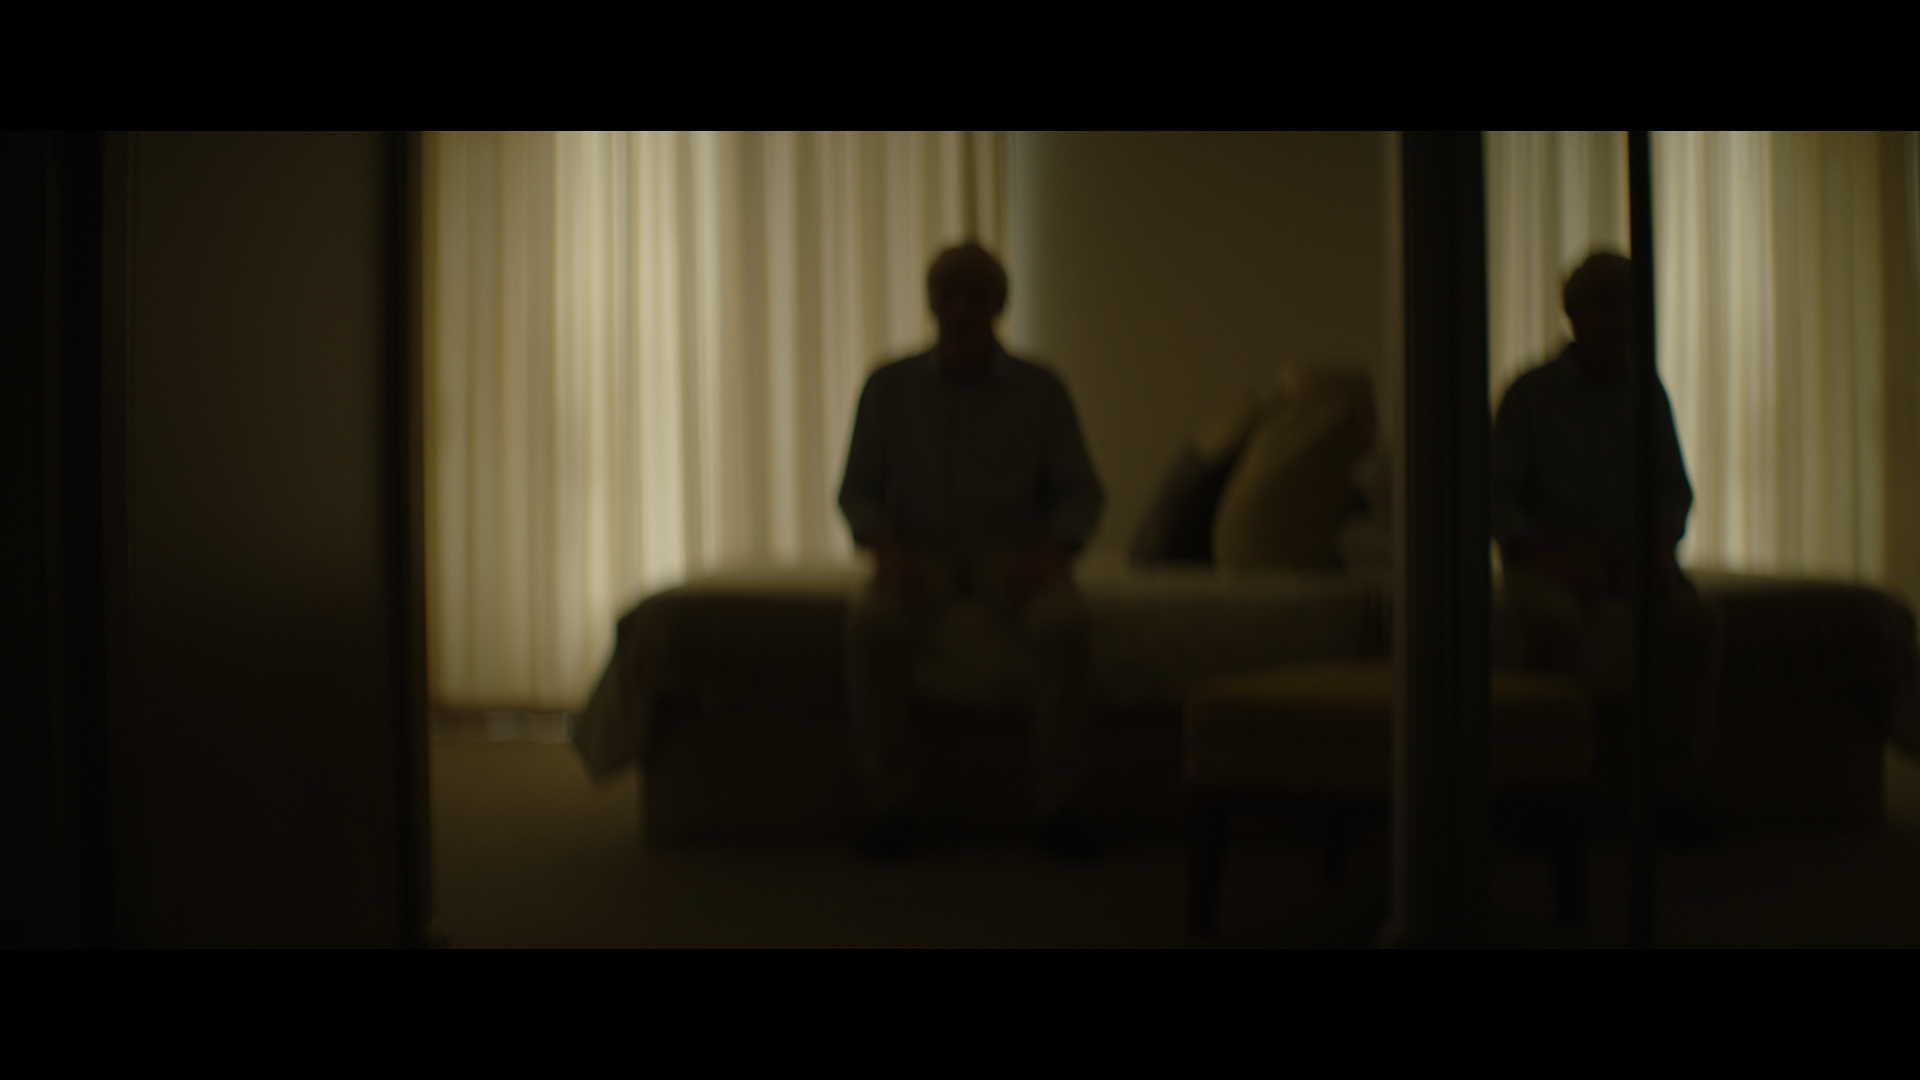
The Shot
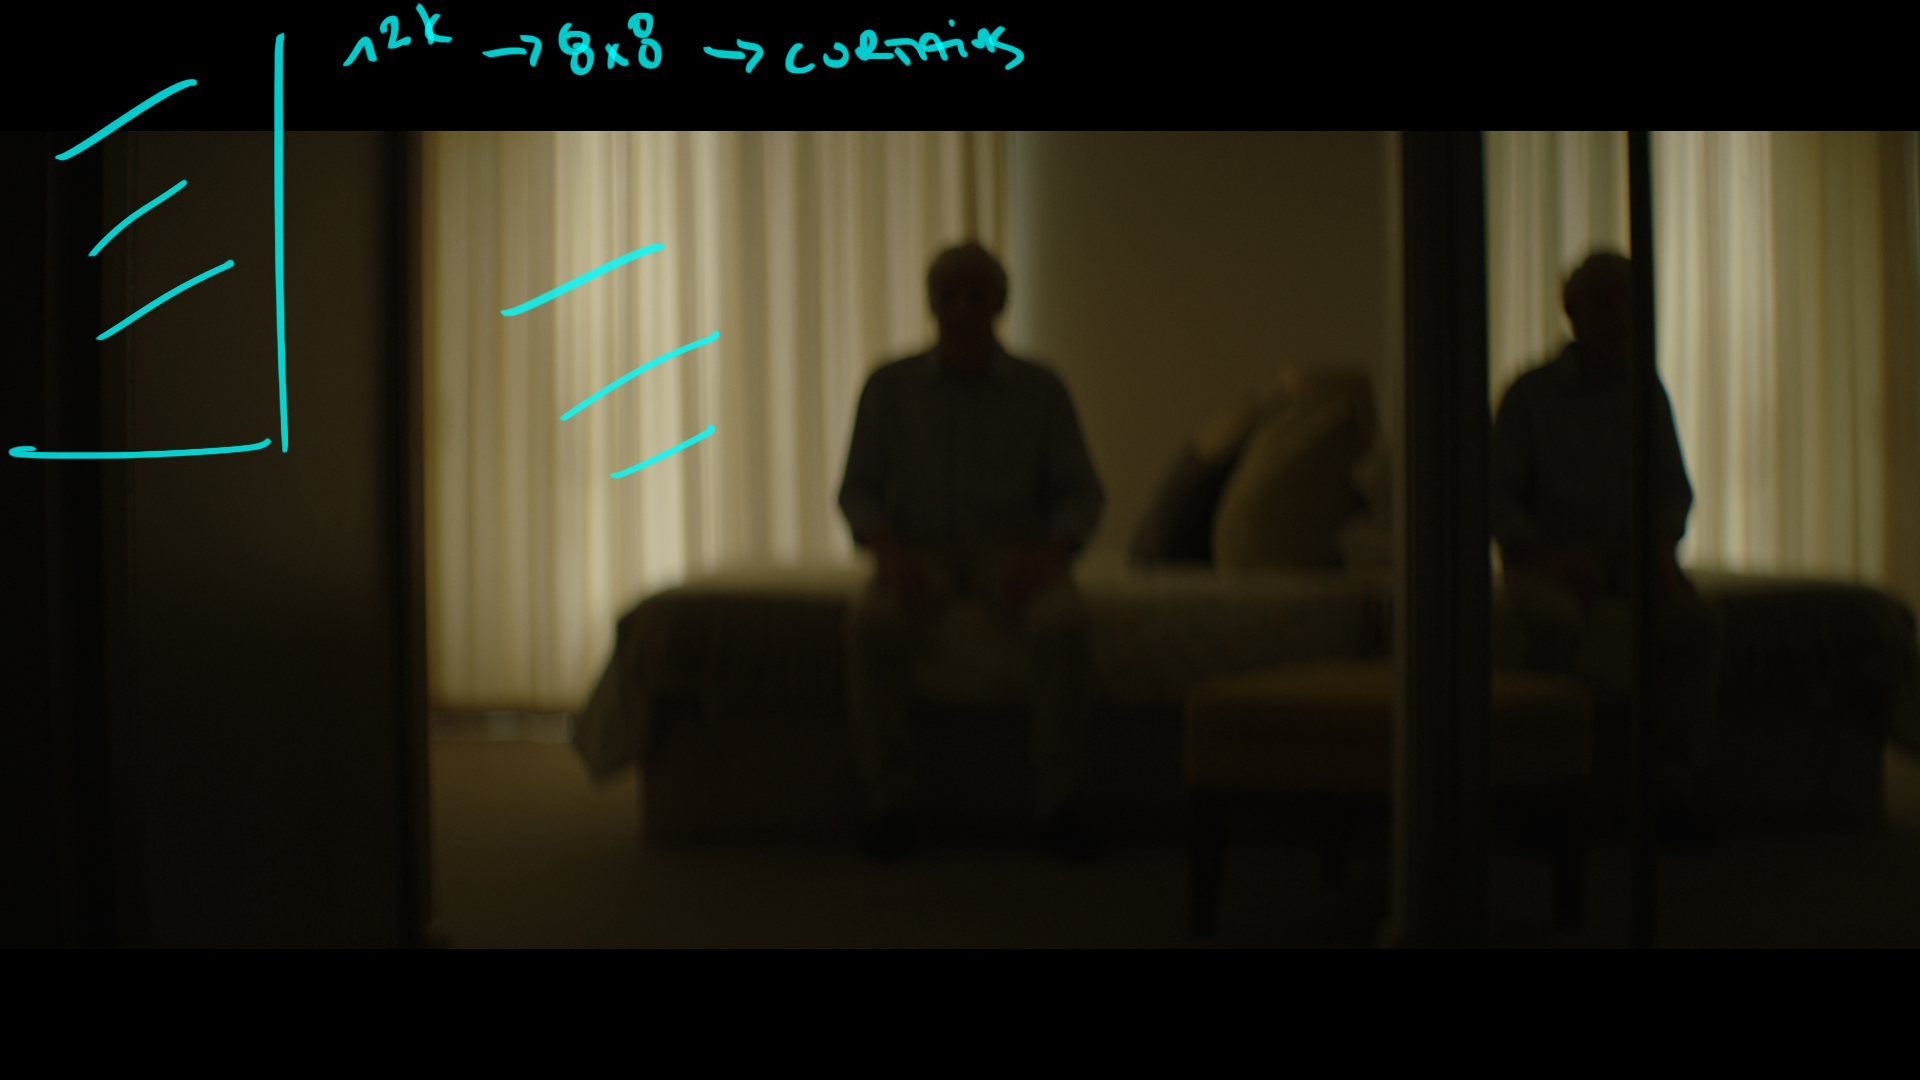
Our talent was positioned at the edge of his bed and this is the only shot in this room.
The Lighting
We had almost no time to make this shot work but with a bit of planning we were able to make it work.
We wanted to keep the ambient down in this shot so all we had to do was turn the 12k outside, adjust all the corresponding diffusion frames and we were set. We used the mirror to give the shot a bit more interest and tried to embrace the darkness.
The Results
The Piano - On the Move
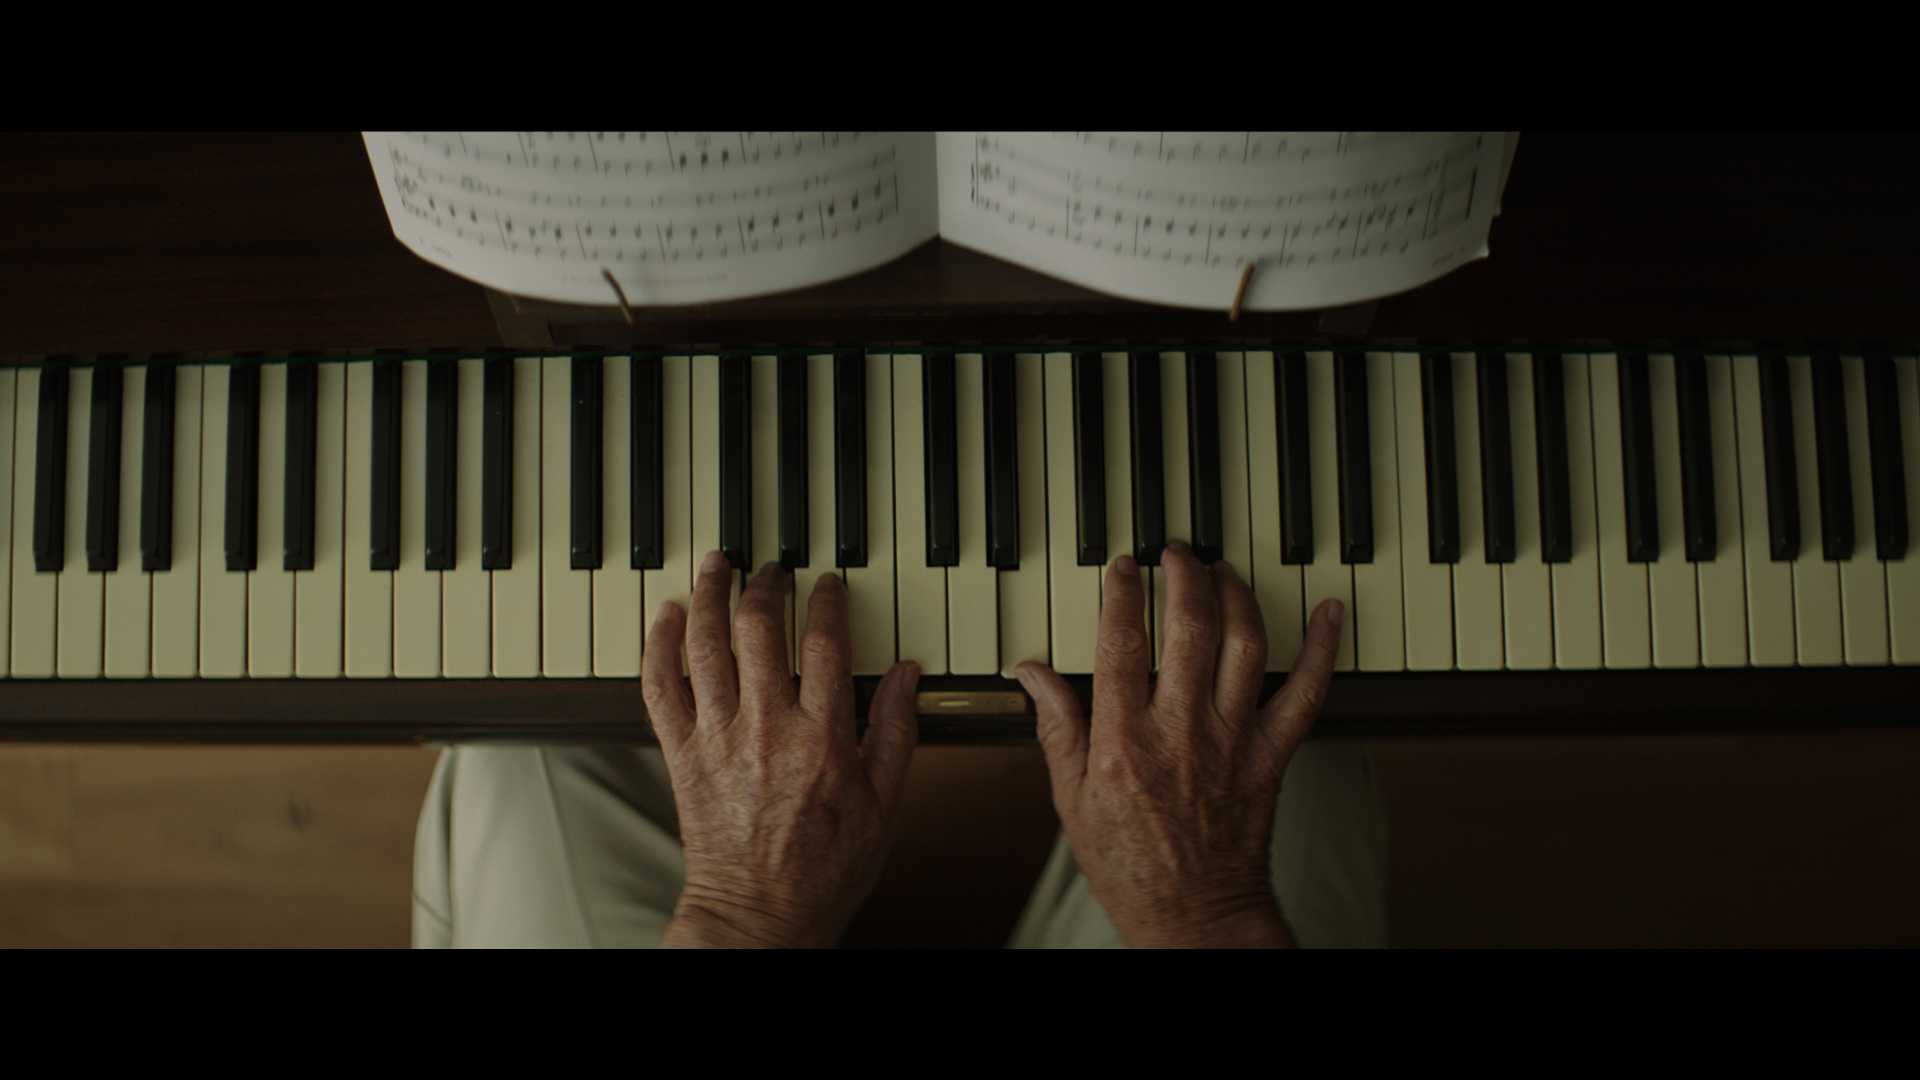
The Shot
We wanted to start in tight on the hands and as the music builds the camera would climb straight up to reveal more of the keys.
The Lighting
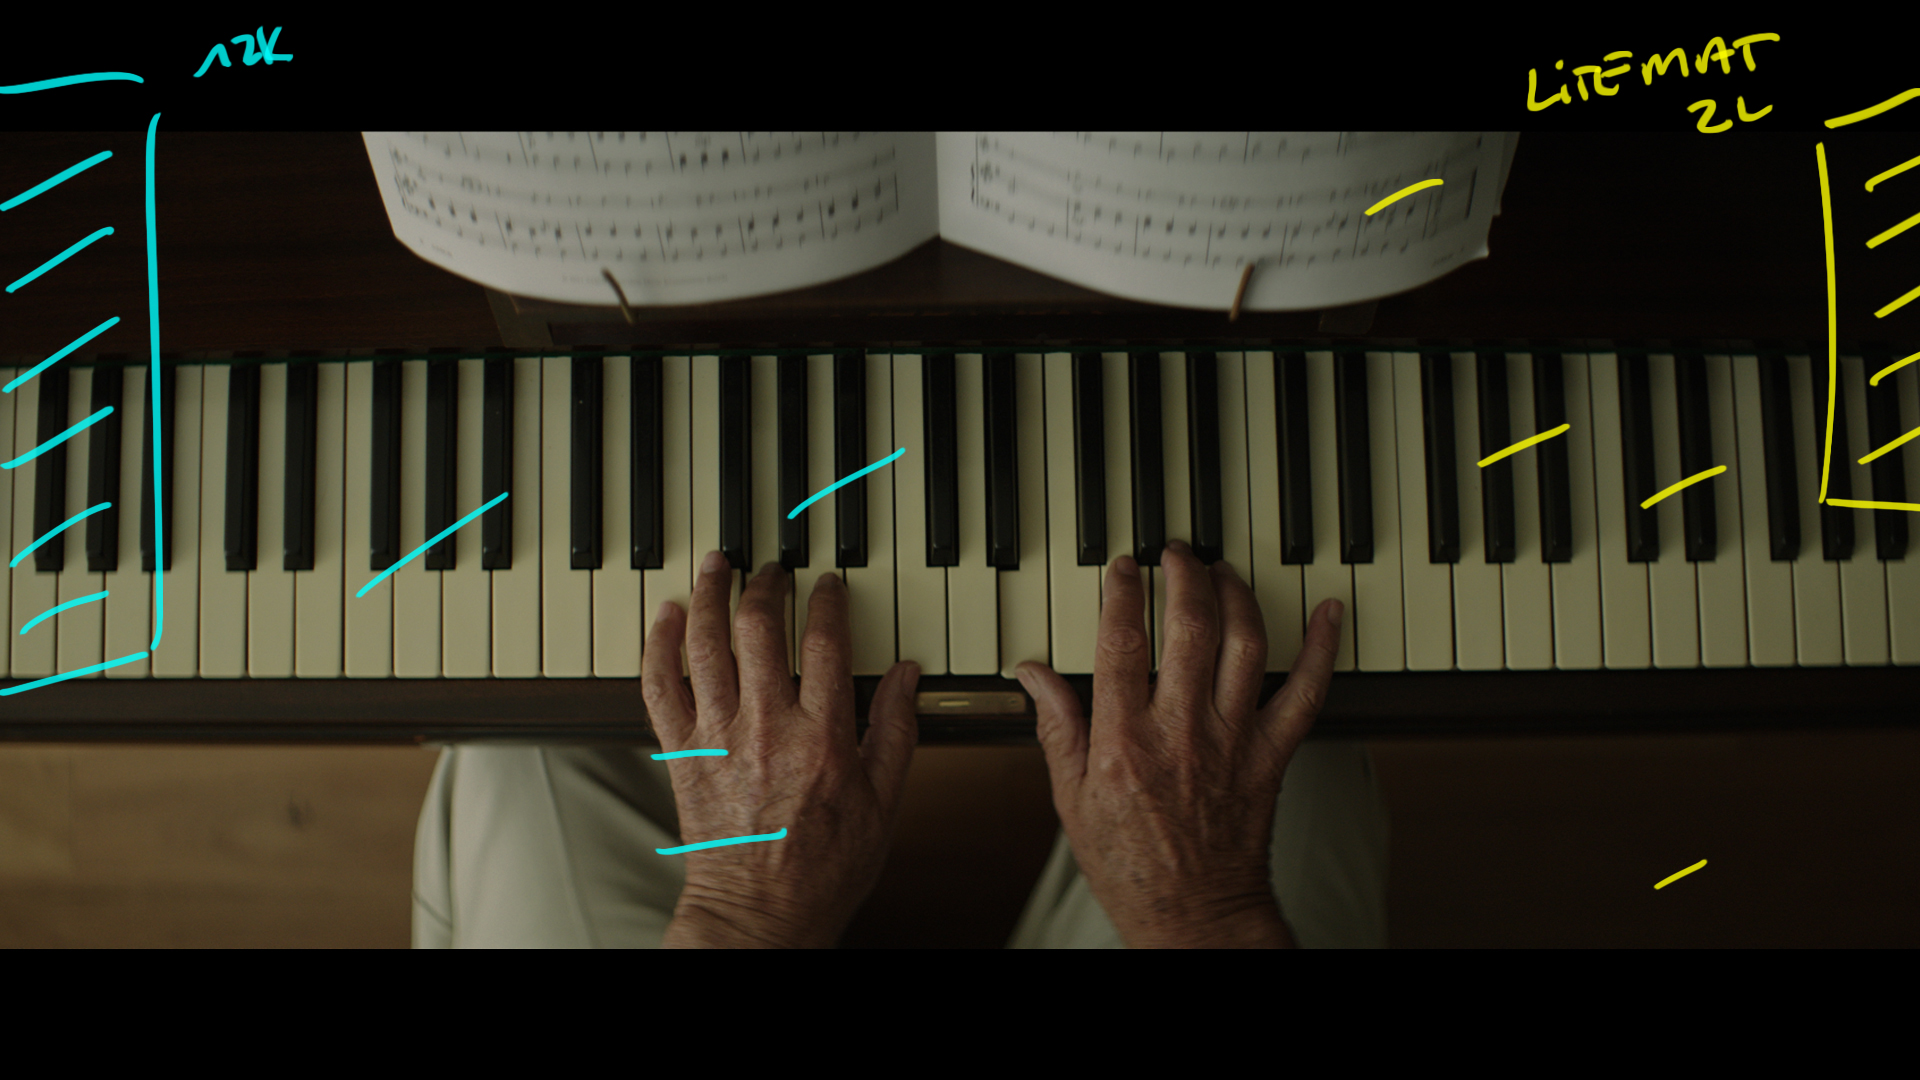
The 12k outside and all the bits and pieces that went along with that set up were coming from camera left.
It got a bit dark as the piano and the talent's body were blocking the majority of the light. To open up the shadows and to make it match the contrast seen in previous shots we used the Litemat from camera left to just up the ambient.
The Results
Behind the Scenes
Piano - Side Angle
The Shot
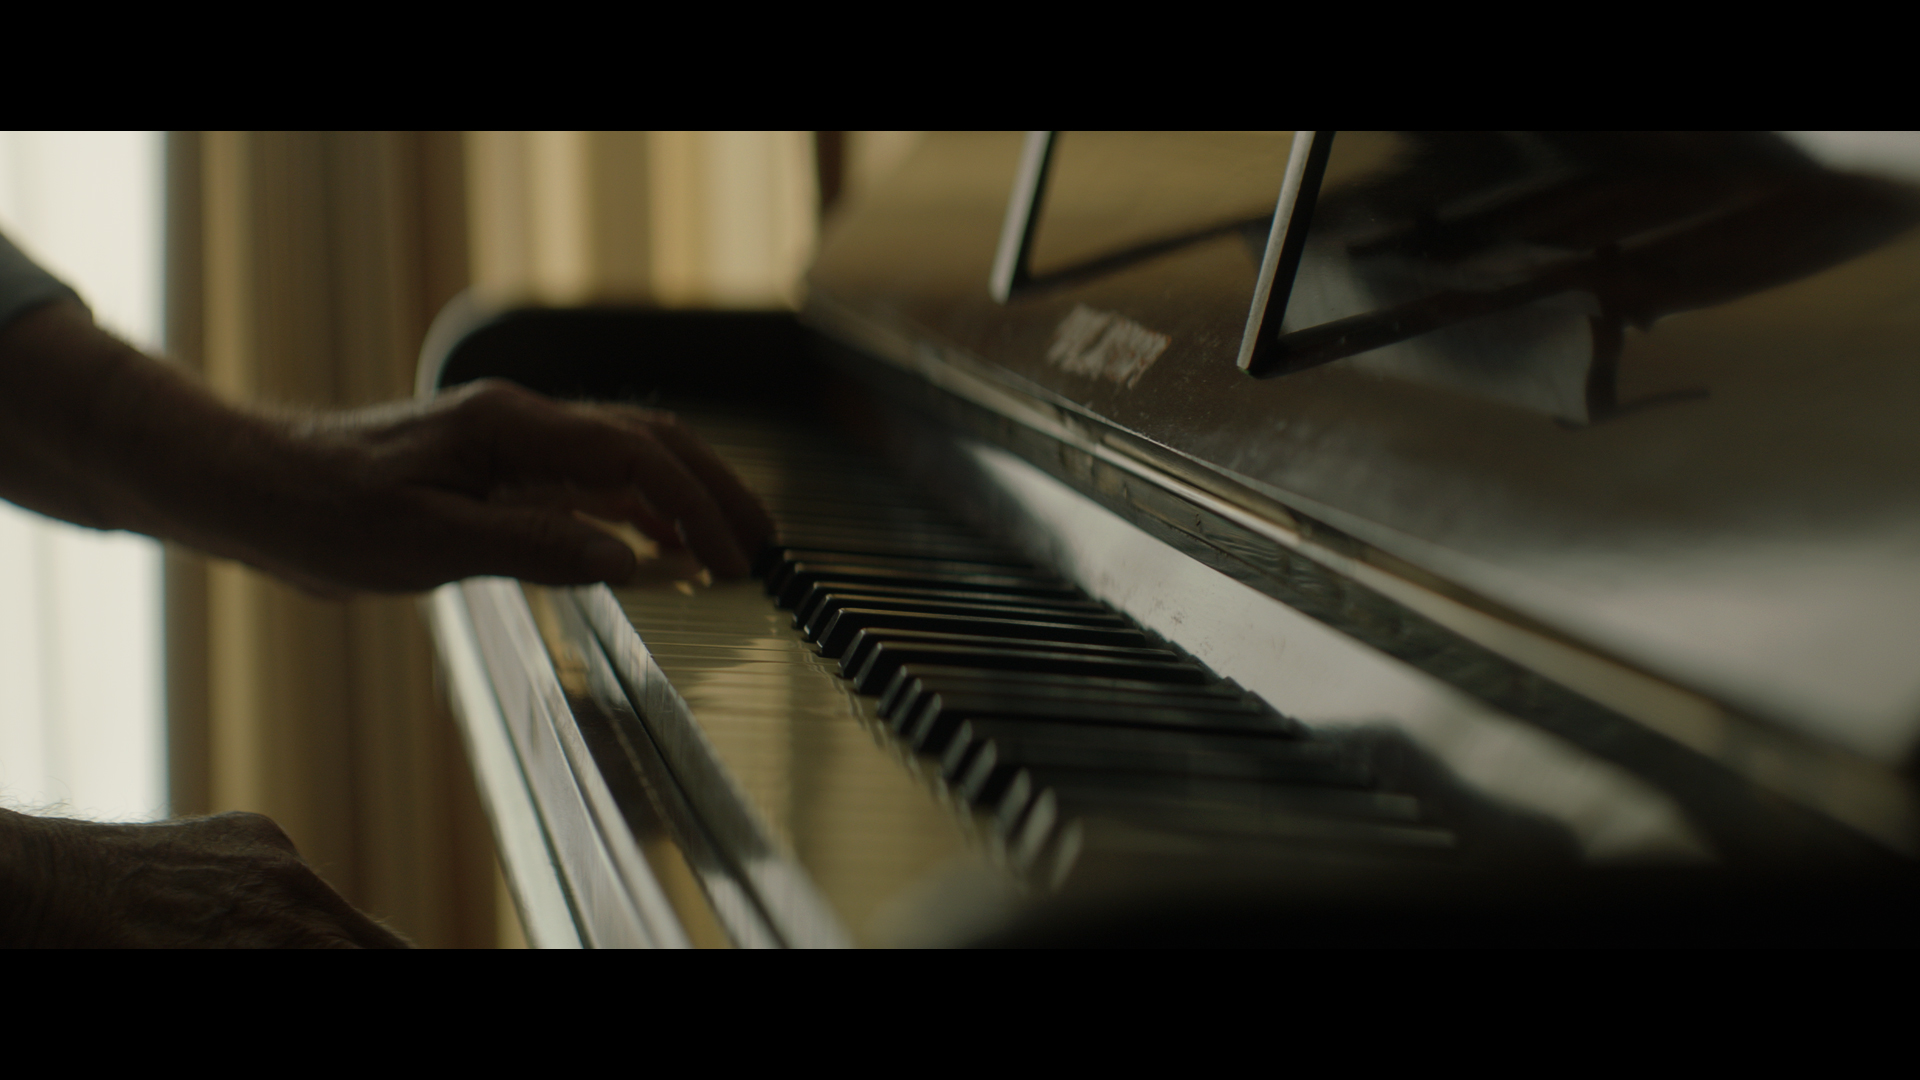
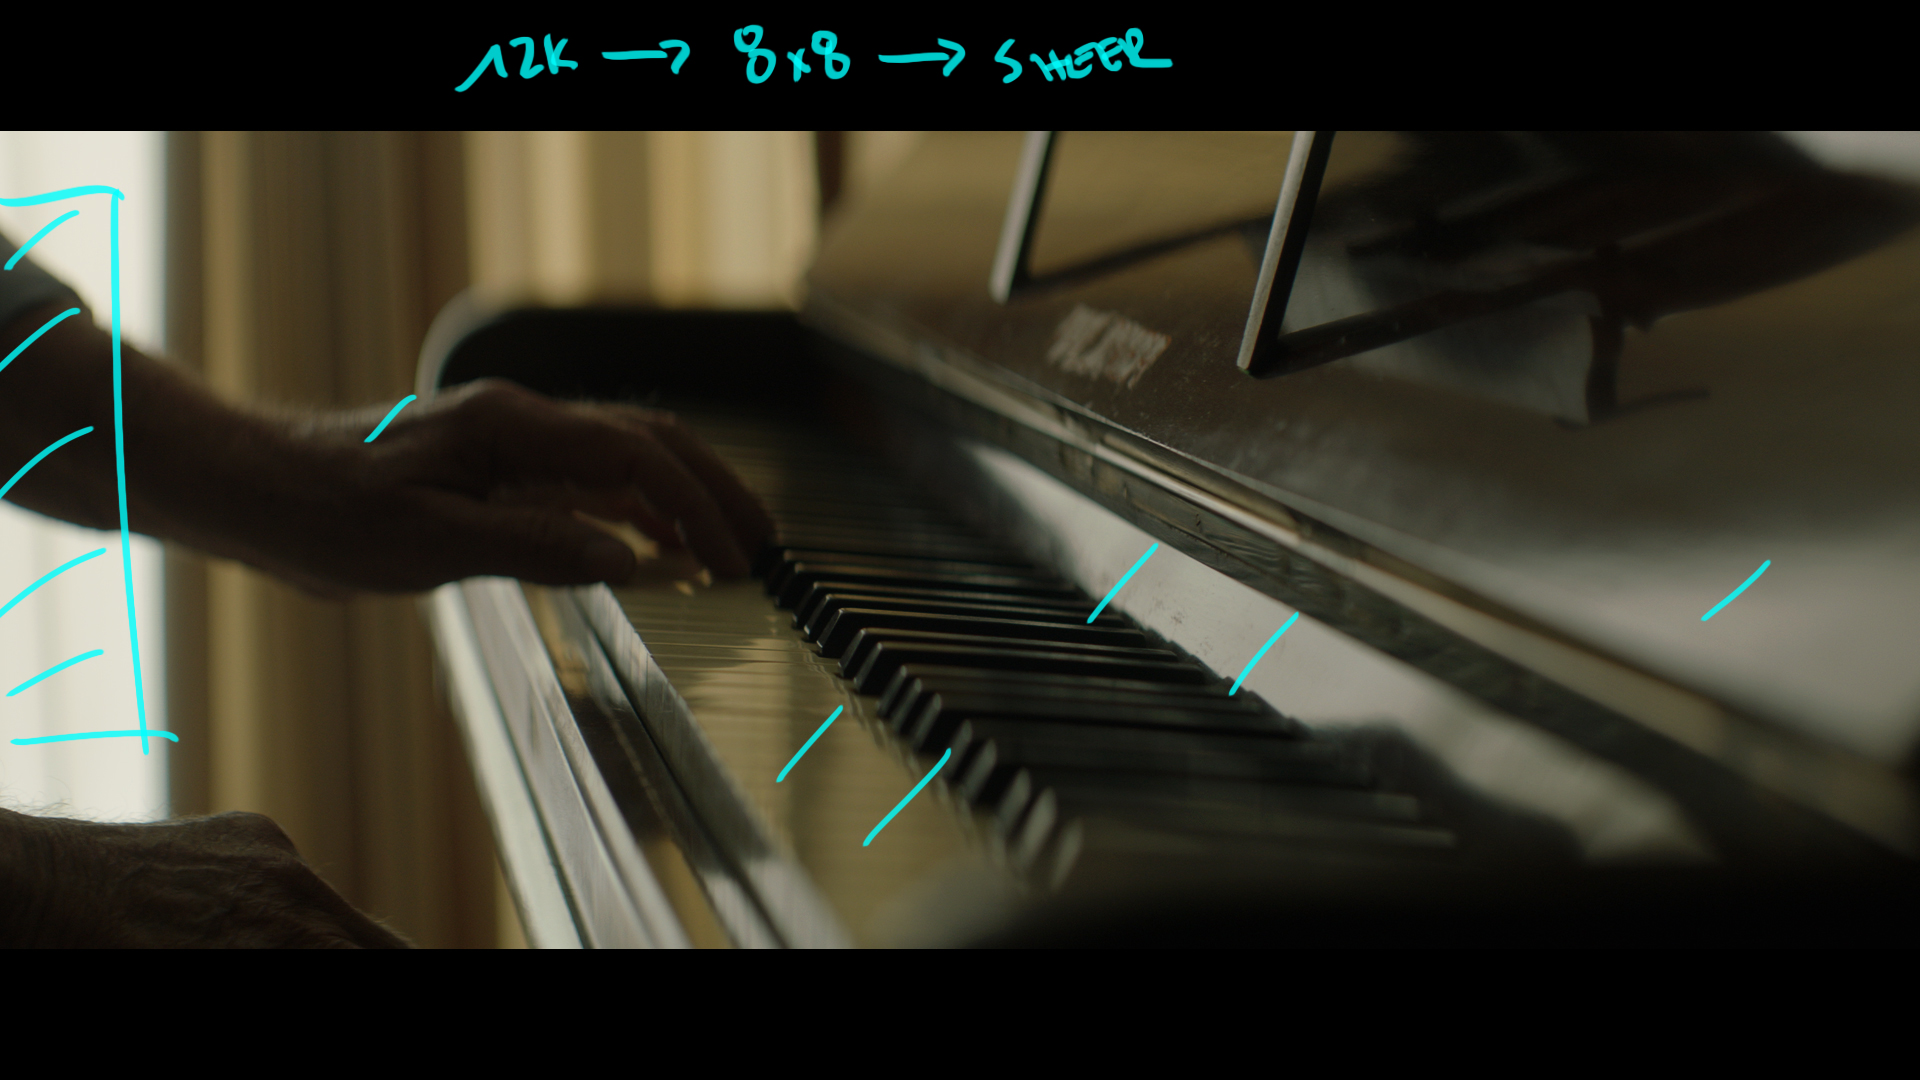
A side shot of the hands playing the piano. Pretty straightforward.
The Lighting
Identical to the previous shot but we took away the Litemat and repositioned the curtains in the background.
The Result
Dead Center - Dolly Shot
The Shot
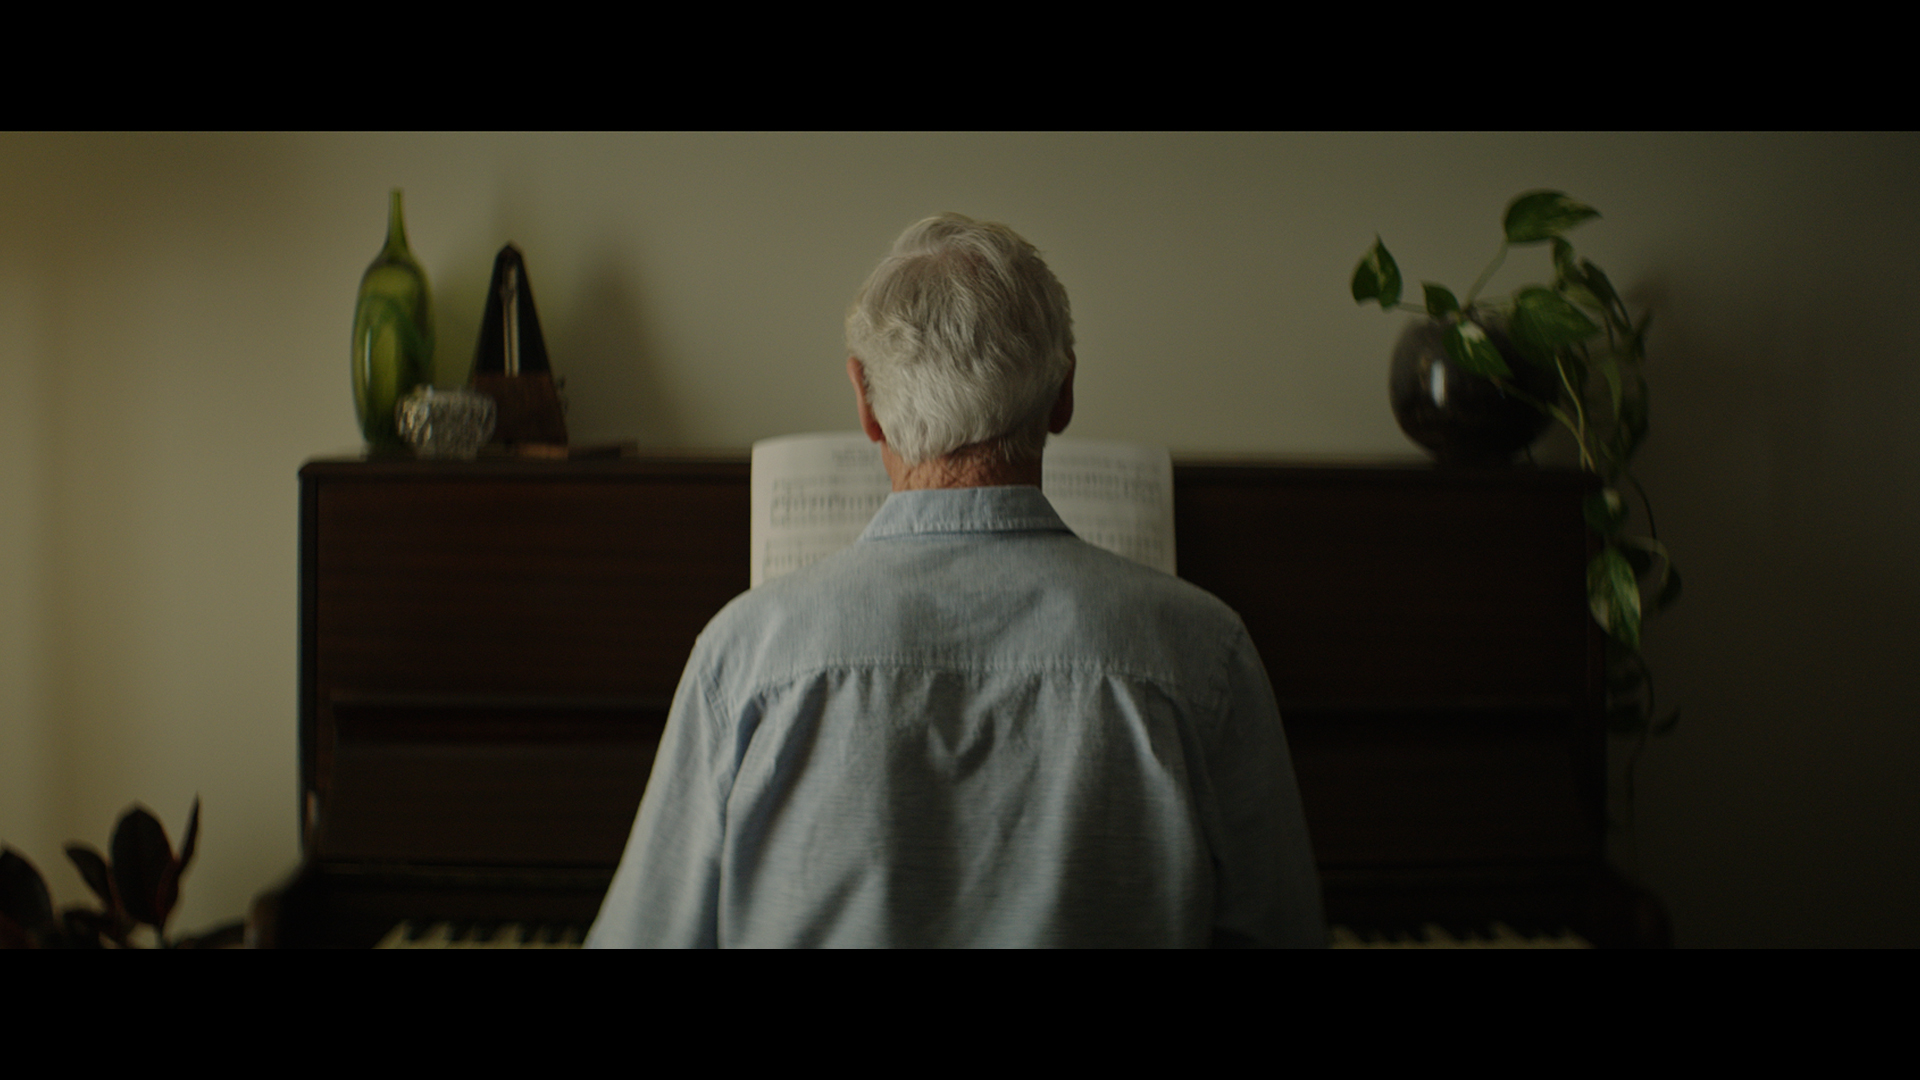
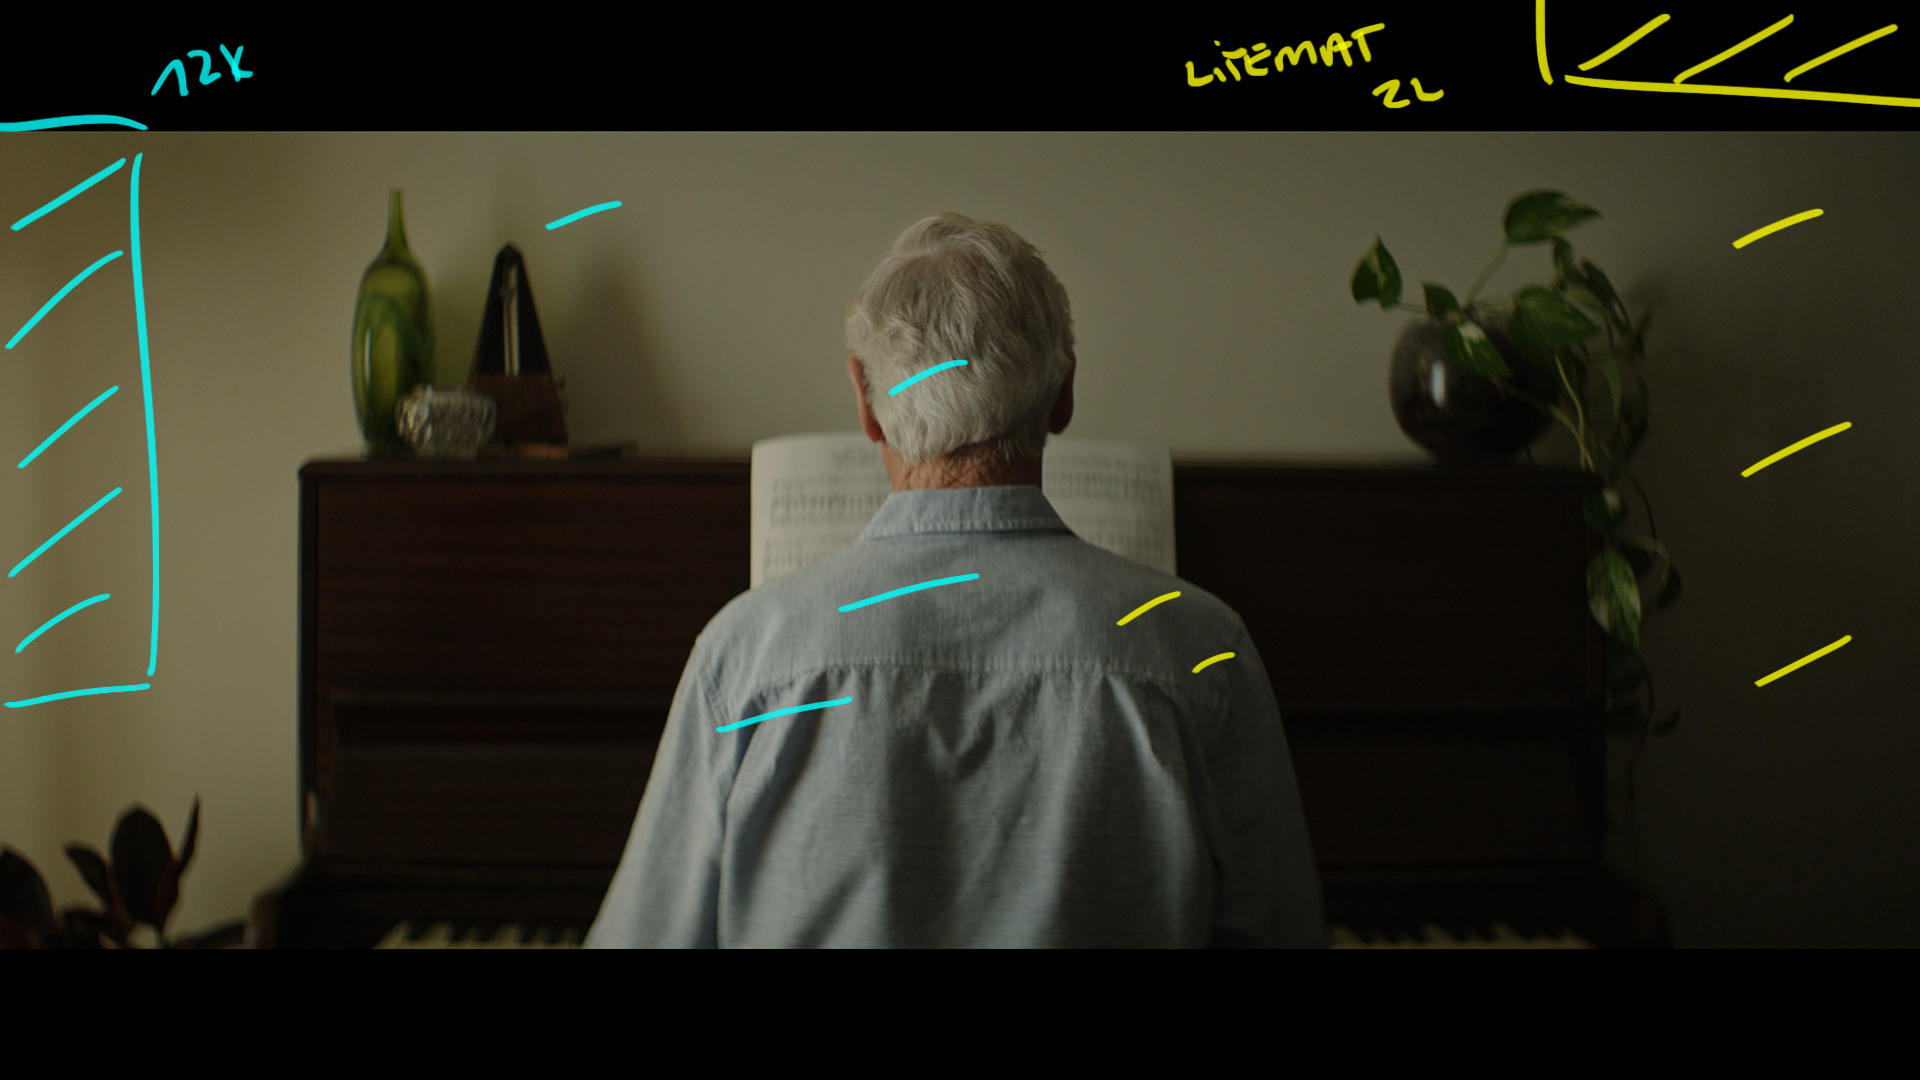
The camera dollies in towards the talent.
The Lighting
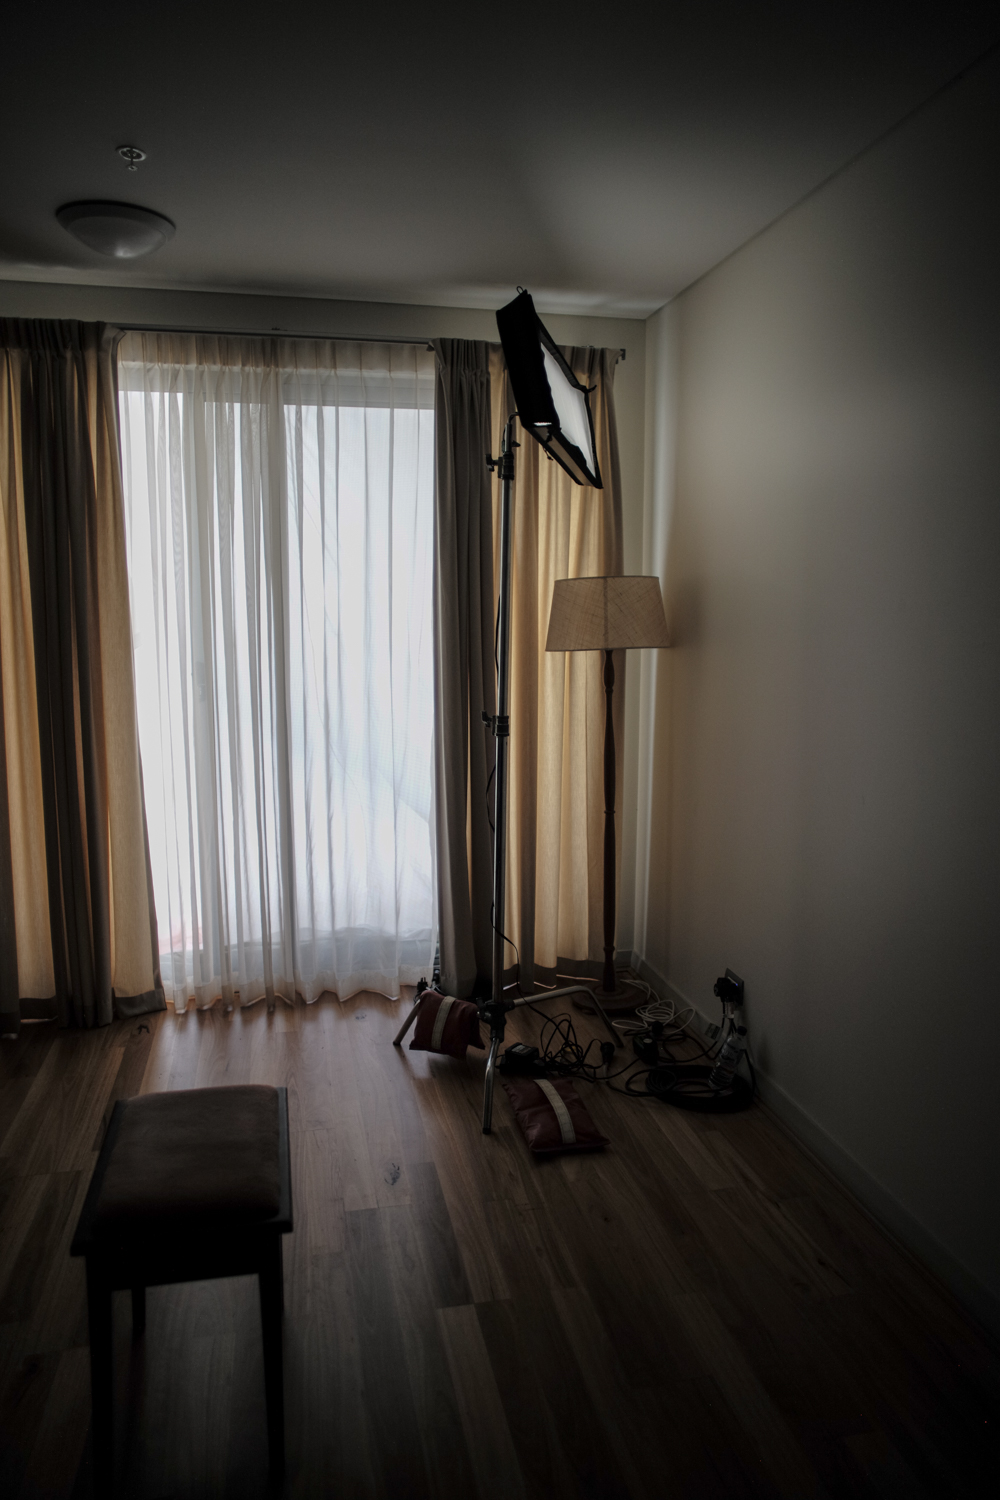
We used the curtains to shape the 12k coming from camera left and the supplemented the ambient with our cooler Litemat 2L set up.
The Result
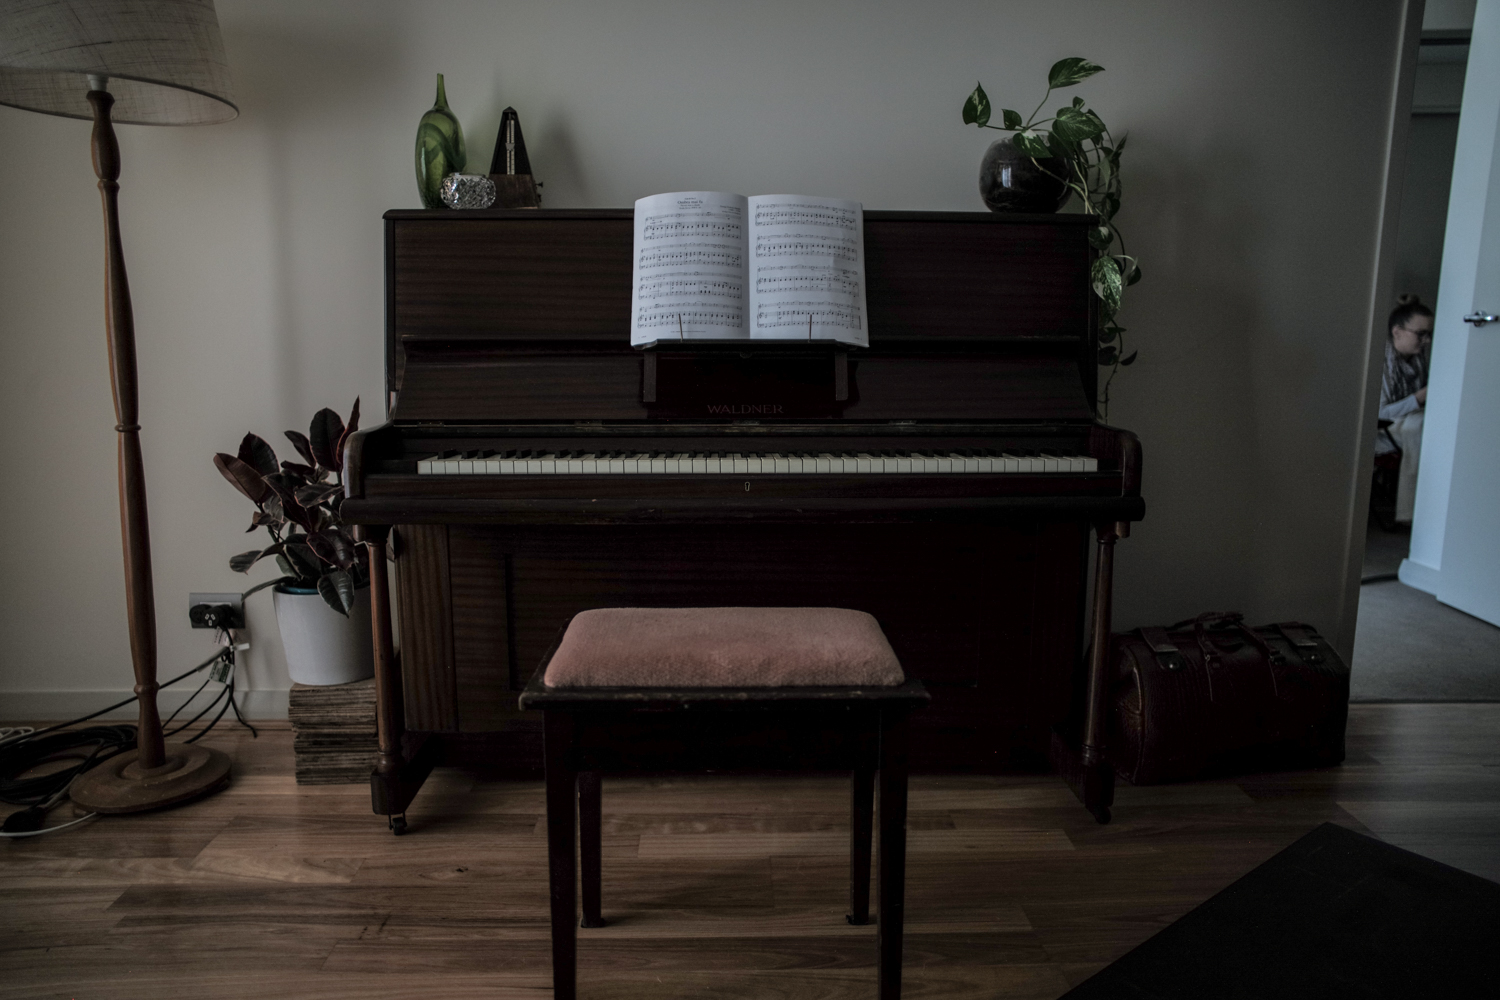
Behind the Scenes
The Details - More Diopters
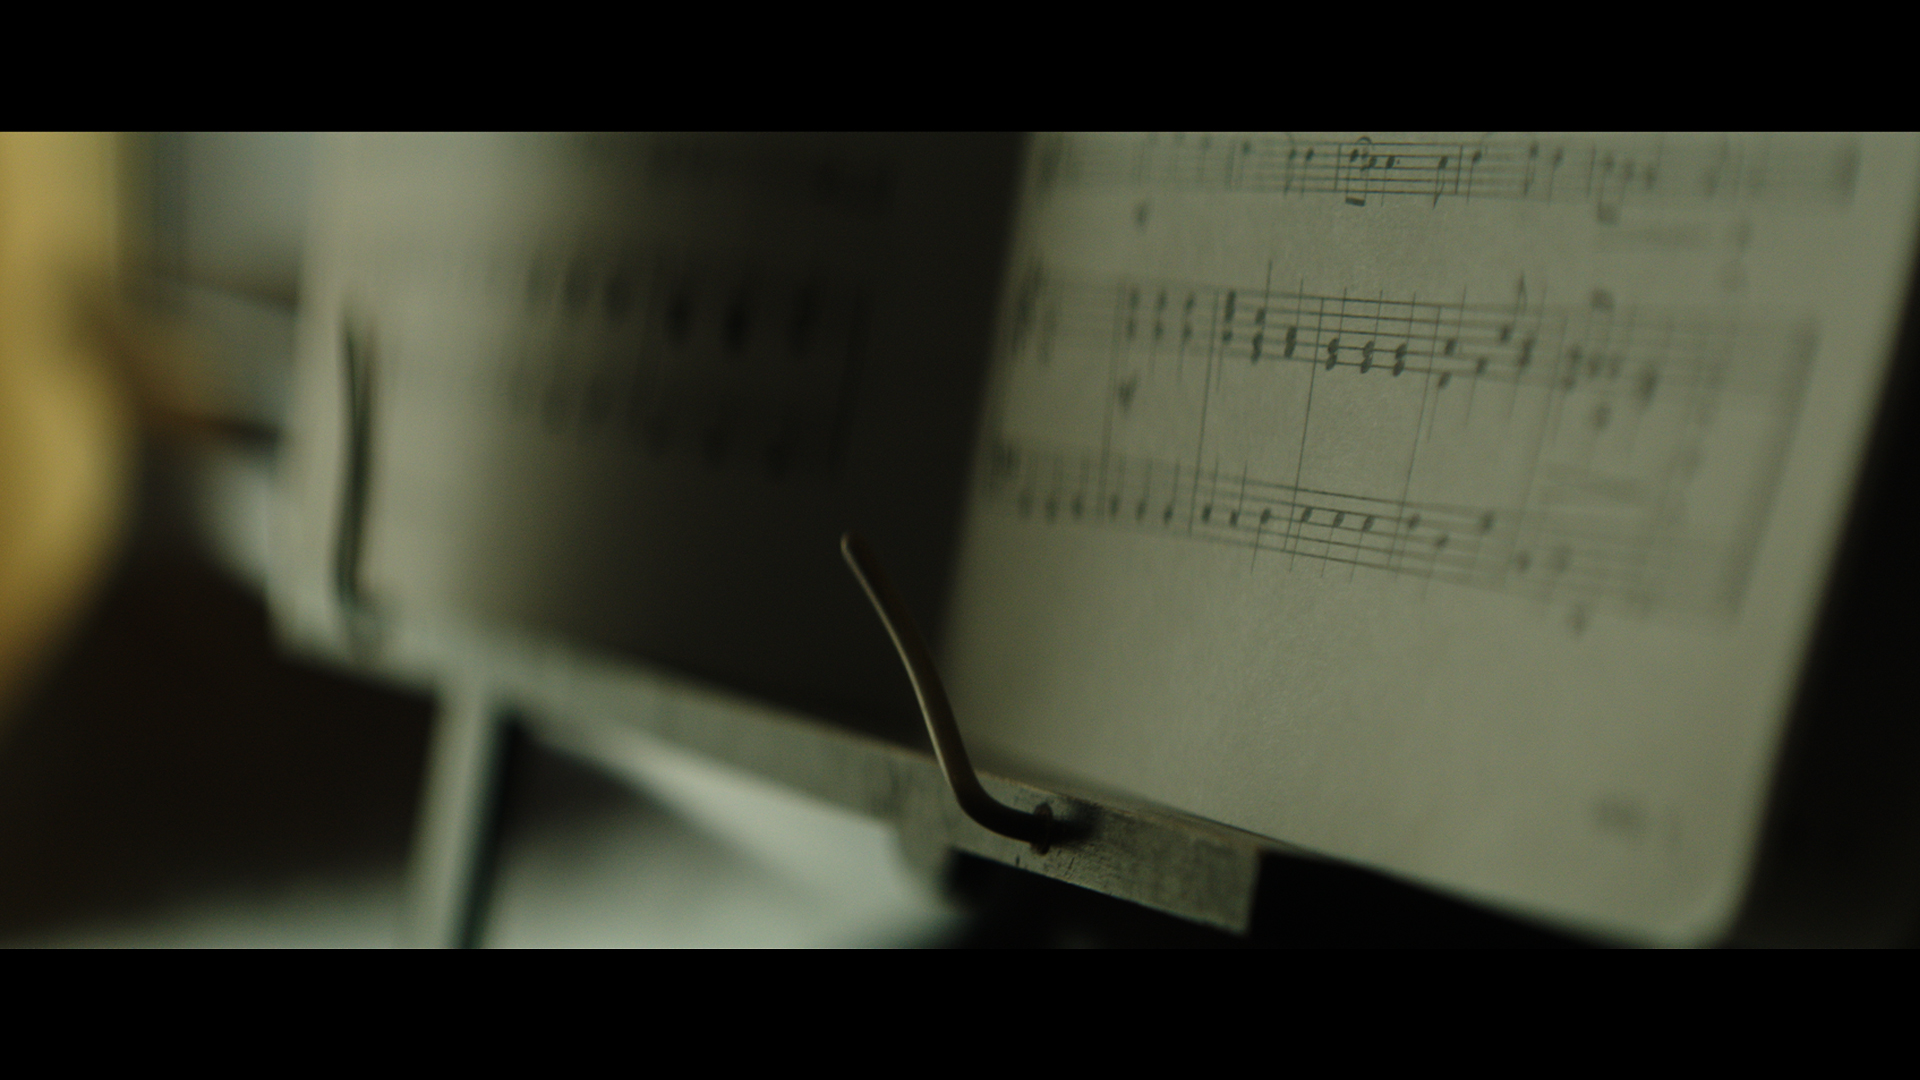
The Shot
We needed a bunch of textural shots to round out the edit.
The Lighting
We stripped everything back except the 12k and then we just shot a whole series of elements repositioning them so the 12k was coming from behind them. By playing with the angle of the elements we were able to quickly move through the list of shots.
The Result
Single Source Lighting - The Biggest Benefit
Setting up and shooting with a single source is fun for a variety of reasons but maybe the biggest reason is the speed at which you can work once the initial set up is complete.
There is very little repositioning from shot to shot as the lighting is set for the entire space.
It takes some practice to make sure you are covering all your bases but lighting with a single source in mind can set you up for some pretty nice results.


Studio v.2. Does that mean that the wonder boy Ian Rogers will be back?
Another great podcast. Thanks!
What time would be a good time to shoot this if you don’t have a 12k light. Would you want the sun to beat down on the window then diffuse?
Great podcast! It’s interesting what you said about the diopters sharpening, it doesn’t really happen with all of them, so i was wondering which ones you were using in this shoot. Thanks!
I love you.
‘f#@K the story’ LOL. I love the honesty and not always trying to be ‘artsy’ about your decisions. Keep up the great work!!