
Listen to the Podcast
This week on The Wandering DP Podcast we revisit a topic from Episode #78 of the podcast entitled "Street Cinematography".
In that episode of the podcast I lay out the background for this project and how it differed from previous breakdowns we have looked at on the show so far.
This week we take a deeper look at an approach I am calling Reactive Cinematography.
We look at a commercial shot using the principles outlined in Episode #78 and discuss the differences in capturing images in this way vs the standard commercial workflow.
The Patreon Podcast: What Can You Offer?
The single most frequently asked question I get from listeners both in and out of the Patreon group has to do with landing jobs as a cinematographer.
I've talked many times on the podcast about making contacts, maintaining relationships, and putting your work out there but in this week's Patreon Podcast I lay out what I think is the single most important element to getting work.
Patreon support helps keep this show going and I couldn't continue to put out new content each week without it. In turn for becoming a supporter of the show I put up extended podcasts for Patreon listeners.
You can gain access to all the extended podcasts that aren't available anywhere else online simply by becoming a supporter.
Check out the Wandering DP Patreon page and if you do decide to become a member please know that I truly appreciate the support.
Technical Info - The Gear
We had to maintain a blistering pace for this shoot and knwoing that ahead of time we were able to shape the camera and lighting package to suit.
The camera package consisted of:
- Arri Alexa Mini - Shooting 2.8k ANA Prores 444 Log C
- Arri Master Anamorphics - 35, 40 , 50, 75mm
- Arri WCU-4 & C-Force Motors - For quick control of the camera settings
- Easyrig Vario 5 - Everything was shot handheld
- True ND .3 + .6 - Because the Mini has internal NDs all you need is a .3 and .6 and you are set.
- Arri LMB-25 - Lightweight and quick but strong enough to hold on to for the handheld moments.
- FSI BM090 - Because nothing says lightweight like a 14 pound 9" on board monitor.
The lighting package was all LED and included:
- Arri Skypanel S-60c - Heavy but incredibly useful
- A homemade softbox - with an eggcrate the gaffer made the day before the shoot.
- A Circular LED - Something I had never seen or heard of before and didn't have any branding on it. It was gigantic as well and looked like this light a bit minus the branding.
- 4 LED Kino-like Tubes - These didn't have any branding either but were identical to Quasars. Probably the exact same product just without the badging.
- A few smaller LEDs - nothing special just small bi-color Rosco like Litepads.
The Breakdown - Reactive Cinematography
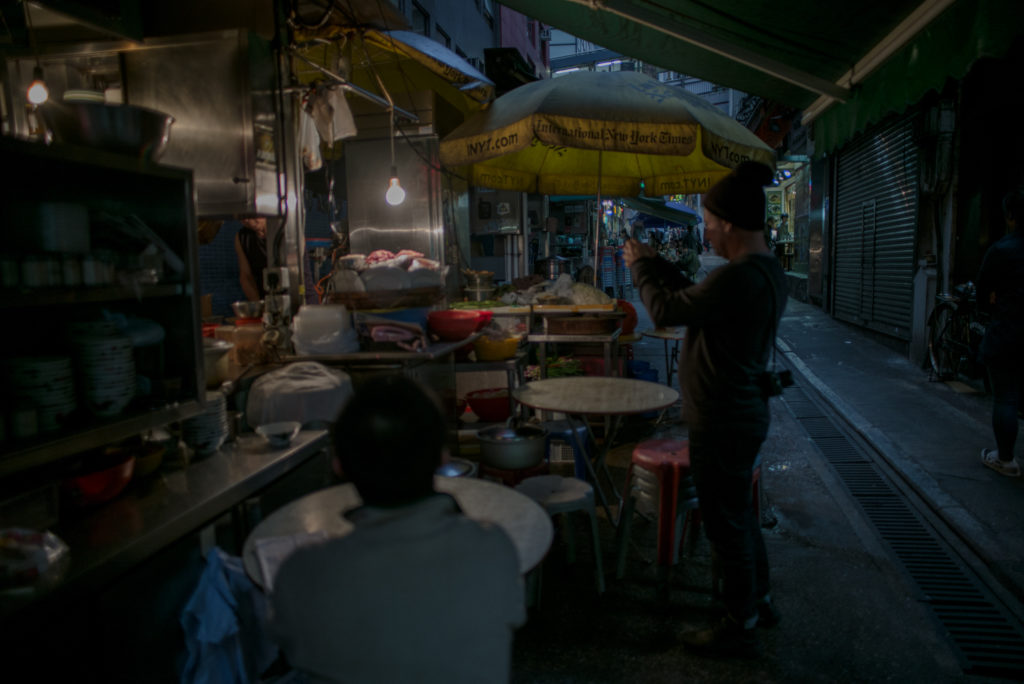
The Idea - Wide
The Shot
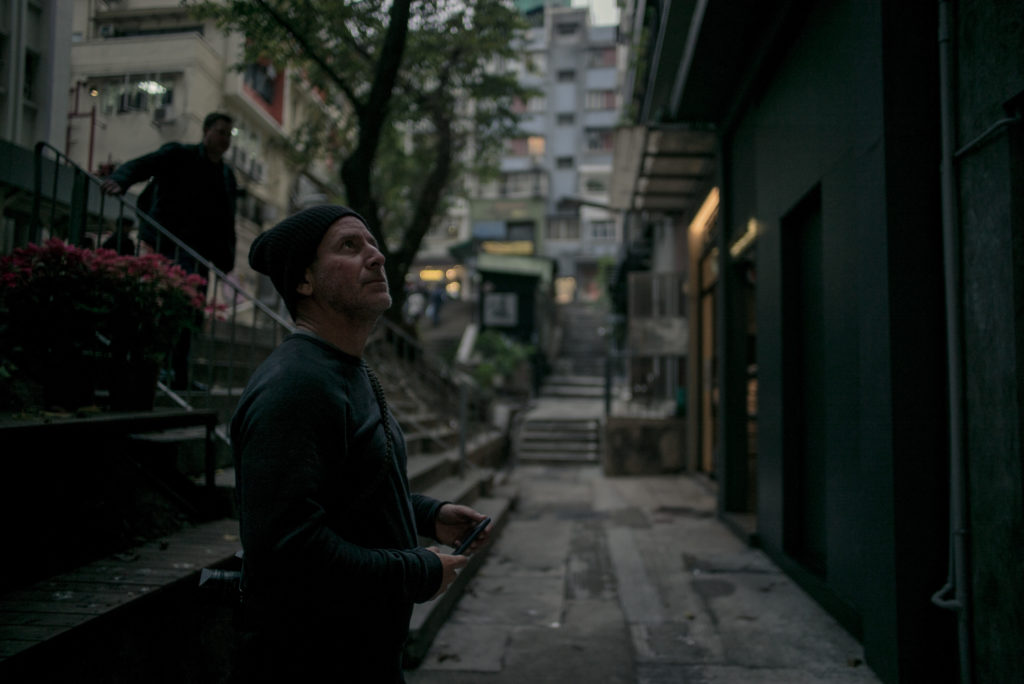
In this shot we needed our character to be studying his environment and learning from his surroundings.
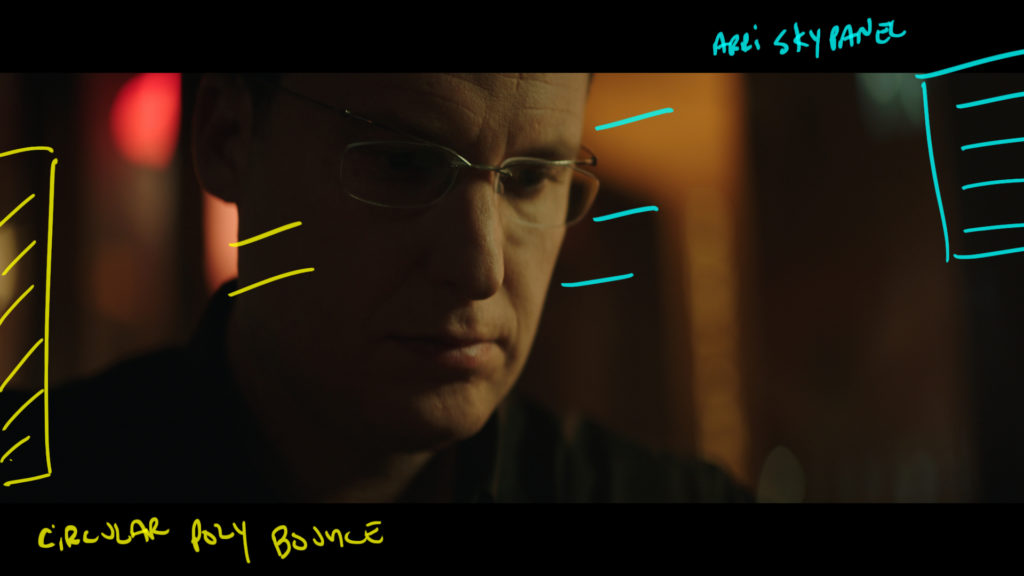
The Lighting
We looked long and hard for a place that had the depth and layering we needed. The layering was created through the practical bulb colors along with the physical elements in the frame.
For additional lighting there is a Arri Skypanel in a softbow with an egg crate off to camera right. The lamp is set to 3200k and the camera is at 4300k giving us the warmer key light.
To fill in the shadows there is a light I have never seen before but it was basically a giant LED circle that was bi-color. It ran off V-mounts so it was perfect for this gig. It is dimmed as low as possible and is aimed directly at the foreground table elements.
Some bounce off of the table elements is what is producing the blue-ish fill on his shadow side.
The LED was set to daylight.
The Results
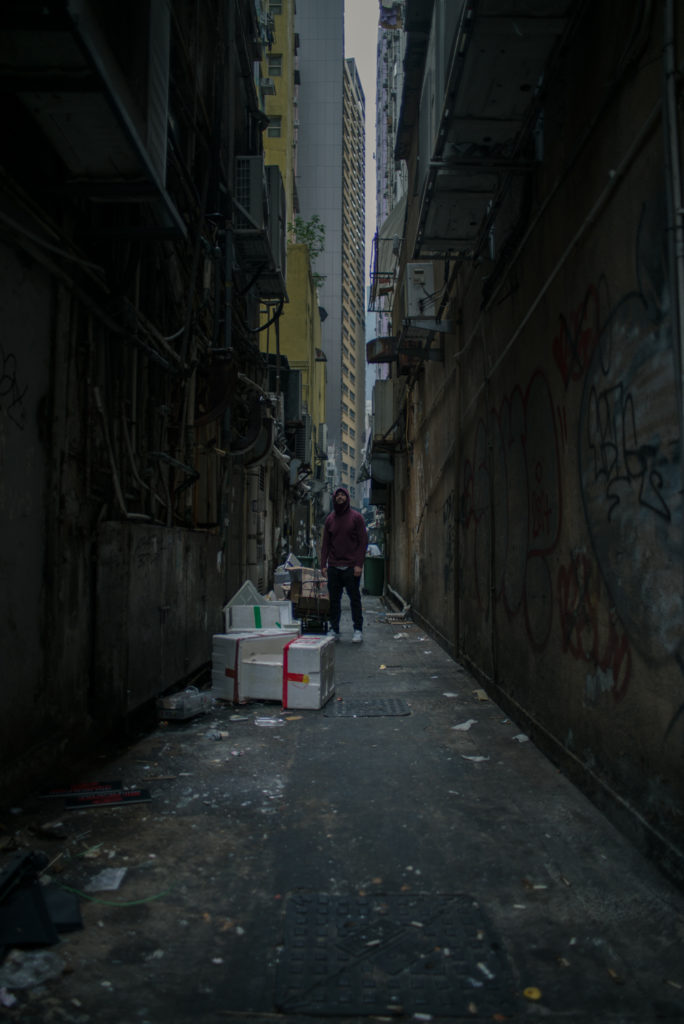
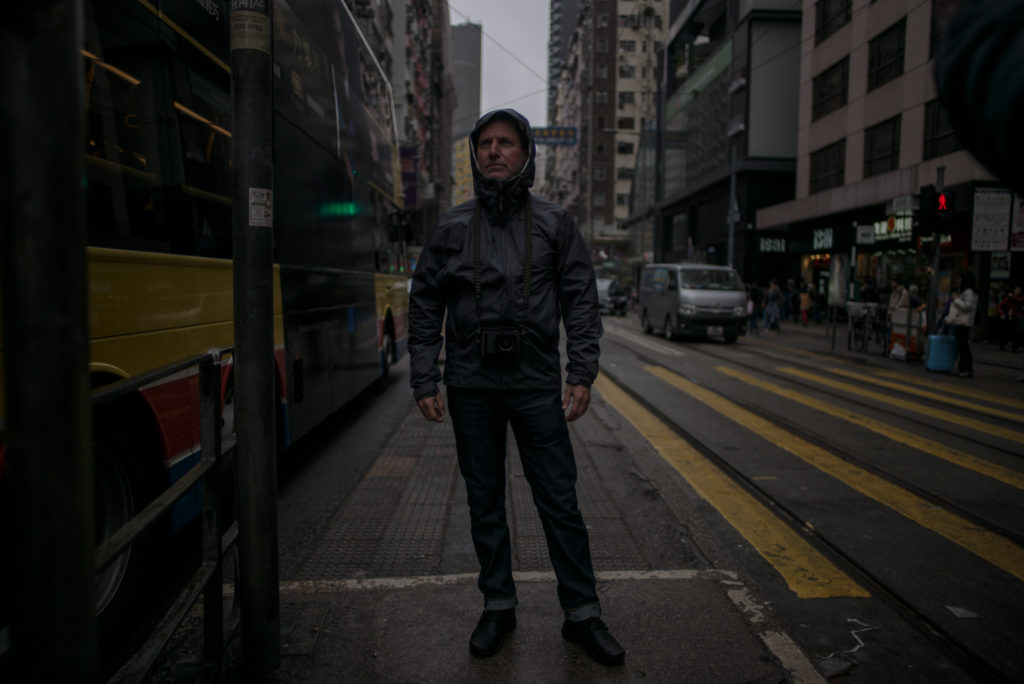
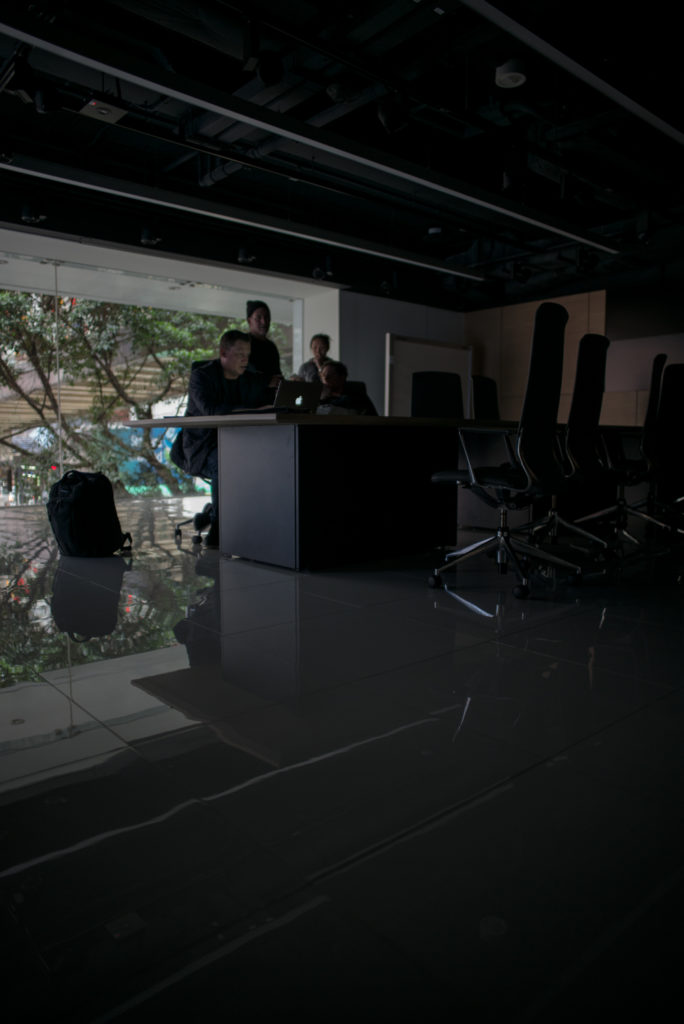
Location Scout Stills
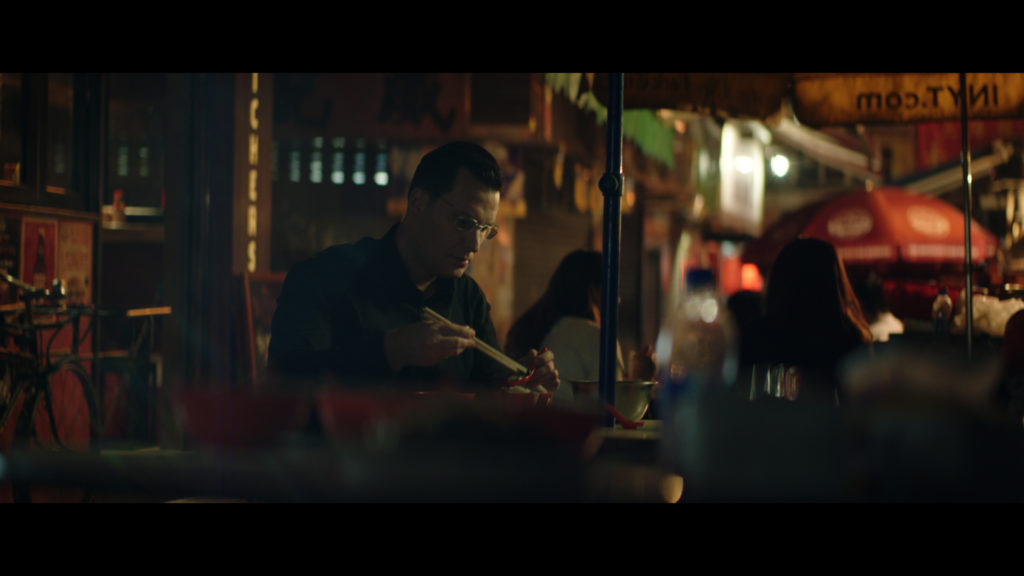
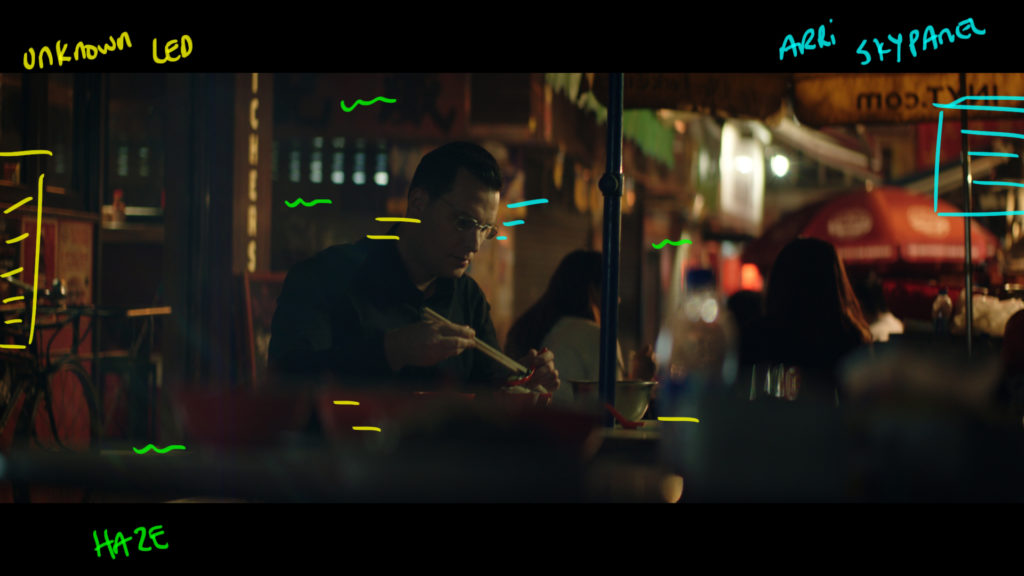
The Idea - In Closer
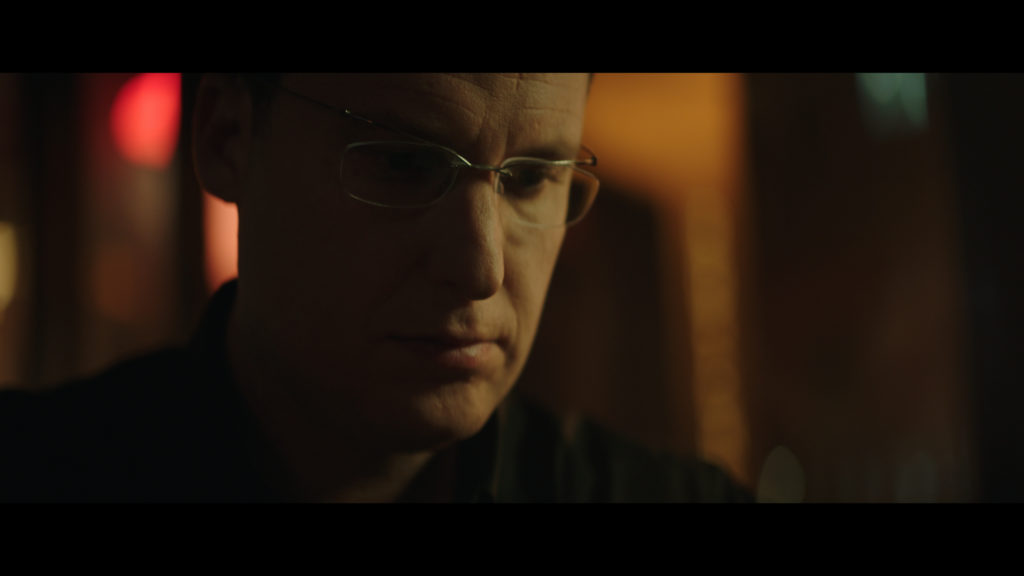
The Shot
These shots are close ups as our talent begins to formulate ideas in his head. We rep-positioned where he was seated so the background became a bit cleaner and more interesting in terms of shape and color.
The Lighting
This lighting is identical to the wide except I slightly moved the Key (Arri Skypanel) so the shadow was a but cleaner.
The new angle was pushed further away from camera leaving the entire side of his face in shadow as opposed to partly in shadow.
Then for the fill there is a small circular poly just lifting the blacks from completely going off the deep end.
The Results
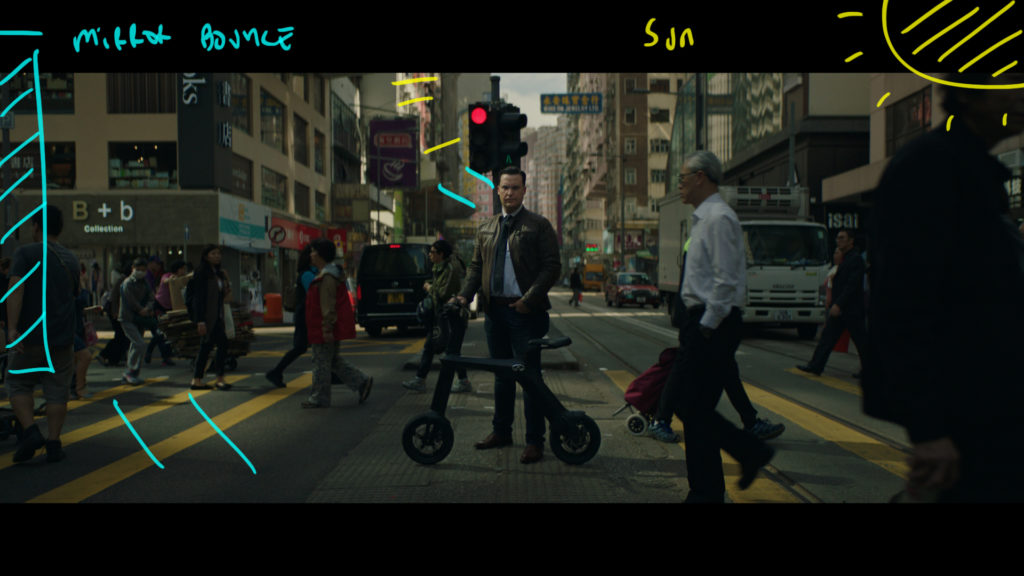
Passing Time - Hyperlapse
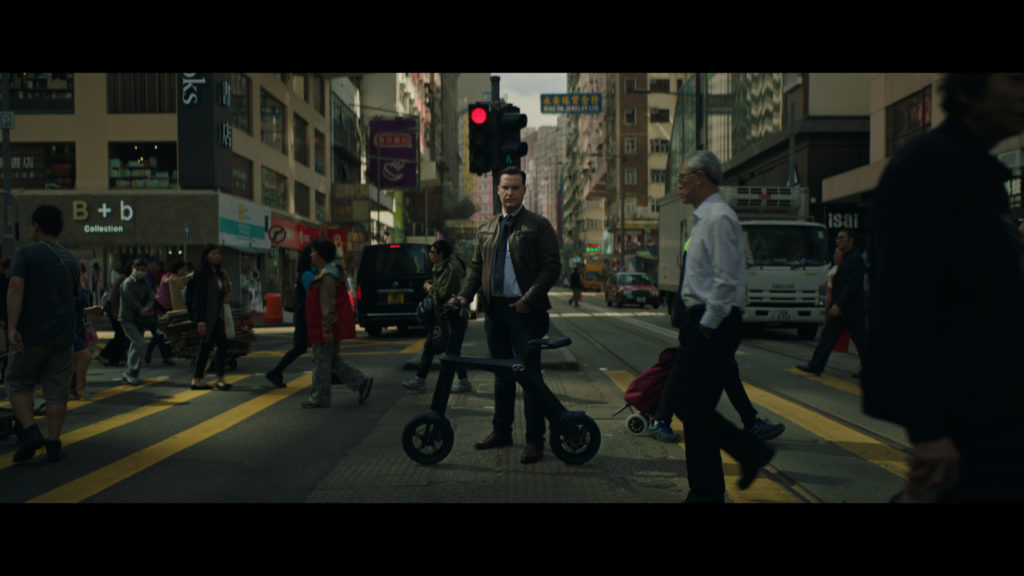
The Shot
For this shot we needed our talent standing in an intersection while cars and pedestrians passed him by.
The Lighting
This shot is a prime example of Reactive Cinematography.
We planned for a certain scenario to play out and when we got to the location on the day we found ways to make it better.
In the end it all came down to scheduling and weather. We set ourselves up with success by knowing exactly when the sun would pop in the background and we made sure we were in a position to make the most of it.
The sun is shining from right to left in the image but when we arrived I saw this mirror bounce happening off of one of the glass towers in Hong Kong.
The effect was just at the right level to be able to bring him up and keep the background nicely exposed. The bounce is creating his key from left to right. All we had to do was position him in the right spot with the light behind him and we waited for the clouds to clear.
The Results
Location Scout Stills
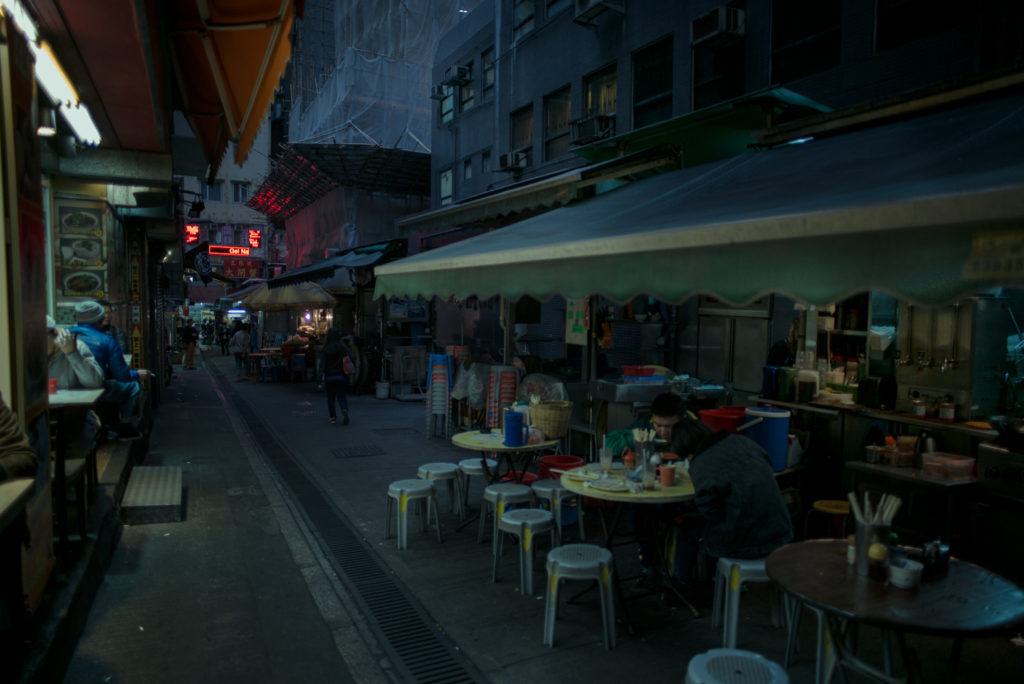
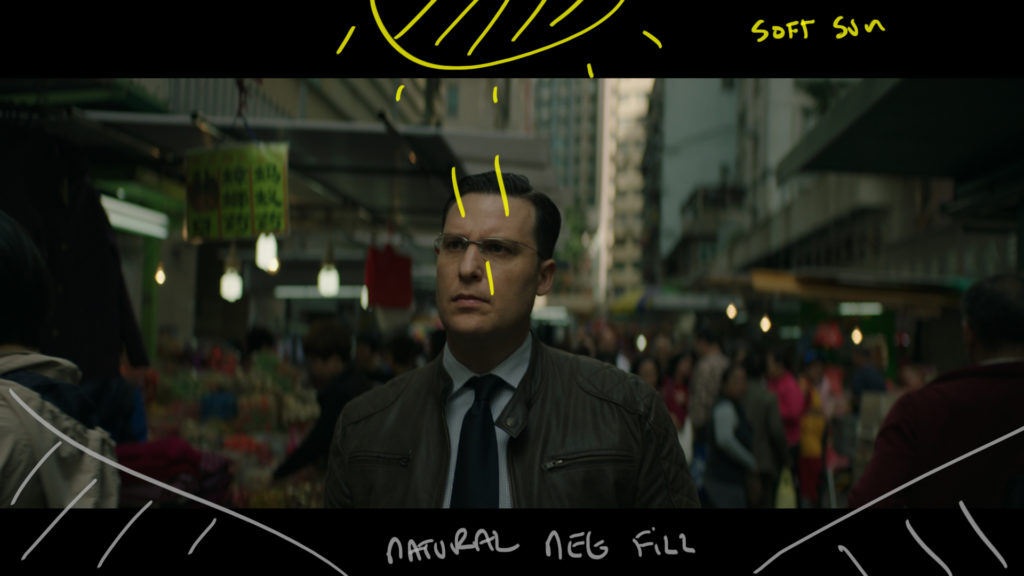
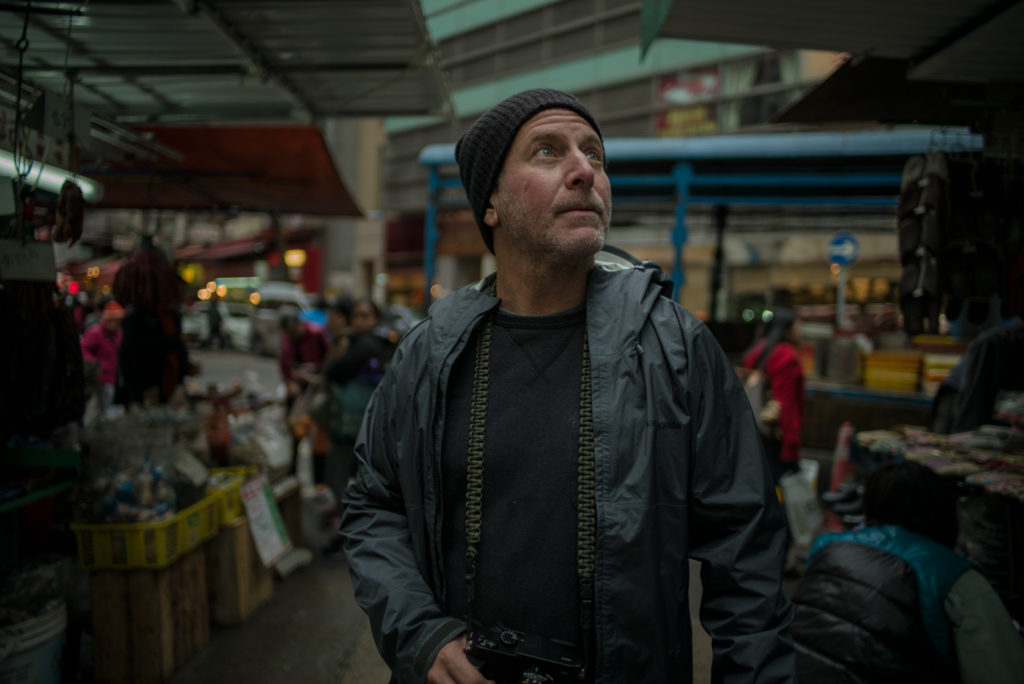
Walking the Streets
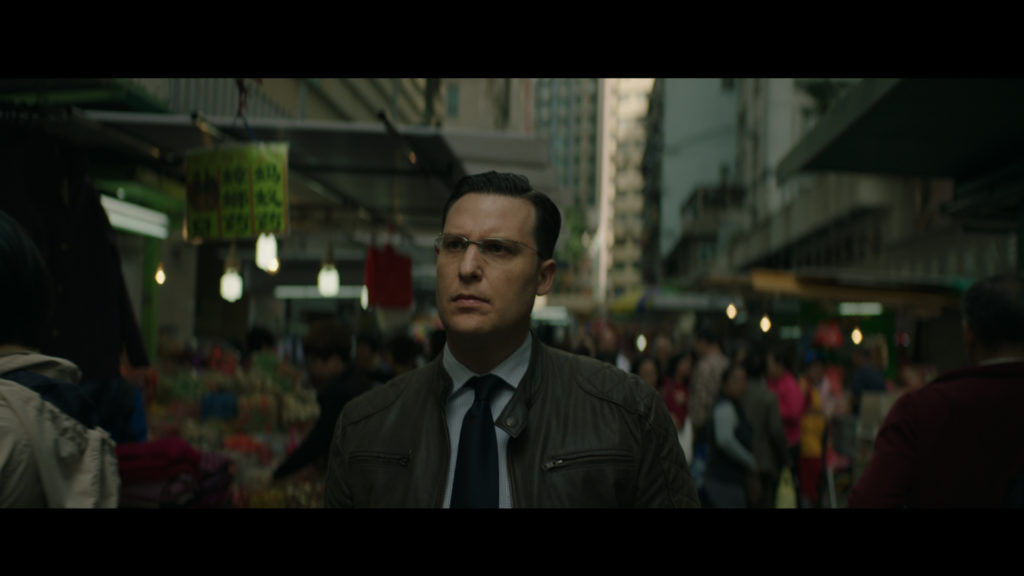
The Shot
In this shot we wanted the talent walking through a busy market place observing his surroundings.
The Lighting
The key to making this shot work was to find an area inside the market where we could pull our talent away from the background.
There was a small break in the tents that lined up with the light. The sun is front lighting this scene indirectly. It is directly behind the camera but is is bouncing off the buildings and hitting the sky giving us a very soft effect.
You can see the direction by looking at the building in the background that is completely front lit.
The Results
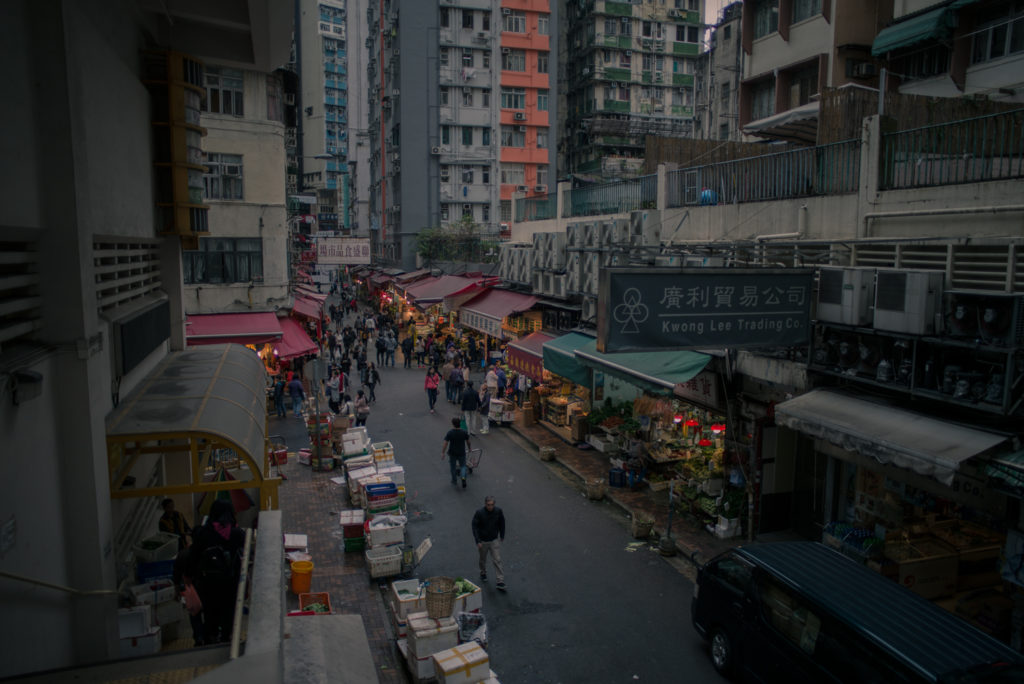
Location Scout Stills
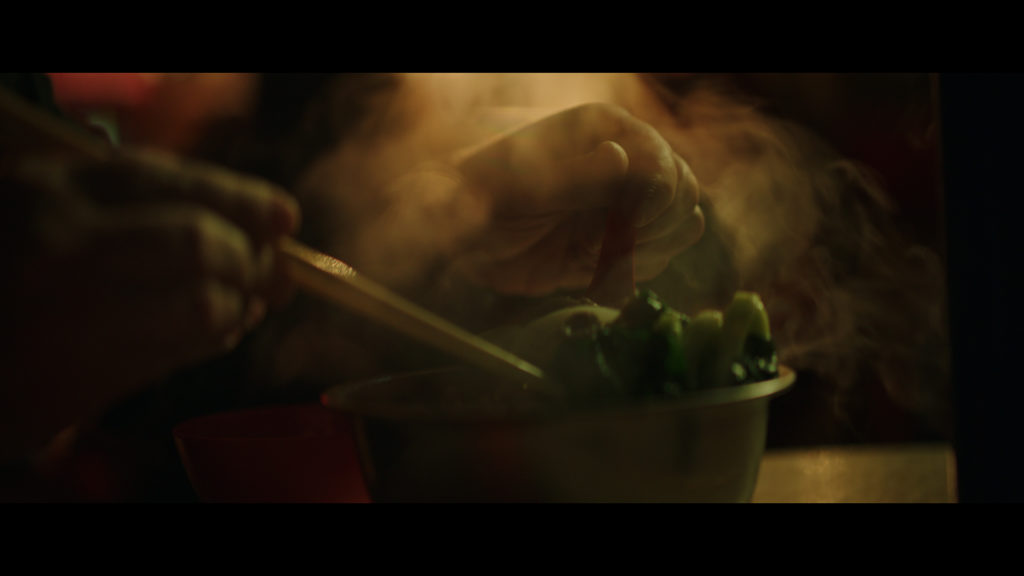
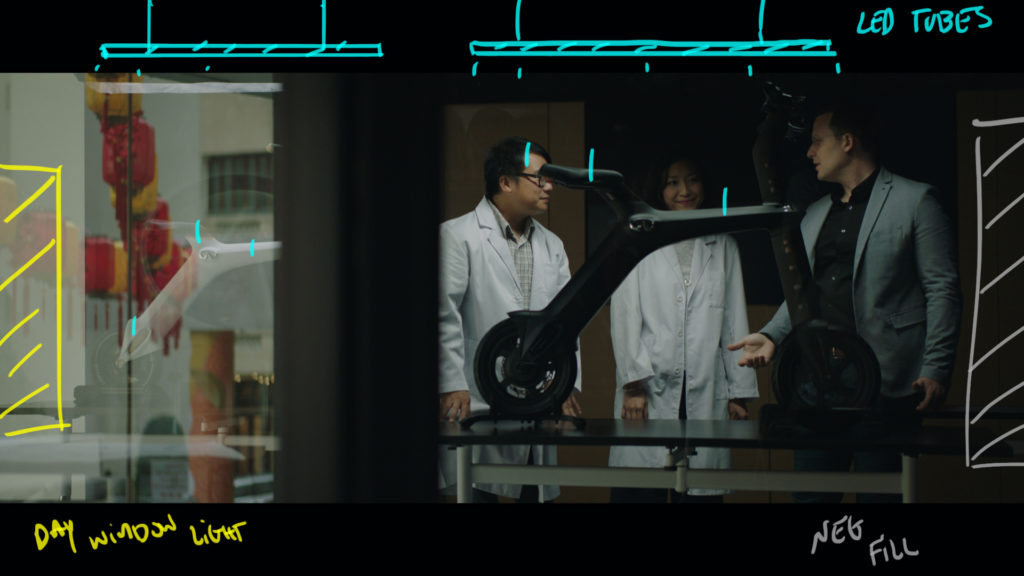
The Lab
The Shot
We needed a lab setting for our talent to be working on his project. In this scene he is working with his team to develop his concept.
The Lighting
We needed to be incredibly quick in this space and it had to have elements of a lab combined with some mood to keep things interesting.
To make all the elements worked we kept with our LED package and added some Kino tube like LED's as top lights over the product.
This created pools of interest and through blocking and framing we could keep things interesting.
We turned off all the house lights and scheduled to be in the space when no sunlight would be coming through the large floor to ceiling windows on camera left.
The Results
Location Scout Stills
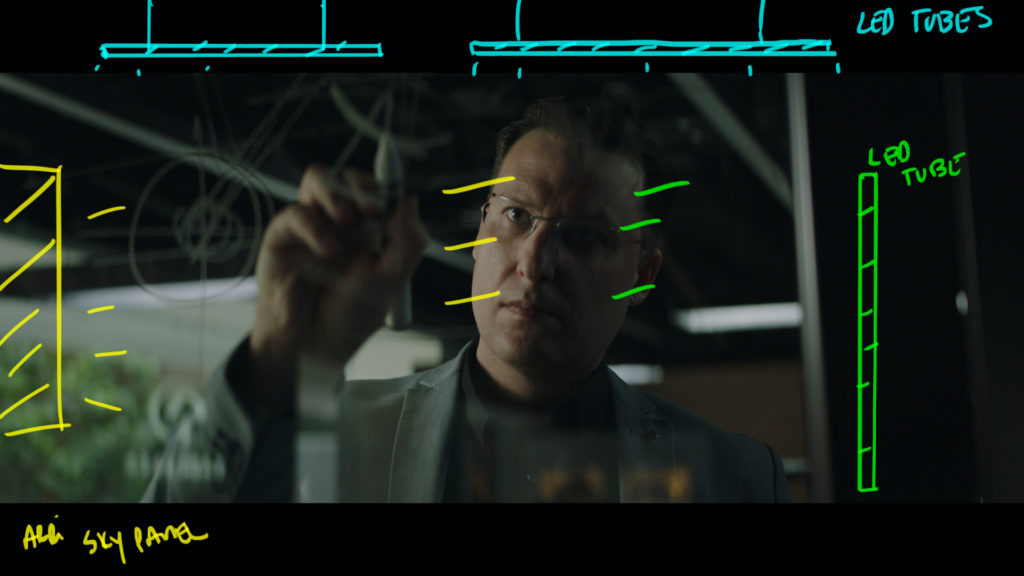
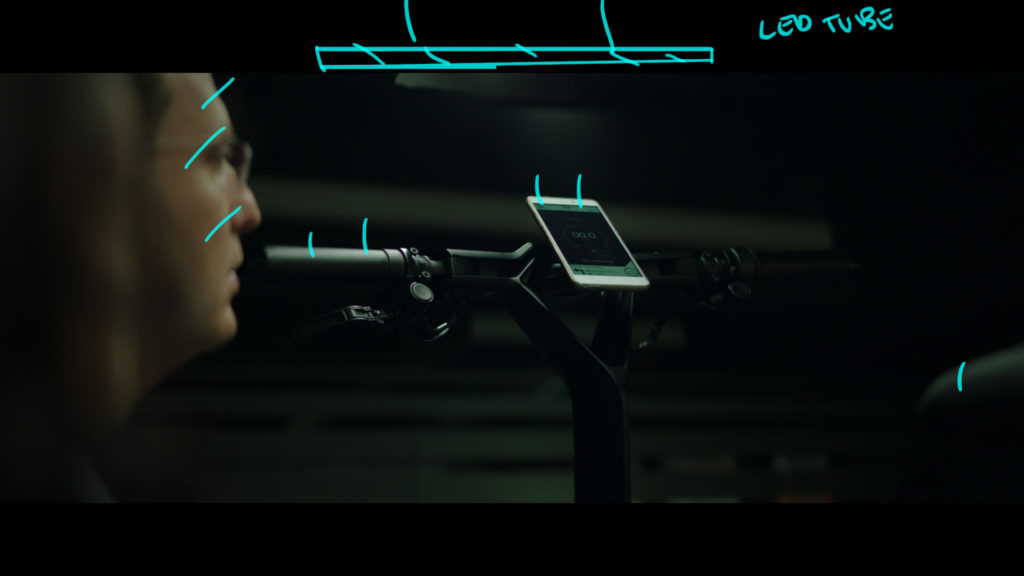
The Lab - Extending the Light
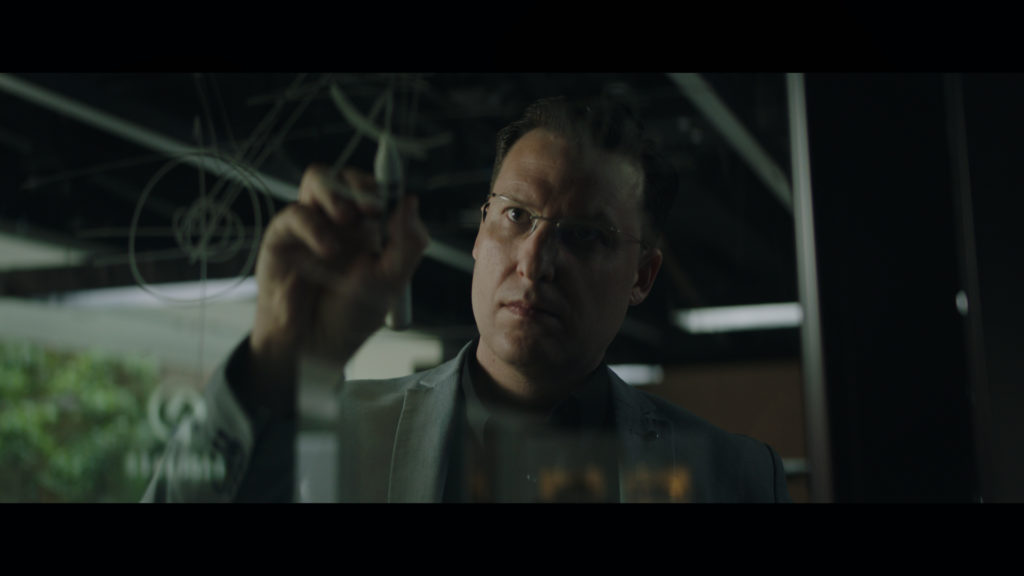
The Shot
We needed our talent at work inside the lab.
The Lighting
The light from the window wasn't strong enough to reach this far into the lab so we used the Skypanel to extened the throw. The panel is from camera left through the home made softbox.
The cooler edge light is one of the LED kino tubes turned vertical and missing right of the talent. Missing right means he only picks up a hint of the level.
In the background you can see the other LED tubes dressed into the background to help create a little bit of interest.
The Results
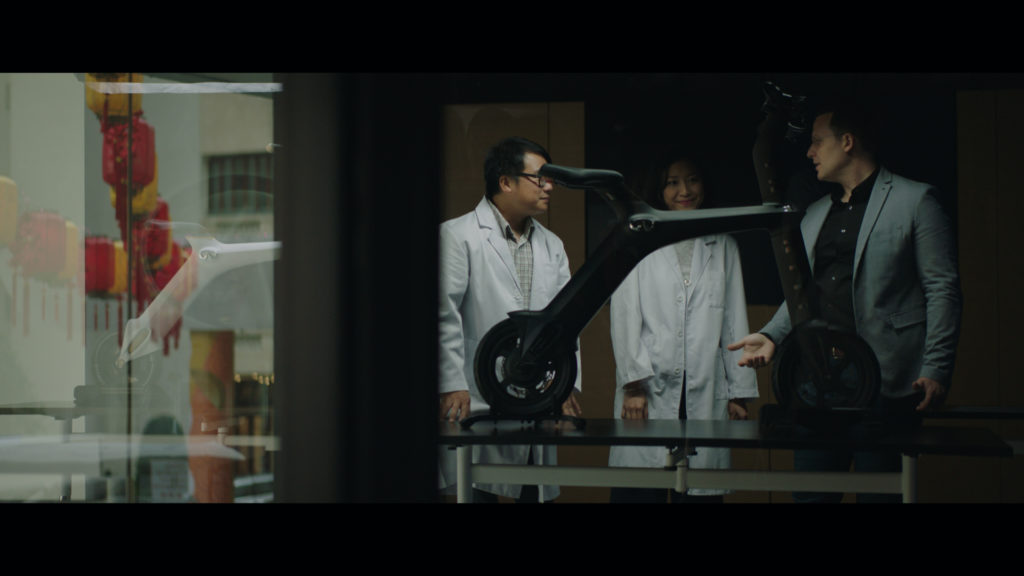
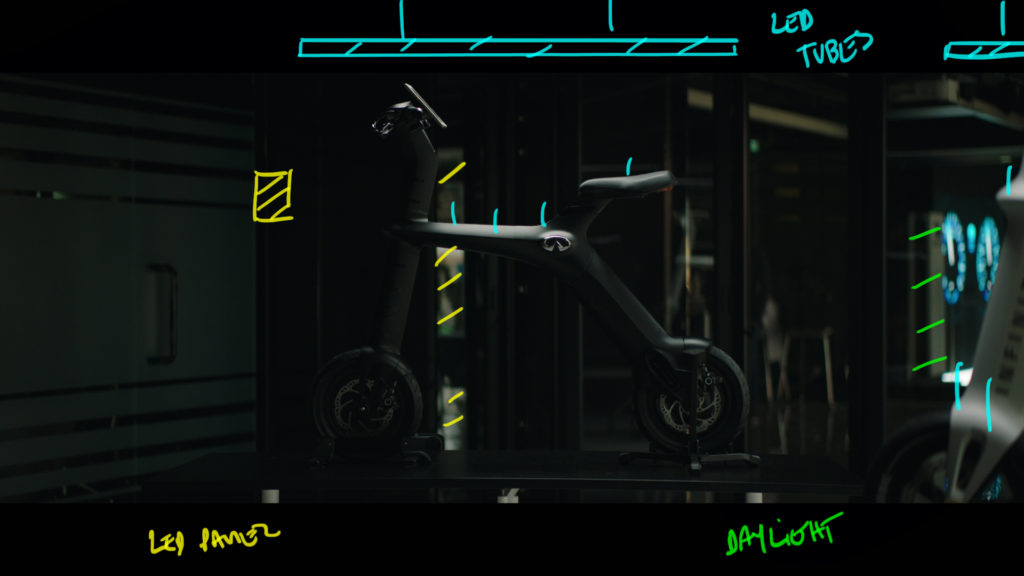
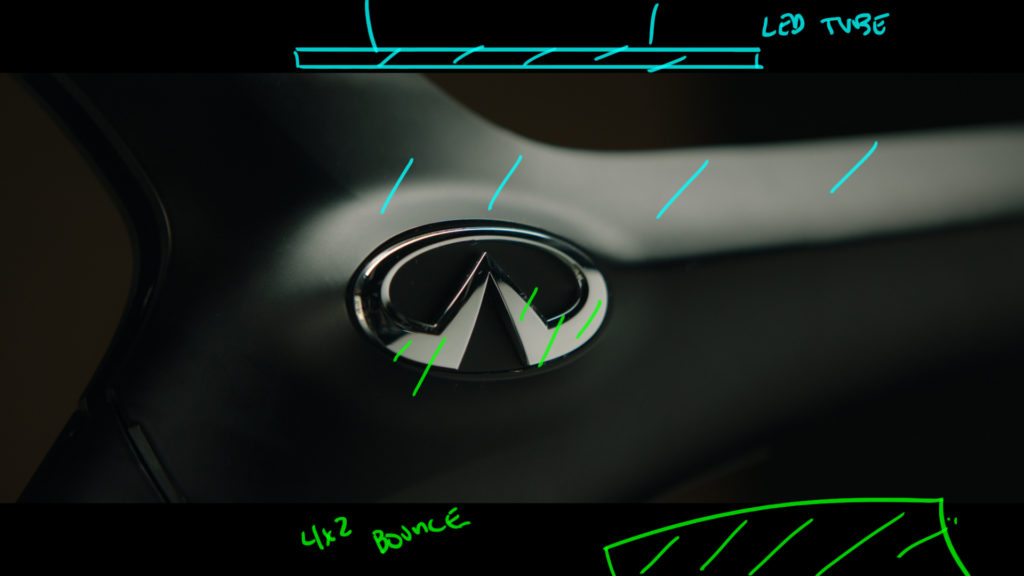
The Product Shots - Inside the Lab
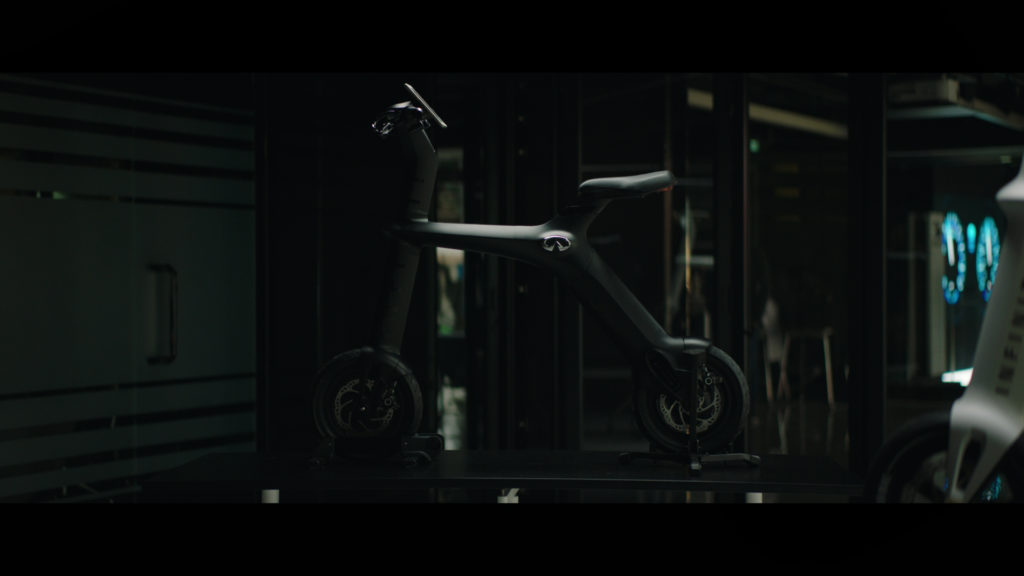
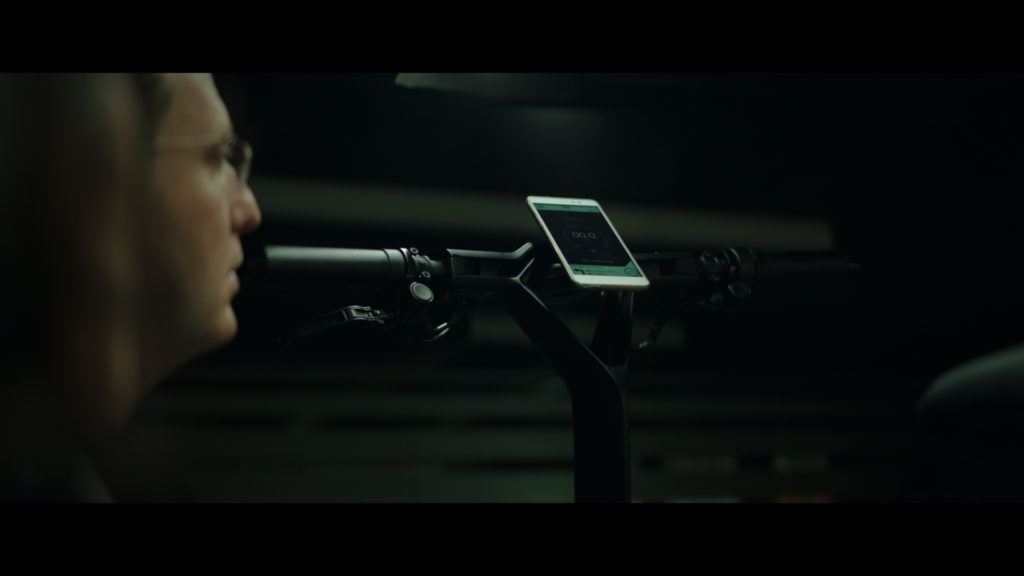
The Shot(s)
These were our hero product shots.
The Lighting
We were still inside the Lab and we recycled the overheads from the previous set up. To light the bike we approached it exactly like you would light a car.
We focused on lighting objects around the material as opposed to actually lighting the bike itself.
In the wide we reversed our angle fro,m the previous shot so we could layer the shot with background details and colors. The glass layers help to pull your eyes to the bike.
In the tighter shots the gaffer walked on the opposite side of the bike and used a 4x2 poly bounce to accent any areas by bouncing light from the overheads at just the right angle.
The Results
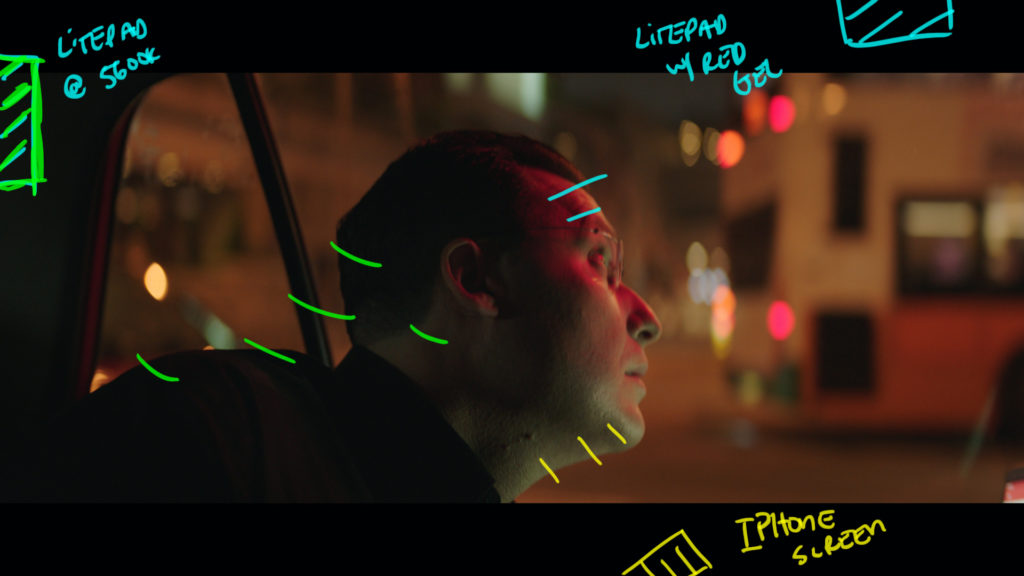
Car Interiors - Red World

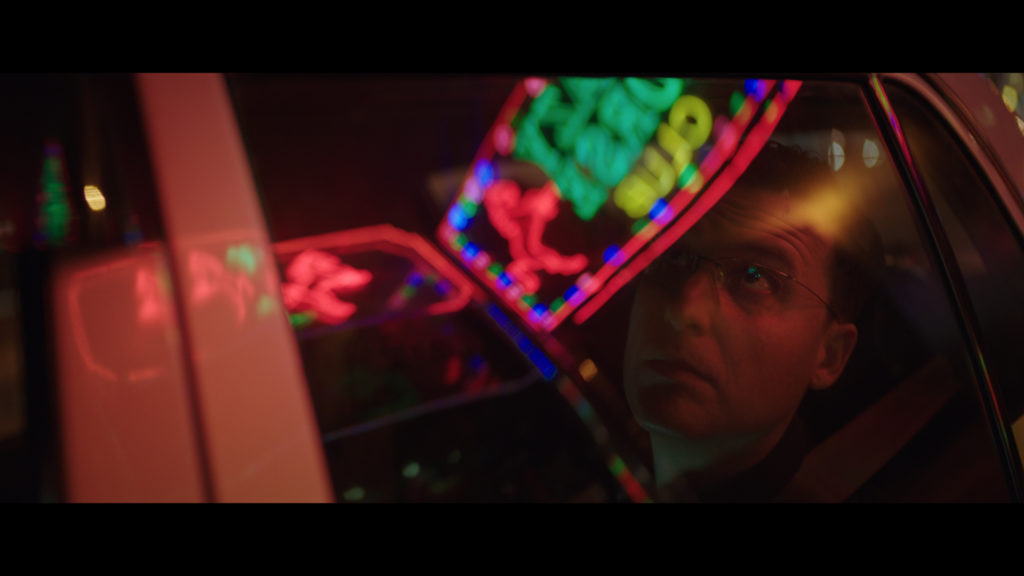
The Shot(s)
We needed some car interior and exterior shots but we were very restricted on car rigs and time.
The Lighting
This is another great example of Reactive Cinematography. We knew what we needed to get, recognized what was and wasn't working in the planned set up and changed our approach accordingly.
In Hong Kong it isn't hard to find interesting backgrounds for traveling shots. The main challenge was deciding on a color palette and then finding pockets of BG to shoot.
We made the call to shoot with red as our primary color. On the top of the car a small (smaller than a 1x1) LED is hung out as far as a c stand arm would allow away from the car point in through the window.
It was gelled super red and then dimmed to blend in with the ambient.
These sorts of setups are where shooting at 800 ISO @ T1.9 comes in handy. We used the Iphone inside with an all white screen to get some level inside the car and then through the back window we had another small LED giving us a bit of an edge.
The Results
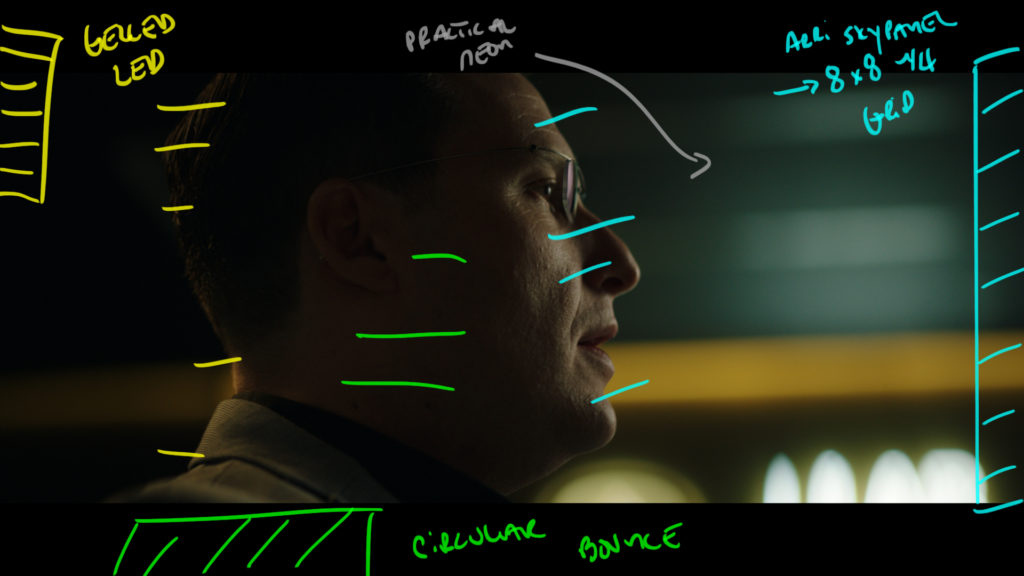
The Talking Head
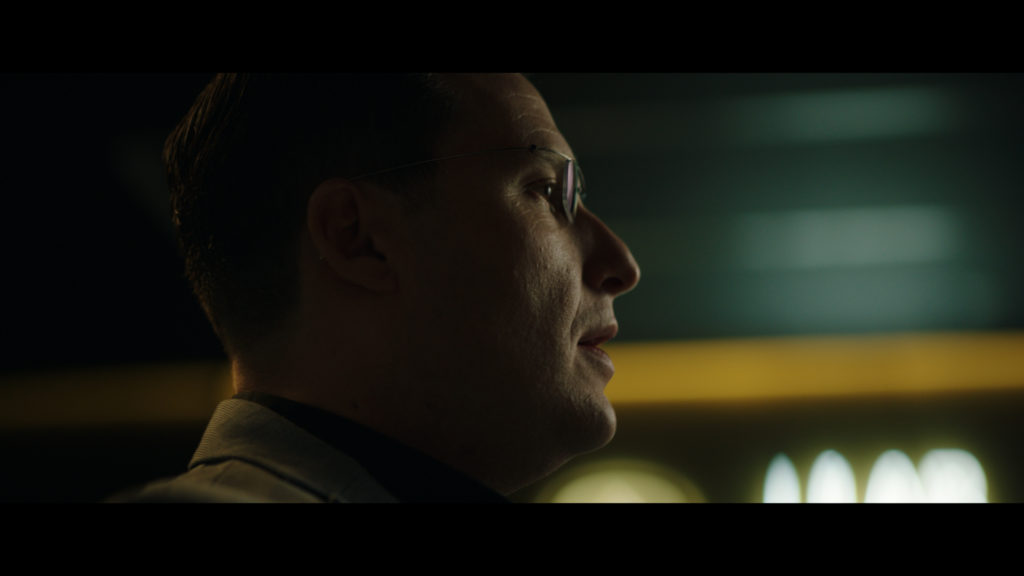
The Shot
One scene called for the talent to be speaking on camera in an interview style. A talking head shot basically. We needed something that wasn't boring.
The Lighting
For time purposes and schedule we were required to shoot this set up in the same area as the Lab sequence.
I looked for some nice color or shape in the background and settled on the yellow and green tones from these neon product lights.
We killed all the other lights and started with those practicals as a foundation.
Next I added an Arri Skypanel through an 8x8 of 1/4 grid for a key. We positioned it so it just wrapped around the talent's face. The shadow was a bit dense so we played with a circular poly for a touch of fill and then finished the look with an amber gelled LED as an edge light.
The LED was missing way left giving us just a hint of line down the talent's neck and the back of his head.
The Results
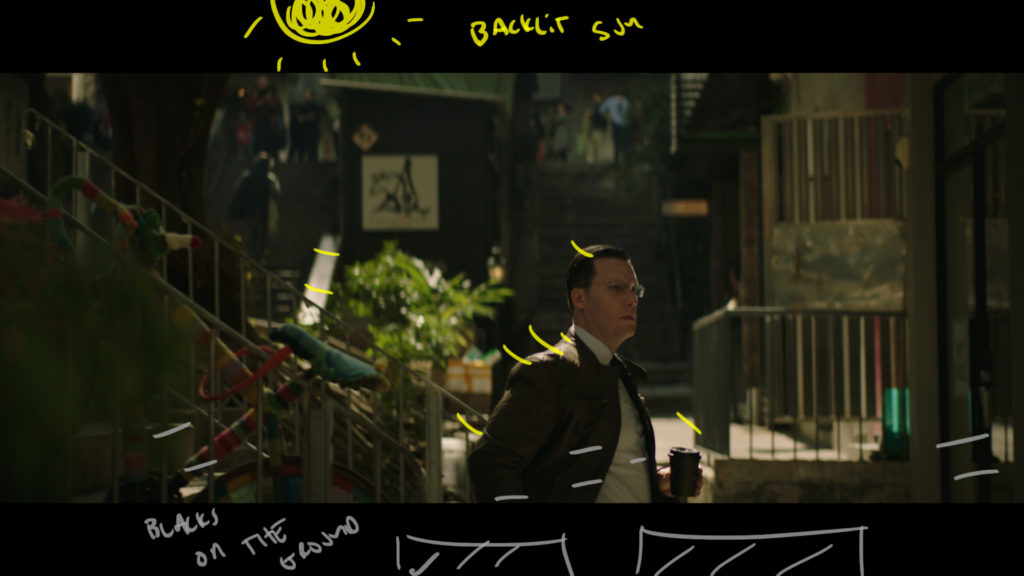
Window Shopping - The Right Street
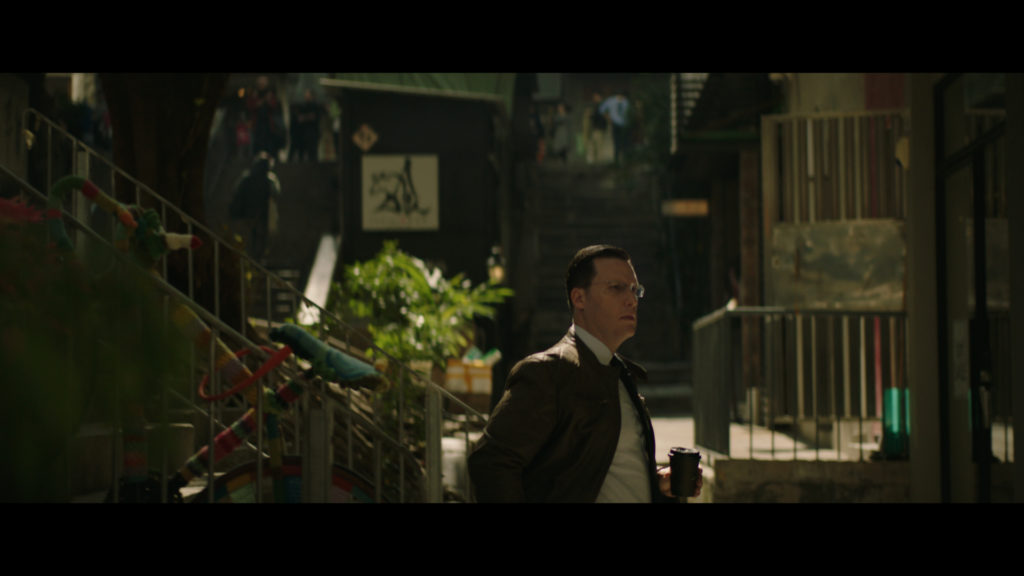
The Shot
We needed a shot of the talent being inspired by what he has seen on the streets of Hong Kong. He needed to look inside a window to sell the idea.
The Lighting
This was all about schedule and framing.
We knew we wanted him backlit so he could stand out from the BG so we found a street with a shop in the right orientation for the time we knew we needed to shot it in.
Then from there we took away some of the light that was coming from behind the camera and that was it. Right time right place.
The Results
Location Scout Stills
Finding the Balance
One trick to moving fast and maintaining a standard to the images is knowing what your strengths are on a project.
On this one we knew we wanted things a bit darker so we found locations and angles that kept us in that zone. Identifying goals early on in the project helped us narrow our search for just the right angles and lens choice.
Hopefully these breakdowns and examples help you prepare better for your next run and gun gig.
Thanks for another great insight.
Why did you choose to push the SkyPanel through the 8x rather than the softbox for the talking head shot?
An 8×8 is gigantic compared to a little softbox. Softer…
the word you were looking for was complementary i think. complementary colors
Wow that mirror window shot was magic!