The Wandering DP Podcast: Episode #62 – Shaping the Sun
In today’s episode of the podcast we look at shaping the sun in your cinematography and how a simple formula can help you get some nice results.
This is a formula I just came up with that describes the way I like to use the sun in my exterior day shots. This formula, like every other, is made to be broken but it is nice to have in your back pocket if you want somewhere nice and basic to start from.
The Formula
Sun ——– Camera ——— Talent (looking towards sun side)
The formula is simple but putting it into practice can be a bit trickier. Let’s start by taking a closer look at each of the three components.
The Sun
Ideally this should be backlighting your subject. This formula only works if that is the case. The sun should be behind your subject and at an angle to camera.
If the sun is directly behind the talent you may get some unwanted sun blow out in your sky and the saturation of the sky may not be fantastic. If it is too far around the front you start to lose the edginess and the image will get a bit flatter with harsher shadows.
The other great thing about shooting into backlight is the background should be dark with just a few edy highlights. This helps pull your talent away from the background because it is dark and they are surrounded by a little glowing edge from the sun.
The Camera
This is the easiest bit of the equation. All you have to do is place the camera between the sun and your talent.
The formula creates a triangle so as to avoid the dreaded SUN SANDWICH (SS). If you block out the scene so you have sun, then talent, then camera you are going to end up with a SS. You need to have the camera between the sun and the talent. That is it.
The Talent
For this equation to ensure you avoid the dreaded SS you need the talent to be looking in the direction of the sun. That doesn’t mean they are looking at the sun. It means that if you are looking through the viewfinder, the talent should be looking in the same direction the sun is coming from. Easy.
Shaping the Sun Examples
Let’s take a look at some examples to get a bit of a better understanding.
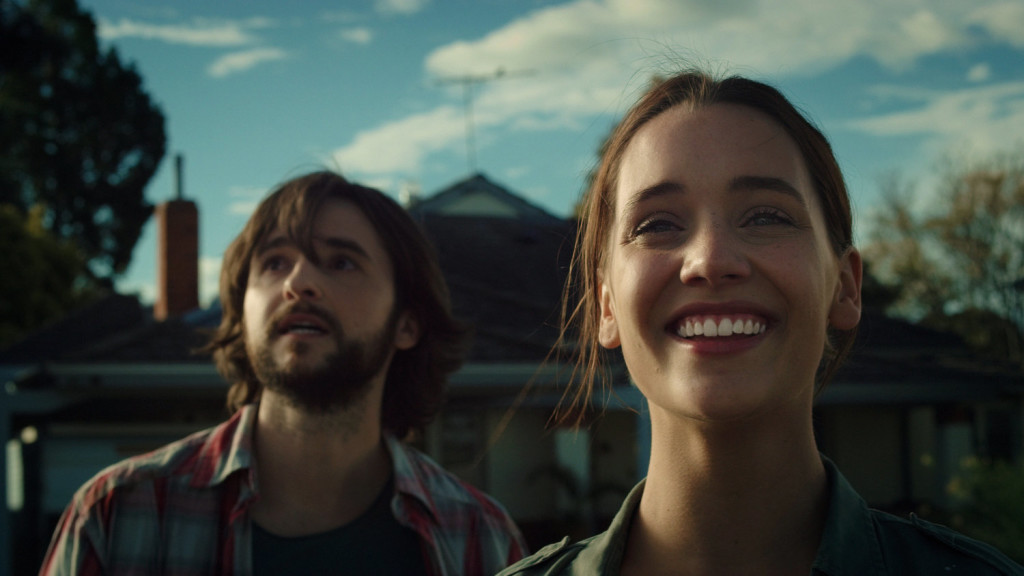
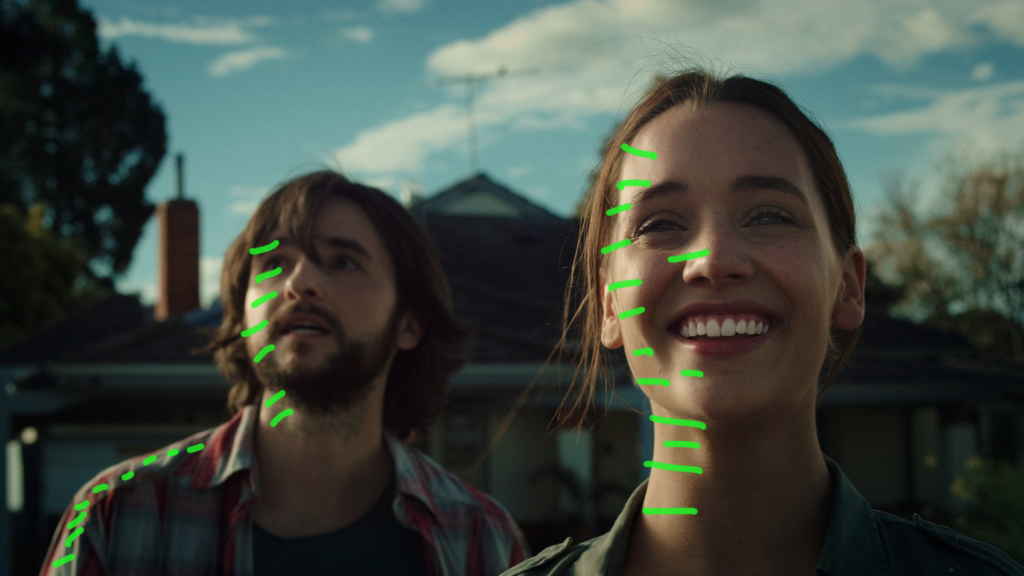
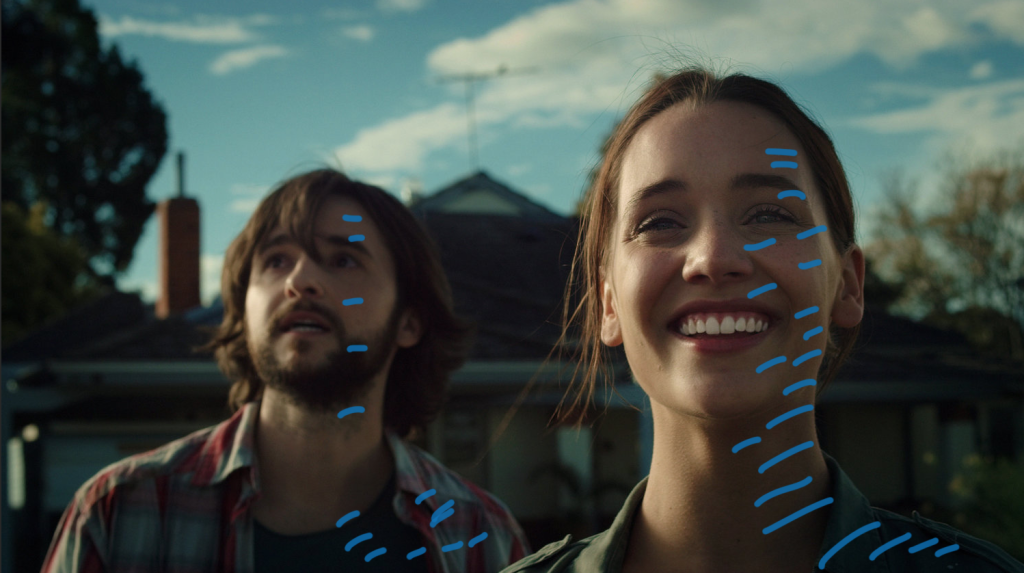
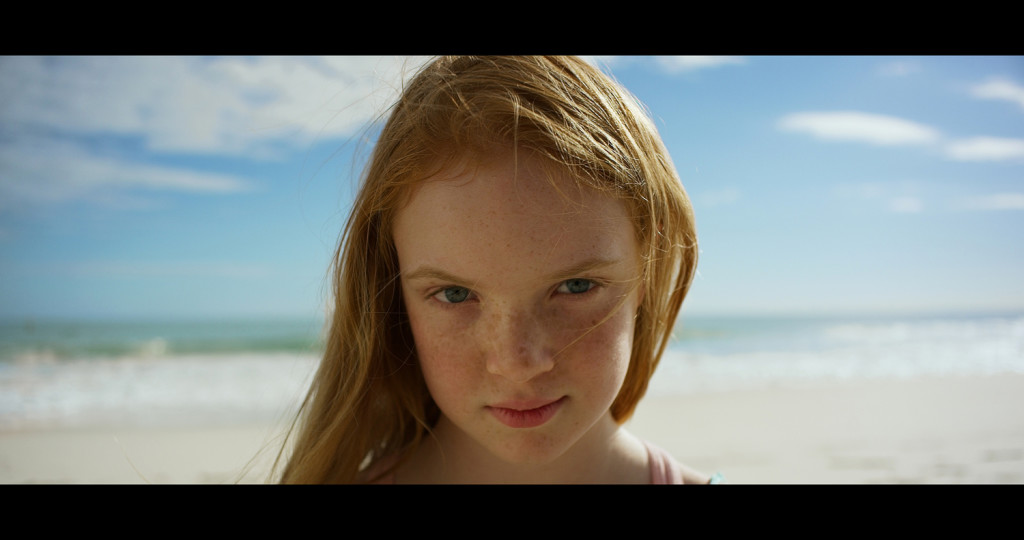
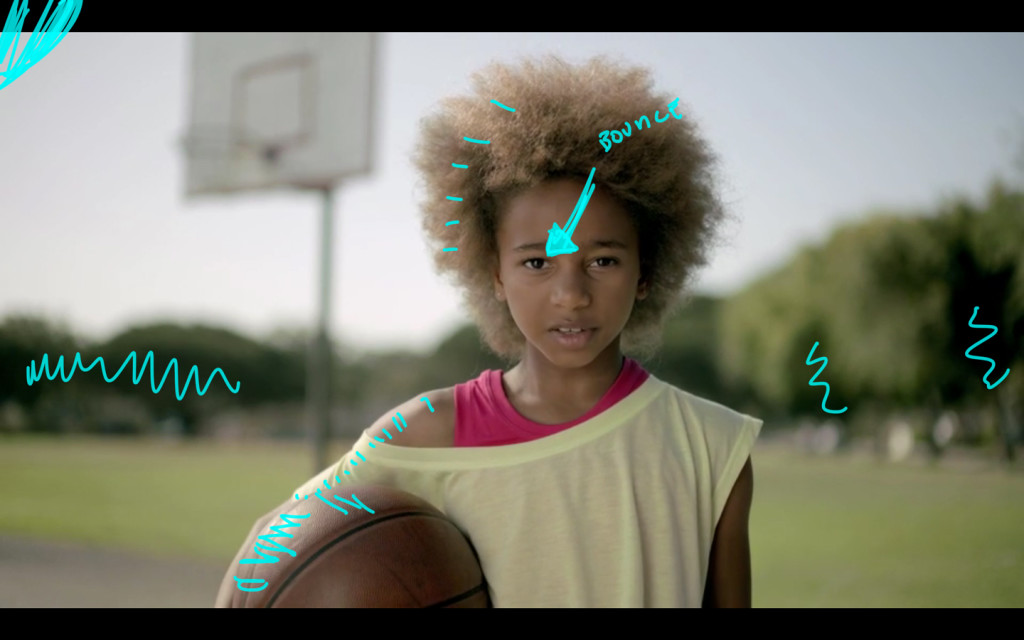
In this first example the sun is off at an angle where it is sort of backlighting (more edgy) the talent. The camera is in between the talent and the sun. The talent are looking in the same direction as the sun.
Voila.
The Break Down
So what does the set up look like for something like this?
The Camera info:
RED Weapon @ 6k FF
Arri Zeiss Master Prime 65mm @ T2.0
ISO 500/25 fps
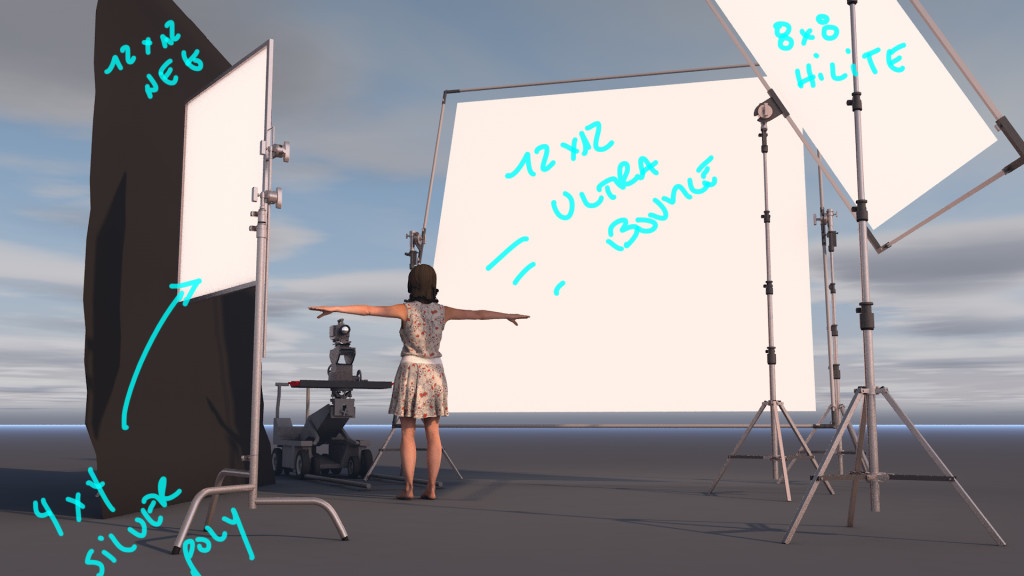
Lighting Equipment:
1 12×12 Ultra bounce
1 8×8 HiLite
1 12×12 Black
1 4×4 Silver Poly
4 Blacks
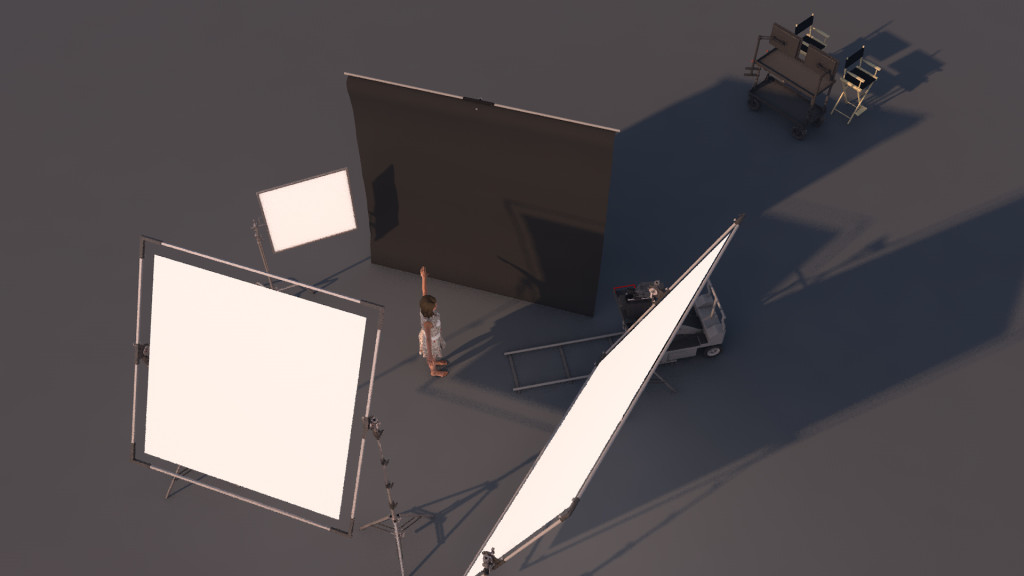
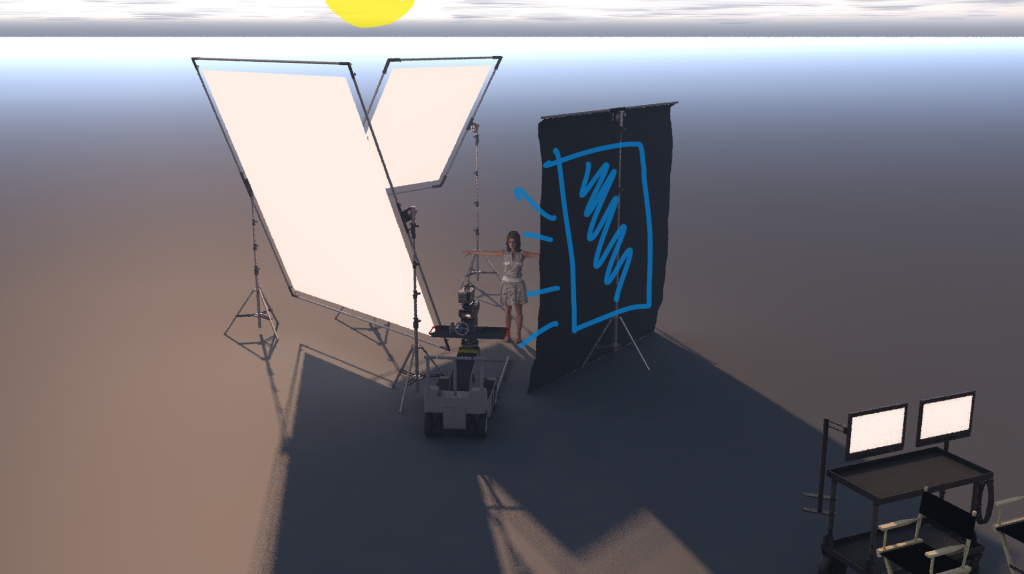
Here is our set up in 3d: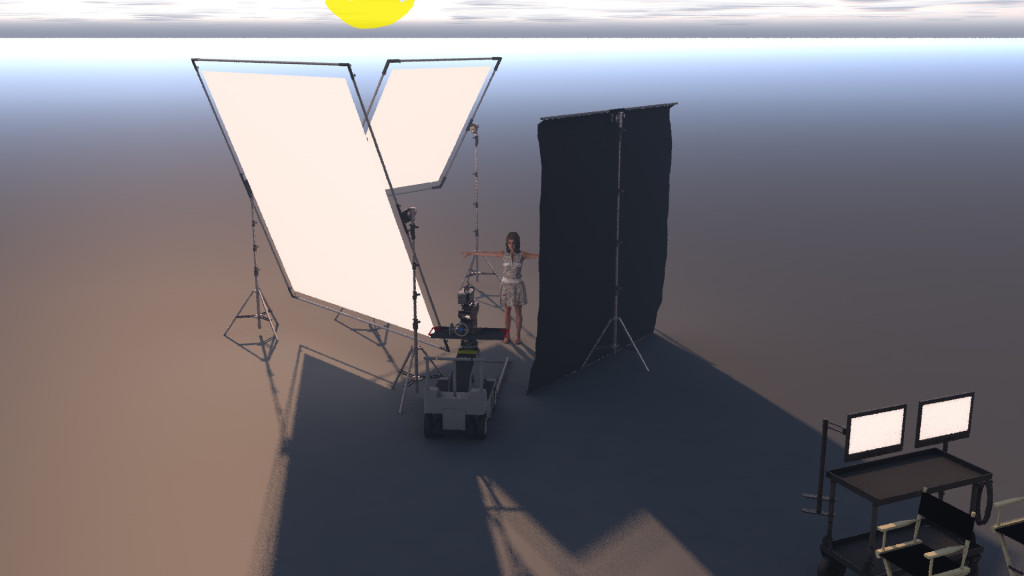
Lighting Steps:
Step #1: The Sun/Edge
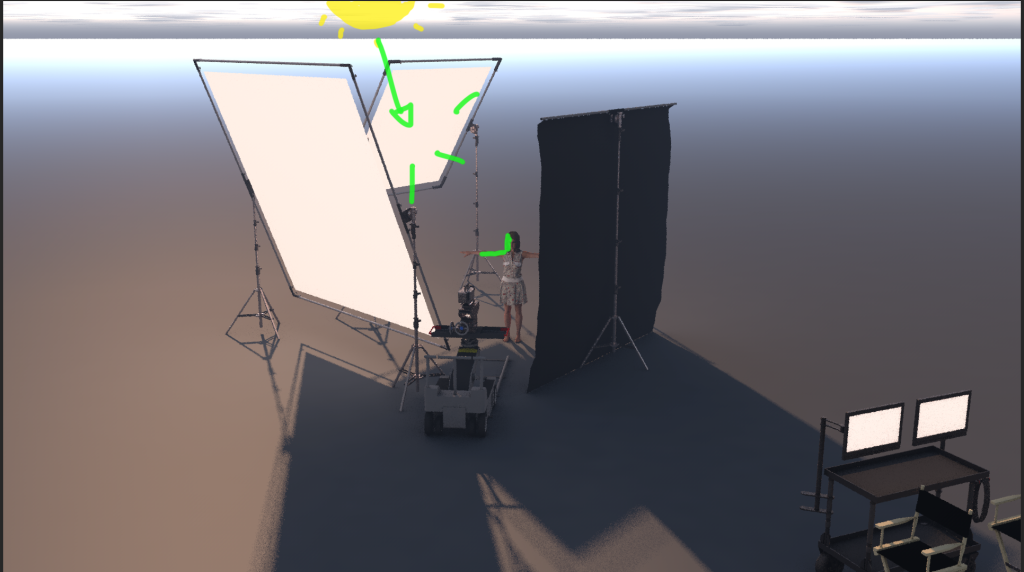
We can’t control the level of the blue sky or the levels on the background so we have to balance everything to those levels. We start with the sun. It is too harsh so we take an 8×8 Hilite and soften it while knocking out a bit of bite.
Step #2: The Wrap
 Next up is the wrappiness of the sun. We want to fill in their faces a bit to make the fall off from light to dark more gradual. We take the 12×12 Ultrabounce and place it just left of camera.
We play with the position so that we get just enough fill without it feeling filly. Should seem probable.
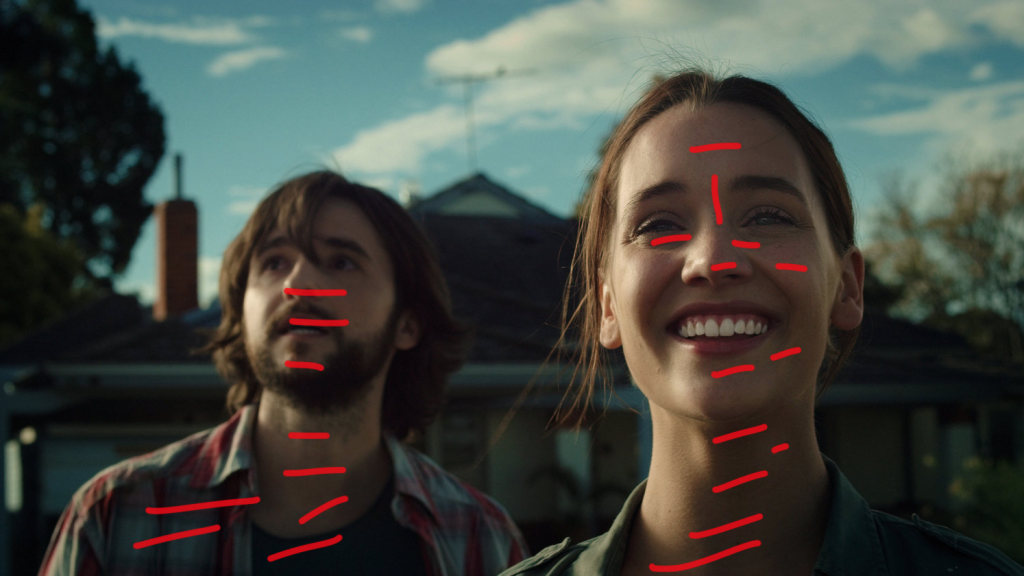
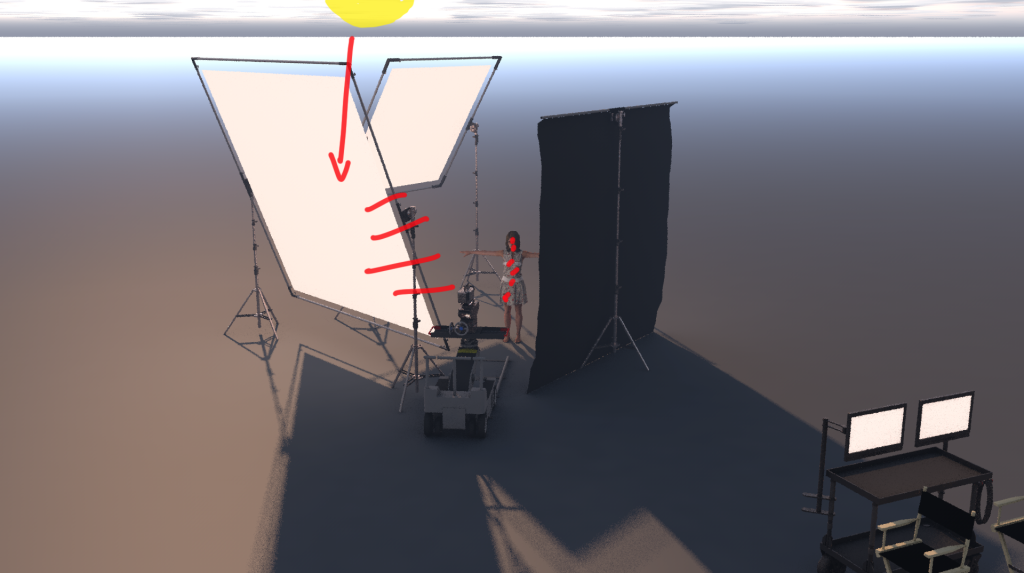
Step #3: The Contrast
We need to add a little dramatic contrast. To do that we throw in a 12×12 black to knock out any level coming from Camera right. Again we shuffle the thing in and out until we get to a probable level.
Step #4: The Last Little Drip

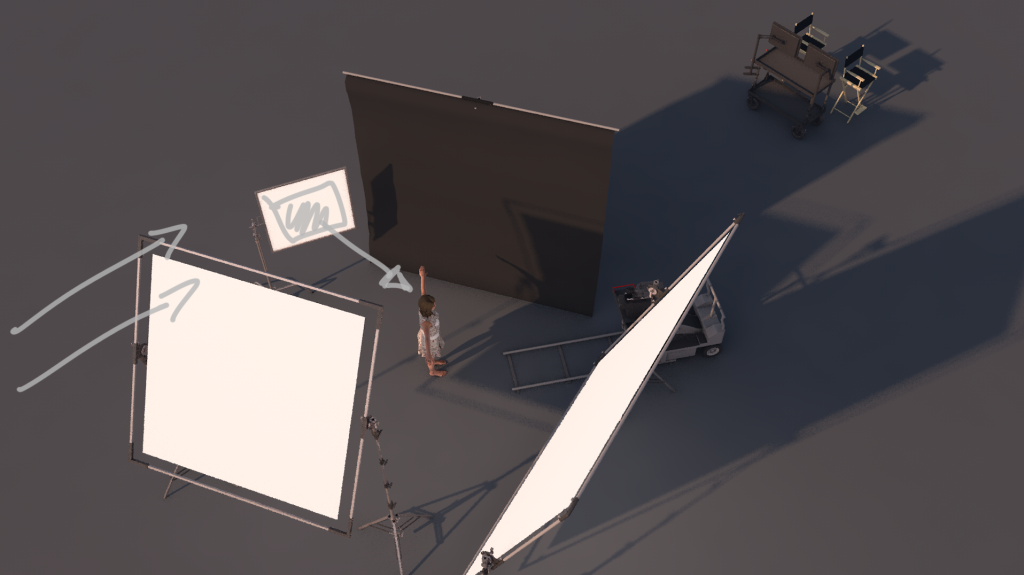
The image is already looking pretty good but just to top it off we throw in a 4×4 silver poly and position it so it is getting direct sun. Then we bounce that harsher light on to the talent’s near side to camera.
That little edge pulls them just that little bit more away from the background.
That is it.
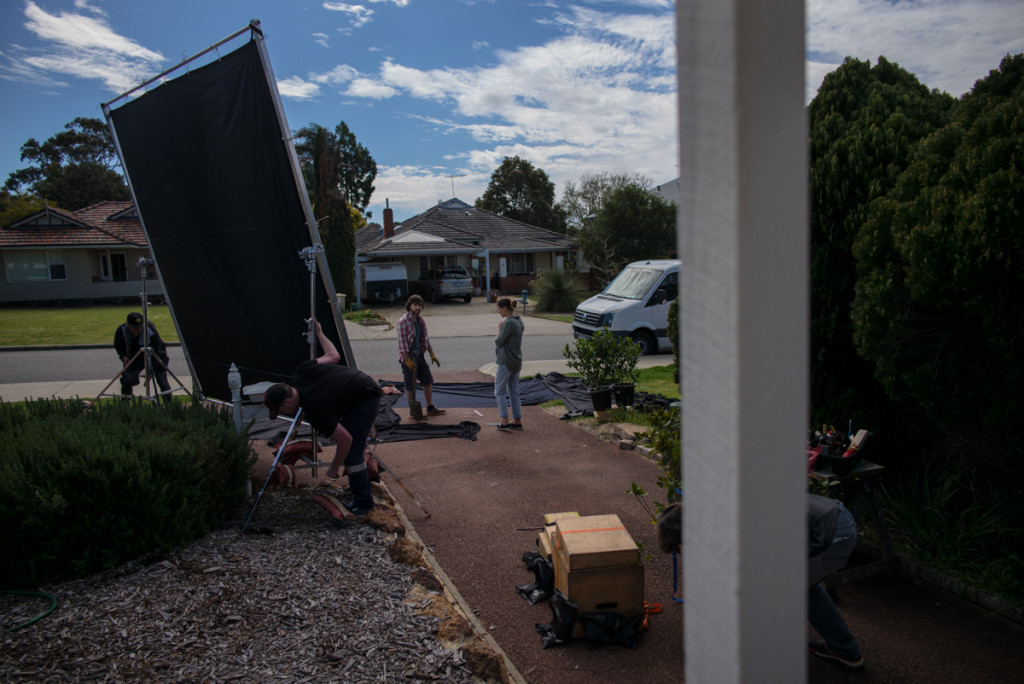
Here is a little behind the scenes photo as we started to set up the shot:
The SUN SANDWICH
This is the opposite of the technique I just showed. In this technique (I use the word loosely) you bounce from the opposite side of the sun. When you do that you create a two light sandwich which doesn’t look near as natural.
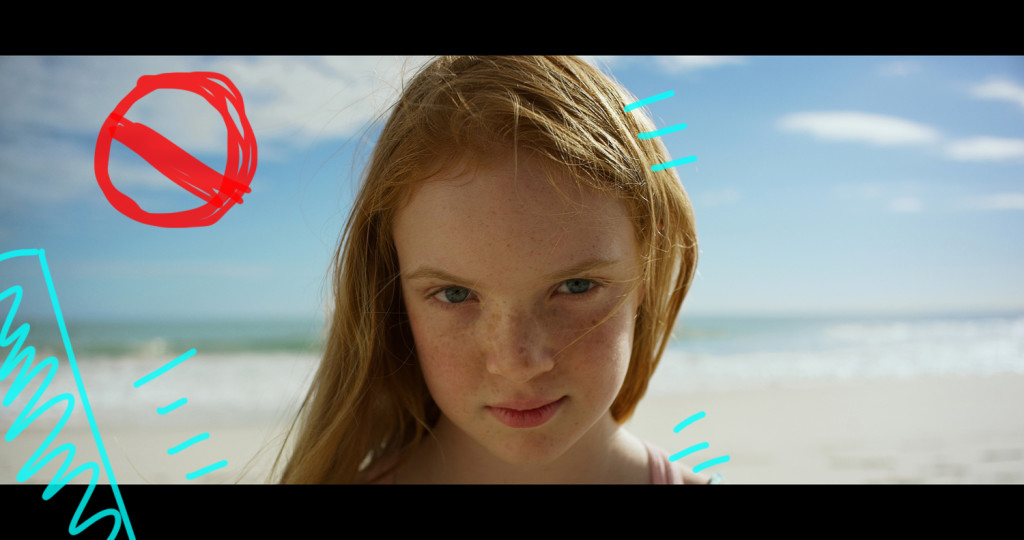
Sometimes though you don’t really have a choice because the location/director/whatever dictates you go this route. You can still get some nice stuff but just not ideal for a more natural light feel.
Further Examples: Shaping the Sun
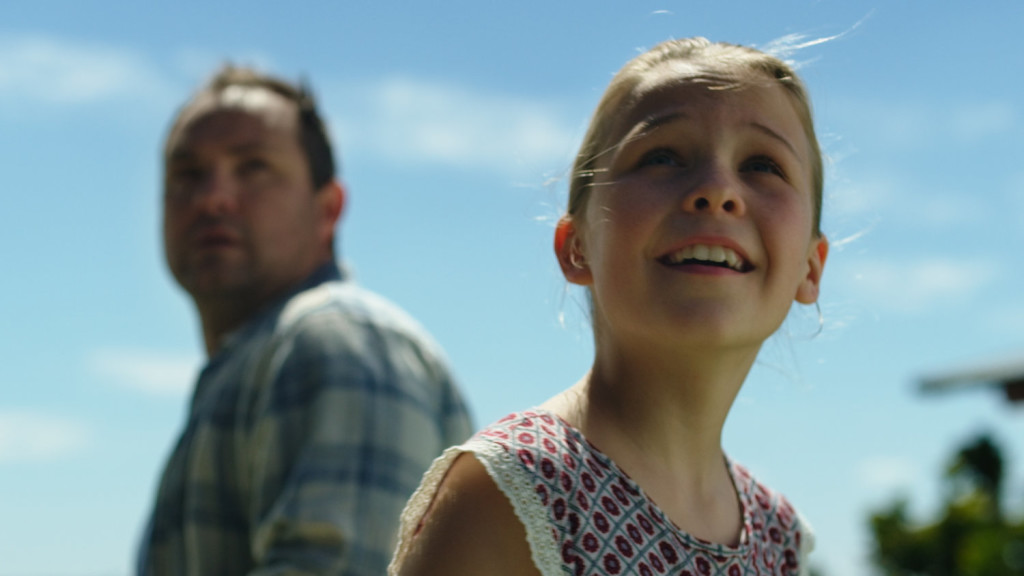
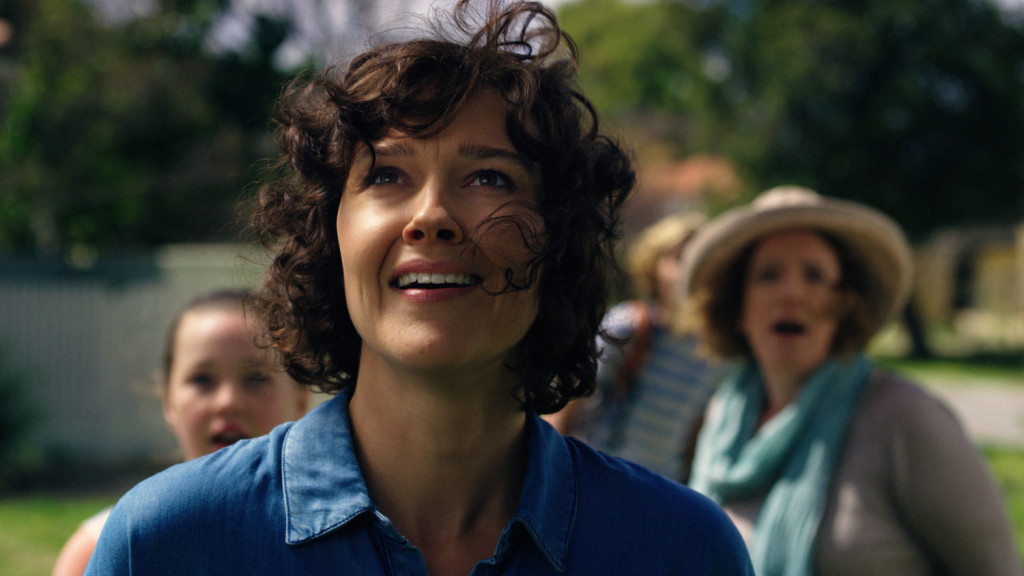
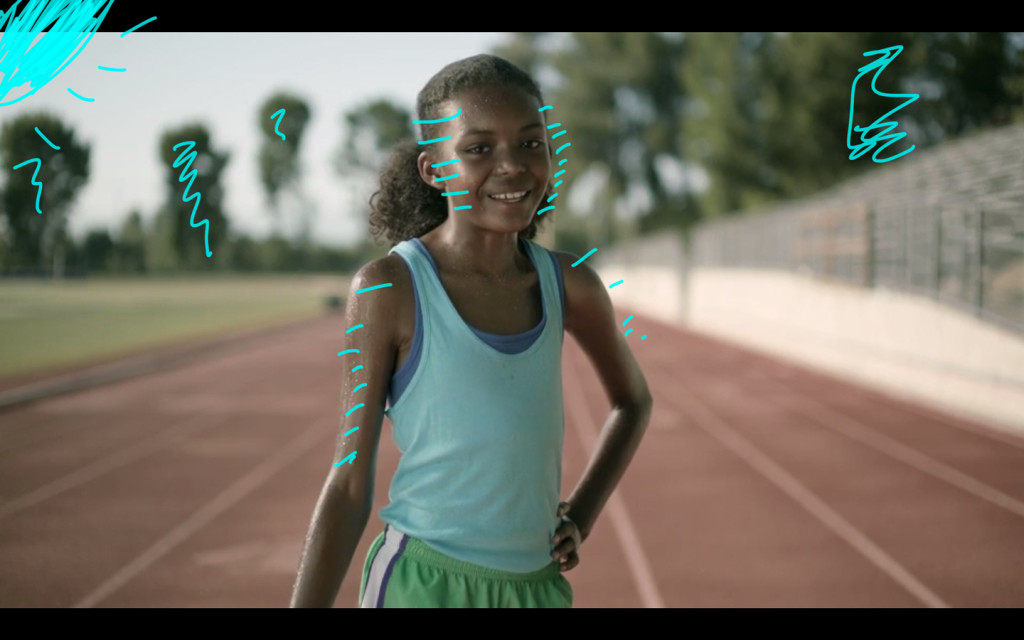
This is the ad where I saw this sort of set up and got the inspiration from:
Conclusion
This formula isn’t ground breaking stuff but I never had it explained to me so I thought I would share it here. It can apply to any exterior set up from a wide to something in tight. As long as you get the sun/camera/talent blocking in the right orientations relative to one another you can use it anywhere.
Very cool article + Podcast Patrick!
Quick question: If you had to deal with a background that had a lot of SpecularHighlights, or very white ish buildings, how would you go balancing the background ratio? Can a Net always work outside?
hey erwan,
Just bring up the foreground to compensate. Nets are only workable for tighter stuff. Even then not fantastic
This is pretty cool. Look forward to trying this out. I have never been a fan of the SS which has been made popular by swimsuit portraits and has bled into motion picture profusely. Thanks for publishing!
Hi Patrick, thanks so much for your great insights. I’m a photographer who has transitioned to film and these tips and tricks have really made this transition easier.
How amazing technic ! Thank you very much !
Hi Patrick, I’m just wondering what you do when shooting out the other side of the conversation (where the sun would be hitting the other person from the front)? I thought I’d give it a go before asking:
Is it basically the same but swapping round the ultrabounce and the Hi lite and nudging round the angles slightly (and maybe adding an hmi through the Hi lite to match contrast ratios)?
By nudging round I mean so the sun/hmi is a 3/4 soft front key and the bounce pulls the key side of the talent out of the background (the floppy would still add shape on the fill side, maybe bring in a bounce if you need a more fill, and the silver poly reflecting direct sunlight act as a kicker). Would that give you a similar look as the first shot where the sun feels like it has side lit both parties in the conversation?
Dannggggg thats cool sir.
Great post, Patrick. Thanks. One question, why do you set your ISO at 500? Isn’t the Weapon’s native 800? Is it because you’re using the Skintone/Highlight OLPF? Thanks, keep the good work!
Great content. Love these breakdowns!
What does he mean by ‘The way the sun is coming from’? The talent isn’t looking at the sun? His model looks to me like it goes Sun – Talent – Camera? What am I missing here?
What he mentions in the podcast is that you have to imagine this on a 2D plane. If you look at the reference frame in that way, the sun is on the left, the camera is in the middle, and the talent is on the right. Talent is facing generally towards frame left, which is where the sun is in the two-dimensional plane, in order to get the stronger key on the side/front of their face. This is why it looks more natural: The key is motivated by the sun.
Correct me if I’m wrong, but this is how I understood it!
Great stuff! Learning so much…
Can you speak about the size of the rags and how that may influence the lighting within your image? Do they need to be so large?
It would seem by the relatively tight framing of these shots that you could get away with smaller frames, but perhaps this would have some adverse effect. The reason I ask is I’m more of a doc DP, so just wondering how I might pull this off working on projects with fewer people to help rig.
I think it was this podcast or it might have been another… you spoke about protecting highlights by stopping down and increasing your ISO. Doesn’t one negate the other or were you referring to the changing dynamic range of different ISOs with a particular camera?
Great cast!
Aright Patrick. I’m lost trying to make sense of what you’re saying. You say that the scene should be backlit. But then you also say that talent should be looking in the general direction of the sun. So in your first example image, the sun is clearly over talent’s right shoulder, which is backlighting them and wrapping around their faces, but they are most definitely not looking in the direction of the sun. I understand what you’re getting at, but I’m just lost on the way you said it. Am I missing something?
Think in 2d not 3d. That should make more sense.