Listen to the Podcast
This week on The Wandering DP Podcast we are looking at how to overcome budgets and time constraints on short films to get the results you are after.
We will be looking at a few different lighting set ups from a short film I shot and discussing how we approached each set up knowing that we were short on time, cash, and manpower.
Patreon Podcast: Wides & Tights
Shooting Sequence & Lighting Adjustments
Over on The Wandering DP Patreon page Patreon supporters can download their extended version of podcast. Up on the show this week we are answering a listener question about the approach to lighting when pushing in from wide to tight.
There are a few little tricks and tips that can help the shots flow together and save time on set. These tricks are every film, tv show, ad, basically on anything and once you know them you will start to see them everywhere.
If you are Patreon supporter don't miss this episode and if you would like to become a supporter click on the link below and get instant access to all of the past Patreon Podcasts and more.
Listen here:
Patreon Extended Podcast: Wides & Tights
The Challenges - Short Film Lighting
The hardest part of any lighting set up is deciding on the direction you want to take things.
There are times when direction is dictated to you in a number of different ways and forces your hand to go one direction instead of another.
The most common hurdles are:
Time
Usually you don't have enough to pull something off. You may have enough time to light it but once you add in breaking it all down and moving on you are in trouble. Time is never on your side.
Money
Having the right equipment means either having the cash or having the connections. Sometimes you don't have either. Those are not fun times.
Manpower
This goes hand and hand with the money aspect but when you are down on manpower you can lose time with set ups taking longer and lose momentum with multiple people doing multiple roles.
For this particular short film we were facing all 3 of these challenges.
When that is the case I like to focus on what we can do well and make the most of the experience. We knew we had a few good things:
We had a great first location and we had a bunch of eager people ready to try and get the job done.
Short Film Lighting - The Breakdown
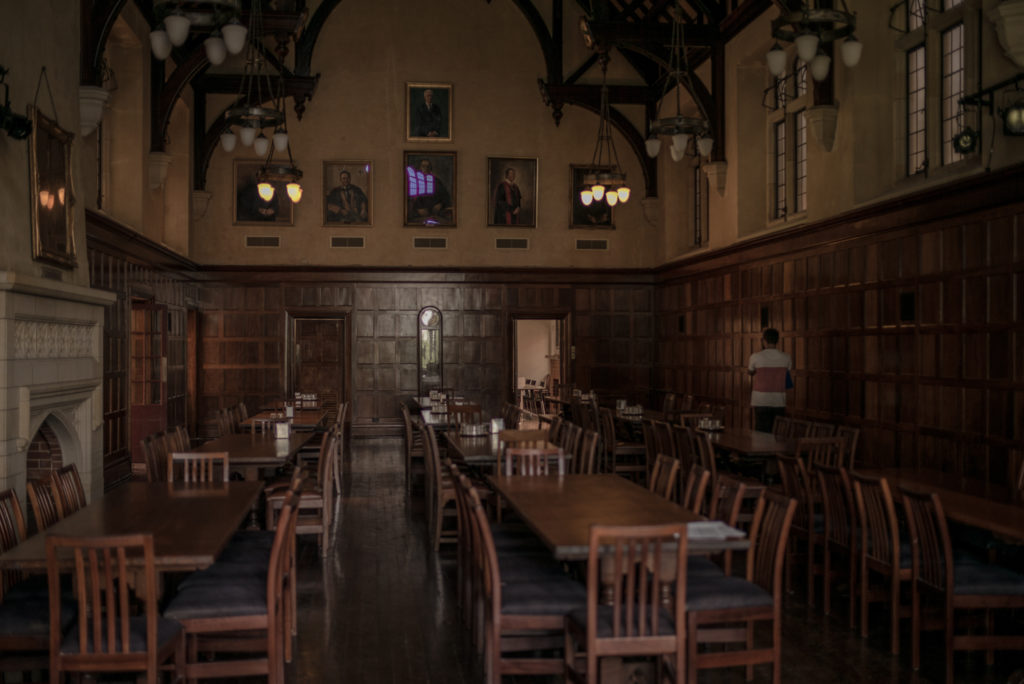
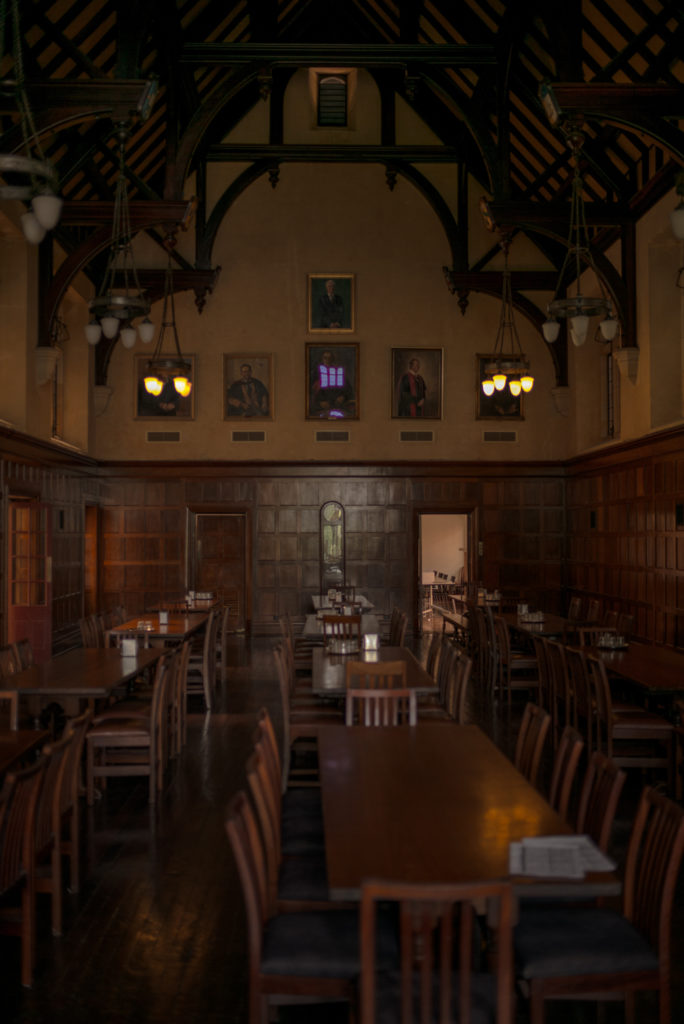
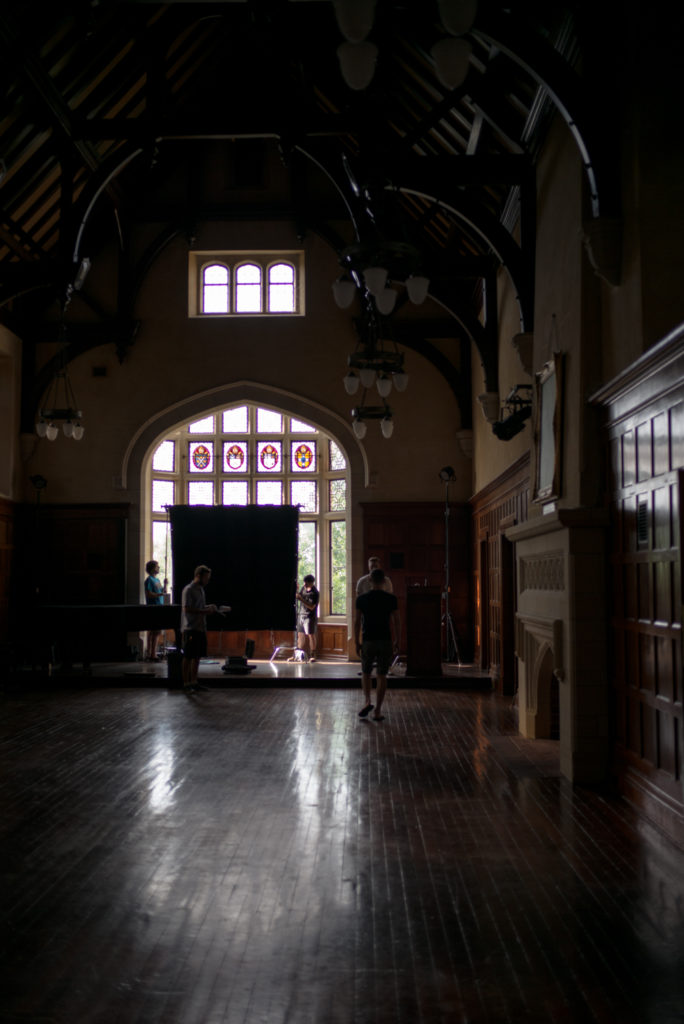
Shot #1 - The Wide
The Shot
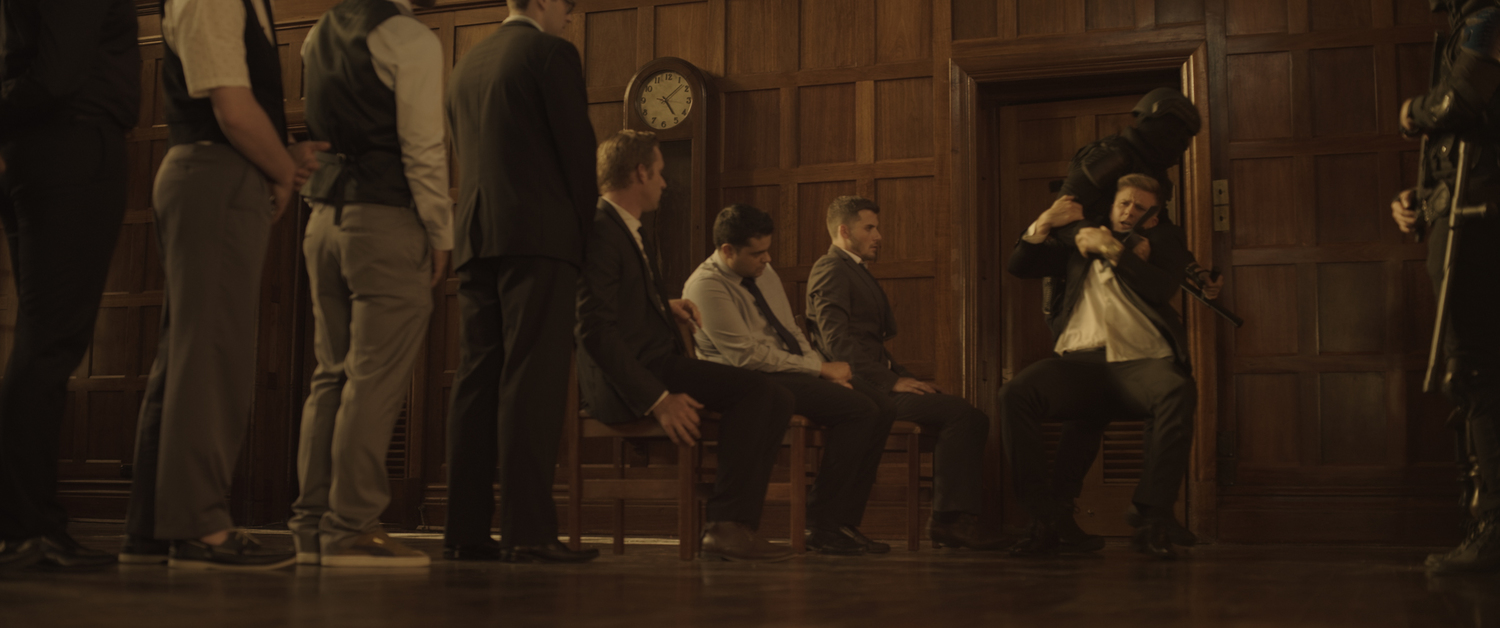
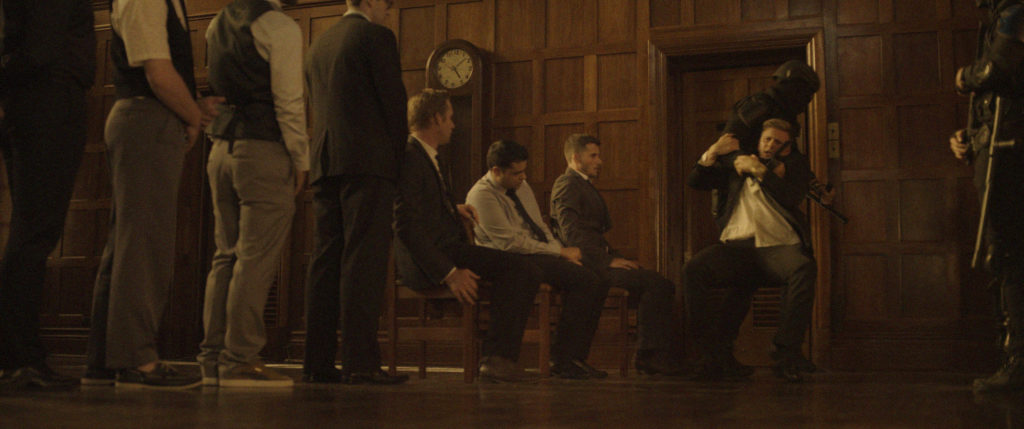
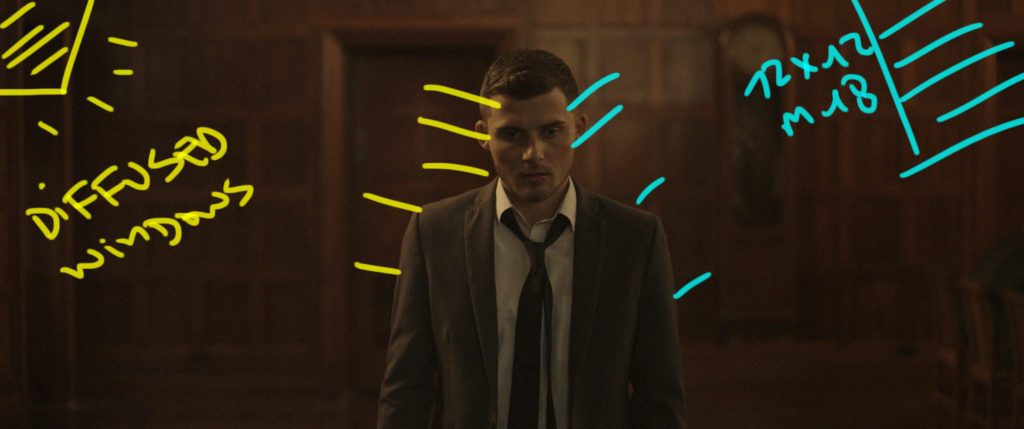
The wide shot of this room was the audience's introduction to the world of the short. We wanted to establish a mood and tone to carry through the rest of the shots.
The Lighting
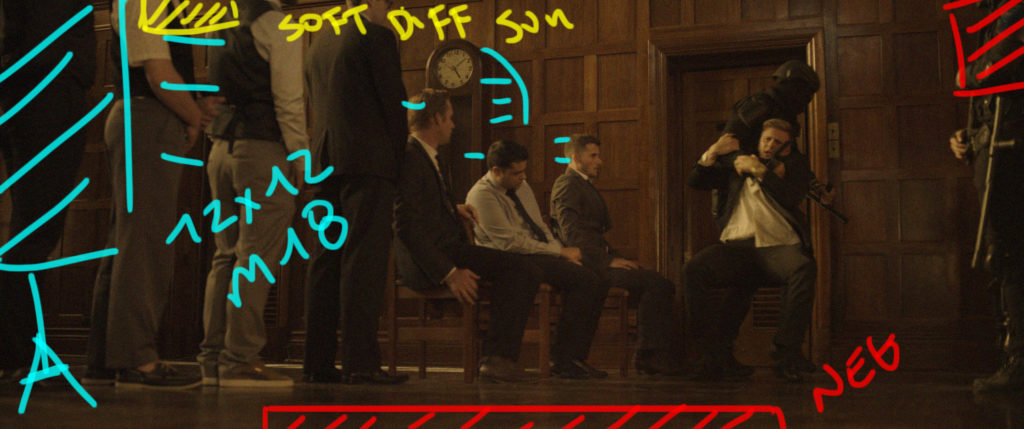
The idea was to wait until the afternoon to take advantage of what natural light was at the location. There were two high windows camera left that got some direct sunlight but we couldn't wait for them to be fully lit up.
We placed some diffusion over the windows to soften what bounced ambient was spilling through and then placed a 12x12 of Ultrabounce as high as we could inside.
We fired up an Arri M18 and put it straight into the 12x12. The angle was adjusted to keep the spill off the visible back wall.
The only other lighting involved blacking out the windows opposite the 12x12 and also blacking out the giant window directly behind camera.
The Results
Shot #2 - The Walk
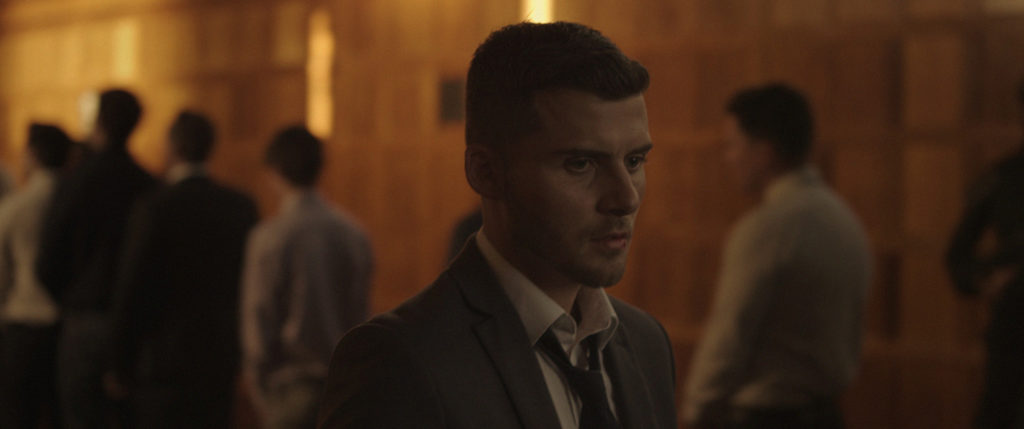
The Shot
This was a backwards tracking shot as the camera leads the talent as he walks out of the judgement room.
The Lighting
We diffused the high windows and doors on the camera left side then wheeled around the 12x12/M18 set up to bring a bit of edge from the other side.
The Results
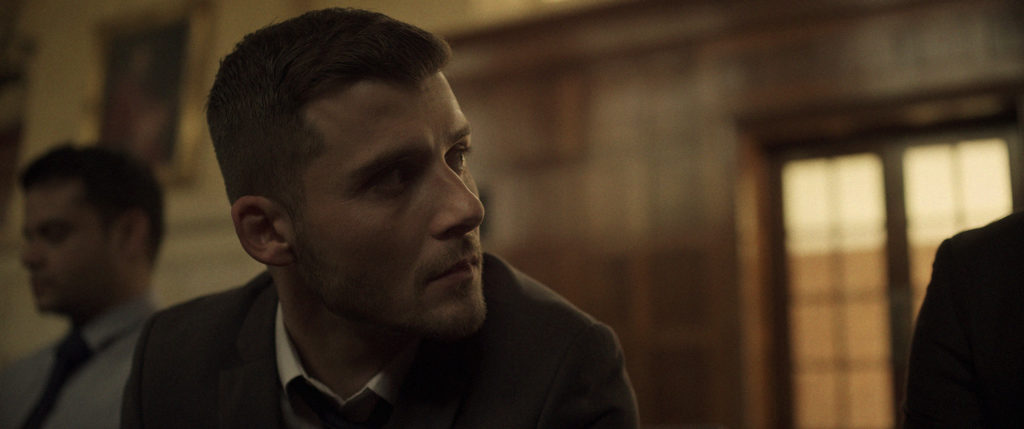
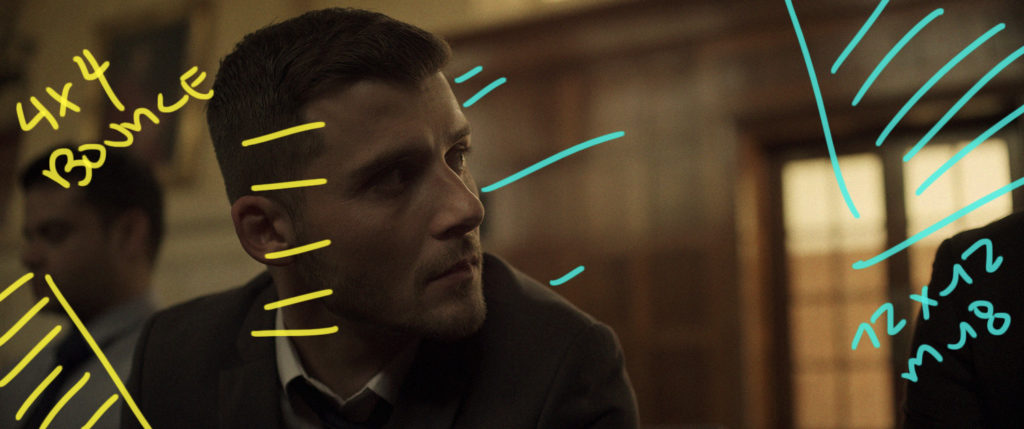
Shot #3 - The Dirty Over
The Shot
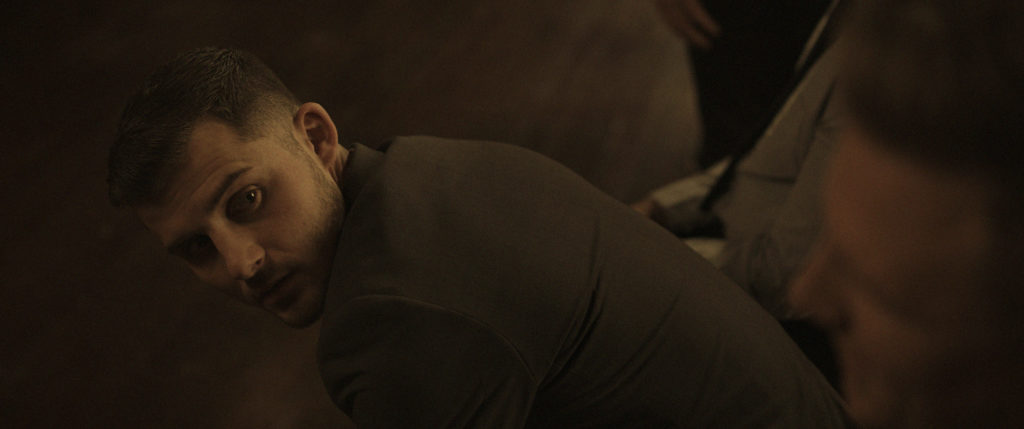
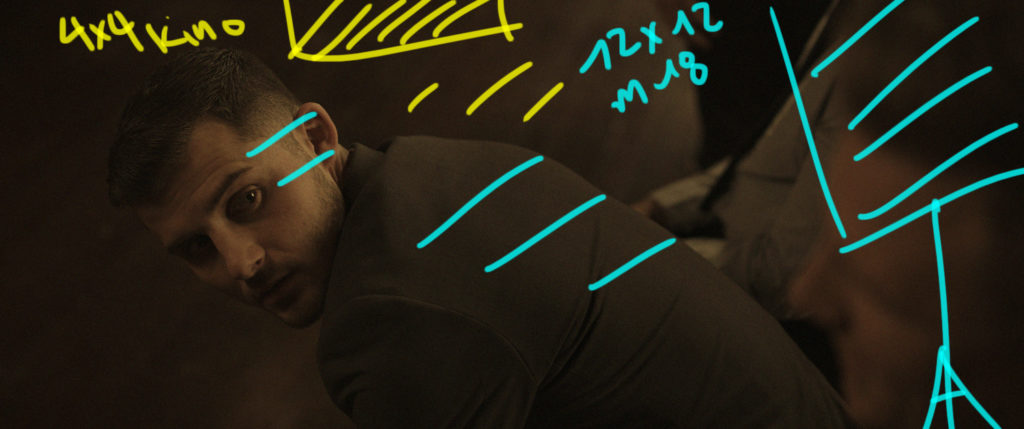
We had a lot of dialogue in this configuration and this is one angle of that exchange.
The Lighting
Because we were shooting these angles before the wide it made it difficult to judge density of shadows vs highlights.
To get a large soft wash I used the 12x12/M18 set up to bring light from camera right. The key was getting the 12x12 as high as possible inside the vaulted ceiling room.
Then to add a bit of interest on the floor in the background I used a 4x4 kino to add a hint of light on the ground.
The Results
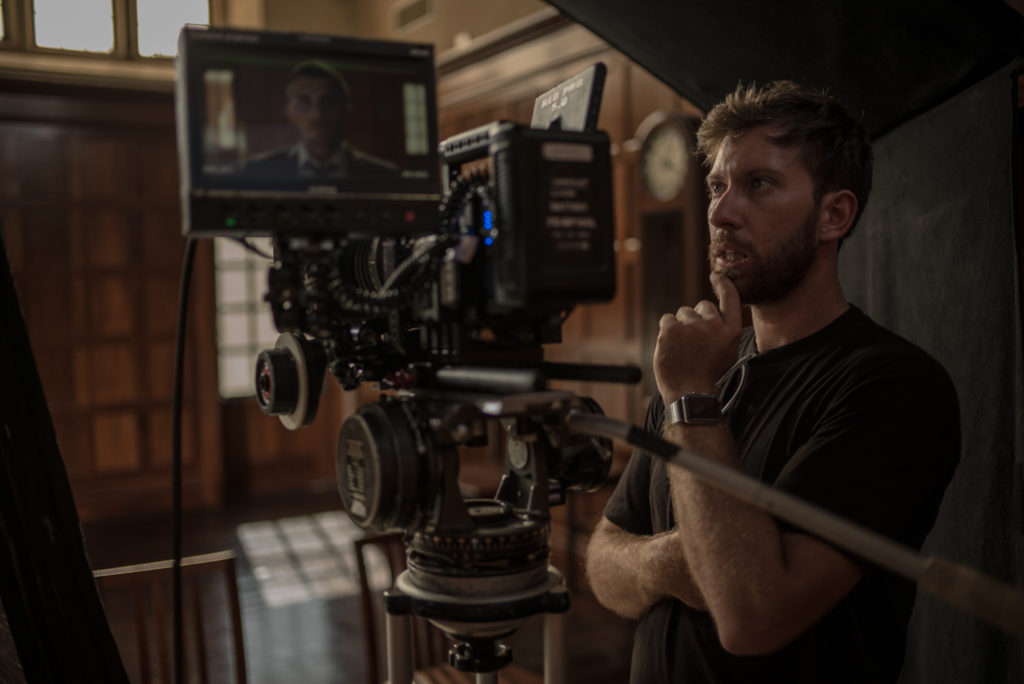
Shot #4 - The CU
The Shot
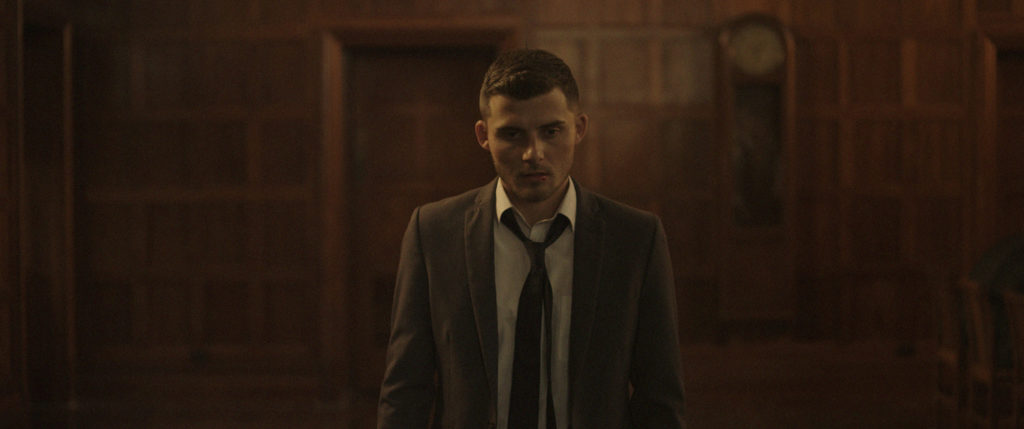
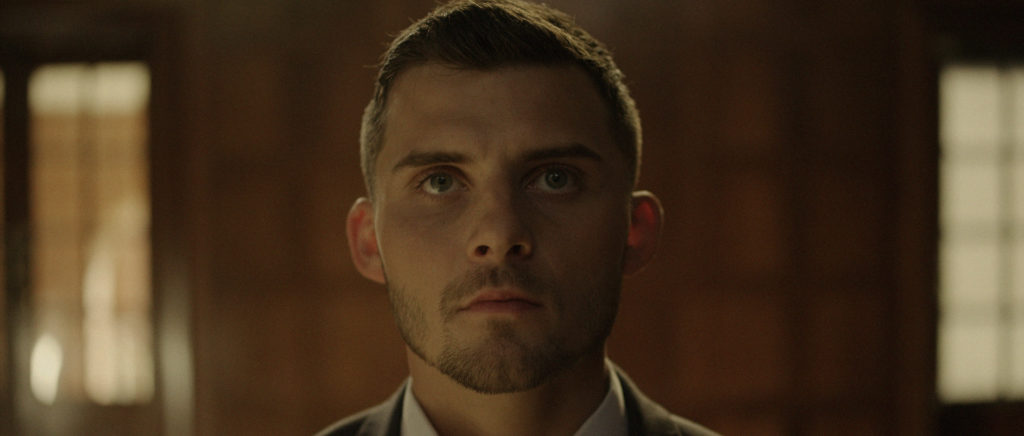
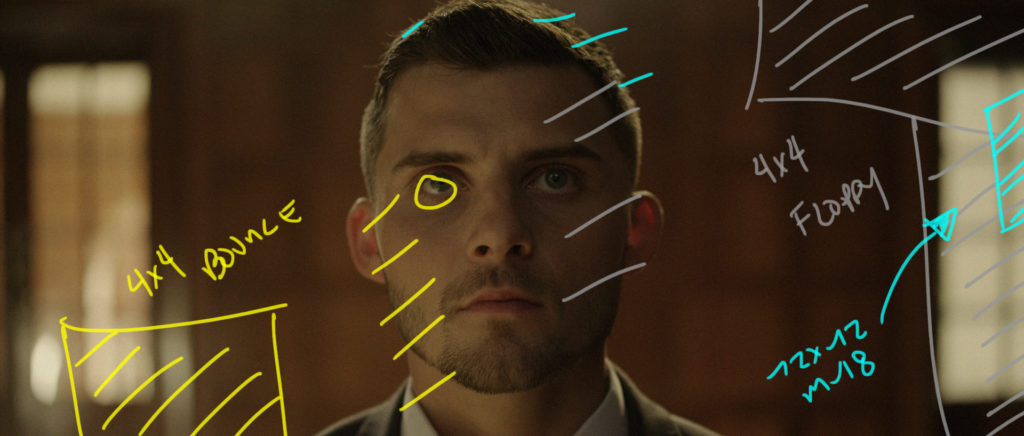
This close up occurs as our talent enters the judgement room. His nerves are on high.
The Lighting
I wanted to take what we had established in the wide and build upon it.
I used 4x4 floppies camera right to cut any light from hitting the side of his face. Then the 12x12/M18 combo I brought from the right as high as it would go. The M18 is giving that nice edge on the top and side of the talent.
To balance out the backlight I just filled in the opposite side of his face with a 4x4 poly.
The Results
Shot #5 - The End Walk
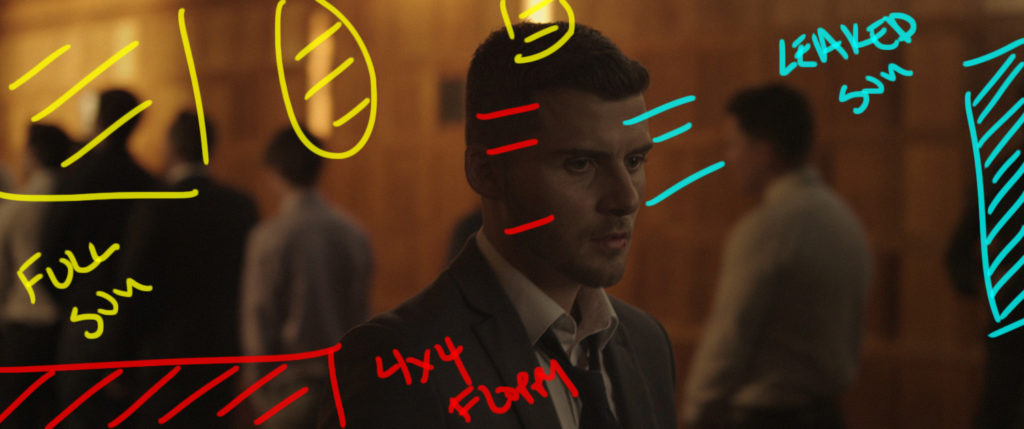
The Shot
This is the end sequence of the film.
The Lighting
The idea was for our talent to fade away as he passed all his peers. We were getting short on time so for a quick fix we simply pulled back the curtains that had been blacking out the big window camera right and added just a touch of daylight ambient to his face.
The background is being done by the high windows camera left and we removed some of the diffusion to give it a more directional feel.
To suck up a bit of light on his near side cheek I placed some 4x4 floppies against the wall.
The Results
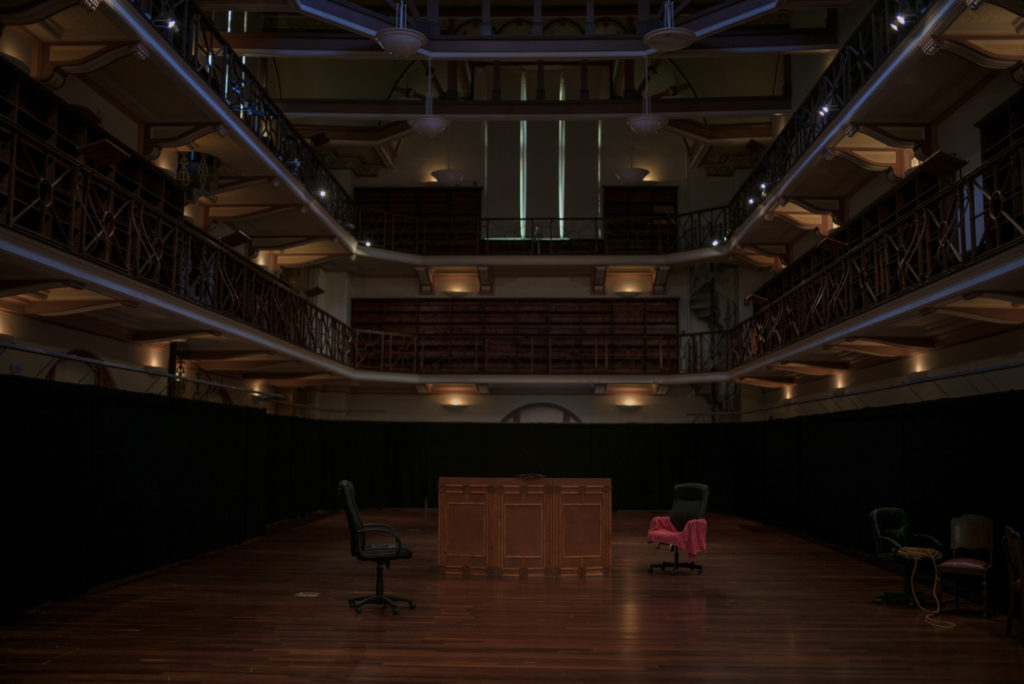
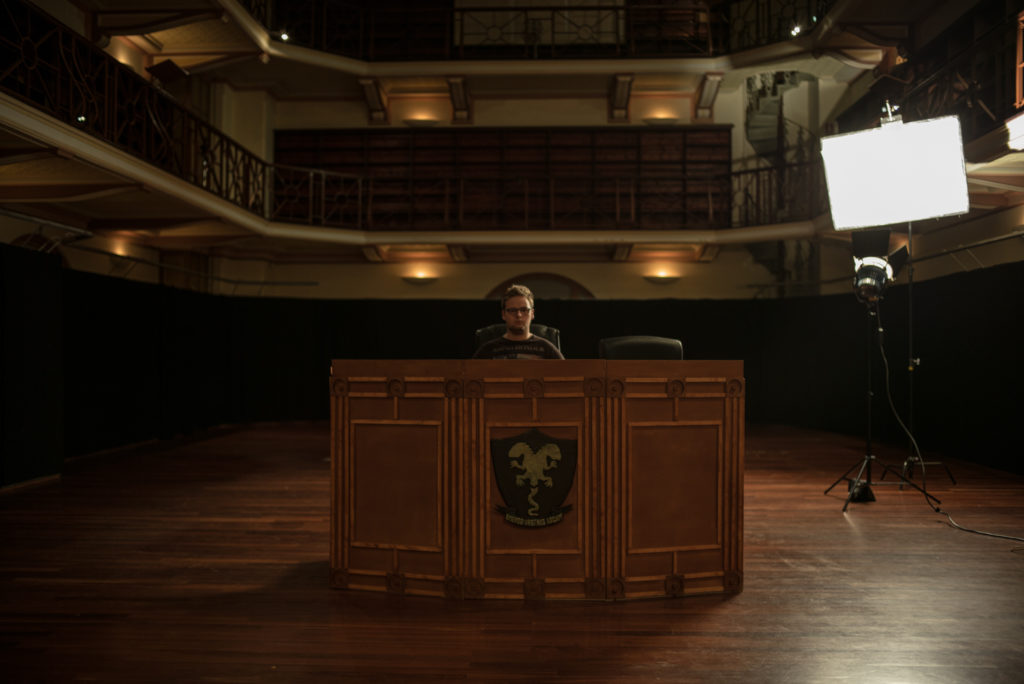
Shot #6 - The Interrogation
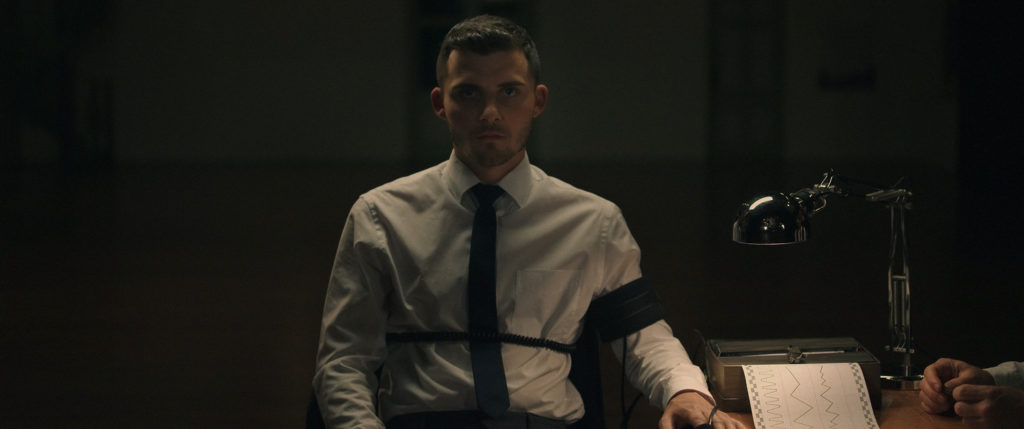
The Shot
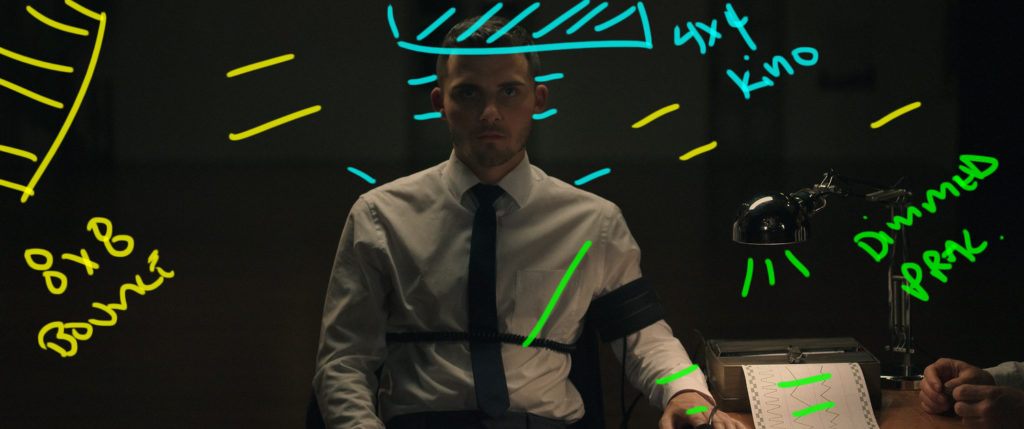
This is our first shot in the second world to the film. Our talent sits at a poly test answering questions from the judges.
The Lighting
The space we were in was massive. We didnt have a prelight.
The key to getting this was to keep things simple.
For our talent there is a 4x4 tungsten kino above and behind him. The kino is softened and is respobnisble for the spread on the talent's shoulders and hair.
I mixed that with a dimmed practical for the foreground and an 8x8 of Ultra with a few redheads to add the ambient for the background.
The Results
Shot #7 - The Judges
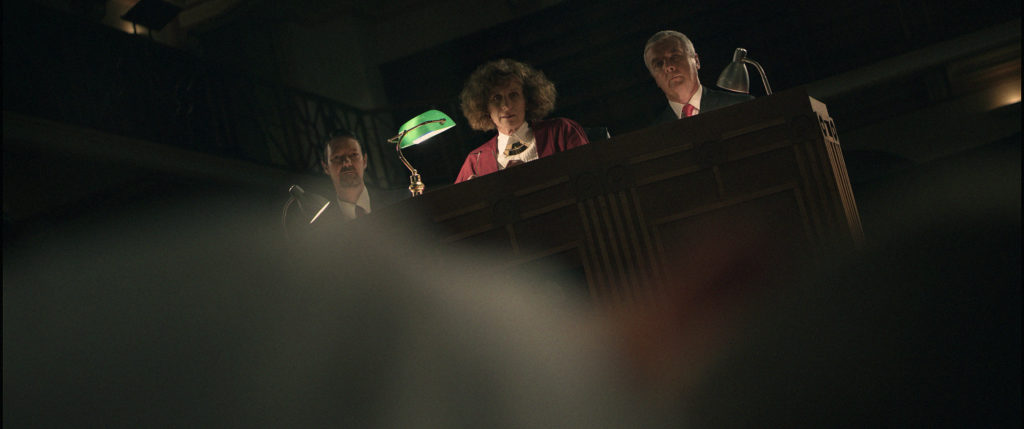
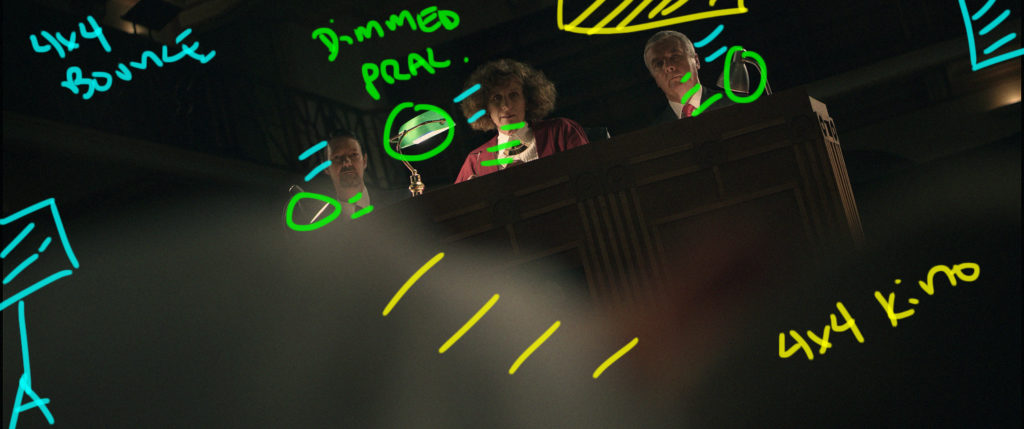
The Shot
A dutch tilted shot of our talent and the 3 judges.
The Lighting
We recycled the red heads and bounced them into two 4x4 polys on either side of the judges.
The BG practicals were already there it was just about finding the frame to fit them in. To light up the desk we placed more practicals and dimmed them way down to add a bit of level of the faces of the judges.
In the foreground we used the same kino as before to light up the talent now laying on the floor.
The Results
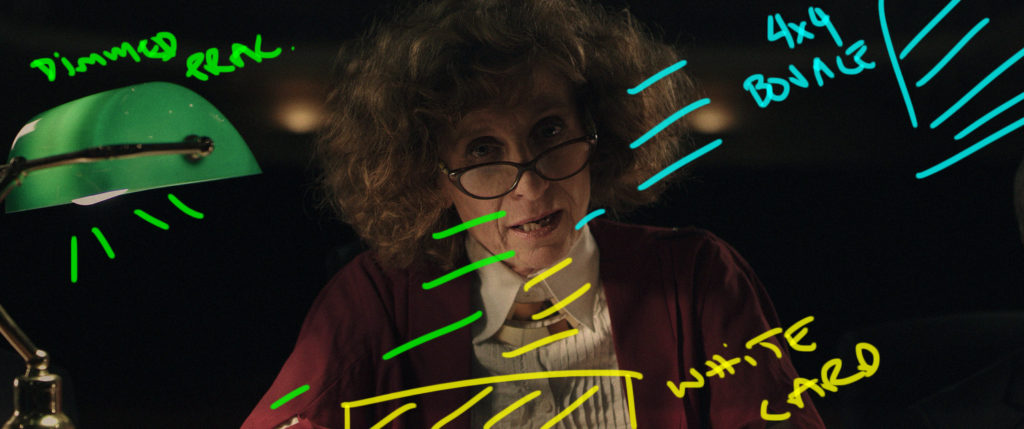
Shot #8 - The Judge CU
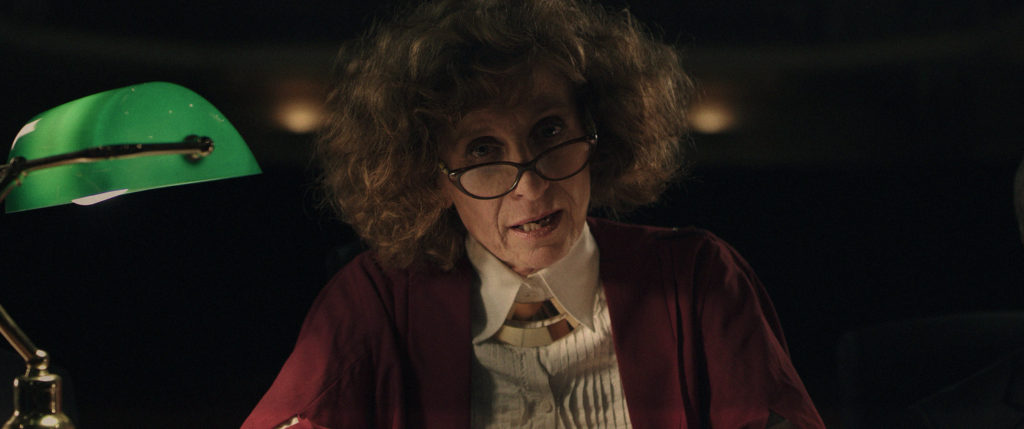
The Shot
Our CU of the main judge as she delivers her verdict.
The Lighting
We punched in and to add more contrast and shape to her face I shut off the red head on the camera left side.
Then we played with some white card on the desk to get more level up from the desk practical and then used the 4x4 poly redhead bounce camera right to get the nice edge light in her hair.
The Results
Shot #9 - The Flashback
The Shot
In this shot we go back to the outside chamber room for another conversation between the two characters.
The Lighting
This lighting used the exact same set up as before with the 12x12/M18 bounce and a bit of 4x4 poly to fill in the shadow side a bit.
The Results
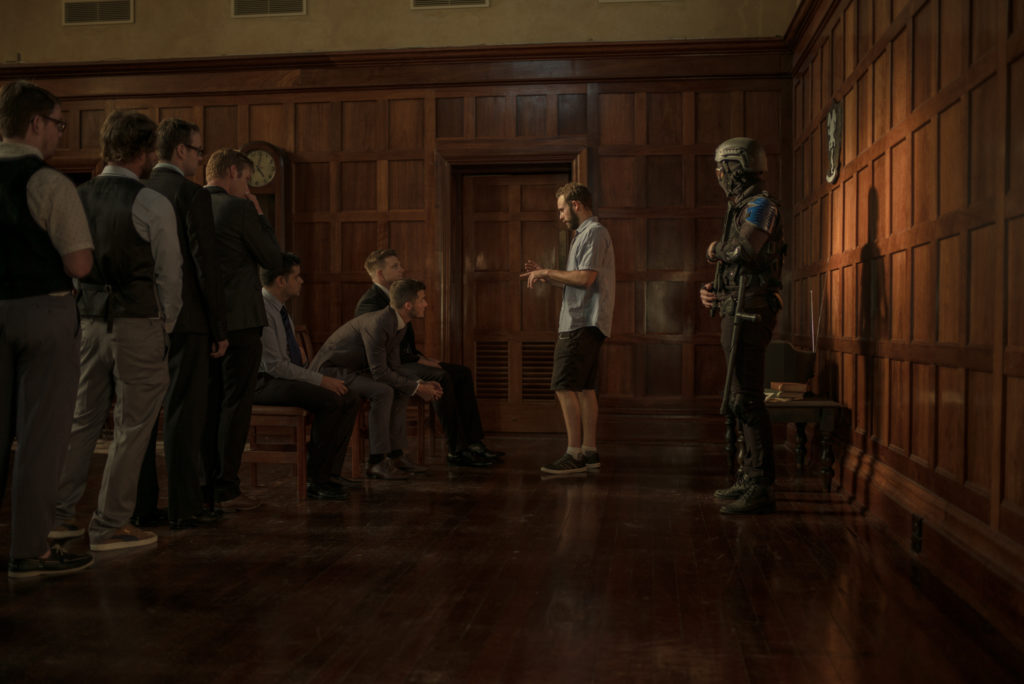
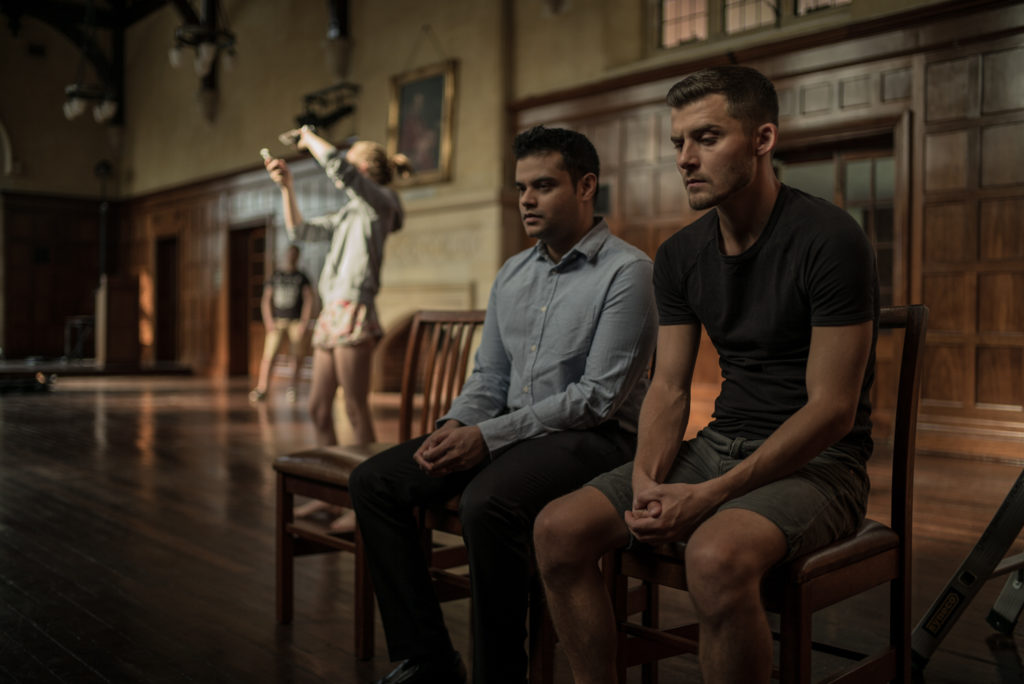
Behind the Scenes
Learning & Moving On
When you are doing short films you are giving yourself an opportunity to experiment with different looks and ideas.
Embrace the chance to make something a bit different and try to push the look to see where it breaks. I know that every short I have done I have walked away with just a little bit more knowledge than when I started.
Can we watch that short somewhere?
Found the trailer. Not out yet. 🙂
I don’t know how many tens or hundreds or thousands or millions of people follow your blog, but it is certainly one of the best around. Your work, under any conditions, is always brilliant, interesting and fast. Thanks so much for sharing!