The Journey Begins
The first time I used the RED Epic MX on a job a few years back I immediately had a love hate relationship with it. It had some amazing positives like the image quality, the extended dynamic range, the resolution and the RAW capture capabilities. At the same time it wasn’t the easiest camera to use to its full potential.
The camera is infinitely configurable.
Normally, that would be considered an asset but when first working with the camera it can be difficult to find your way.
The First Step
On my first job I managed to compile bits and pieces from the rental house and my own gear collection to put together a frankein-rig for the handheld set ups. I thought it was going to work great. I tested it out in the days leading up to the shoot and everything seemed fine. The only issue was I never really had it on my shoulder for an extended period of time during pre-production. It felt good for a few minutes so I stopped there. It wasn’t until I got 30 minutes into the shoot day that I realized what a costly mistake I had made.
The production was following around avocado farmers as they went about their daily work and it involved 99% handheld stuff. After 8 hours my shoulder felt like it was going to fall off and my hands were completely numb. In reality, the pain actually effected my cinematography as at times I was in too much pain to get the angle I would have liked. It was restricting my creativity and the end result.
I needed a solution. I spent the next two years trying to make sure that situation never repeats itself.
After owning the camera for a few years and learning the ins and outs of what is possible with it I have come up with what is the “perfect” handheld rig for my style. I put the word perfect in quotations because what works for me is not going to work for everyone. Shoulder rigs and set ups are very personal and if you want the most out of your experience you really have to test out multiple options to find out what solution works best for you.


The Perfect Rig
To understand what makes a great shoulder rig you have to determine what you actually want out of it.
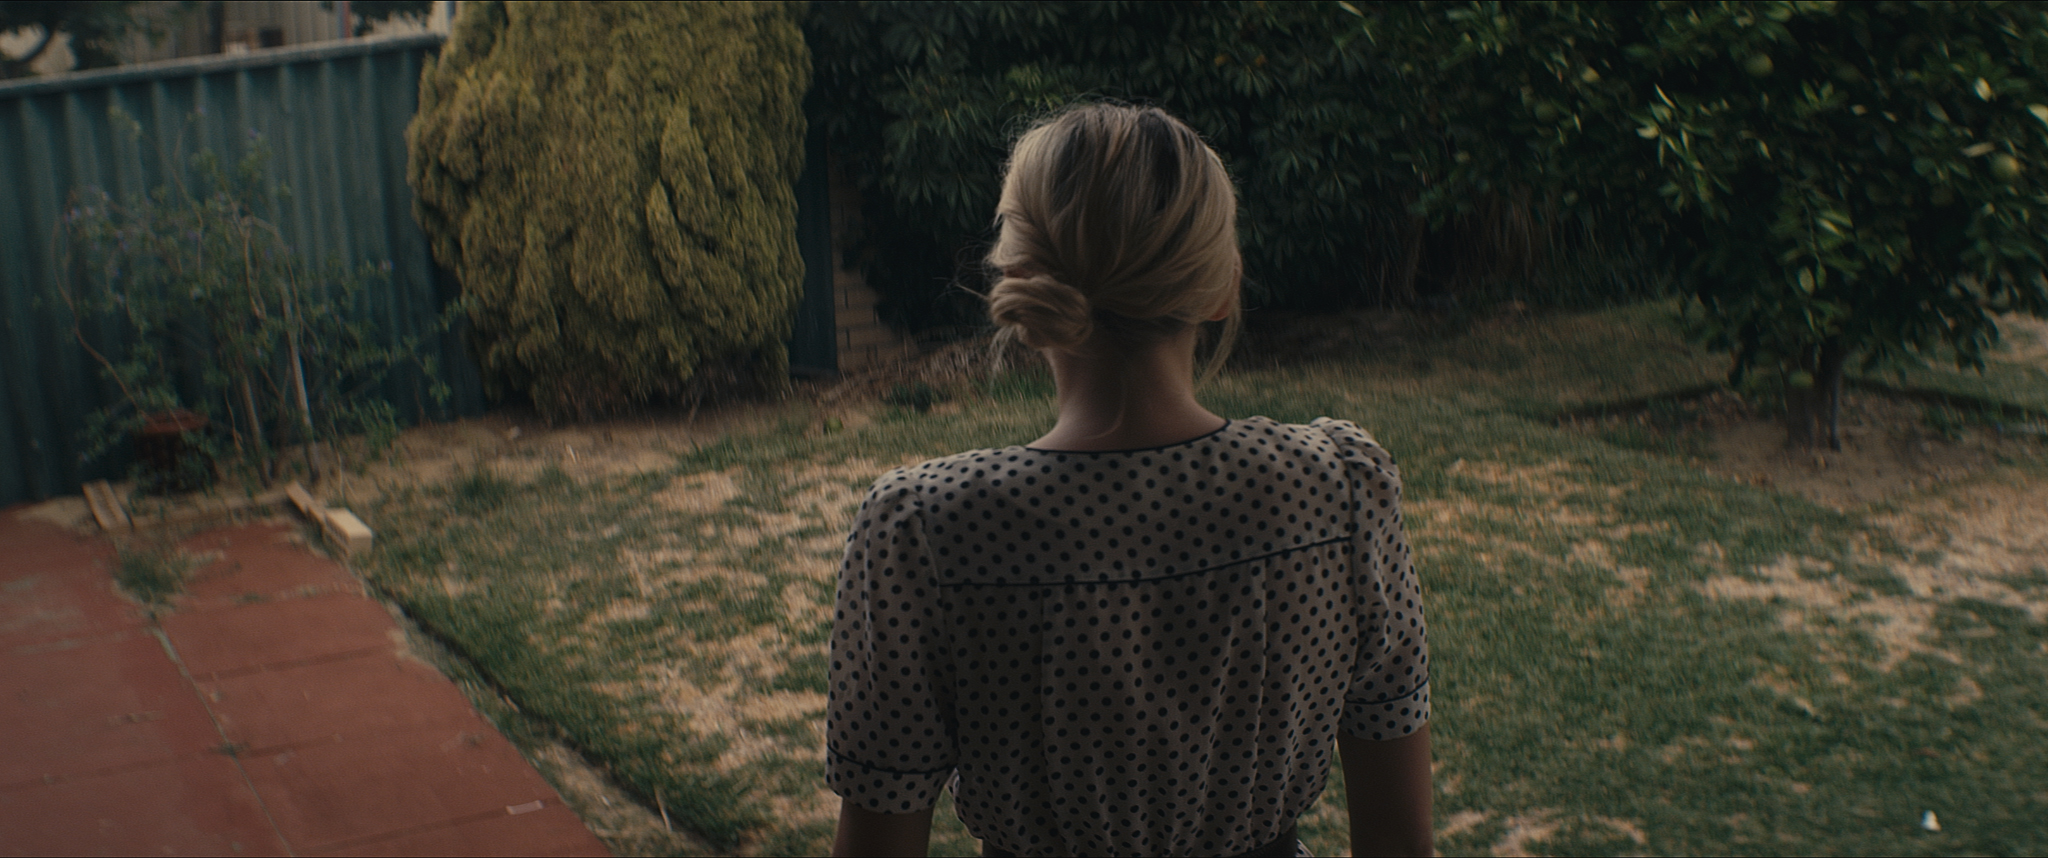
There are a number of reasons a production/director would want handheld and you have to acknowledge those reasons and make sure your rig is in alignment with them. Generally when people think handheld they think of Saving Private Ryan and the Omaha beach scenes. They think of throwing the audience into the action by making the camera an active participant. This is certainly true in some cases, handheld scenes due tend to feel a bit more gritty. They feel a bit more intimate because the imperfection in the stability of the frame makes the scene less tableau and more real. Knowing this, the perfect shoulder rig has to accent it.
You wouldn’t want your shoulder rig to be like a steadicam if you are going for a gritty geel. You want a bit of movement. There is a fine line in how much movement though. The majority of the time you dont want shake, you want a gentle rocking feel. Almost as if the camera is breathing. To do that you need some stabilization but not too much.
It is best to open the dialogue up with the director very early on about what kind of handheld work needs to be done as one person’s idea of handheld may be completely different than some else’s.
The Pieces of the Shoulder Rig Puzzle
The most important thing I strive for when creating a shoulder rig, regardless of the camera system being used, is comfort. If the operator isn’t comfortable nothing else matters. The entire project will suffer if after one take everyone has to break to give the cinematographer a few minutes to recover because he isn’t comfortable. Lack of comfort can also lead to other issues with the footage. Continuity from shot to shot can be thrown off if the operator gets tired throughout the course of the day and the images become less and less controlled. These things can lead to serious production issues.
To stay on schedule and on budget the most important thing is comfort. So what things do you have to take into account when creating a comfortable shoulder rig:
Weight distribution
The distribution of the weight of a system can make or break the comfort levels of the user. If the weight is too far forward the arms are going to be gone after one take. If the weight is too far back there are going to be fatigue and handling issues. It is all about find the sweet spot in a set up.
The best tactic to use when setting up the camera is to focus on getting a low center of gravity. The higher up a camera gets the less stable the platform becomes. You need a low center of gravity to be ale to manage the load. Although the majority of cameras are not built these days for handheld work it isn’t usually the camera that is the problem with low center of gravity issues. In fact, the problem is usually the shoulder pad.
Most modern shoulder pad set ups for shoulder rigs place the camera multiple inches off the shoulder. Combine this with the height of the camera you are already in trouble.
The Solution
My solution is to eliminate the now conventional shoulder pad system all together. Rather than using a pad that is somehow attached to the camera I use a pad called the House of Power Shoulder Pad.
This pad is strapped to the operator’s body and over time it is shaped and curved to their shoulders. Placing the camera directly on the pad allows for the lowest possible center of gravity as the pad is only a few centimeters thick when the weight of the camera squishes into the foam. Another great thing abotut the H.O.P. pad is the speed that you can slip it on and off in a matter of seconds. It packs down nice and small as well and is perfect for travel.
For the price I think it is an absolute must have for handheld operation. You can find the House of Power Shoulder Pad here: Shoulder Rig Pad
Power Supply
The next thing you can do with the majority of modern digital cinema cameras is relocate the power supply.
The battery is usually a hefty piece of the entire package and if you use it to counter balance the rest of the shoulder rig you can make weight distribution much more friendly. The majority of the time you want to push the battery to the rear of the system to counteract the front heaviness of the rig. Finding the sweet spot can take some time but once you it will make operating hand held much more pleasant. With my approach using the Red Epic I have set up the system with a Vmount battery at the rear of the rig and it balances out all the front weight by me having a point of contact on my shoulder that balances the two loads evenly.
The Handles
Once you’ve got a low center of gravity and nice even weight distribution the next aspect to deal with is the positioning of the handles.
Each operator is different with some preferring longer handles and others who like to operate directly from the matte box. Either way you are going to want something that is adjustable so if you are shooting for an extended period of time you have the option to change things out.
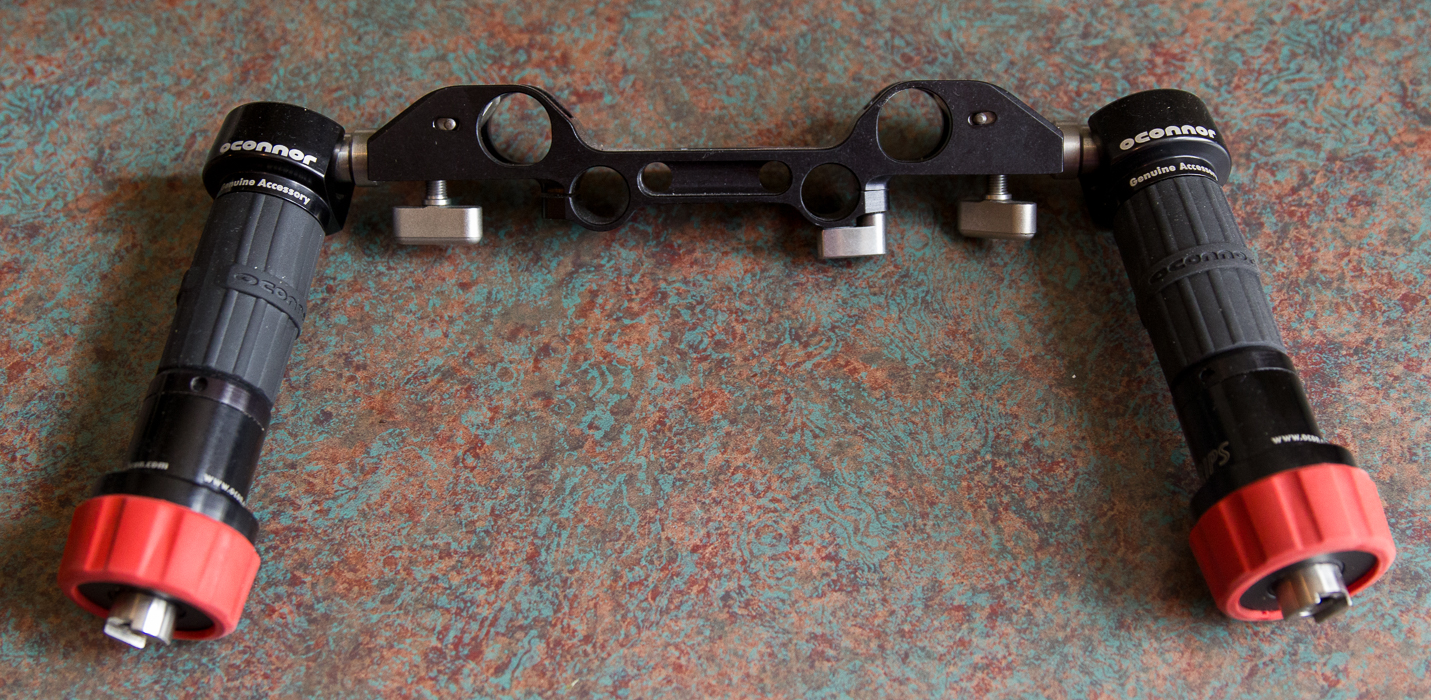
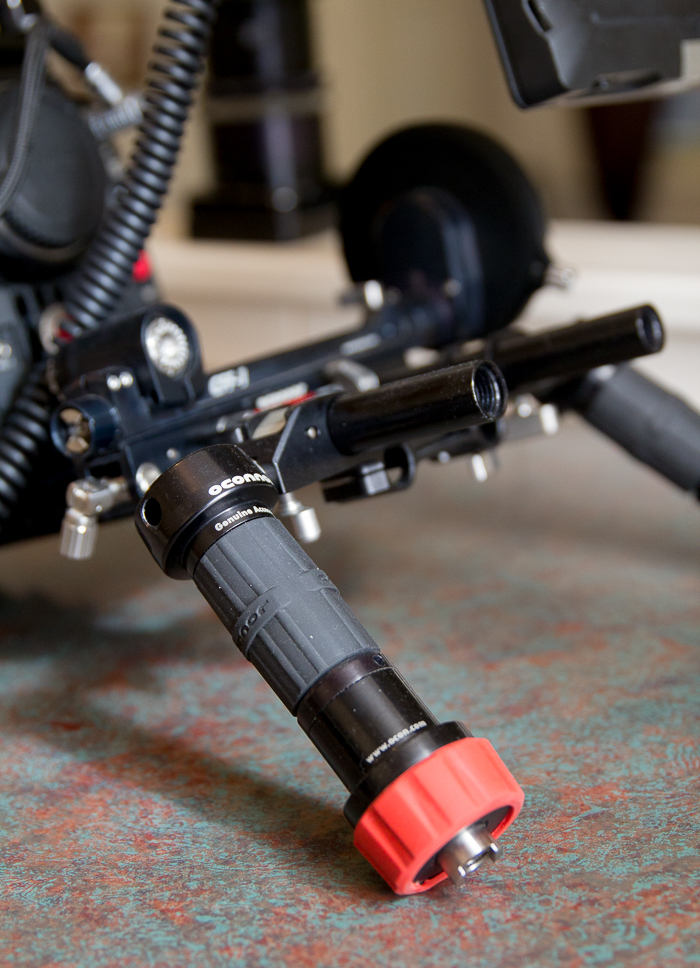
My preferred handles solution are the OConnor O-grips. The OConnor O-grips are infinitely customizable to just the right combination of angles and height. They are extremely well built and are more than capable of working with any size camera package. These are not cheap handles but this is a classic case of buy once, cry once. They will be around long after I’ve shot my last scene.
The handles themselves are wrapped in a nice grippable rubber that seems to get better as the day goes on. The individual units are swappable so if you want a giant handle or just a single handle all you need is two minutes to pull it apart or put it together with an allen key and you are good to go. Another great feature is that all the handles can be poisitioned and locked with just one hand which means you may not even have to put down the camera to re-position.
In my current set up I use the bridge and single O-grips on 19mm rods. The combination seems to be just the right height for my arms when used in combination with my secret weapon (not that secret if you know Christopher Doyle). I talk about my secret weapon a little later on in the post.
Weight distribution is key to maintaining comfort over the course of a shoot. Remember film isn’t a sprint, it’s a marathon.
Speed
Why You Need It & How to Achieve It
The higher up the budget food chain you go in your cinematography career the crazier the demands become on the time you have and the quality expected from you. On major Hollywood films there are times when a minute wasted fiddling with a cheap fastener or stripped nut could be costing the production tens of thousands of dollars. The bigger the budgets, the faster you have to become in getting the job done at a high level.
Speed is everything.
The faster you can get your gear set and ready to go, the faster you can have your lighting plan communicated and executed by the gaffer, the faster you can go through any last minute adjustments, the better off you are going to be. When it comes to shoulder rigs and working handheld, if something takes time to set up or just doesn’t fit with the speed is everything mantra than it has to go.
If it takes you twenty minutes and ten differnt screw/bolt/fastener changes to get from handheld to tripod than your system needs a complete changeover. All the gear may look fancy but once you get on set you quickly realize why the good gear is so expensive. If it isn’t fast, easy to use, and built for the rough production environment chances are it is not going to last.
There are a few key essentials to making sure your preferred shoulder rig isn’t slowing you down.
1. Is your Shoulder Rig set up for as many different scenarios as possible?
You can’t predict all the scenarios the rig may be asked to go in to during a production but you can be sure it is very flexible from the start. Are all the components flexible? Can they be repositioned without tools? If they can’t, what tools are needed to get the job done. Is the follow focus double sided? If not is it a quick operation from switch to one side from the other?
What about your rod system and matte box. Do you have to take apart 10 things to slide your matte box off for a filter change or is it swing away?
Speed comes from thinking through as many scenarios as you can and then incorporating what you learn from that in to the construction of you shoulder rig.
2. Shoulder to Tripod
How long and how many steps does it take you to get from handheld to tripod and then back again? This happens all the time.
On low budget sets or indie sets there aren’t as many crew and that means people are usually wearing multiple hats. Lower budgets means less at stake financially but it also means speed may be even more important because if you don’t make your day there may not be any funds left over to make it up in the future. There is not excuse for not have a completely tool free switch between tripod and handheld.
Do yourself a giant favor and aim for a shoulder rig that gets this right. Productions across your career will thank you.
3. Quick Release Everything
QR set ups make the world a better place.
Everything nowadays can be attached to QR plates and QR plates come in all shapes and sizes. It saves time being able to just slide something in to place and pull back the lever rather than getting out the tools and bolting things on or unscrewing things in the middle of a scene while possibly hundreds of people are waiting on you.
Be prepared by embracing quick release set ups.
4. Stay with the Classics
The is a reason there are only really two dominant accessory makers in the film market.
One is because it isn’t an easy business and the other is because production speeds up tremendously if everyone involved is familiar with the tools provided before they start. New gear is cool but if your first AC doesn’t know the follow focus that just came out last week that you decided to buy, it will slow down production.
I am not saying you have to buy Arri or OConnor (although you can’t go wrong with either) but I would caution you that if you are looking for speed you need to also take in to account familiarity with yourself and the crew.
5. Thumb Screws
I love OConnor gear (which will be very evident when you read about my current shoulder rig below) and one of the things that drew me to their products was the fact that all of the gear was built for speed. The O-grips are easily positioned with a few twists of the wrist and the CFF-1 is made adjustable via thumb screws. This goes in line with the idea of QR plates on everything. The less tools the better and thumb screws help keep more tools in their cases.
Speed will separate the men from the boys once you get to a certain budget level. The on set environment is already jam packed with enough stress and anything you can do ahead of time to eliminate possible issues can help put your in good stead with your director and producers.
A good DP is a quick DP.
My Holy Grail of Shoulder Rig Set Ups

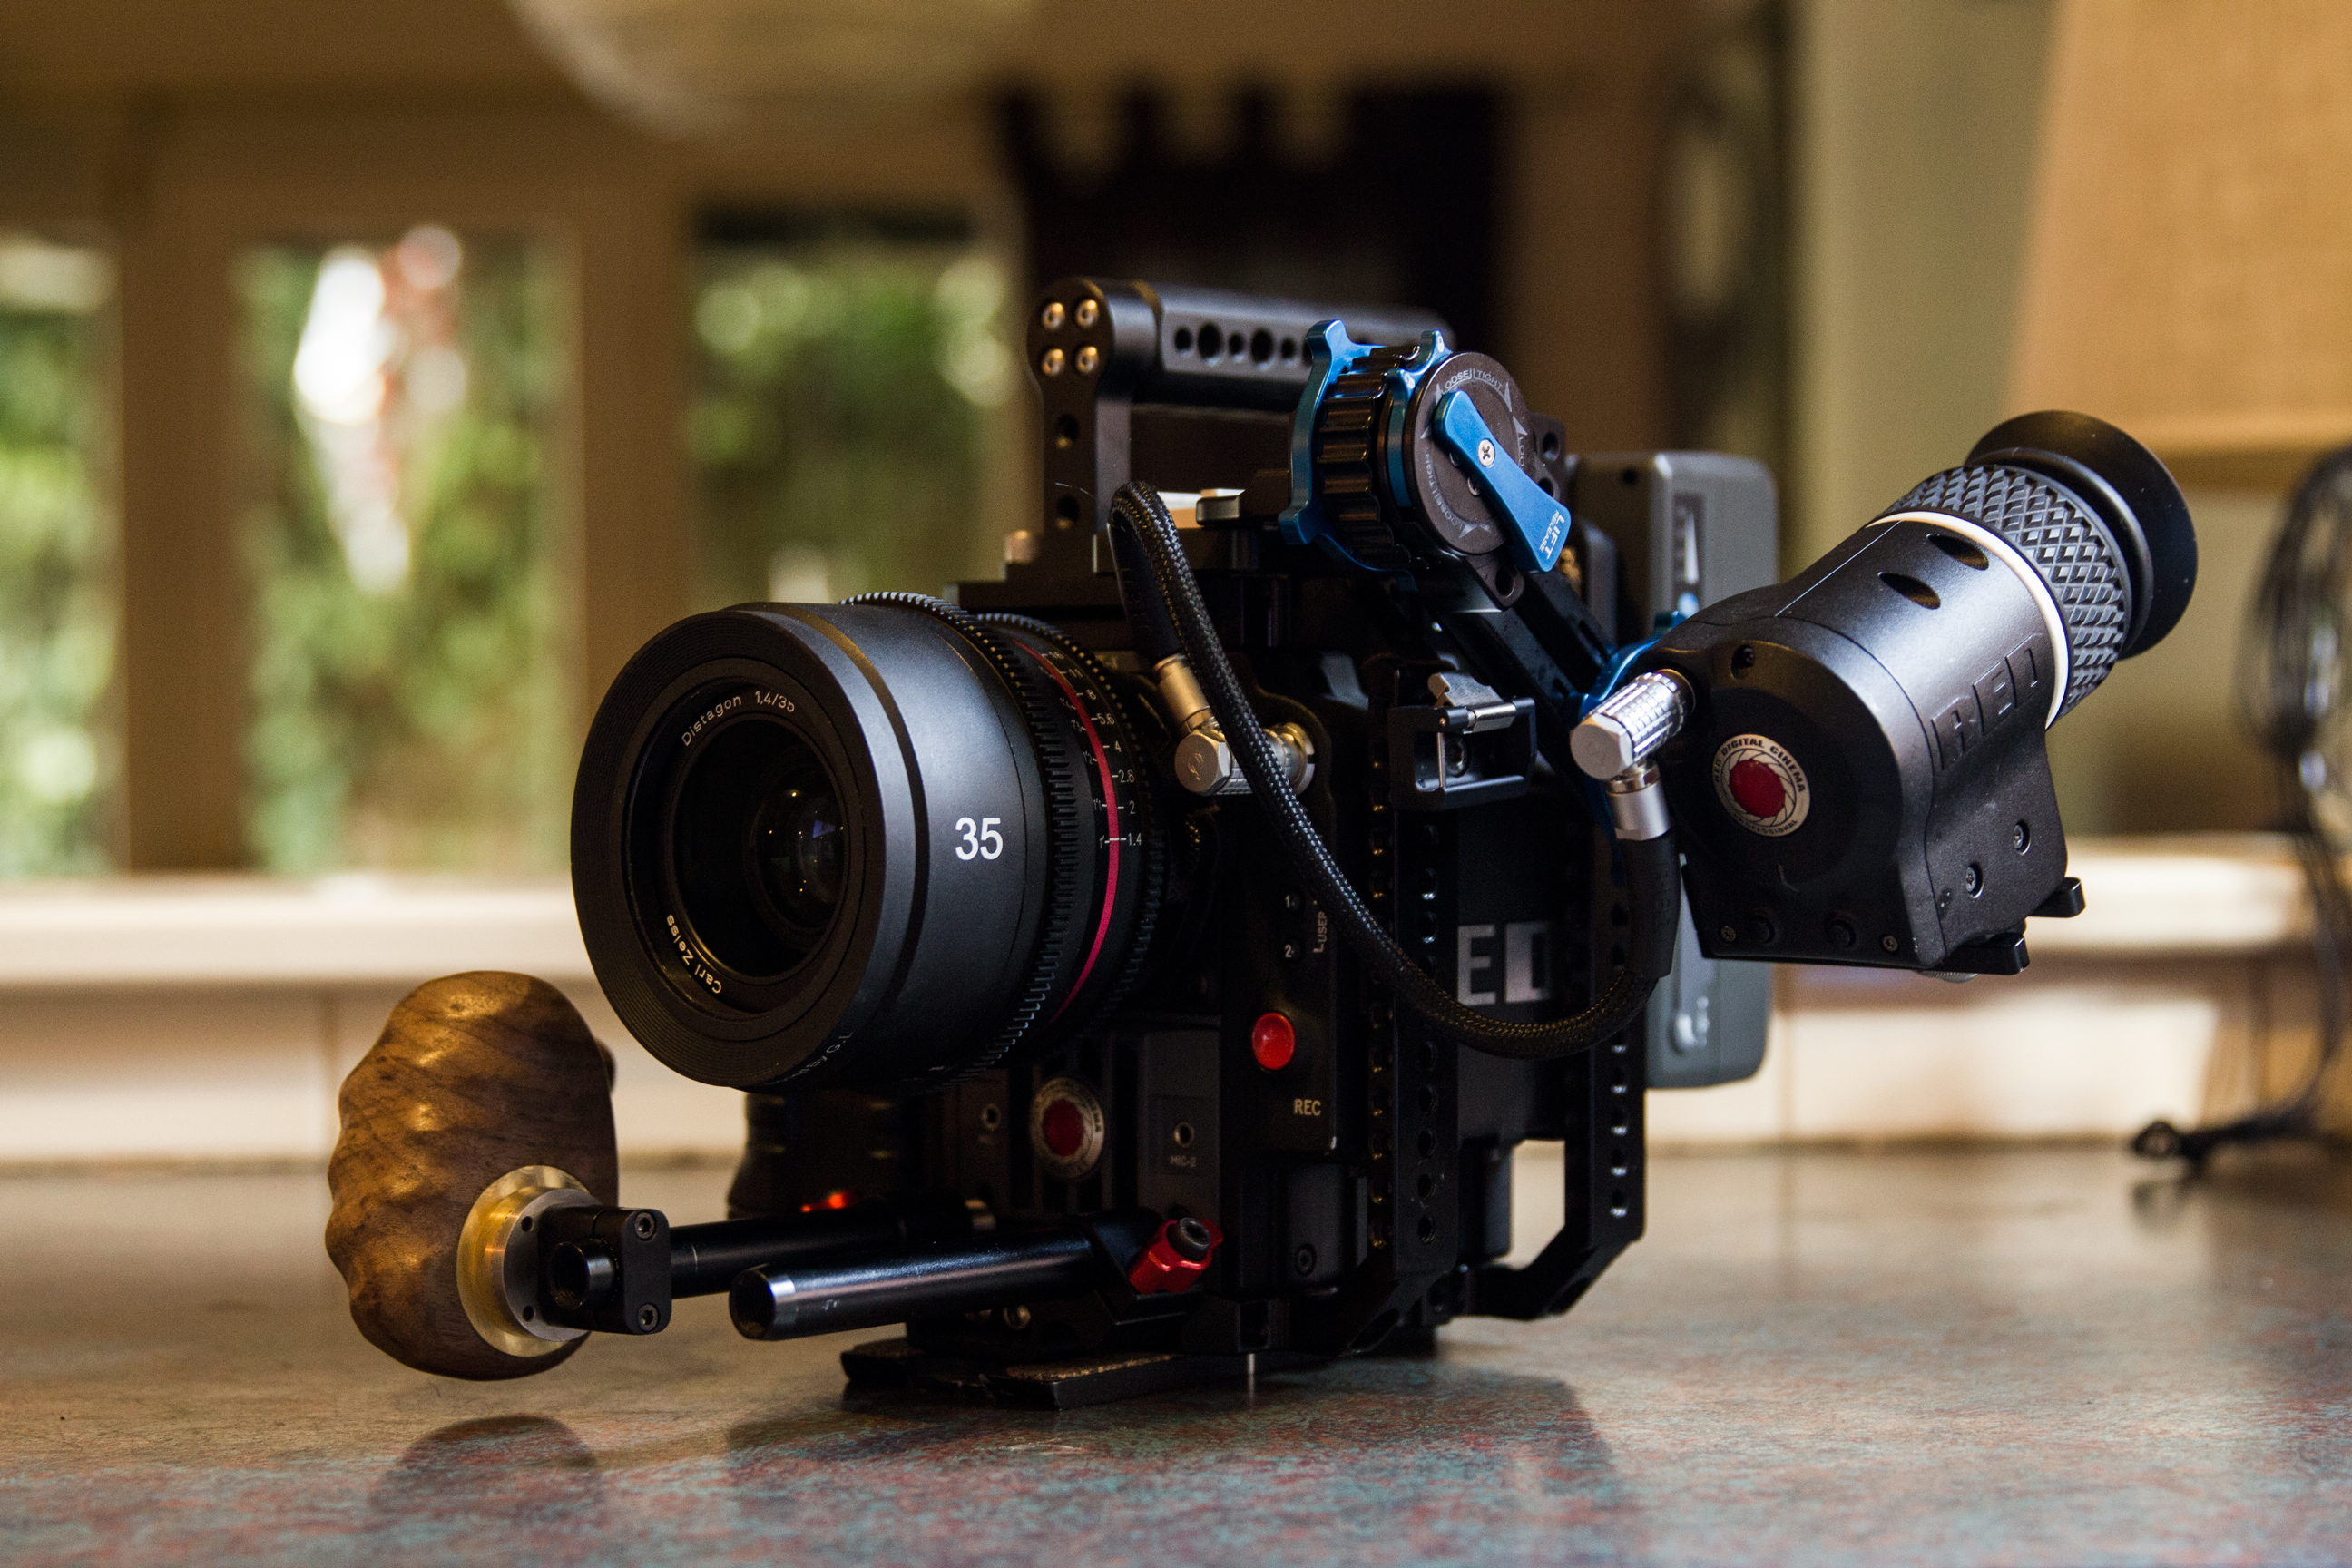
The RED Epic Tamed
At the top of this post I told you the story of my painful first experience trying to conform the RED Epic to my shoulder rig ways. It was a disaster but I was prepared to never let it happen again. It has taken me three years now but I feel I have finally reached a point where I can say that my current rig is as good as it can get. The combination of accessories allows me ultimate flexibility without any compromise in speed or quality.
I am extremely happy with it and I hope that by sharing my set up with you it may help you down your path of the perfect shoulder rig.
The list is quite long but I wanted to make sure I get every component listed as the devil is in the details.
So here it is:
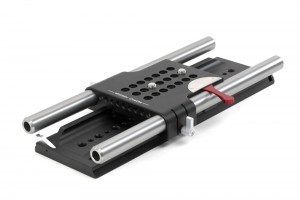
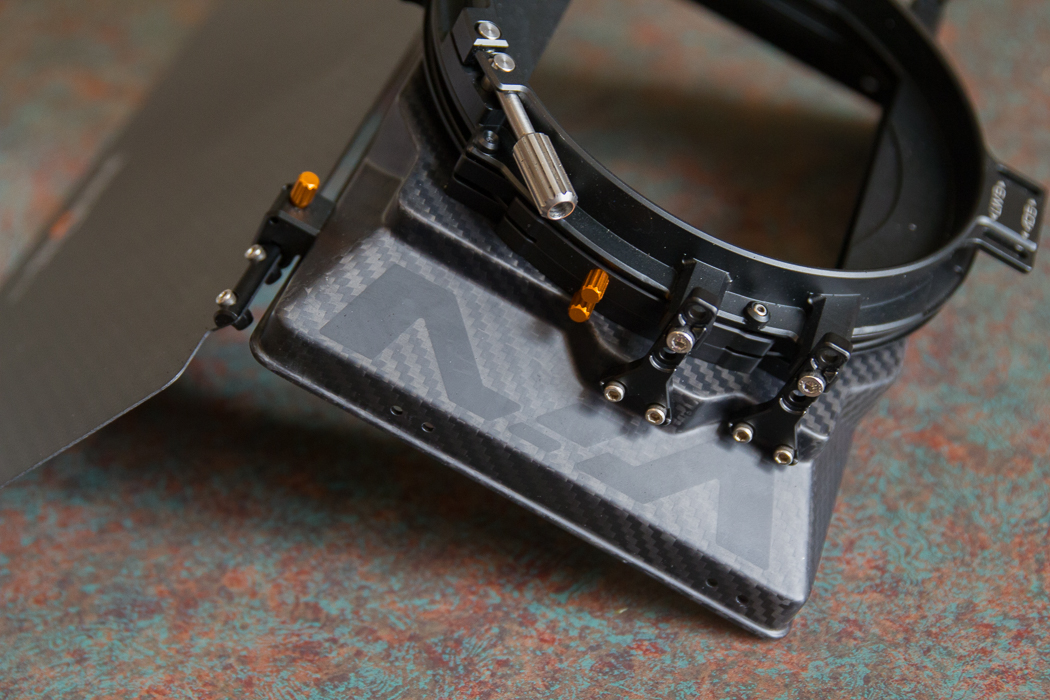
The Base
The base of the rig is where it all begins.
I have discovered two important must have features for my base set up.
#1: The Flatter the Better.
If you use the HOP shoulder pad which I highly recommend than you need a flat surface to control the rig. If the bottom of the base isn’t flat than you are going to encounter issues.
#2: Tripod Integration.
As I mentioned before, going from fluid head to shoulder rig in a tool less transition is a must.
It happens time and time again on set and if you don’t have the operation sorted out it can grow old, fast. The main platform of my rig comes for a company called Gini Rig. For my exact base plate just click here.
They are an old ebay based company out of Asia who make knock offs. Knock offs? But you said earlier that you get what you pay for. Yes, you do. But I used to have a name brand dovetail system and it wasn’t as well built as this thing.
You can find other solutions from 1st tier companies here:
Wooden Camera: 19mm Bridgeplate
Innocinema: 19mm Bridgeplate
RED: Shoulder Rig Dovetail Adapter
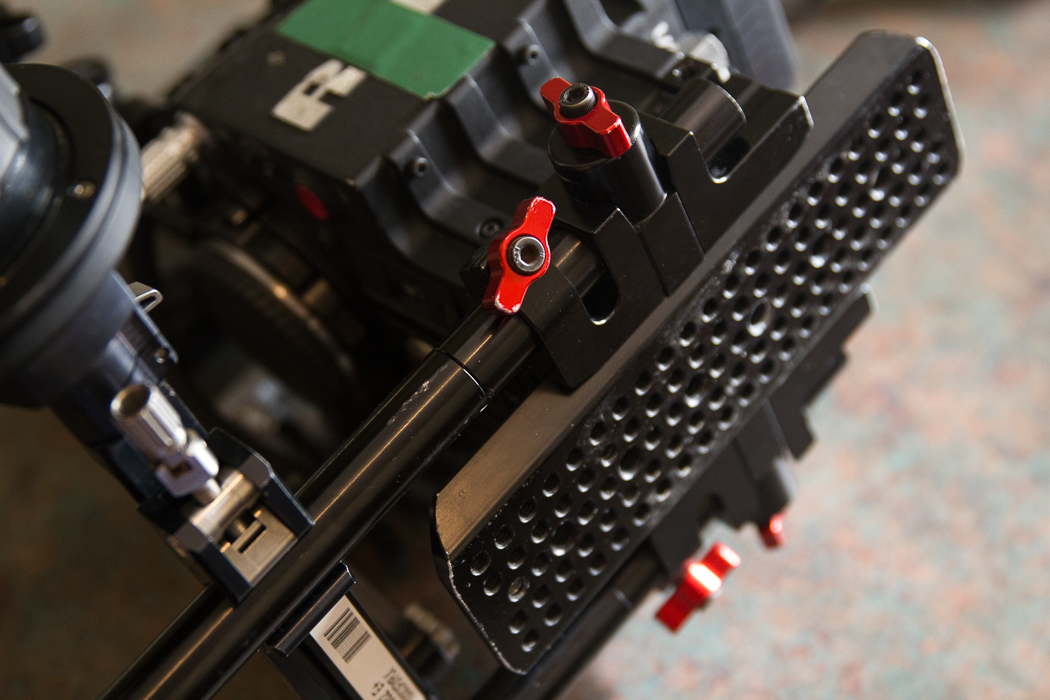
The base is on a dovetail and the camera has a dovetail plate bolted onto the bottom of it. I don’t use the dovetail in a traditional sense. I have two dovetails but in order to have the widest base possible on the handheld rig I leave the large dovetail plate attached to the underside of the camera to allow for maximum stability on the HOP shoulder pad.
You can find an example the dovetail plate here: Shoulder Rig Dovetail
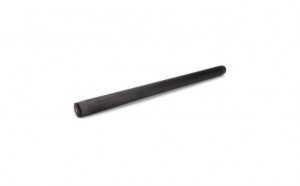
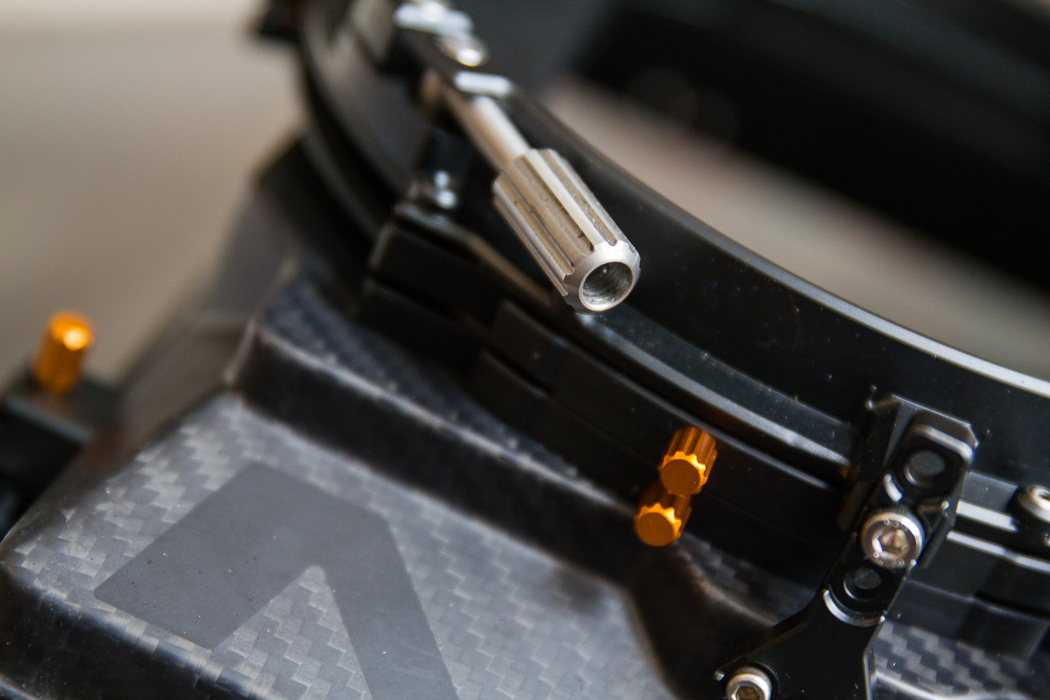
Rods
The rods are 19mm and they are carbon fiber. The material makes them virtually weight free but incredibly strong.
The ones pictured are the traditional rods before I made the carbon fiber upgrade. A big weight improvement.
What may seem like a trivial weight difference adds uyp over the course of a shoot day. I prefer 19mm rods as they give a wider base to attach the hand grips to. They also provide a wider base for all the accessories that end up getting tacked onto the shoulder rig by ACs.
You can find the rods here: Shoulder Rig Carbon Fiber Rods
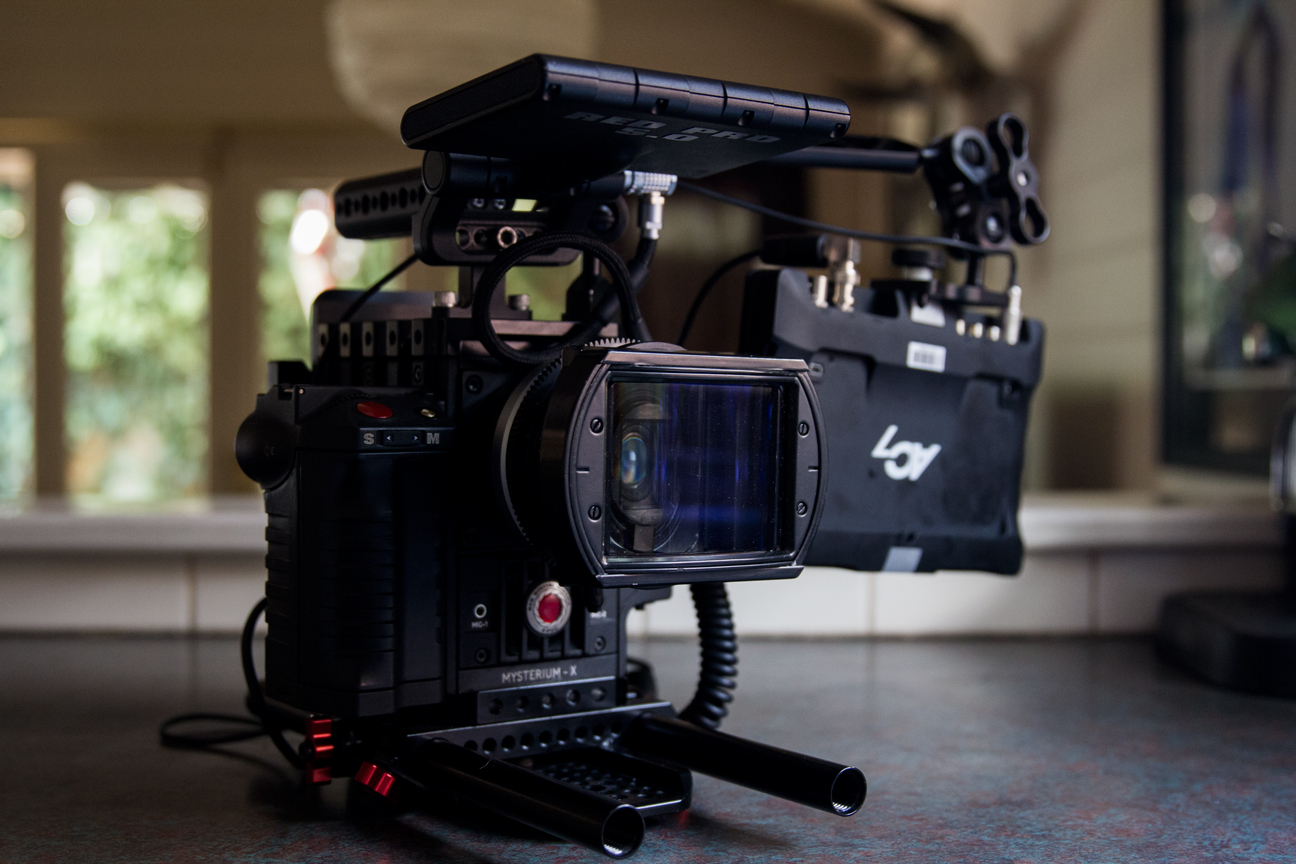
Camera Pieces
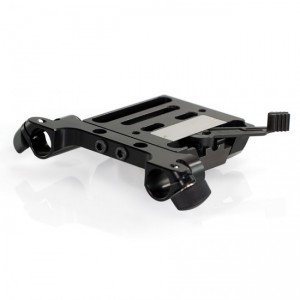
Top Plate
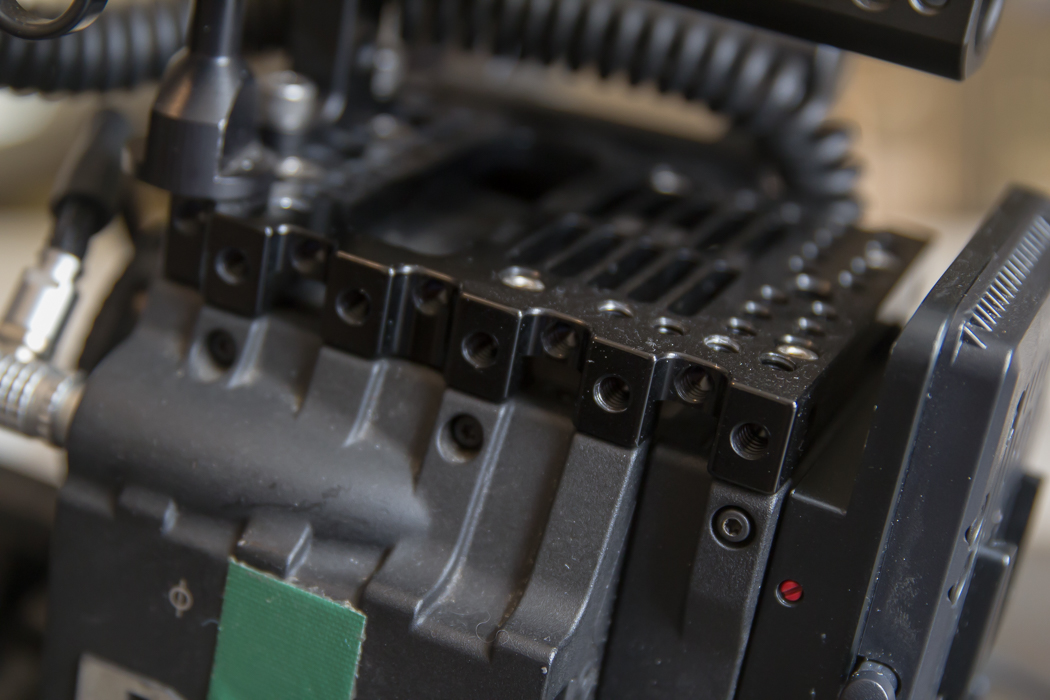
The first important camera piece in my shoulder rig is the Top Plate.
The top plate is also from Gini Rig but there are a number of other top plate makers out there.
The most popular: Wooden Camera: Shoulder Rig Top Plate
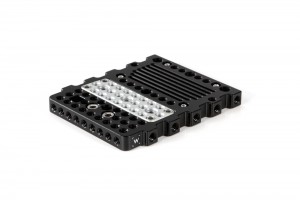
RED: Tactical Shoulder Rig Top Plate
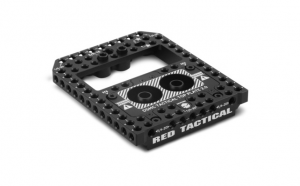
Innocinema: Shoulder Rig Top Plate
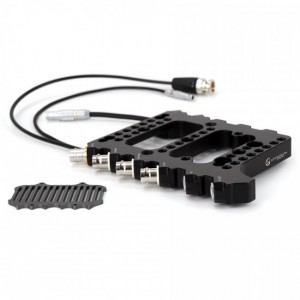
Each one has their own pros and cons but I can’t fault the Gini Rig model so I have stuck with it over the past few years. A top plate is really a must have unless you are going super stealth mode. It is generally the prime real estate on the rig for attaching all the bits and pieces.
Top Handle
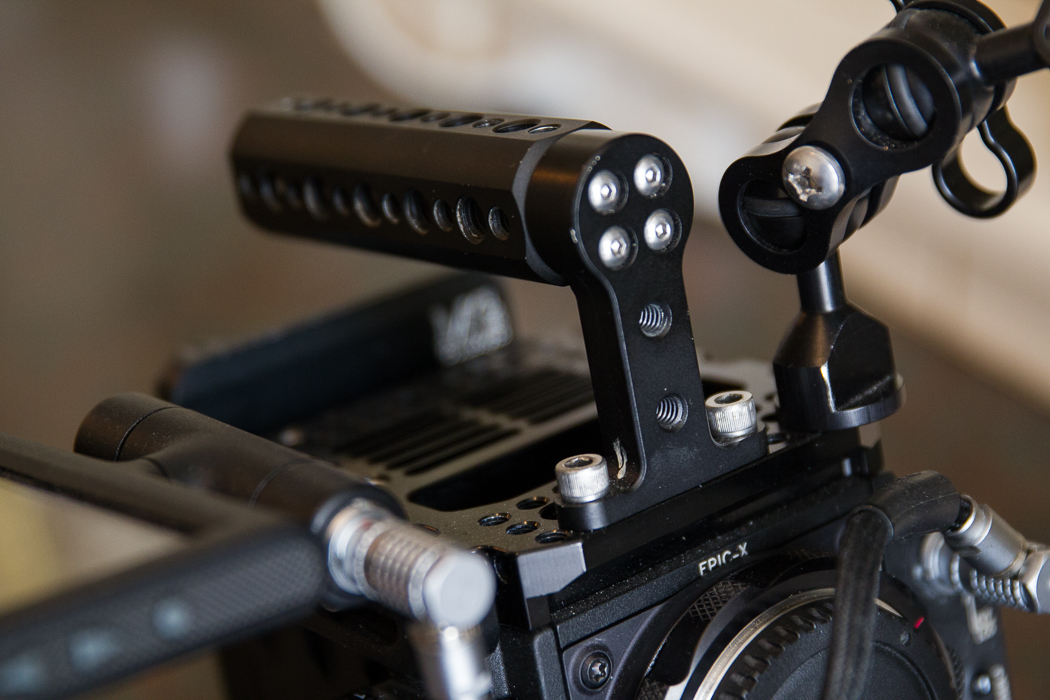
Next up is the top handle. In the same vein as the top plate, the top handle is a must have on 99.9% of jobs.
It is the primary way to load the camera on your shoulder and also the best way to carry the camera when you aren’t shooting. You want something solid and with a bit of grip.
My top handle is from Wooden Camera. I am happy with the quality but this is one thing I have since changed about my rig. The idea of more 1/4 20s and 3/8 holes for accessories is great but I don’t really like populating the handle with bits and pieces. The metal grip area means things can get slippery if you aren’t careful. I actually prefer the handle from RED.
The RED top handle features a nice height and more importantly a nice fat rubber grip so that once you grab it you know it is secure.
RED Handle:
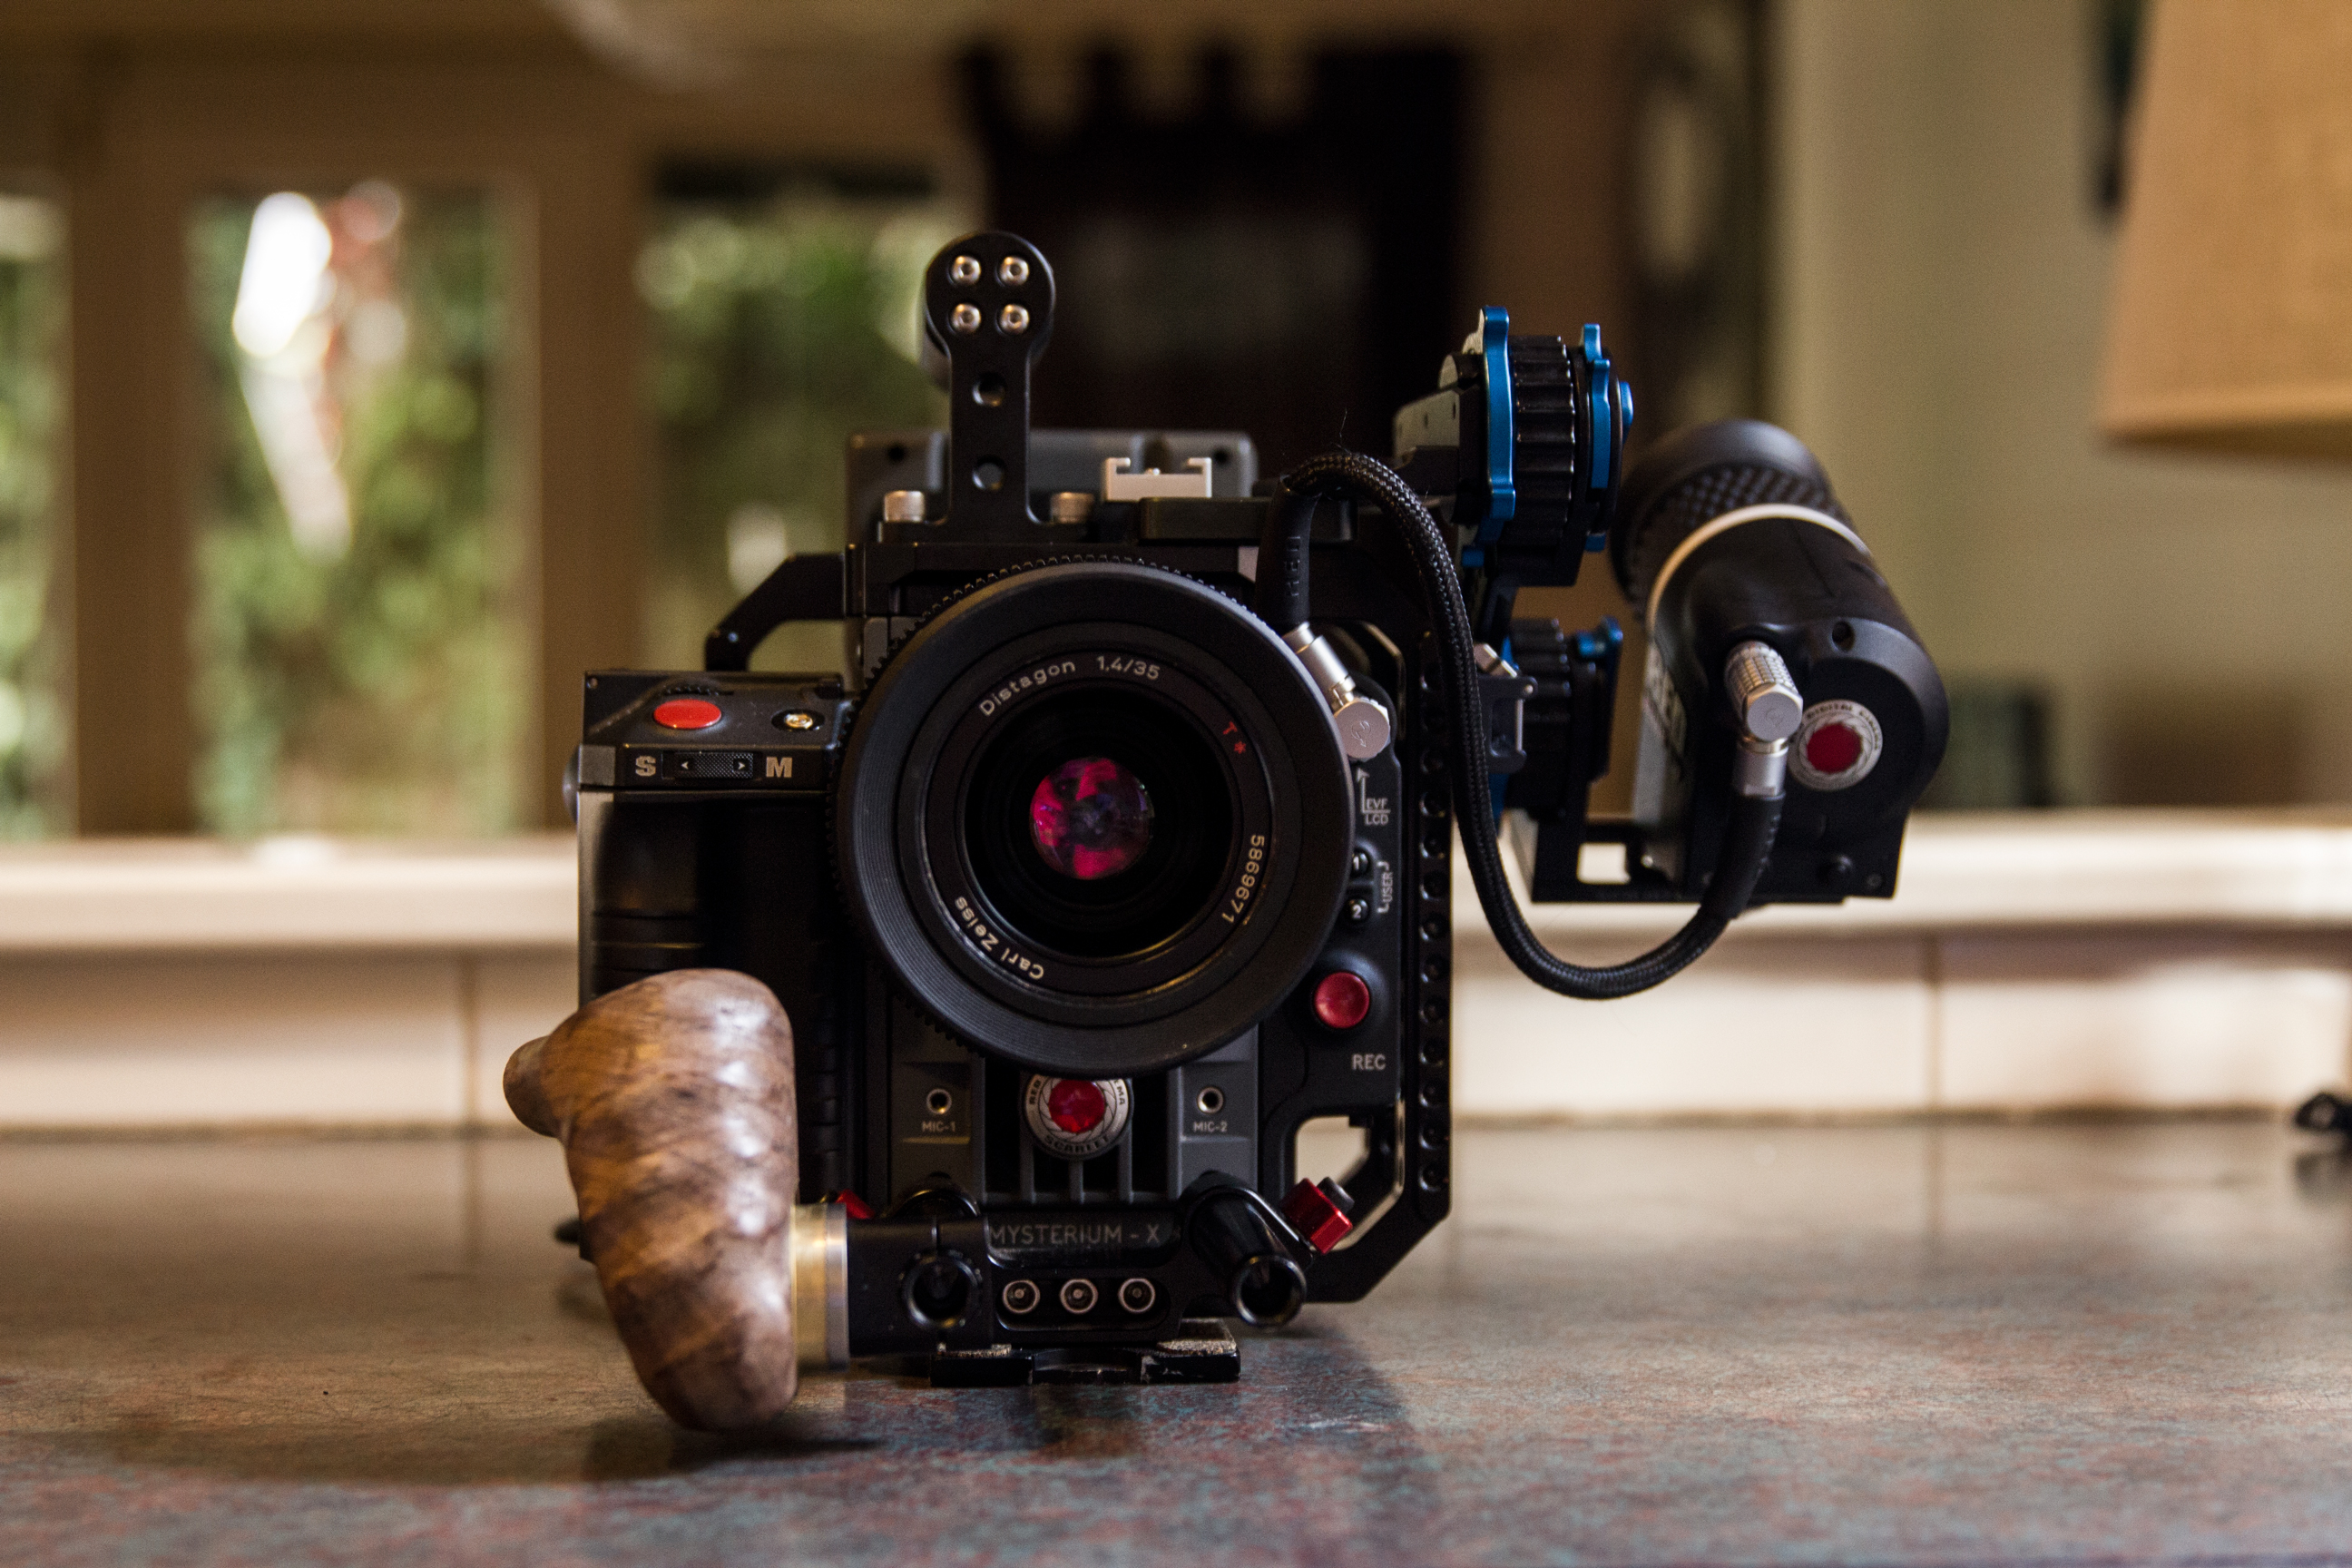
Touch Screen
The touch screen is one way RED allows users to navigate the various settings on the camera.
It also doubles as a framing monitor but in truth I very rarely use it for that purpose. I much prefer having a higher quality viewing option to judge framing but that may be changing with RED’s latest announcement that they will be offering a higher resolution touch screen now. I do always like to have the touchscreen though because it is very easy to use and can quickly give you visual confirmation that your settings are correct.
I like to have the touchscreen mounted to the side of the top plate which allows for the monitor to swivel and tilt for both dumb and smart side operation. It is on the camera but not in the way of things like the top handle and other accessories. 9 times out of 10 the AC, once the scene is set, will have it oriented to face him so that he can confirm all the settings before each take to make sure nothing has been bumped.
The operation of the touch screen is great but it can sometimes be difficult to use in practice. I also like to have the side handle attached because sometimes tangible buttons are just easier. Touchscreen is cool but buttons are fast and I am all about speed.
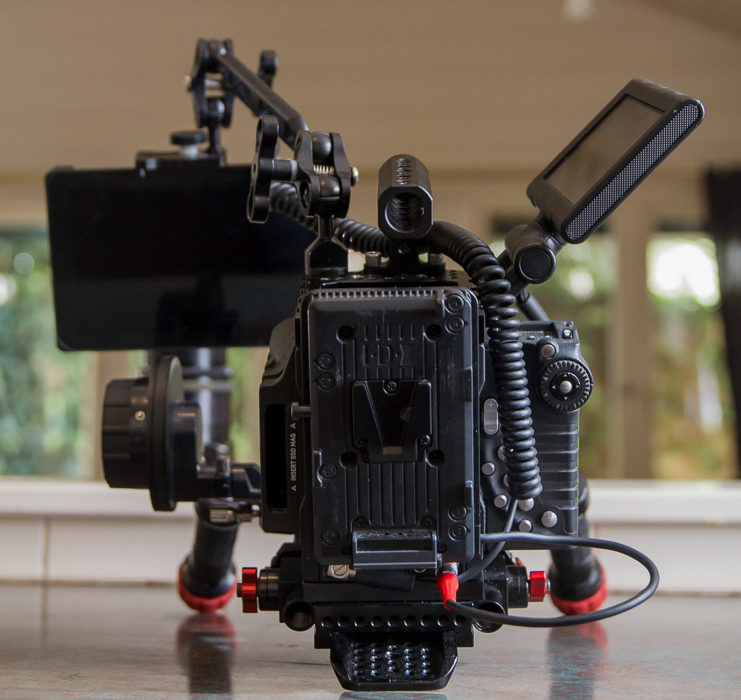
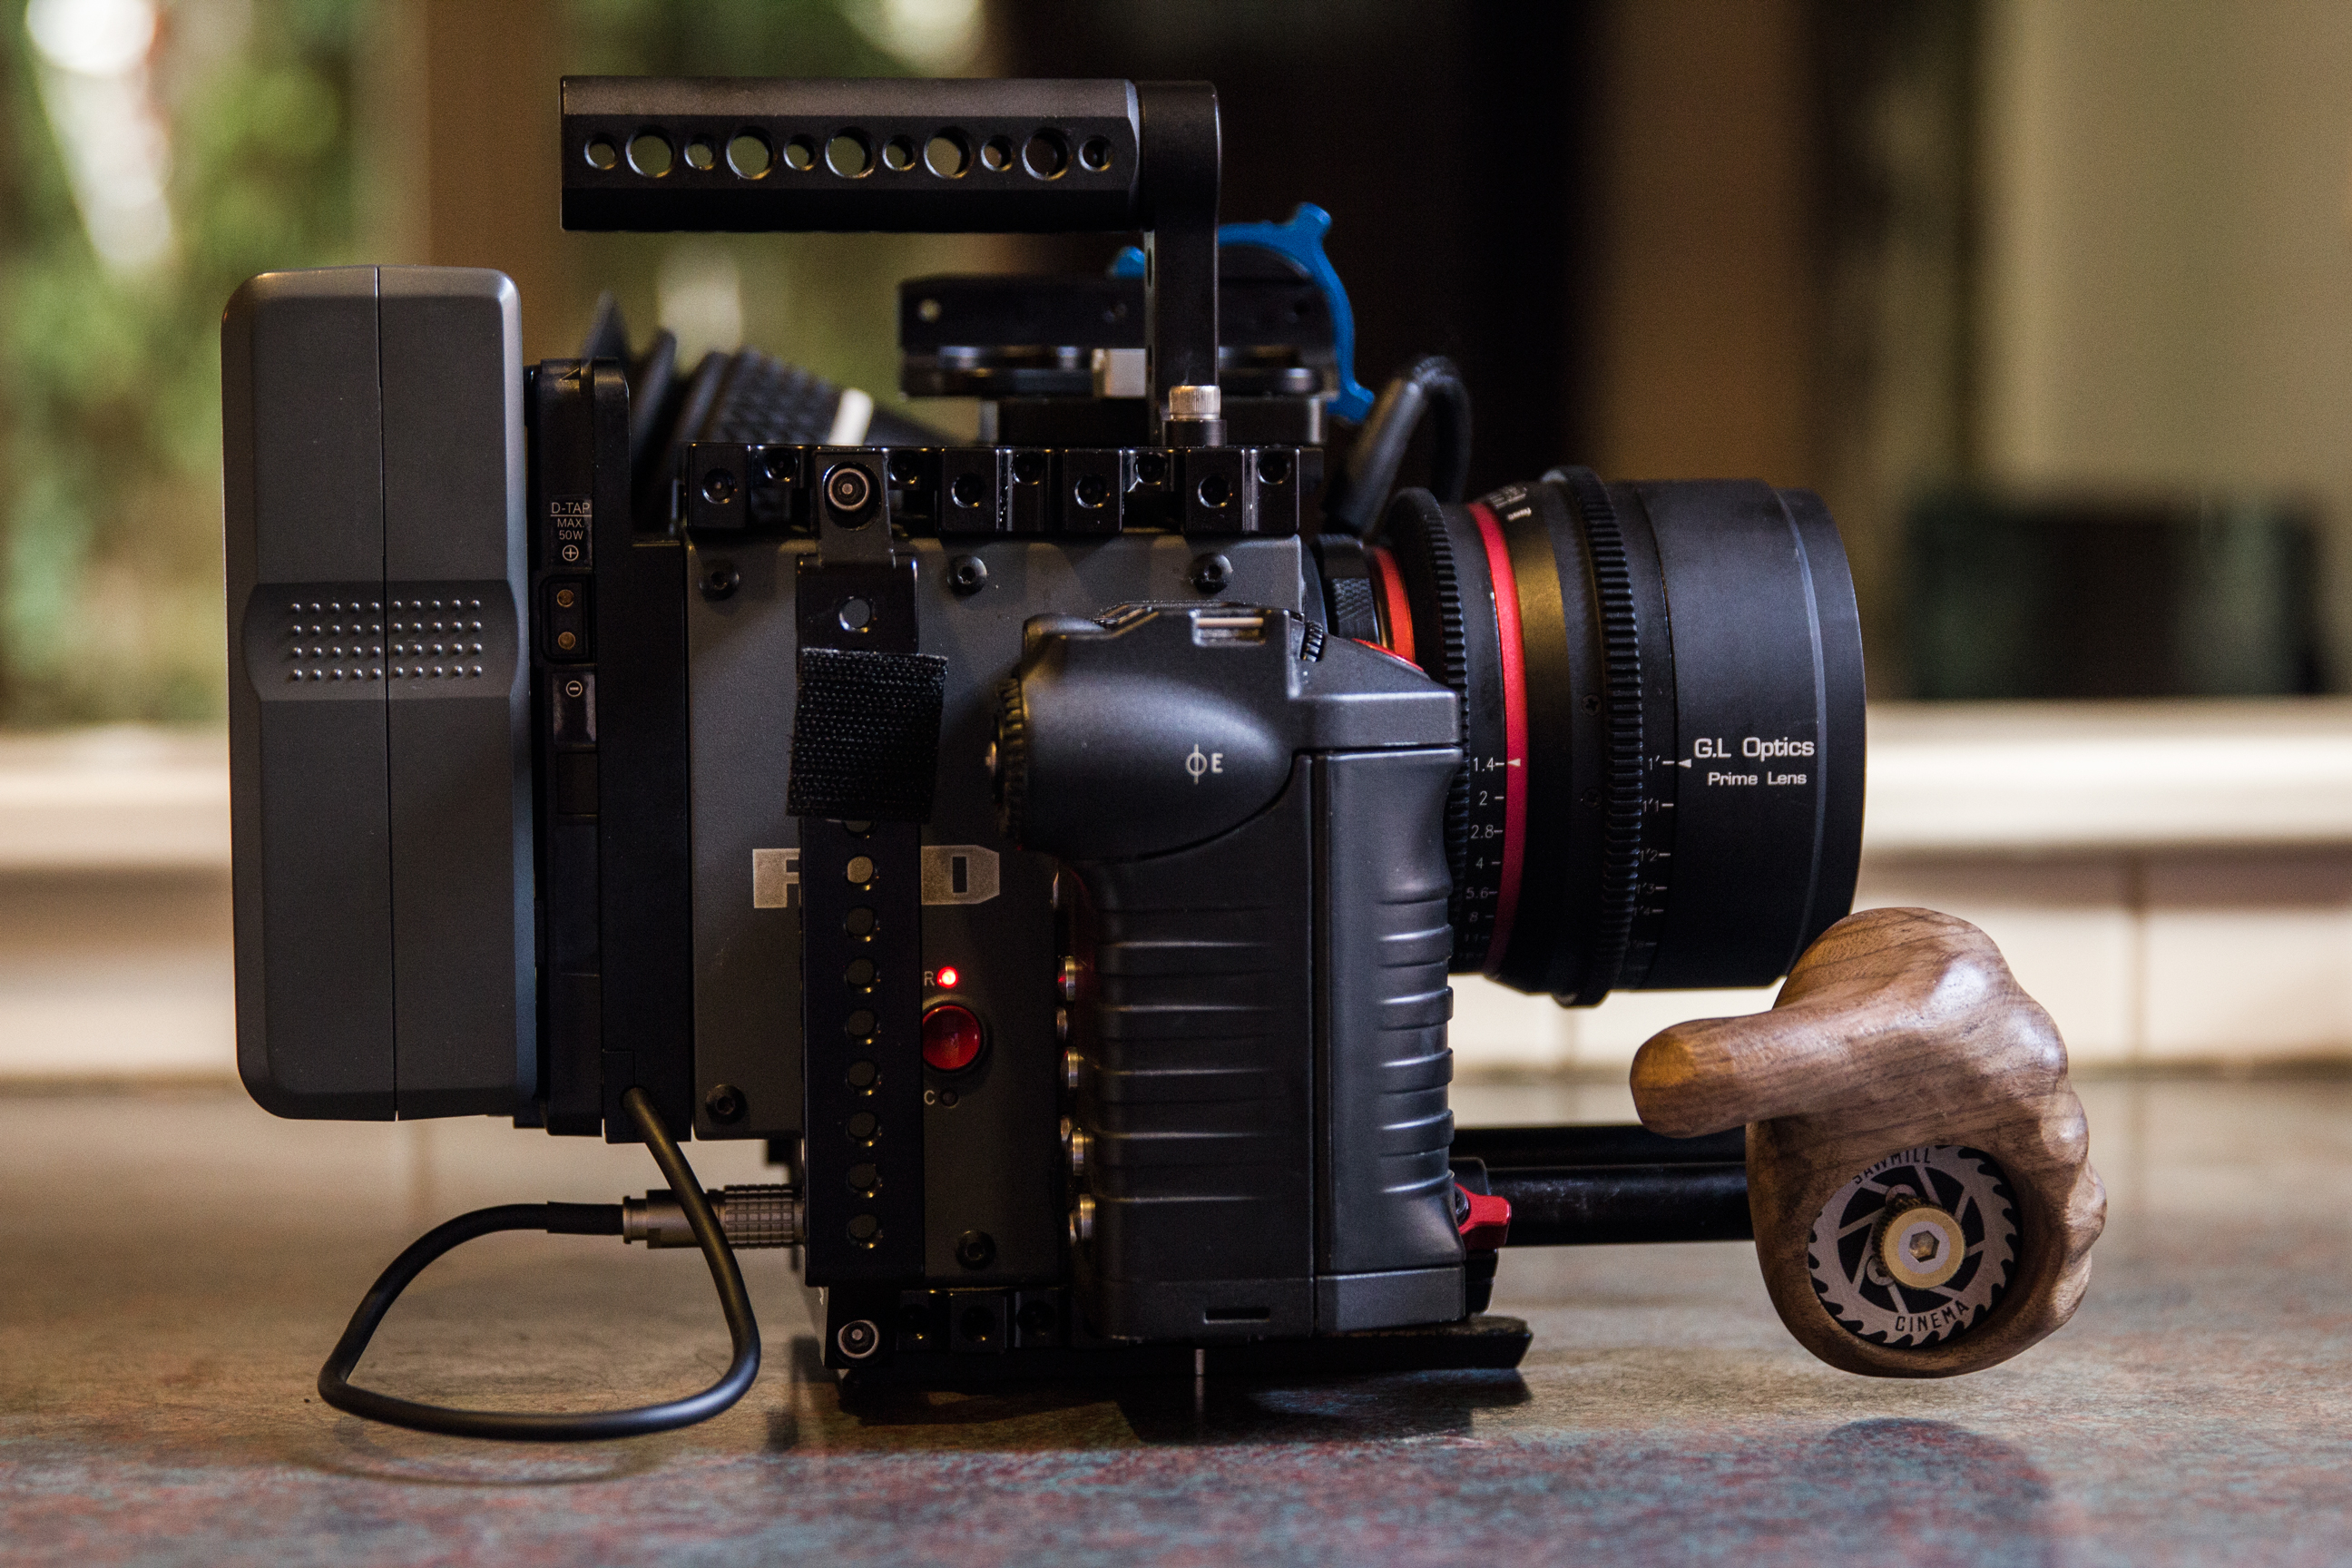
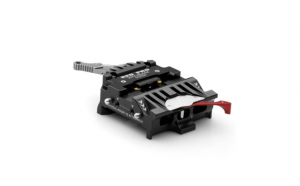
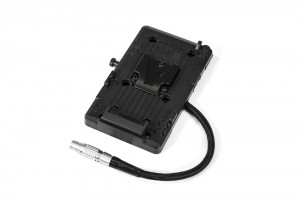
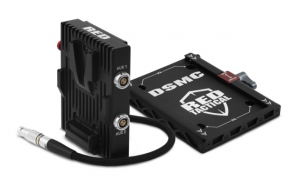
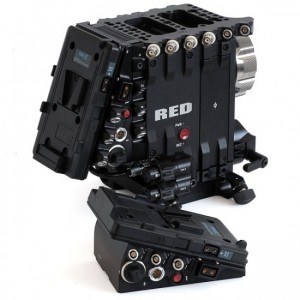
The Battery Plate and Batteries
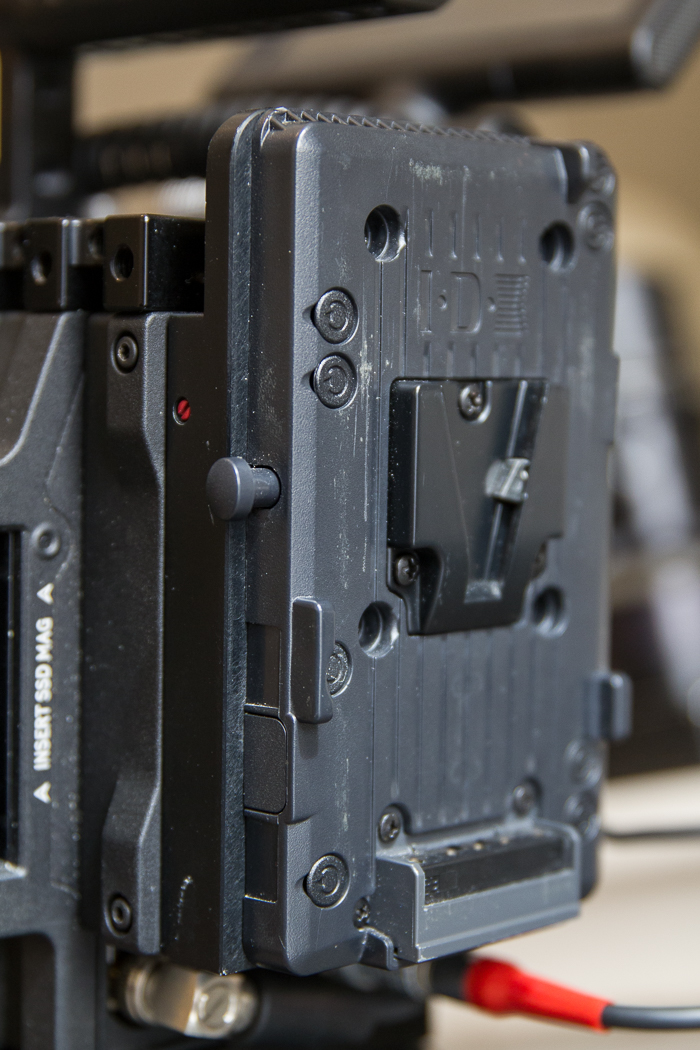
There are lots of ways to power an Epic but I prefer using a V mount battery plate bolted on the rear.
The battery plate and the battery itself help to spread the weight out a little. Once the camera has a mid-sized prime on the front with a follow focus and a matte box set up it can get fairly front heavy pretty quick. Having the battery on the rear helps out quite a bit. I like to work with a slightly larger battery when doing handheld work because, again, the more weight at the back the less fighting you have to do with your arms to keep the shoulder rig balance.
I prefer 160WH batteries if I have the choice and as I said before my current system is set up to run on V mounts. The battery plate itself is nice and slim so it can remain unobtrusive and also has a few dtaps so I can run a few monitors off of it if needed. I purchased the plate from a company called MG1 Concepts but you can find others here (all with their own plus’s and minuses):
Wooden Camera: Battery Plate – Shoulder Rig
RED: Battery Plate Back Pack – Shoulder Rig Solution
Innocinema: All in One Power Package – Shoulder Rig Set Up
Monitor & Monitor Mount

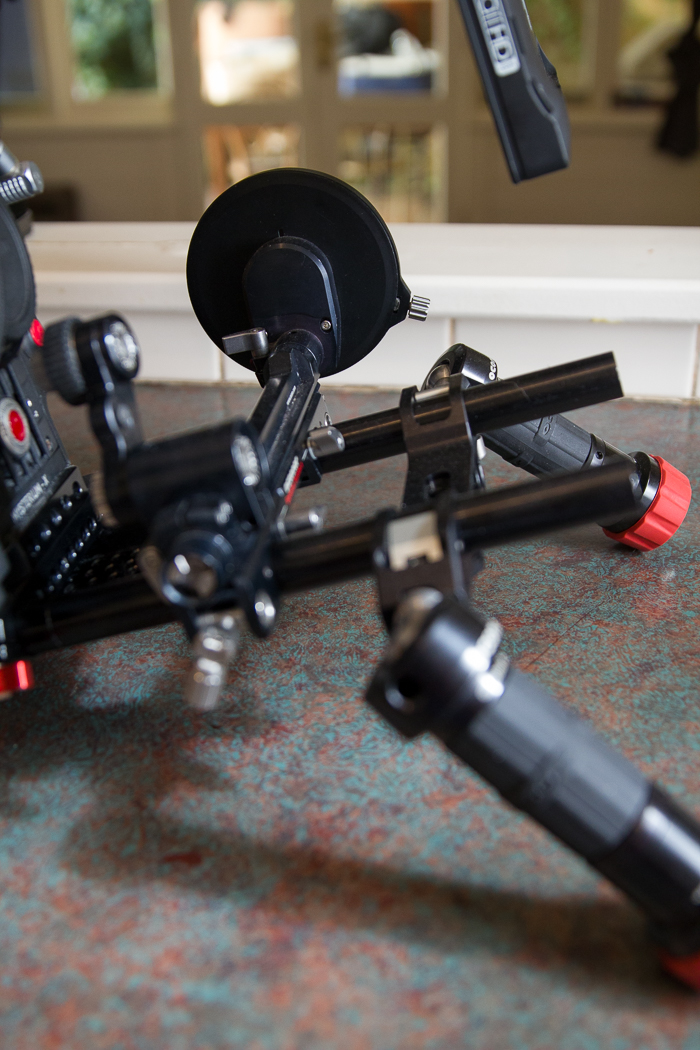
My favorite aspect of my shoulder rig is the monitor/mount combination.
The two work perfect together and it was a major relief to come up with the match as I was struggling before to find a solution I liked.
I have a RED Bomb EVF and a great mount from Solid Camera for the EVF that I love but I was getting excruciating headaches from operating with the EVF for extended periods. I had to find another solution. What I came across for a monitor was the SmallHD AC-7 OLED.
This is a great monitor loaded with more features than I will ever use. I get questioned all the time why I didn’t go with the more feature packed DP-7 and the answer is simple. I don’t need the features. I use the monitor strictly for framing. I’d like the color to be accurate and the contrast to be spot on but at the end of the day I don’t use the monitor to make exposure decisions.
I like to light digital like it is 35mm film, by using a light meter and my eyes. The AC7 gives me a beautiful 7.7 inches of screen for framing and that is exactly what I need.
The problem was how to mount the monitor in a position that I could operate from the shoulder and have it be rock solid.
The answer: A scuba gear company that makes killer mounting arms that are built rock solid. The mount is part of the Ultra Light Arms system.
I always get a kick out of finding gear that works better than you expect. After using Noga arms and other monitor arms that would fail or slip over time I was over it. I stopped by the Ultra Light booth at CineGear a few years back and I was hooked. These things are rock solid and incredibly versatile. They are definitely the best buy for a monitor mounting solution. Using the Ultra Light system with the AC7 allows me to position the monitor at just the right level for handheld work. The monitor also has a great hood that can be used outdoors to block out any light that may be hitting the screen.
TIP: If you are going the full 9 yards you might as well throw in the best HD-SDI cable I’ve ever used. Cinecoil produces awesome cables that are perfect for production environments. Keeps the cable mess under control.
The Shoulder Pad
I mentioned the shoulder pad before but it is such a good buy it is worth mentioning here again.
I tried all the bolt on solutions out ther from the cheap to the expensive but none of them give me the same range and comfort of the House of Power Shoulder Pad. I love this thing.
It is so simple but so effective. No more shoulder mount headaches. You throw the thing in your bag and you can whip it out and be set to roll in seconds. You can pay a lot more for a system that only works in you configuration or you can take my advice and save yourself a ton of money and time by going with the HOP Shoulder Pad.
Another great part about the House of Power pad is that it forms to your shoulder over time so the more you use it the better it fits. Brilliant.
The Handles
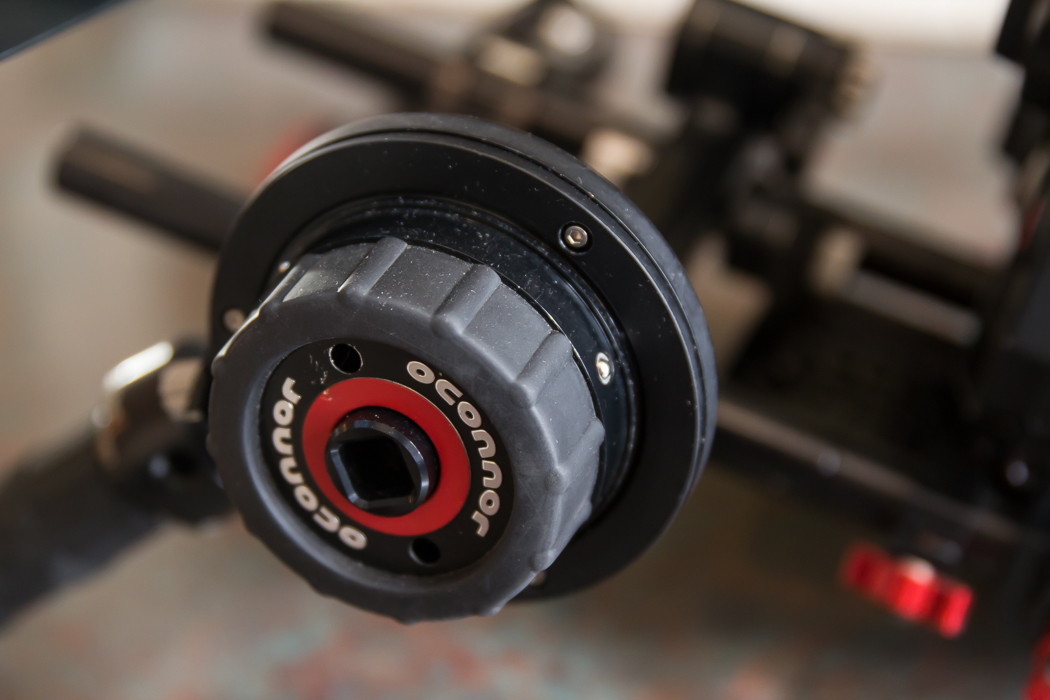
The OConnor O-grips. Without a doubt the strongest and most flexible hand grip system on the market.
I was tossing up between these and the Spyder Grips but in the end the flexibility and the possibilty to add on to this system won me over. They are strong, they have great grip, and they are incredibly easy to adjust. What more could you want from a set of hand grips. The only downside is they are expensive but again, buy once, cry once.
They will last forever.
Add Ons
The following bits of gear varies from job to job but I have my own solutions to offer when I can to productions as I have tested out a number of different options to get the best possible set up.
The Follow Focus
Wireless is so common these days that the manual FF is getting less and less time on set. When I do go manual I prefer the OConnor CFF-1 over the Arri FF4 or 5.
Yes more ACs know the Arri stuff but the OConnor definitely wins out in flexibility and mounting options. I run the thing dual sided but if I don’t need my side I just pop it off or drop it under the rods in a matter of seconds and I am good to go. The OConnor is great and works with every lens I have come across.
The Matte Box
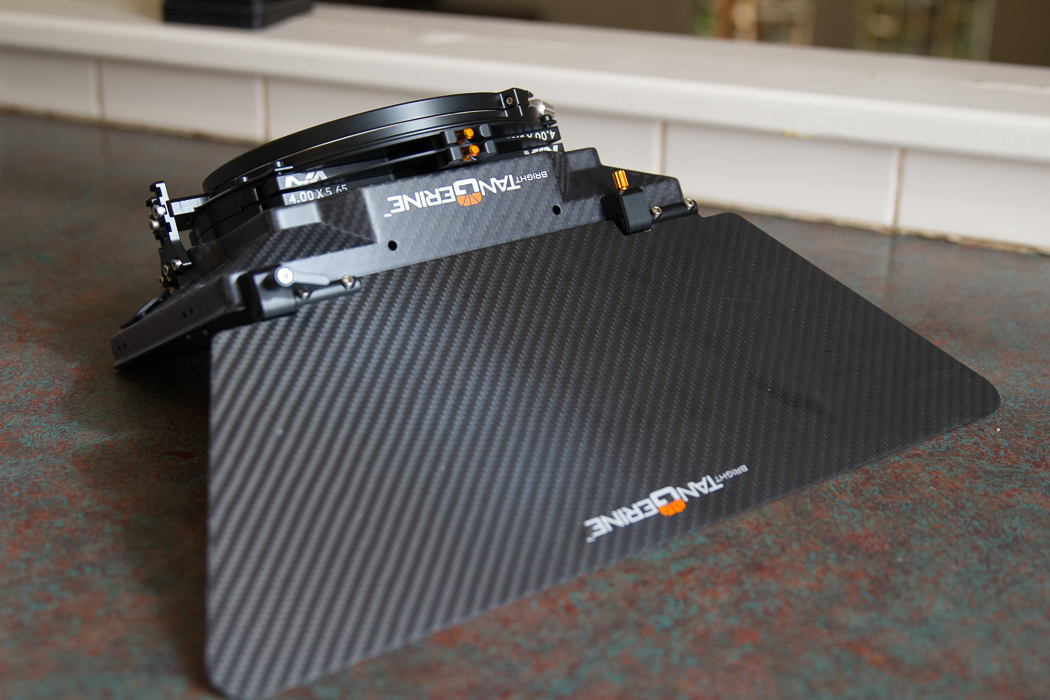
I absolutely love my Bright Tangerine VIV matte box.
It does everything you want and more. Bright Tangerine is a newish company but the thing is built like a german tank and has modularity at its core. Everything is swappable, switchable, removable. It is truly a well thought out system to the matte box market.
Plus the company itself offers the best customer service experience I have ever come across. Very knowledgable and very repsonsive. Exactly what you want if you are looking to get in to a system for the long haul.
The VIV works with almost any lens and while I prefer it is clip on mode I do have a Rod mount option for my Square Front Lomo Anamorphics Set. Either way the matte box works great.
Extras
The core system when shooting handheld is listed above but there are times where you want a little bit of movement but there are other factors to consider on the production as well. Cinematography is all about balancing different factors and that skill has to be used with gear selection as well.
One tool I like to use when the occasion arises for it is the EasyRig. The EasyRig is fantastic for what is was built to do. It is a very easy way to hold the camera at odd angles for an extended period of time. For longer handheld scenes with somewhat static shots it can help you as an operate maintain focus by relieving some of the weight off your shoulder and placing it on your hips.
It isn’t a complete hand held cure all however. There are certain aspects that aren’t great for everything. If the handheld scene has lots of movement and walking the EasyRig can exaggerate shake while the operator moves. The hip movement makes the whole rig move and that can make it fairly unstable.
If you know when to use it though it can be a powerful tool for creating a mood within a scene.
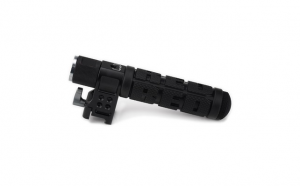
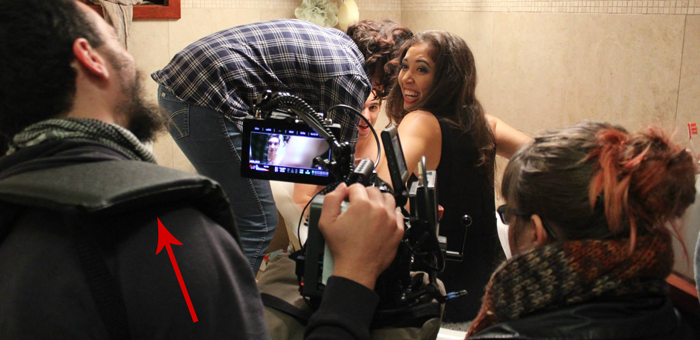
My Secret Weapon
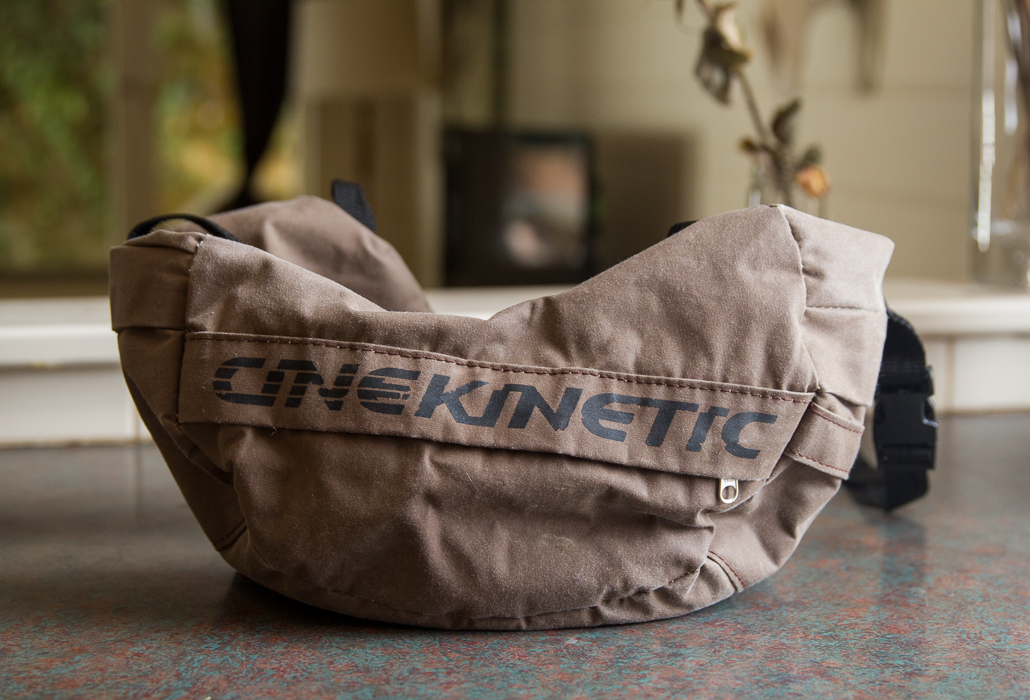
Not really a secret weapon but a tool I use on every handheld shoot. The Cinesaddle was originally designed to make mounting a camera in odd places super easy.
It works great for that but I use it in a completely different way. I strap the cinesaddle around my shoulder and then I use the bag to prop under my right arm. This creates a nice cushion between my body and the bag and it greatly increases the steadiness of any movements during handheld shots. It is light, easy to transport, and always does the job.
If you are looking for a quick solution then you may want to check it out.
Going Forward
Building and maintaining the perfect shoulder rig is a never ending journey. There are always pieces of the kit coming and going. No two jobs are the same but there is a baseline across them all. If you understand what you are trying to achieve with your handhled shots than you can start to zero in on what tools can help you make them shine.
In my mind, comfort and speed are two things that will always be required no matter the project or the budget.
My goal was to find a way to make my shoulder rig as universal as possible and I think I am finally getting there.
How do you set up your rig for going handheld? Do you have any tricks or tips you like to use to make the days shoot go smoother?
If you are interested in a bit of further viewing I strongly suggest checking out Sean Bobbit’s fantastic seminar on handheld work. It is long but there are numerous golden nuggets in there for both rookie cinematographers and season veterans as well. You can find that video here: 
Patrick – Thanks for The Wandering DP podcast! Lots of great information and inspiration.
I come from a stills background in studio still life and I understood how to get into ad agencies and meet ADs. But how do you meet directors for commercial and narrative work?
Thanks, Barry
Hey Barry,
Thanks for checking out the show and I am glad you are enjoying it.
I think meeting directors varies from market to market and the level you are targeting. At the beginning it is really about meeting as many people as you can and hopefully finding people who have a similar aesthetic. Most of the podcast interviewees have started either directing their own stuff so they could put their vision into action or by working with close friends also just starting out in the industry.
I wish I had a better answer but it really is pretty varied. I am going to put out a longer post on a few paths you could look down in November. Hopefully that will shed a little light.
Great stuff. I just stumbled upon the podcast and was so happy to see that you have the same DP inspirations that I do. Keep up the good work. I think there is a lack of “in-depthness” if you will to many cinematography tutorials and what not, and I am so glad that you are taking it a step further and talking with, who I think, are the best DPs in the game.
Keep it up.
Matt
Thanks Matt.
Lots of great DPs lined up so definitely check back for more.
Cheers
Perfect handheld Epic for me is the Shape Baseplate 7000.
I think it gets the camera even lower than your setup.
Handles are on separate rosetta mounts, so you don’t have to fiddle with handles, when you remove follow focus and matteboxes.
And it clicks onto a standard Sony Baseplate for tripod shooting (less than a second).
https://d1c86o3nm55du5.cloudfront.net/prodimgalt/large/266997_1.jpg
Anyways I totally dig your website and podcast!!! A real gem!
Thanks Tom,
I will check it out. Glad you are enjoying the show.
Great site man, lots of extremely useful information. Shot a gig last year in Melbourne and had a blast with some mad cunts! Keep up the great work, looking forward to more!
Thank you. Thank you. Thank you. I cannot express how valuable this post is to me. On personal projects, I tend to do a lot of handheld but every time I work with a rig I am extremely unhappy. Usually they are the pre-bundle rigs from zacuto, redrock, etc. Unfortunately, I don’t have the money or resources to constantly test and test, but you article really shows me an amazing path and I am very grateful. You explained a lot of problems I have, physical and time, offer your solutions. Even though I still need to adjust for myself, this is really great start. So thank you again.
Just wanted to say thanks for the work you’ve put into the site. Recently discovered your podcast which has been a huge insight into others work as well as your own. Keep it up!
I wanted to ask it you’d consider doing a piece discussing the pro’s and con’s of investing in your own camera gear? It would be interesting to hear your thoughts and experiences on this. For many of us starting out, becoming an owner-operator is an attractive idea to help pitch for work in a very competitive marketplace. But investing in broadcast ready equipment and beyond represents a huge financial outlay, especially considering the amount of low/no budget work you may have to take to help establish your business in the early stages.
Hello Patrick,
I have recently come across your podcast and it is fucking great! Thanks for sharing knowledge and for having such a sense of humor about it all.
I have a question about the rig and I need your help. I dig what you are doing with the shoulder pad and how you keep the dovetail on and use it to balance the camera on the shoulder. I don’t understand how you would then go back to tripod. If the dovetail is no your camera and not on the tripod, what do you use on the tripod to reattach the camera to it?
Thanks for all the great info and looking forward to new podcast releases.
Rick